
Why This Platter Will Become Your New Family Favorite
The Buttermilk Brine Difference: Never Dry, Always Flavorful
This recipe’s star secret is the buttermilk brine. It works wonders by tenderizing the chicken and infusing it with flavor deep into the meat, ensuring it stays unbelievably moist during frying. You’ll never experience dry fried chicken again. The brine creates a tangy, seasoned foundation, guaranteeing a succulent result that’s anything but bland. This crucial step is why your chicken will always be juicy, even under its crispy exterior.A Complete Meal, Thoughtfully Crafted
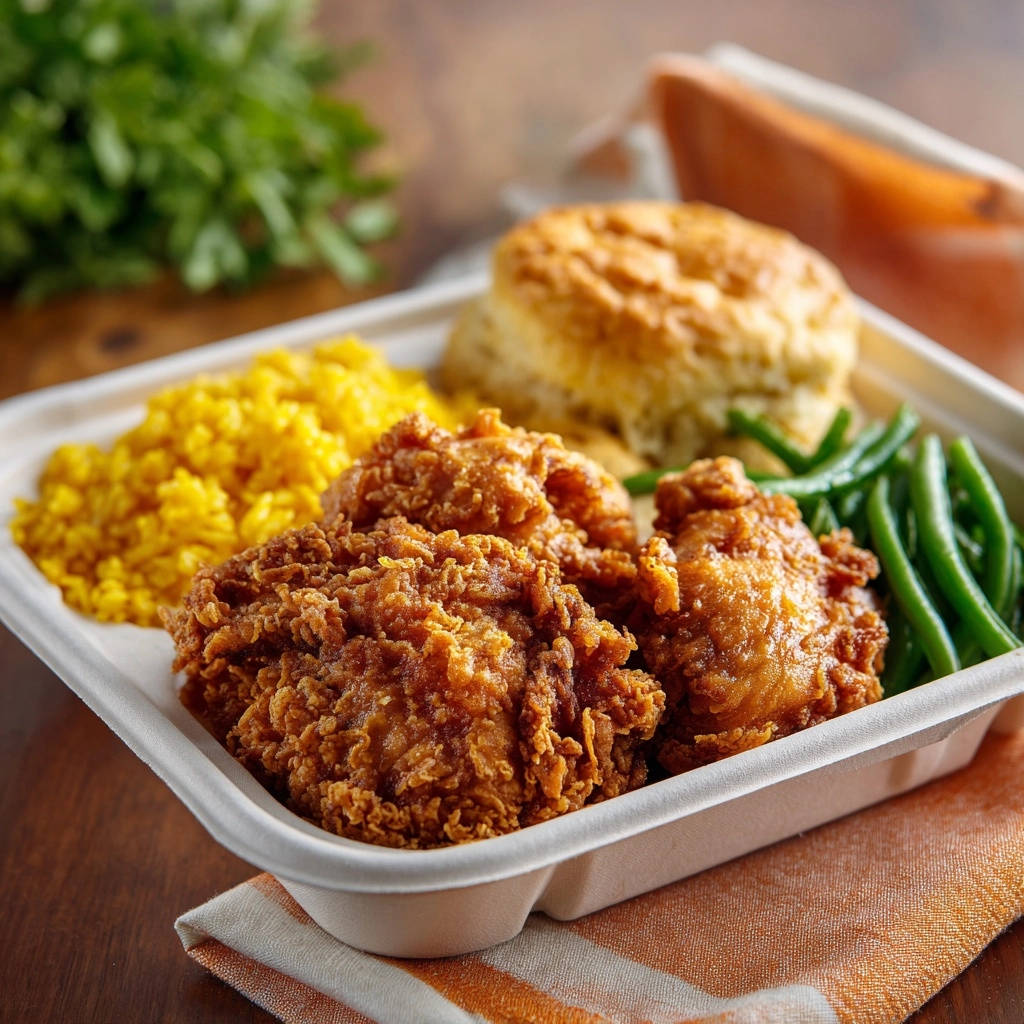
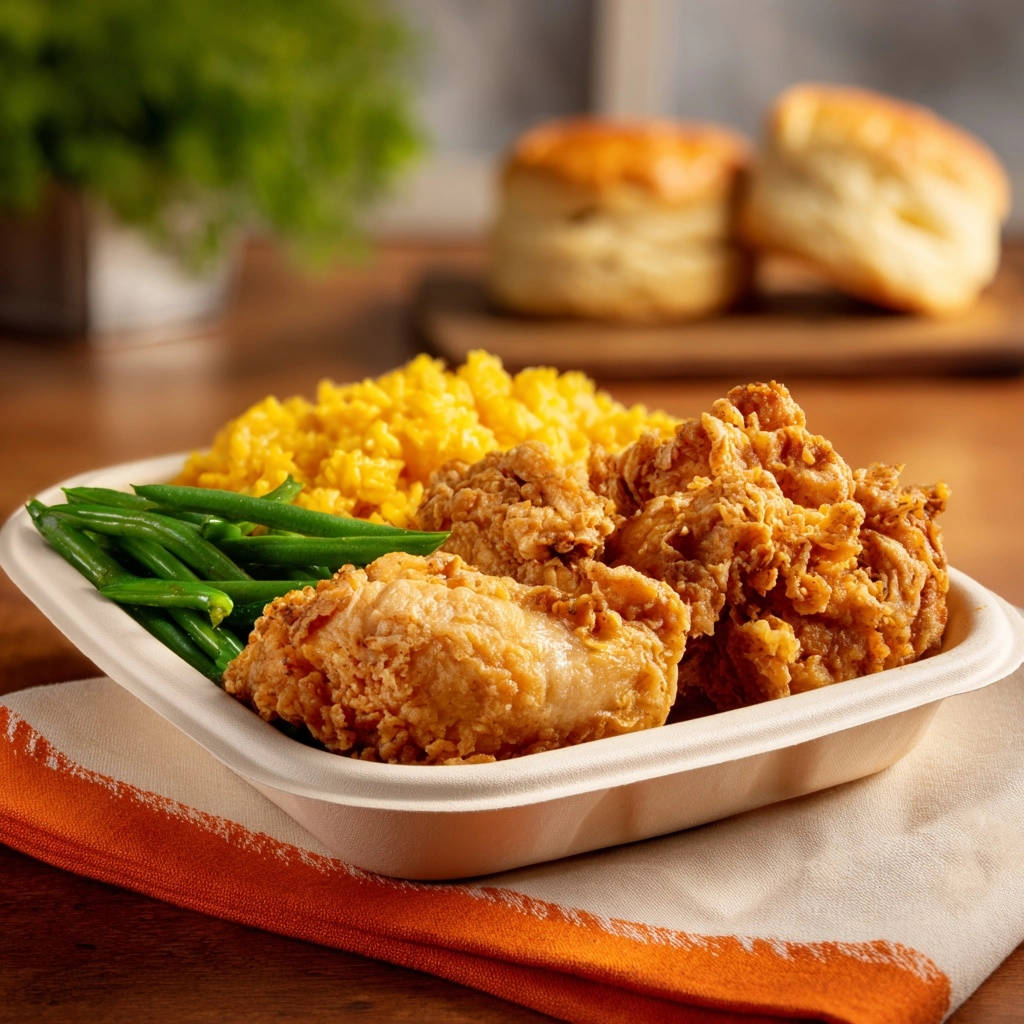
What truly elevates this recipe beyond just fried chicken is the complete platter experience. Each component – the fluffy yellow rice, vibrant tender-crisp green beans, and warm, flaky buttermilk biscuits – is designed to complement the savory chicken. This isn’t just a main dish; it’s a perfectly balanced, satisfying feast.Achieve Restaurant-Quality Fried Chicken at Home
With this guide, restaurant-level fried chicken becomes entirely achievable in your own kitchen. The detailed steps and expert tips empower you to produce a dish that impresses, providing that ultimate crunchy, juicy satisfaction. Get ready to amaze your family and friends with your culinary skills!Gather Your Essentials: Ingredients for a Standout Platter
For the Irresistibly Juicy Fried Chicken
Bone-in, skin-on chicken pieces: A mix of drumsticks and thighs works beautifully, offering variety and bone-in cuts retain moisture best. Bone-in ensures maximum juiciness and flavor.
Buttermilk: This is your tenderizing and flavor-infusing superstar. Full-fat buttermilk is preferred for the best results.
Hot sauce (optional): Don’t worry about heat; it’s purely for adding a subtle depth of flavor to the brine. It enhances the overall profile without making the chicken spicy.
All-purpose flour & cornstarch: The blend creates that perfectly crisp, golden-brown crust that holds up without being too heavy. Cornstarch is key for extra crispiness.
Seasoning blend: Paprika, garlic powder, onion powder, and a touch of cayenne (optional for a little kick) are combined with salt and pepper to create a rich, savory coating.
Crafting Fluffy Buttermilk Biscuits
All-purpose flour: The foundation for light, tender biscuits. Use unbleached for best texture.
Baking powder & baking soda: These leavening agents ensure your biscuits rise high and are incredibly fluffy. Always check their freshness.
Salt: Essential for balancing the flavors and enhancing the overall taste of the biscuits.
Cold unsalted butter: Cut into small cubes, cold butter creates pockets of steam in the oven, leading to those desirable flaky layers. Do not let it get warm!
Cold buttermilk: Just like butter, cold buttermilk reacts with the leaveners to create a tender crumb and adds a lovely tang. This ensures a delicate texture.
The Aromatic Yellow Rice
Long-grain white rice: Its separate grains are perfect for a fluffy, non-sticky side. Basmati or jasmine are excellent choices.
Chicken broth or water: Chicken broth adds an extra layer of savory flavor, but water works well too. Consider low-sodium broth.
Turmeric powder: This spice imparts the beautiful yellow color and a subtle earthy flavor. It’s safe to use a little more for a vibrant hue.
Salt: To season the rice perfectly and bring out its natural taste.
Crisp, Vibrant Green Beans
Fresh green beans: Look for firm, bright green beans. Freshness is key for that satisfying tender-crisp texture.
Olive oil, salt, & black pepper: A simple seasoning trio that enhances the natural sweetness of the beans. Use a good quality olive oil.
Frying Oil: The Key to Golden Perfection
Vegetable oil or peanut oil: These oils have high smoke points, making them ideal for deep frying and achieving a perfectly golden, crispy crust. Ensure you have enough to submerge the chicken halfway.
Gear Up: Essential Tools for Homestyle Fried Chicken Platter Success
Key Kitchen Utensils for Prep
Large bowls: You’ll need several for brining chicken, mixing biscuit dough, and preparing the dredge.
Whisk & measuring tools: For accurately combining dry ingredients and wet components.
Pastry blender or fingertips: Crucial for cutting cold butter into the biscuit flour mixture without warming it too much.
Biscuit cutter: Ensures uniformly shaped biscuits that bake evenly. A round cookie cutter or glass rim works in a pinch.
The Right Cookware for Frying
Large, heavy-bottomed pot or Dutch oven: Essential for even heat distribution and maintaining a stable oil temperature, which is vital for perfect frying. Cast iron is excellent.
Deep-fry thermometer: Absolutely critical for monitoring and maintaining the precise oil temperature. This prevents greasy or burnt chicken.
Essential Finishing Tools
Tongs: For safely adding and removing chicken from hot oil and turning pieces.
Wire rack set over a baking sheet: Allows excess oil to drain from the fried chicken, keeping it crispy, and prevents it from getting soggy. Don’t skip this step.
Medium saucepan with lid: For cooking your fluffy yellow rice evenly and allowing it to steam to perfection.
Your Path to Platter Perfection: A Detailed Cooking Guide
Step 1: The Transformative Chicken Brine (Prep Ahead!)
Combine Brine Ingredients: In a large bowl, whisk together the buttermilk, hot sauce (if using), 1 teaspoon salt, and 1/2 teaspoon black pepper. This creates the flavor-packed base for your chicken.
Submerge Chicken: Add the chicken pieces to the buttermilk mixture, ensuring each piece is fully submerged. This contact is crucial for the brine’s effectiveness.
Brine for Flavor and Juiciness: Cover the bowl and refrigerate for at least 4 hours, or ideally overnight (up to 24 hours). This extended brine is the ultimate secret to tender, incredibly juicy fried chicken.
Step 2: Crafting Your Fluffy Buttermilk Biscuits
Preheat and Combine Dry Ingredients: Preheat your oven to 425 degrees F (220 C). In a large bowl, whisk together the flour, baking powder, baking soda, and salt. This ensures leavening agents are evenly distributed.
Cut in Cold Butter: Add the cold, cubed butter to the dry ingredients. Use a pastry blender or your fingertips to cut it in until the mixture resembles coarse crumbs. The cold butter is essential for flaky layers.
Gently Add Buttermilk: Gradually add the cold buttermilk, mixing until just combined. Be careful not to overmix; overworking the dough will result in tough biscuits. For more tips on achieving the perfect crumb, explore our recipe for fluffy homemade biscuits.
Shape and Bake: Turn the dough out onto a lightly floured surface and gently pat or roll to about 1 inch thickness. Use a biscuit cutter to cut out your biscuits, placing them on a baking sheet. Bake for 12-15 minutes, or until they’re golden brown and beautifully risen.
Step 3: Simmering the Golden Yellow Rice
Combine and Boil: In a medium saucepan, combine the long-grain white rice, chicken broth or water, turmeric, and 1/2 teaspoon salt. Bring the mixture to a rolling boil over medium-high heat.
Simmer and Steam: Reduce the heat to low, cover the saucepan tightly, and let it simmer for 15-18 minutes, or until all the liquid is absorbed and the rice is tender. Resist the urge to lift the lid!
Rest and Fluff: Remove the saucepan from the heat and let it stand, still covered, for 5 minutes. This crucial resting period allows the steam to finish cooking the rice and makes it extra fluffy. Then, gently fluff with a fork. For other aromatic rice ideas, check out our toasted coconut rice recipe.
Step 4: Preparing the Tender-Crisp Green Beans
Blanch the Beans: Bring a pot of lightly salted water to a boil. Add the trimmed fresh green beans and cook for 3-5 minutes, until they are tender-crisp, still holding a slight bite.
Season and Set Aside: Drain the green beans immediately to stop the cooking process. Toss them with olive oil, salt, and pepper to taste. Set them aside while you finish the rest of the platter.
Step 5: The Perfect Dredge for Crispy Chicken
Prepare Dredging Mixture: Remove the chicken from the buttermilk brine, letting any excess drip off, but do not rinse it. In a large shallow dish, whisk together the flour, cornstarch, paprika, garlic powder, onion powder, remaining 1 teaspoon salt, 1/2 teaspoon black pepper, and cayenne pepper (if using). The cornstarch is vital for an extra crispy crust.
Coat the Chicken: Dredge each piece of chicken in the flour mixture, pressing firmly to ensure a thick, even coating. This firm press helps the crust adhere properly during frying. Place the coated chicken on a wire rack while you prepare the oil, allowing the coating to “set” slightly.
Step 6: Frying the Chicken to Golden Brown
Heat Frying Oil: Heat the vegetable or peanut oil in your large, heavy-bottomed pot or Dutch oven over medium-high heat until it reaches 350 degrees F (175 C). Use a deep-fry thermometer to confirm the temperature; this is crucial for crispy, non-greasy chicken.
Fry in Batches: Carefully add 2-3 pieces of chicken to the hot oil, ensuring not to overcrowd the pot. Overcrowding will drop the oil temperature and lead to soggy chicken. Fry for about 6-8 minutes per side, turning occasionally, until the chicken is golden brown and cooked through.
Check Doneness and Drain: The internal temperature should reach 165 degrees F (74 C) when tested with a meat thermometer. Use tongs to remove the chicken from the oil and place it on a wire rack set over a baking sheet to drain any excess oil. Repeat with the remaining chicken pieces. For more frying insights, see our recipe for juicy classic crispy fried chicken drumsticks.
Step 7: The Grand Finale – Assembling Your Platter
Create Your Platter: Arrange the crispy fried chicken, fluffy yellow rice, seasoned green beans, and warm buttermilk biscuits beautifully on individual platters or in takeout-style containers. A sprinkle of fresh parsley adds a nice touch.
Serve Immediately: Enjoy your complete and satisfying Homestyle Fried Chicken Platter while everything is warm and at its best. This meal is truly a celebration of comfort food!
Chef’s Secrets: Elevate Your Fried Chicken & Sides
Brining Beyond Expectations: Max Flavor Absorption
For truly exceptional flavor, aim for an overnight brine (12-24 hours). This extended period allows the buttermilk and spices to penetrate deep into the chicken, guaranteeing maximum juiciness and seasoned flavor throughout every bite. Ensure chicken pieces are fully submerged for even brining.
Mastering Frying Temperature: The Crispy-Juicy Balance
Maintaining a consistent oil temperature of 350°F (175°C) is paramount. If the oil is too hot, the crust will burn before the chicken cooks through; if too cool, the chicken will absorb too much oil and become greasy and soggy. Always use a deep-fry thermometer and adjust heat as needed between batches.
The Gentle Touch for Biscuits: Avoid Overmixing at All Costs
Always use cold butter and cold buttermilk for your biscuits. The key to flaky biscuits is incorporating cold fat into the flour, which creates steam pockets during baking. Mix the dough only until just combined; overmixing develops gluten, leading to tough, dense biscuits instead of light, tender ones.
Double-Dredging for Extra Crispy Chicken
For an even thicker, crunchier crust, consider a double-dredge. After the first coating, dip the chicken back into the leftover buttermilk brine (or a fresh bowl of buttermilk) and then dredge again in the flour mixture. This builds a robust, extra-crispy exterior.
Seasoning in Layers: Don’t Forget the Brine!
Remember that the seasoning for your chicken isn’t just in the flour dredge. The salt and pepper added to the buttermilk brine are crucial for flavoring the meat from within. This multi-layered approach ensures a deeply seasoned, delicious experience.
Troubleshooting Your Homestyle Fried Chicken Platter
Why Is My Fried Chicken Not Crispy Enough?
This often happens when the oil temperature is too low, or the pot is overcrowded. Ensure your oil is consistently at 350°F (175°C) using a thermometer. Fry in small batches to maintain heat and allow proper crisping.
Also, make sure your chicken is well-dredged and resting on a wire rack before frying. This allows the coating to slightly set, which helps it adhere and crisp better.
My Chicken is Dry! What Went Wrong?
The most common culprit for dry fried chicken is insufficient brining time or overcooking. Ensure your chicken brines for at least 4 hours, preferably overnight, for maximum moisture. Always use a meat thermometer to pull the chicken from the oil as soon as it reaches 165°F (74°C).
My Biscuits are Hard or Dense
Hard or dense biscuits typically result from using warm ingredients (butter/buttermilk) or overmixing the dough. Always ensure your butter and buttermilk are very cold. Mix the biscuit dough minimally, just until the ingredients come together, to keep them light and flaky.
Rice is Mushy or Too Dry
Mushy rice usually means too much liquid or overcooking. Dry rice means too little liquid or not enough simmering/resting time. Follow the liquid-to-rice ratio precisely, ensure a tight lid during simmering, and always allow the rice to rest off the heat for 5 minutes before fluffing.
Serving, Storing, and Enjoying Your Platter All Week Long
Creative Serving Suggestions for a Full Feast
Beyond the classic platter, elevate your meal with a sprinkle of fresh chopped parsley or chives over the chicken for color. A side of honey mustard or a tangy ranch dressing can be a delicious dipping accompaniment. Consider adding a simple side salad for extra freshness.
Make-Ahead Magic: Prepping Components in Advance
The chicken can be brined for up to 24 hours, making it perfect for overnight prep. You can also whisk together the dry ingredients for the biscuits in advance, storing them in an airtight container. Trim your green beans the day before to save time.
Storing Leftovers: Keeping Everything Fresh
Store leftover fried chicken, yellow rice, and green beans in separate airtight containers in the refrigerator for up to 3-4 days. Biscuits are best stored at room temperature in an airtight container for 1-2 days, or refrigerated for longer.
Reheating for Optimal Taste and Texture
Reheat fried chicken in a preheated oven or air fryer at 375°F (190°C) for 10-15 minutes until crispy and heated through. Biscuits can be warmed in the oven or microwave. Rice and green beans reheat well in the microwave or on the stovetop with a splash of water or broth to maintain moisture.
Your Homestyle Fried Chicken Platter Questions Answered (FAQs)
Can I use boneless chicken for this recipe?
Yes, you can use boneless chicken, but you’ll need to adjust the brining and frying times. Boneless pieces will brine faster (around 2-3 hours) and fry more quickly (typically 4-6 minutes per side). Always monitor the internal temperature closely.
What’s the best type of oil for frying?
Vegetable oil or peanut oil are excellent choices for deep frying. Both have high smoke points and a neutral flavor that won’t overpower the chicken. Ensure you use enough oil to submerge the chicken halfway for even cooking.
How do I know when the chicken is fully cooked?
The most reliable way is to use a meat thermometer. Insert it into the thickest part of the chicken, avoiding the bone. The chicken is fully cooked when it reaches an internal temperature of 165°F (74°C).
Can I make the buttermilk biscuits gluten-free?
You can substitute a 1:1 gluten-free all-purpose flour blend for the regular flour. The texture might be slightly different, often a bit more crumbly, but they can still be delicious. Ensure your blend contains xanthan gum.
Is the hot sauce necessary in the brine?
No, the hot sauce is entirely optional. It’s added to the brine for an extra layer of flavor depth, not for heat. If you prefer, you can omit it entirely without significantly impacting the recipe’s success.
Ready to Impress? Share Your Homestyle Fried Chicken Platter Creation!
Now that you hold the secrets to the ultimate Homestyle Fried Chicken Platter, it’s time to bring this incredible meal to your table. The joy of biting into that perfectly crispy exterior, followed by incredibly juicy, flavorful chicken, is unparalleled. This recipe isn’t just about cooking; it’s about creating cherished memories around a truly satisfying meal. Don’t be shy about experimenting with your favorite spices in the dredge or finding new ways to present your magnificent platter. Embrace the process and savor the delicious reward. We can’t wait to see your golden, crispy creations!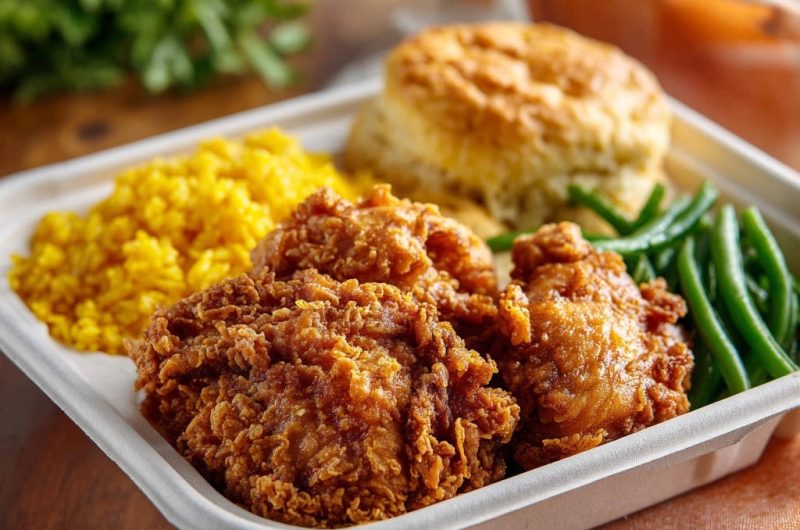
Fried Chicken
Course: Main CourseCuisine: AmericanDifficulty: medium4
servings20
minutes35
minutes1100
kcal55
minutesThis Homestyle Fried Chicken Platter features incredibly juicy fried chicken thanks to a simple brining trick. Served with fluffy yellow rice, tender crisp green beans, and warm buttermilk biscuits, it’s a complete and satisfying meal that will change your fried chicken game forever!
Ingredients
For the Juicy Fried Chicken:
8 pieces bone in, skin on chicken (a mix of drumsticks and thighs)
4 cups buttermilk
1/4 cup hot sauce (optional, for flavor, not heat)
2 teaspoons salt
1 teaspoon black pepper
2 cups all purpose flour
1/4 cup cornstarch
1 tablespoon paprika
1 teaspoon garlic powder
1 teaspoon onion powder
1/2 teaspoon cayenne pepper (optional)
4 cups vegetable oil or peanut oil for frying
For the Yellow Rice:
1 cup long grain white rice
2 cups chicken broth or water
1 teaspoon turmeric powder
1/2 teaspoon salt
For the Green Beans:
1 pound fresh green beans, trimmed
1 tablespoon olive oil
1/2 teaspoon salt
1/4 teaspoon black pepper
For the Buttermilk Biscuits:
2 cups all purpose flour
1 tablespoon baking powder
1/2 teaspoon baking soda
1 teaspoon salt
6 tablespoons cold unsalted butter, cut into small cubes
3/4 cup cold buttermilk
Directions
- Start the Juicy Chicken Brine: In a large bowl, combine the buttermilk, hot sauce (if using), 1 teaspoon salt, and 1/2 teaspoon black pepper. Add the chicken pieces, ensuring they are fully submerged. Cover and refrigerate for at least 4 hours, or preferably overnight. This is the secret to locking in moisture and flavor and ensuring that guaranteed juicy inside!
- Prepare the Biscuits: Preheat your oven to 425 degrees F (220 C). In a large bowl, whisk together the flour, baking powder, baking soda, and salt. Cut in the cold butter using a pastry blender or your fingertips until the mixture resembles coarse crumbs. Gradually add the cold buttermilk, mixing until just combined. Do not overmix. Turn the dough out onto a lightly floured surface and gently pat or roll to about 1 inch thickness. Use a biscuit cutter to cut out biscuits. Place on a baking sheet and bake for 12 15 minutes, or until golden brown and risen.
- Cook the Yellow Rice: In a medium saucepan, combine the rice, chicken broth or water, turmeric, and 1/2 teaspoon salt. Bring to a boil, then reduce heat to low, cover, and simmer for 15 18 minutes, or until all liquid is absorbed and rice is tender. Remove from heat and let stand, covered, for 5 minutes, then fluff with a fork.
- Blanch the Green Beans: Bring a pot of lightly salted water to a boil. Add the trimmed green beans and cook for 3 5 minutes, until tender crisp. Drain immediately and toss with olive oil, salt, and pepper. Set aside.
- Dredge the Chicken: Remove the chicken from the buttermilk brine, letting excess drip off, but do not rinse. In a large shallow dish, whisk together the flour, cornstarch, paprika, garlic powder, onion powder, remaining 1 teaspoon salt, and 1/2 teaspoon black pepper, and cayenne pepper (if using). Dredge each piece of chicken in the flour mixture, pressing firmly to ensure a thick, even coating. Place on a wire rack while you prepare the oil.
- Fry the Chicken: Heat the vegetable or peanut oil in a large, heavy bottomed pot or Dutch oven over medium high heat until it reaches 350 degrees F (175 C). Carefully add 2 3 pieces of chicken to the hot oil, ensuring not to overcrowd the pot. Fry for about 6 8 minutes per side, turning occasionally, until golden brown and cooked through, with an internal temperature of 165 degrees F (74 C). Use tongs to remove the chicken from the oil and place it on a wire rack set over a baking sheet to drain any excess oil. Repeat with remaining chicken pieces.
- Assemble the Platter: Arrange the crispy fried chicken, fluffy yellow rice, seasoned green beans, and warm buttermilk biscuits on individual platters or in takeout style containers for a complete and satisfying meal.
Notes
- Brining the chicken is the secret to a guaranteed juicy inside!


