
I struggled for years making homemade hummus that was thick and grainy, never achieving the dreamy texture found in high-end restaurants.
It wasn’t until I learned two crucial, yet simple, preparation secrets that I finally mastered truly Creamy Homemade Hummus.
This method leverages the powerful baking soda trick and an aggressive tahini whip to guarantee a light, airy dip every single time, making store-bought versions obsolete.
For an even more refined consistency, discover how to achieve silky smooth hummus without any grittiness.
Beyond Basic: Why This Creamy Homemade Hummus Recipe Works
The “No Gritty Texture” Guarantee
Standard recipes often skip the critical softening step, leaving the tough cellulose skins intact.
Our quick hot bath with baking soda chemically dissolves those pesky skins, creating a smooth foundation that is easily pulverized in the food processor.
Achieving the Perfect Emulsion Through Whipping
The secret to achieving maximum hummus volume is treating the tahini and lemon juice like a mayonnaise base.
Whipping the tahini with ice water and salt forces a stable, light emulsion that traps air before the heavy chickpeas are even introduced, guaranteeing an airy final result.
Fast and Convenient: Quality Results Using Canned Chickpeas
While dried chickpeas can be used, this recipe delivers exceptional, restaurant quality using convenient canned chickpeas.
The intense softening power of the baking soda technique means you achieve the desired texture in just 20 minutes, eliminating the need for hours of soaking and simmering.
Equipment Check: Essential Tools for Maximum Smoothness
A High-Powered Food Processor: The continuous, high-speed blending is non-negotiable for whipping the air and fully breaking down the softened chickpeas.
Avoid blenders if possible, as they struggle with the thick paste and may overheat the emulsion.
Small Saucepot: Used specifically for the crucial softening step using baking soda.
Ice Water Ready: Having the ice water measured and ready ensures the rapid temperature shifts needed for aeration and stabilizing the emulsion during blending.
The Building Blocks of Flavor: Understanding Your Key Ingredients
The Tahini Quality Test: Light vs. Bitter
Poor quality tahini, often made from unhulled sesame seeds, introduces unwelcome bitterness and a chalky, thick texture.
Seek out brands with a light, runny consistency made from hulled, lightly roasted seeds for the cleanest, nuttiest flavor profile possible.
Baking Soda: The Scientific Secret to Peeling-Free Smoothness
Baking soda (sodium bicarbonate) is crucial because it drastically raises the pH level of the cooking water.
This high alkalinity breaks down pectin and hemicellulose-the components of the chickpea skin-much faster than plain boiling, thus achieving the truly velvet texture without manual peeling.
Why Hot Chickpeas Meet Ice Water: Temperature Shock
Adding the hot, freshly boiled chickpeas to the food processor ensures they are maximally pliable and break down instantly under the blades.
The ice water then stabilizes the emulsion and prevents the friction of the long blending time from heating and separating the oil and tahini mixture.
Your Path to Creamy Homemade Hummus Perfection: A Detailed Guide
- Simmer Chickpeas with Baking Soda:
Transfer the drained chickpeas to a small pot, add the specified baking soda, and cover with fresh water. Bring to a boil, then immediately reduce to a simmer and cook for the required 3-5 minutes.
Watch closely for the skins to visibly begin dissolving or separating from the chickpeas. Immediately drain and rinse with hot water, ensuring they remain warm for blending.
- Whip the Tahini Base:
Combine tahini, fresh lemon juice, and garlic in the bowl of the food processor. Process aggressively for 60 seconds, scraping down the sides.
This initial processing creates a thick, almost clay-like paste. Don’t worry, this is correct; it’s the sign of a ready emulsion base.
- Activate the Emulsion with Ice Water:
Add the kosher salt and the initial 2 tablespoons of ice water. Process continuously for 1 to 2 minutes.
The mixture will dramatically lighten, turning pale white and significantly increasing in volume as it emulsifies. This stage is non-negotiable for the final airy texture.
- The Three-Minute Grind:
Add the hot, softened chickpeas and 1 tablespoon of olive oil to the whipping base. Process continuously for a full 3 minutes, stopping once to scrape down the sides.
The mixture will look dense and pasty at this point, but the long processing time ensures that all remaining solids are completely pulverized for a fine texture.
- Aerate and Thin:
With the processor still running, slowly drizzle in the remaining ice water, one tablespoon at a time, until the hummus reaches your desired light and whipped consistency.
Stop adding water when the hummus is holding a soft peak but still flows lazily off a spoon. The continuous blending here incorporates maximum air for the perfect finish.
- Final Adjustments and Garnish:
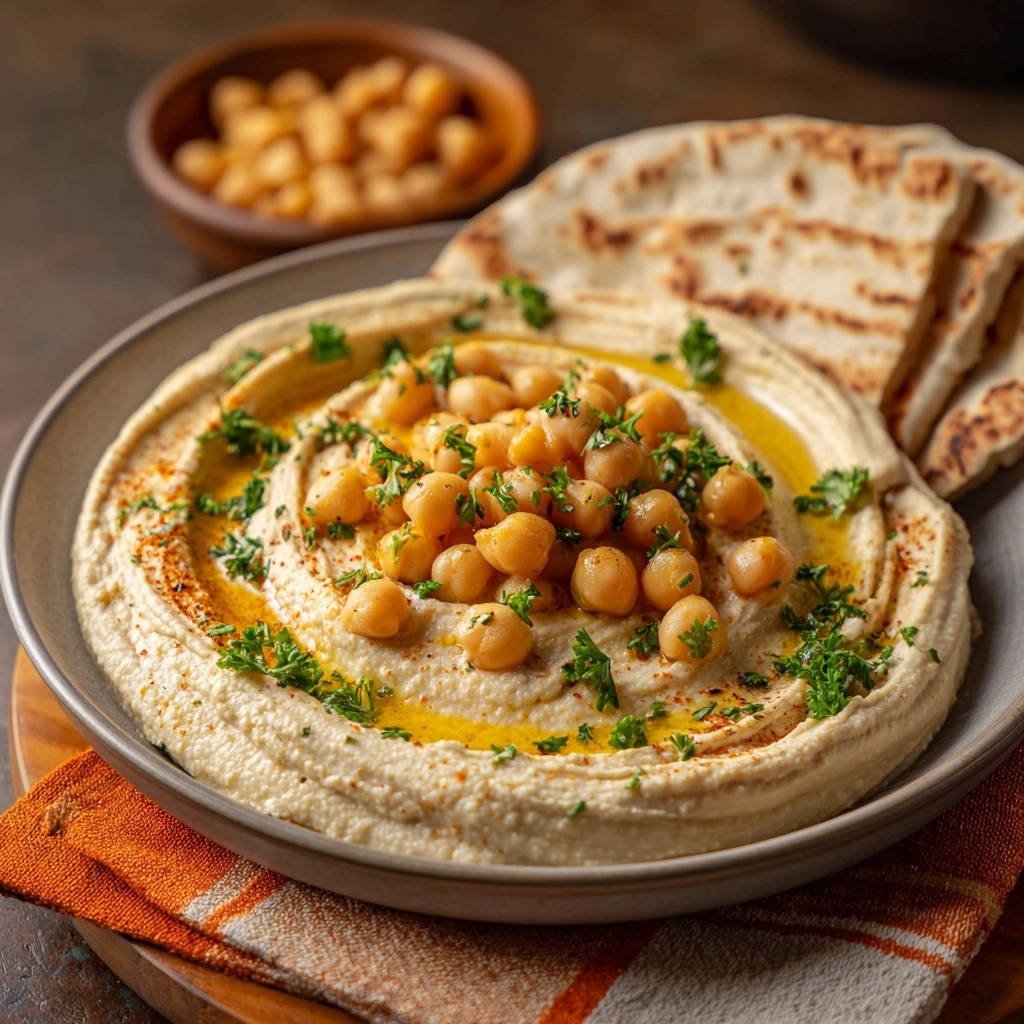
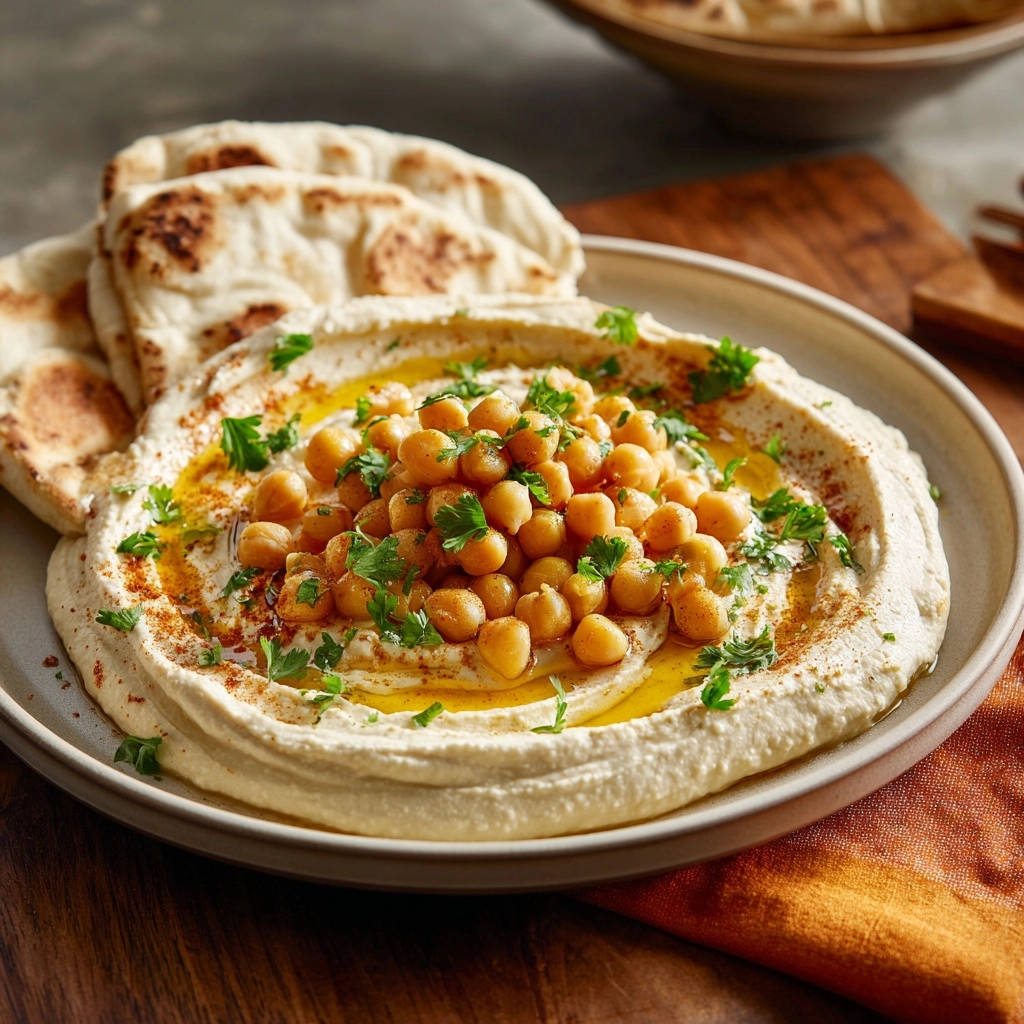
Taste and adjust the seasoning-the mix of salt and lemon juice should be bright and balanced. Transfer the hummus to a serving dish, swirl, and drizzle generously with the reserved olive oil, paprika, and fresh parsley.
For an even more satisfying outcome, discover how to create a silky smooth Greek hummus platter.
Chef’s Secrets: Elevating Your Hummus Game to Professional Standards
The Olive Oil Blending Trick
While most recipes reserve olive oil strictly for garnish, adding a small amount (like the 1 tablespoon in Step 4) directly into the processor helps smooth the mixture.
This internal oil contributes to a richer, silkier mouthfeel throughout the entire batch of Creamy Homemade Hummus.
Avoiding Burnt Garlic Flavor
If you find raw garlic too harsh, mince the cloves and let them sit in the lemon juice for five minutes before blending; the acidity naturally tempers the raw flavor and prevents that sharp bite.
For a sweeter flavor profile, consider gently roasting the garlic cloves until golden brown before adding them to the tahini base.
The Overnight Chill and Remix
For the deepest, most developed flavor, make the hummus a few hours ahead or even the day before; the components harmonize beautifully during refrigeration.
If it thickens too much after chilling, add a splash of cold water or reserved chickpea liquid (aquafaba) and whip it again briefly before serving to restore the airy texture.
Troubleshooting Common Hummus Mistakes
Problem: My Hummus is Too Thick and Dense
Solution: The blending time was likely insufficient, or not enough ice water was added during the final stage. Put the hummus back into the processor and slowly stream in 1-2 more tablespoons of ice water while blending continuously until the texture lightens dramatically.
Problem: My Tahini Base Broke and Looks Curdled
Solution: This usually means the tahini or lemon juice was too cold, or the tahini quality was poor. Stop the processor and let the mixture sit for 5 minutes.
If it hasn’t re-emulsified, add another teaspoon of cold water and blend aggressively for 30 seconds; this shock usually forces the emulsion back together.
Serving, Storage, and Pairing Your Homemade Hummus
Perfect Presentation: The Signature Swirl and Oil Pool
Use the back of a spoon to create a classic swirl pattern when spreading the hummus in a shallow bowl; this adds visual appeal and texture.
This structured surface catches the finishing drizzle of high-quality extra virgin olive oil, forming a small pool that enhances both flavor and visual appeal.
Creative Pairings for Hummus
Roasted vegetable planks (carrots, sweet potatoes, zucchini)
As a base layer for substantial grain bowls or hearty falafel sandwiches
Looking for More?
Complement your creamy hummus with these satisfying options.
- For a flavorful chicken dish, consider this Garlic Butter Chicken Souvlaki, which also features garlic and butter notes.
- If you enjoy seafood, try this Garlic Butter Shrimp Scampi Pasta for a similar bright, garlicky taste.
Served warm with sautéed pine nuts, brown butter, and a dash of cayenne pepper for heat
Storage and Make-Ahead Instructions
Store leftover hummus in an airtight container in the refrigerator for up to 4 days. Always use clean utensils when serving to maximize its shelf life.
If the surface oxidizes or dries out, simply stir it up and add a fresh drizzle of olive oil before serving; the oil acts as a barrier against air and maintains moisture.
Frequently Asked Questions About Making Creamy Homemade Hummus
Can I Use the Liquid from the Can (Aquafaba) Instead of Ice Water?
The reserved chickpea liquid, or aquafaba, works beautifully! Using aquafaba adds a subtle richness and helps the emulsion stabilize even further.
Just ensure the liquid is well chilled before use, similar to the ice water, to help the whipping process.
Why Is It Important to Use Hot Chickpeas?
Using hot (or at least warm) chickpeas ensures they are at their softest state immediately following the baking soda treatment.
This combination of heat and mechanical friction allows the chickpeas to completely disintegrate into the tahini base, which is necessary for achieving the smooth, velvet consistency of professional hummus.
How Do I Make a Larger Batch?
This recipe scales up easily, provided your food processor bowl is large enough to handle the increased volume.
If doubling the recipe, you may need to increase the processing time slightly (by 1-2 minutes) during the three-minute grind stage to ensure every component is fully incorporated and pulverized.
Ready to Impress? Share Your Hummus Masterpiece!
Now that you know the simple but transformative secrets-the baking soda trick and the critical whipping process-you are ready to create the light, airy, restaurant-quality Creamy Homemade Hummus you’ve always dreamed of.
Forget the supermarket version forever and enjoy the compliments on your surprisingly simple, yet spectacularly smooth creation!

Hummus
Course: AppetizerCuisine: MediterraneanDifficulty: easy6
servings15
minutes5
minutes240
kcal20
minutesStop buying gritty, thick store-bought hummus! This method uses one simple trick—baking soda when softening the chickpeas—combined with a strategic whipping sequence to achieve the lightest, dreamiest, restaurant-quality texture. You will never go back to the old way.
Ingredients
1 (15-ounce) can chickpeas, rinsed and drained (reserve the liquid)
1/2 teaspoon baking soda (key ingredient for texture)
1/2 cup high-quality tahini
1/4 cup fresh lemon juice
2 cloves garlic, peeled
1/4 cup ice water, plus more as needed
1/2 teaspoon kosher salt, plus more to taste
1/4 cup extra virgin olive oil, divided (for blending and serving)
1/2 teaspoon paprika, for garnish
2 tablespoons fresh parsley, chopped, for garnish
Pita bread or vegetables, for serving
Directions
- Prepare the Chickpeas for Maximum Smoothness: Transfer the drained chickpeas to a small pot. Add 1/2 teaspoon of baking soda and enough fresh water to cover them by about an inch. Bring the mixture to a boil over high heat, then reduce to a simmer and cook for 3 to 5 minutes, stirring occasionally. The baking soda helps dissolve the pesky skins and softens the chickpeas far beyond simple cooking, which is crucial for velvet texture. Drain the hot chickpeas immediately and rinse with hot water.
- Create the Tahini Base: In the bowl of a food processor, combine the tahini, lemon juice, and garlic cloves. Process for 60 seconds until a thick, pale paste forms. Scrape down the sides.
- The Whipping Step: Add 2 tablespoons of the ice water and the kosher salt to the tahini mixture. Process continuously for 1 to 2 minutes. The mixture will lighten significantly and emulsify into a fluffy, almost white, thick paste. This whipping is vital for structure.
- Blend and Incorporate: Add the hot, softened chickpeas and 1 tablespoon of olive oil to the tahini base. Process for 3 minutes continuously. The hummus will look thick and pasty at first.
- Achieve the Ultimate Creaminess: While the food processor is still running, slowly stream in the remaining ice water, one tablespoon at a time, until the hummus reaches a perfectly light and fluffy consistency. You are looking for a whipped texture that holds its shape. This continuous long blending process, utilizing the ice water to keep the mixture cool and aerated, is the final secret to its texture.
- Adjust and Serve: Taste and add more salt or lemon juice if necessary. To serve, spread the hummus into a shallow bowl, making a swirl pattern with the back of a spoon. Drizzle generously with the remaining olive oil, top with reserved whole chickpeas, a dusting of paprika, and fresh parsley. Serve immediately with warm pita bread.
Notes
- For ultra-smooth hummus, ensure your chickpeas are thoroughly softened by boiling them with baking soda. Don’t be afraid to add a little extra ice water, a tablespoon at a time, during the final blending stage to reach your desired creamy consistency.


