
If you’ve ever battled with soggy, disappointing baked zucchini fries, I completely understand your frustration. I’ve personally experimented endlessly to crack the code, and I’m thrilled to share the game-changing secret that delivers truly crispy baked zucchini fries every single time.
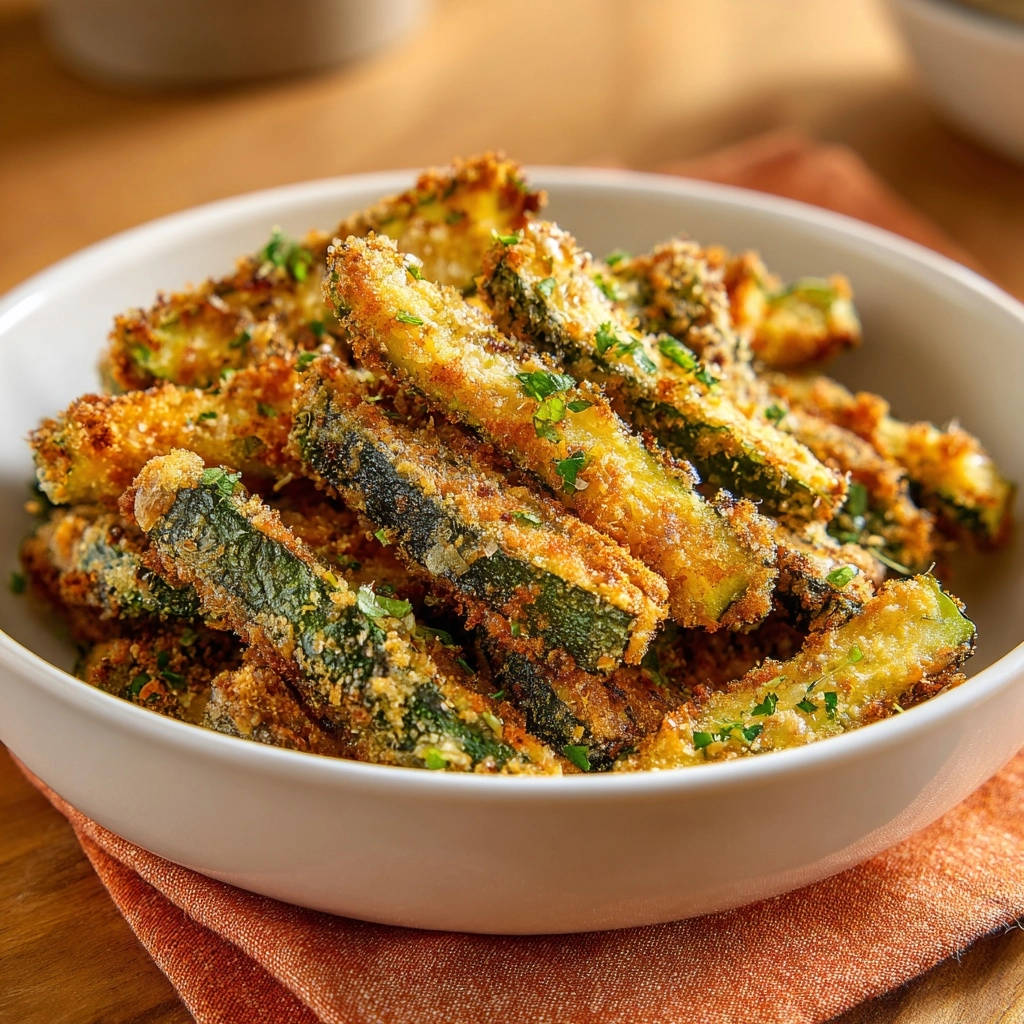
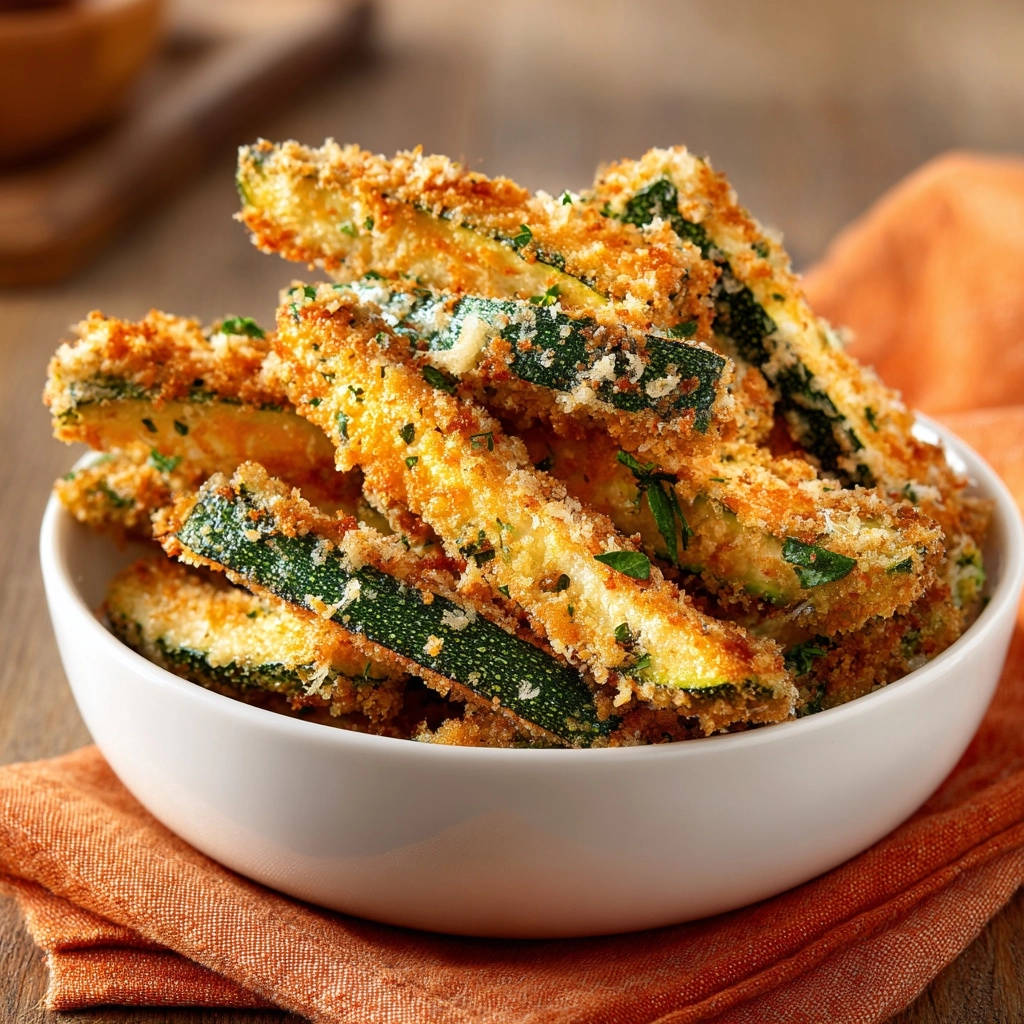
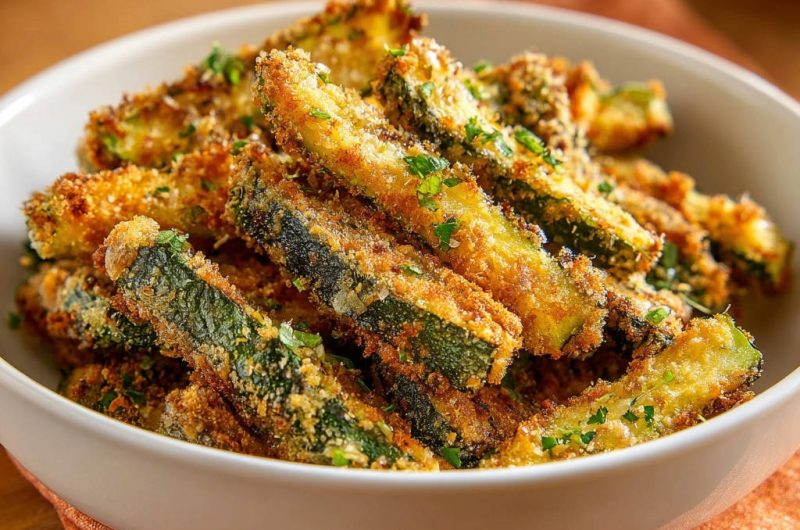
This recipe isn’t just easy; it consistently produces a golden, satisfying crunch, transforming humble zucchini into an irresistible snack or side dish that will vanish from the plate in moments.
Beyond Basic: Why This Recipe Delivers Unmatched Crispiness
The Secret Weapon: Banishing Zucchini Moisture
The absolute cornerstone of achieving truly crispy baked zucchini fries lies in effectively removing excess moisture from the zucchini itself. This recipe employs a simple, yet incredibly effective salting and blotting technique.
This critical step prevents the zucchini from steaming in the oven, ensuring it crisps up beautifully instead of becoming limp and watery.
Quick Prep, Quicker Disappearance
From start to finish, these delectable fries are ready in just over 30 minutes, making them a perfect solution for busy weeknights. Their quick cooking time means you can whip up a batch on a whim whenever a craving strikes.
A Healthier Spin on a Beloved Snack
By baking instead of deep-frying, this recipe drastically cuts down on oil and calories, offering a guilt-free indulgence. You get all the flavor and satisfying crunch of traditional fries, but with the added nutritional benefits of fresh vegetables.
Family Favorite (Even for Picky Eaters!)
These crispy baked zucchini fries are a proven crowd-pleaser, appealing to even the most discerning palates. They are an ingenious and delicious way to encourage more vegetable consumption in a fun, familiar format.
Your Kitchen Arsenal: Essential Tools for Crispy Success
Large Baking Sheet & Parchment Paper: Crucial for even baking and easy cleanup. Parchment paper also helps prevent sticking and promotes crispness.
Plenty of Paper Towels: Absolutely non-negotiable for the moisture removal step. Have extra on hand!
Shallow Dishes: Essential for setting up an organized and efficient breading station, making the coating process mess-free.
Whisk: To perfectly combine your breading ingredients and eggs, ensuring a smooth and consistent coating mixture.
The Building Blocks of Flavor: Ingredients You’ll Need
The Star: Fresh Zucchini
Choose firm, medium-sized zucchini for the best texture and flavor in your crispy baked zucchini fries. Avoid overly large zucchini, which can be watery or seedy.
Approximately one pound (two medium zucchini) is ideal for this recipe, yielding a generous serving for four.
The Crisp Creators: Breading Essentials
All-Purpose Flour: Forms the initial dry layer, acting as an anchor that helps the egg and breading adhere perfectly to the zucchini sticks.
Panko Breadcrumbs: These are non-negotiable for their superior crispiness compared to regular breadcrumbs. Panko’s light, airy texture creates an incredibly crunchy coating.
Grated Parmesan Cheese: Adds a savory, umami depth to the breading and contributes to the beautiful golden-brown crust as the fries bake.
For even more cheesy goodness, check out these crispy parmesan zucchini fries.
Seasoning for Savory Perfection
Garlic and Onion Powder: These provide aromatic depth and a classic savory flavor profile without adding any unwanted moisture, ensuring maximum crispness.
Black Pepper: A simple yet effective seasoning, black pepper enhances the overall flavor of your crispy baked zucchini fries, complementing the other spices.
The Binder & The Finish: Eggs & Olive Oil
Large Eggs: Act as the crucial binder, creating a tacky surface that ensures the flour and breadcrumb mixture sticks securely to the zucchini.
Olive Oil: A light drizzle or spray of olive oil helps achieve that beautiful golden-brown color and contributes significantly to the irresistible crispness of the fries in the oven.
Optional Garnish: Fresh Parsley
Fresh Chopped Parsley: Adds a touch of vibrant freshness and bright green color, elevating the presentation of your finished crispy baked zucchini fries.
Your Journey to Golden Perfection: Step-by-Step Instructions
- Prepare Your Oven & Sheet:
Preheat your oven to a precise 400°F (200°C) to ensure rapid and even crisping.
Line a large baking sheet with parchment paper for effortless cleanup and to prevent any potential sticking.
- Cut the Zucchini:
Wash and carefully trim both ends of your zucchini to remove any tough bits.
Cut each zucchini into uniform fry-shaped sticks, aiming for approximately 3 to 4 inches long and 1/2 inch thick.
Consistent sizing is key here to ensure all your crispy baked zucchini fries cook evenly and achieve the same perfect texture.
- The Crucial Salting Step:
Lay the cut zucchini sticks in a single layer on several layers of absorbent paper towels.
Generously sprinkle them with salt; don’t be shy, as most of this will be blotted away.
Let them sit undisturbed for 10 to 15 minutes; you will visibly observe beads of moisture forming on the surface, drawn out by the salt.
This is the essential technique to remove excess water, which is paramount for preventing soggy fries.
- Blot, Blot, Blot!
After the salting period, firmly blot the zucchini sticks completely dry using fresh paper towels. Press down gently but firmly to absorb all visible moisture.
This step is absolutely critical: ensure every bit of surface moisture is removed to guarantee a truly crispy result.
- Set Up Your Breading Station:
Arrange three shallow dishes side-by-side on your counter.
In the first dish, place the all-purpose flour. In the second, whisk the eggs until they are well combined and smooth. In the third, thoroughly mix together the Panko breadcrumbs, grated Parmesan cheese, garlic powder, onion powder, and black pepper.
Having an organized station makes the breading process smooth, efficient, and minimizes mess.
- Coat Each Fry Perfectly:
Working in small batches to avoid overcrowding, dredge each zucchini stick first in the flour, shaking off any excess gently.
Then, dip it into the beaten egg, allowing any extra egg to drip off for an even coating.
Finally, roll and press the stick thoroughly into the breadcrumb mixture, ensuring a complete and even coating that will become golden and crispy.
- Arrange for Success:
Arrange the coated zucchini sticks in a single layer on your prepared baking sheet.
It’s crucial that they are not touching each other; this separation allows proper air circulation, which is essential for uniform crisping.
Lightly drizzle or spray the zucchini sticks with olive oil, as this fat aids significantly in achieving that desirable golden-brown color and extra crispness during baking.
- Bake Until Golden & Crispy:
Bake for an initial 10 minutes, then carefully flip each zucchini stick over using tongs.
Continue baking for another 10 to 15 minutes, or until they are beautifully golden brown, firm to the touch, and undeniably crispy.
Keep a close eye during these final minutes to prevent any over-browning or burning.
- Serve Immediately:
Remove the Crispy Baked Zucchini Fries from the oven as soon as they reach peak crispness.
Garnish them generously with fresh chopped parsley for a delightful pop of color and an added layer of fresh flavor.
For the absolute best texture and taste, serve these delicious homemade zucchini fries straight away!
Chef’s Secrets: Mastering Your Baked Zucchini Fries
Don’t Rush the Salting & Blotting: This is the single most critical step in achieving truly crispy baked zucchini fries. Insufficient moisture removal will inevitably result in soggy fries, no matter how perfectly you bake them.
Uniform Zucchini Cuts: Aim for consistent size when cutting your zucchini sticks to ensure all fries bake evenly. Too thin and they’ll burn; too thick and they’ll remain soft inside.
Press the Breading Firmly: After dipping, gently but firmly pressing the Panko mixture onto the zucchini sticks helps it adhere better, leading to a more substantial and satisfyingly crisp coating.
Give Them Space: Crowding the baking sheet prevents proper air circulation, which is absolutely essential for crisping. If necessary, bake in batches to ensure each fry has enough room.
Flip for Evenness: Flipping the zucchini fries halfway through baking ensures both sides get beautifully golden and evenly crisp. This prevents one side from being pale while the other is browned.
Serve Immediately: While still delicious, zucchini fries are best enjoyed hot and fresh from the oven for peak crispness. Their texture can soften upon cooling.
Common Pitfalls & Easy Fixes
“My Zucchini Fries are Soggy!”
This almost always points to insufficient moisture removal. Ensure you generously salt the zucchini and blot them completely dry – don’t leave any visible moisture!
Also, confirm your oven is fully preheated to the correct temperature and that you haven’t overcrowded the baking sheet, as both can significantly hinder crisping.
“The Coating Isn’t Sticking!”
Make sure the zucchini is thoroughly dried after salting; any residual moisture on the surface will make it harder for the flour to adhere properly. Also, ensure you’re shaking off excess flour and allowing excess egg to drip off before moving to the next coating layer.
Gently pressing the breadcrumbs onto the zucchini also helps them stick better and form a solid crust.
“My Fries Aren’t Getting Golden/Crispy Enough!”
Confirm your oven temperature is accurate by using an oven thermometer, if possible. Ensure you’ve lightly drizzled or sprayed the fries with olive oil before baking, as this fat promotes browning. Also, double-check that your baking sheet isn’t overcrowded, preventing proper air circulation.
Remember, Panko breadcrumbs are key here; regular breadcrumbs simply won’t give the same level of crispness for these baked zucchini snacks.
Perfect Pairings: What to Serve with Your Zucchini Fries
Dipping Delights
These crispy treats are fantastic with a variety of dips. Consider classic marinara sauce, a cool and creamy ranch dressing, a zesty lemon-garlic aioli, or even a spicy sriracha mayo for a kick.
Main Course Companions
They make an excellent, lighter side dish for grilled chicken, baked fish, or even alongside a hearty burger, serving as a healthier and delicious alternative to traditional potato fries.
More Crispy Favorites
If you enjoyed the crunch of these zucchini fries, you might like these other crisp creations.
- For another satisfying crunch, try these crispy panko chicken cutlets, perfect for a light meal.
- Consider making these crispy chicken avocado club sandwiches for a filling option.
Garnish & Presentation
Beyond the suggested fresh parsley, consider a sprinkle of extra grated Parmesan cheese for an added savory note, or a dash of red pepper flakes for a subtle hint of heat.
Planning Ahead: Storage & Reheating Tips
Storing Leftovers
While best enjoyed fresh, leftover baked zucchini fries can be stored in an airtight container in the refrigerator for up to 2-3 days. Be aware that they will naturally lose some of their initial crispness upon cooling.
Reheating for Crispiness
To revive their crispness and enjoy them again, reheat your zucchini side dish in a preheated oven (around 375°F / 190°C) or an air fryer until heated through and re-crisped, typically about 5-10 minutes. Avoid the microwave at all costs, as it will make them soggy.
Can I Prep Zucchini Fries Ahead of Time?
You can cut and salt/blot the zucchini a few hours ahead and store them in the refrigerator on fresh paper towels. However, for optimal crispness, it is truly best to bread and bake them just before you plan to serve them.
Your Top Questions Answered
Can I Use Different Breading for Crispy Baked Zucchini Fries?
While Panko breadcrumbs are highly recommended for their superior crispiness, you could experiment with gluten-free Panko or a mix of almond flour and finely crushed pork rinds for a low-carb option. However, results may vary in texture and crispness compared to the original crispy baked zucchini fries.
Are These Zucchini Fries Gluten-Free?
As written, this recipe uses all-purpose flour and standard Panko breadcrumbs, so it is not gluten-free. To make them gluten-free, simply substitute gluten-free all-purpose flour and gluten-free Panko breadcrumbs for a delicious, diet-friendly version.
Can I Make These Zucchini Fries in an Air Fryer?
Yes! Air frying is a fantastic method for these homemade zucchini fries! Follow all the prep and breading steps as outlined, then air fry at 375°F (190°C) for 8-12 minutes, making sure to flip them halfway through. Cooking times may vary slightly by air fryer model.
How Can I Add More Spice to My Zucchini Fries?
To add a delightful kick to your oven-crisped zucchini, incorporate a pinch of cayenne pepper or red pepper flakes directly into your Panko breadcrumb mixture. You could also serve them with a spicy dipping sauce, like a sriracha aioli, for customizable heat.
Can I Freeze Cooked Zucchini Fries?
Freezing cooked zucchini fries is not recommended, as they tend to become very soggy and lose their appealing texture upon thawing and reheating. These crispy vegetable fries are truly best enjoyed fresh from the oven.
Ready to Enjoy Your Perfect Zucchini Fries?
Now you have all the insider secrets to master perfectly crispy, never-limp baked zucchini fries right in your own kitchen! This recipe is a true game-changer for anyone looking for a healthier, delicious snack or a versatile side that truly satisfies.
Don’t be shy – give this recipe a try and experience the satisfying crunch for yourself. We’d love to see your creations! Share your beautiful golden fries on social media and tag us, or leave a comment below with your favorite dipping sauce!
If you loved this recipe, explore our other healthy and delicious vegetable side dishes like our Crispy Zucchini Fritters or our Perfect Roasted Carrots and Crispy Chickpeas for more kitchen inspiration!
For more vegetable ideas, try these parmesan asparagus spears.
Baked Zucchini Fries
Course: Side DishCuisine: AmericanDifficulty: easy4
servings15
minutes20
minutes240
kcal35
minutesSay goodbye to limp zucchini fries! This recipe reveals the simple secret to perfectly crispy baked zucchini fries, every single time. It’s all about one crucial step to remove excess moisture, ensuring a satisfying crunch for your homemade fries.
Ingredients
2 medium zucchini, about 1 pound total
1/2 teaspoon salt, plus more for salting zucchini
1/4 cup all-purpose flour
1/2 cup Panko breadcrumbs
1/4 cup grated Parmesan cheese
1 teaspoon garlic powder
1/2 teaspoon onion powder
1/4 teaspoon black pepper
2 large eggs
2 tablespoons olive oil
2 tablespoons fresh parsley, chopped, for garnish
Directions
- Preheat your oven to 400 degrees Fahrenheit (200 degrees Celsius). Line a large baking sheet with parchment paper for easy cleanup.
- Wash and trim the ends off the zucchini. Cut each zucchini into fry shaped sticks, about 3 to 4 inches long and 1/2 inch thick.
- This next step is the key to crispiness: Lay the zucchini sticks in a single layer on a few layers of paper towels. Sprinkle them generously with salt. Let them sit for 10 to 15 minutes. You’ll see beads of moisture form on the surface.
- After 10 to 15 minutes, firmly blot the zucchini sticks completely dry with more paper towels. This removes excess moisture and is crucial for getting them crispy.
- Set up your breading station: In a shallow dish, combine the all-purpose flour. In a second shallow dish, whisk the eggs. In a third shallow dish, mix together the Panko breadcrumbs, Parmesan cheese, garlic powder, onion powder, and black pepper.
- Working in batches, dredge each zucchini stick first in the flour, shaking off any excess. Then dip it into the beaten egg, allowing any extra to drip off. Finally, coat it thoroughly in the breadcrumb mixture, pressing gently to ensure the crumbs stick.
- Arrange the coated zucchini sticks in a single layer on the prepared baking sheet. Make sure they are not touching, as this helps them crisp evenly. Drizzle or lightly spray the zucchini sticks with olive oil.
- Bake for 10 minutes, then flip the zucchini sticks carefully. Continue baking for another 10 to 15 minutes, or until golden brown and crispy. Keep an eye on them to prevent burning.
- Remove from the oven, garnish with fresh chopped parsley, and serve immediately.
Notes
- For extra crispy fries, ensure you thoroughly blot the zucchini dry after salting, as any remaining moisture will steam instead of crisp. Don’t overcrowd the baking sheet; give the zucchini fries space so they can roast and get golden brown all around.


