
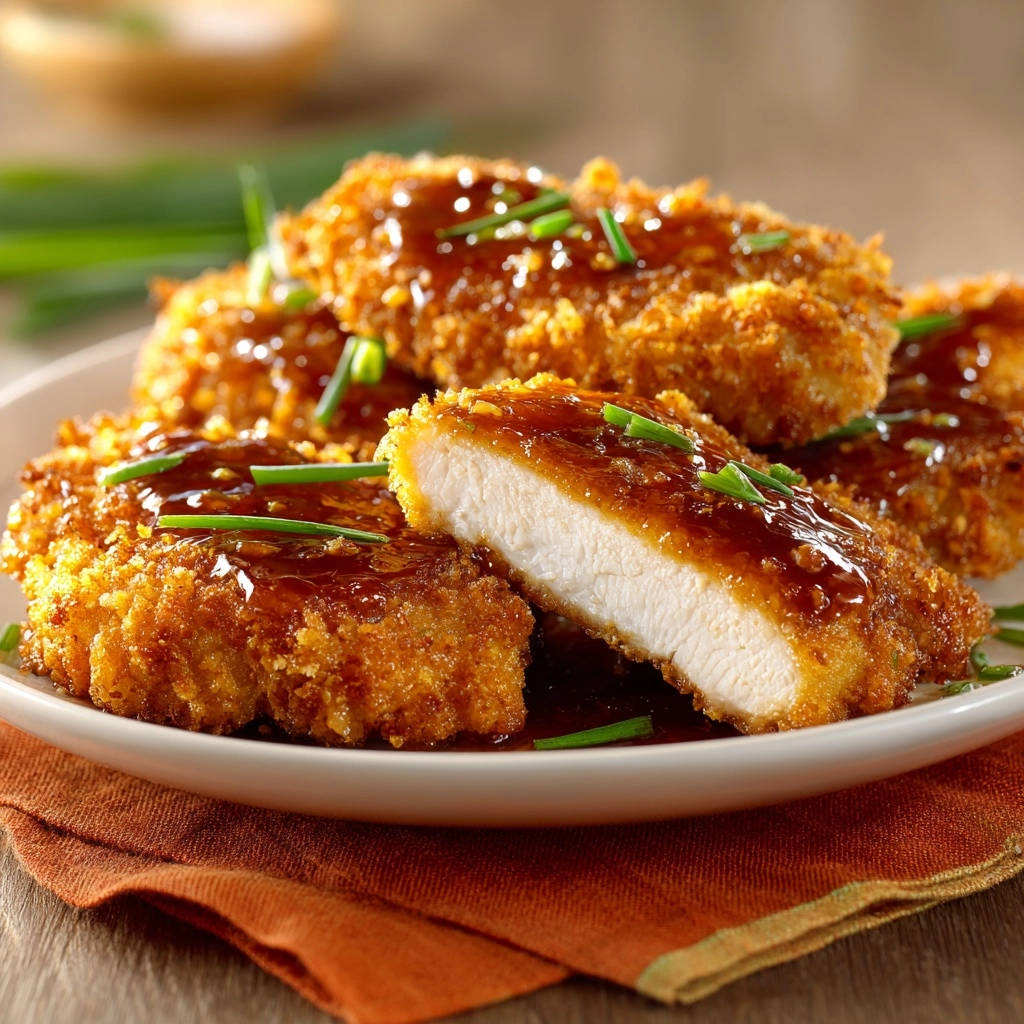
I know the disappointment of slicing into what promises to be a golden, crispy chicken cutlet, only to find it surprisingly dry. After many attempts, I finally cracked the code to making Crispy Chicken Cutlets with Glaze that are incredibly moist and tender on the inside, with an undeniable crunch. This perfected recipe is truly a game-changer, offering a delicious weeknight meal that will impress everyone at your table.
Why You’ll Obsess Over These Crispy Chicken Cutlets
Quick & Easy Weeknight Solution
Despite their gourmet appearance and incredible flavor, these Crispy Chicken Cutlets with Glaze come together in just 25 minutes. They are the ideal solution for busy weeknights when you crave something special without spending hours in the kitchen.
The Moisture Secret Unveiled: No More Dry Chicken!
Our unique technique involves carefully pounding the chicken to an even thickness. This ensures rapid, uniform cooking, preventing those dreaded dry spots.
Equally crucial is the resting period after frying; this allows the juices to redistribute throughout the meat, guaranteeing tender, succulent chicken every time.
Irresistible Sweet & Savory Glaze Perfection
The glossy, flavorful glaze is a harmonious blend of sweet and savory notes, with a hint of ginger and garlic. It perfectly complements the golden, crunchy exterior of the chicken, adding an extra layer of culinary delight.
The Building Blocks: Key Ingredients for Perfect Cutlets
For the Tender Chicken Base
Choose boneless, skinless chicken breasts for quick cooking and easy preparation. Seasoning with salt and pepper is vital to enhance the chicken’s natural flavor before breading.
Crafting the Ultimate Crispy Coating
All-purpose flour creates a foundational layer that helps the egg adhere to the chicken.
Beaten eggs act as the binder, allowing the breadcrumbs to cling evenly and securely.
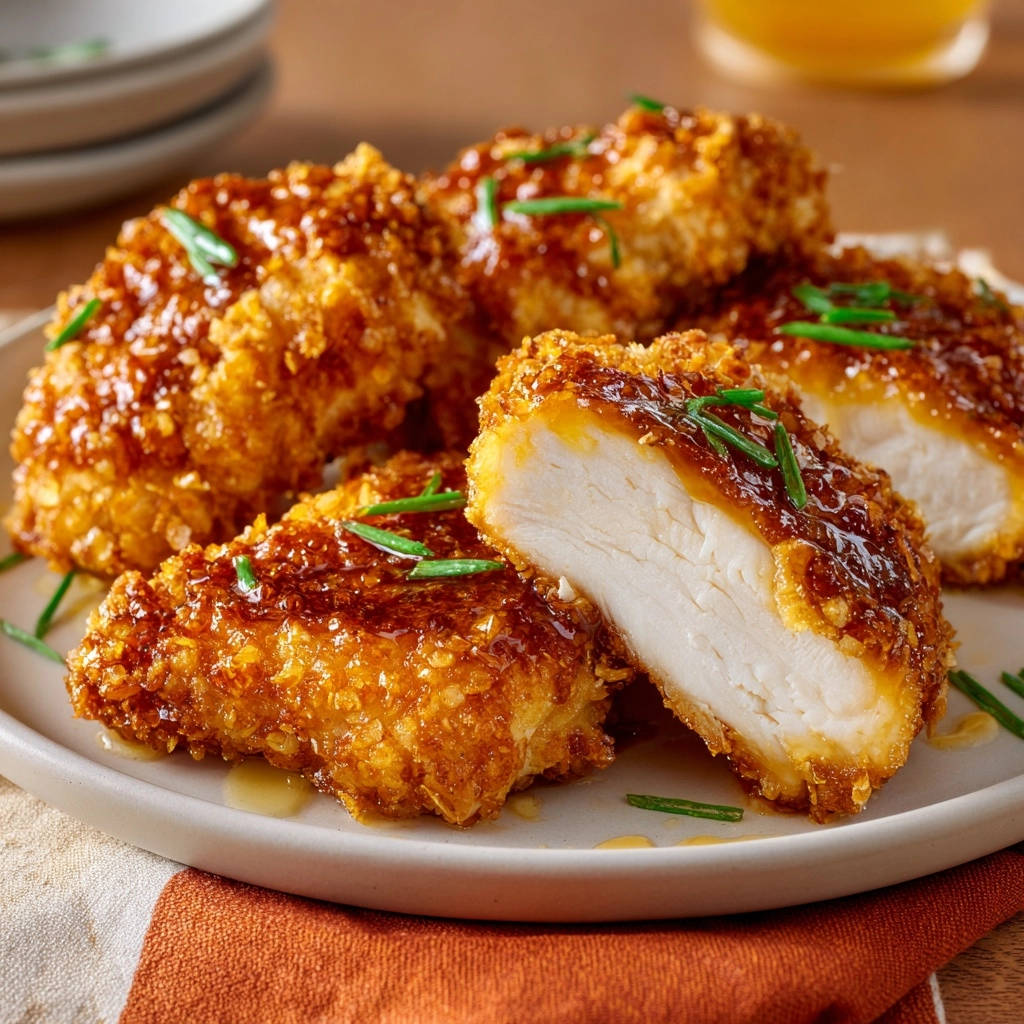
Panko breadcrumbs are essential; their larger, flakier texture results in an exceptionally light and crispy crust, far superior to traditional breadcrumbs.
The Irresistible Sweet-Savory Glaze Components
Low-sodium soy sauce forms the savory base of our glaze, adding depth without excessive saltiness.
Brown sugar provides a delightful sweetness and helps achieve that beautiful caramelization.
Rice vinegar introduces a bright, tangy balance, cutting through the richness of the other ingredients.
Freshly grated ginger and minced garlic infuse the glaze with aromatic, pungent notes that truly elevate the flavor profile.
Cornstarch, when mixed with water to form a slurry, is our secret to thickening the glaze to a perfect, luscious consistency.
Finishing Touches: Fresh Chives
A sprinkle of fresh chopped chives adds a vibrant pop of color and a delicate oniony freshness, perfectly balancing the richness of the glaze and fried chicken.
Essential Kitchen Gear for Your Crispy Cutlet Success
Having the right tools on hand makes preparing these Crispy Chicken Cutlets with Glaze a breeze. Here’s what you’ll need:
Prepping the Chicken with Ease: A meat mallet or the flat side of a heavy pan is crucial for pounding the chicken evenly. Plastic wrap protects your surfaces and keeps things hygienic.
Breading, Frying, and Resting Tools: Three shallow dishes are perfect for your flour, egg, and Panko breading station. A large skillet or deep pan is needed for frying, and an oil thermometer (highly recommended) ensures ideal oil temperature. Finally, a wire rack set over paper towels is essential for draining excess oil and allowing the chicken to rest properly.
Whipping Up the Glossy Glaze: A small saucepan is ideal for simmering your glaze. A whisk ensures all ingredients are smoothly combined and helps create a silky, lump-free sauce. A separate small bowl is handy for preparing the cornstarch slurry.
Your Path to Crispy Chicken Cutlets with Glaze Perfection
The Moisture Secret: Pounding & Seasoning
Place each chicken breast between two sheets of plastic wrap. Using a meat mallet or the flat side of a heavy pan, pound the chicken until it’s about 1/2 inch thick and uniform. This crucial step guarantees even cooking and prevents drying out, resulting in juicy cutlets.
Cut each pounded breast in half to create four cutlets, then season both sides generously with salt and pepper. Proper seasoning at this stage is fundamental for flavor.
Setting Up Your Breading Assembly Line
Prepare three shallow dishes for an efficient breading process. In the first, place the all-purpose flour; in the second, the beaten eggs; and in the third, the Panko breadcrumbs. This organized setup streamlines the coating process.
Achieving the Perfect Panko Coat
Dredge each chicken cutlet first in the flour, tapping off any excess to ensure a thin, even coat. Then, dip it into the beaten egg, letting any extra drip off before moving to the Panko.
Finally, press the chicken firmly into the Panko breadcrumbs, ensuring it’s fully coated on all sides. A thorough coating is key to maximum crispiness.
For even crispier results, check out this guide on crispy glazed chicken cutlets.
Frying to Golden Perfection
Heat about 1 inch of oil in a large skillet over medium-high heat until it reaches 350°F (175°C). If you don’t have a thermometer, a small piece of breading should sizzle immediately when dropped in, indicating readiness.
Carefully place 2-3 breaded chicken cutlets into the hot oil, ensuring not to overcrowd the pan. Fry for 3-4 minutes per side, or until golden brown and cooked through (internal temperature reaches 165°F or 74°C). The thin cutlets cook quickly, which helps preserve their tenderness.
The Crucial Resting Period
Transfer the cooked chicken cutlets to a wire rack set over a paper towel-lined baking sheet to drain excess oil. More importantly, let them rest for at least 5 minutes before slicing or serving.
This resting period allows the juices to redistribute throughout the meat, guaranteeing incredibly tender and moist chicken every time you enjoy these Crispy Chicken Cutlets with Glaze.
Whipping Up the Flavorful Glaze Base
While the chicken rests, whisk together soy sauce, brown sugar, rice vinegar, ginger, and garlic in a small saucepan. This forms the foundational flavor of your sweet and savory glaze.
In a separate small bowl, whisk cornstarch and water until completely smooth. This cornstarch slurry is vital for achieving the perfect glaze consistency.
Thickening to a Silky, Glossy Finish
Bring the soy sauce mixture to a simmer over medium heat. Slowly whisk in the cornstarch slurry, ensuring no lumps form.
Continue to cook, stirring constantly, until the sauce thickens to a beautiful, glossy consistency, which usually takes about 1-2 minutes. The glaze will beautifully coat the back of a spoon.
For a similar flavorful glaze, consider this sticky sesame ginger chicken recipe.
Drizzle, Garnish & Serve Immediately!
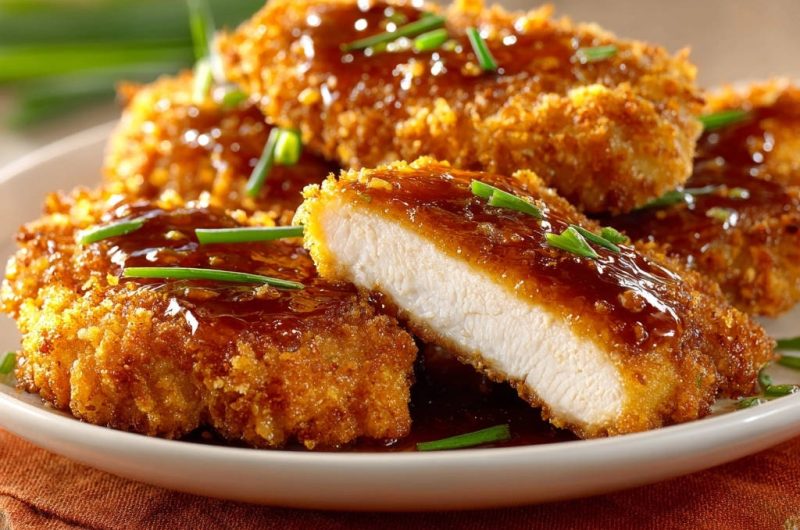
Arrange the rested, crispy chicken cutlets on your serving plate. Drizzle generously with the warm, glossy glaze, letting it cascade over the golden crust.
Sprinkle with fresh chives for a burst of color and fresh flavor. Serve these glorious Crispy Chicken Cutlets with Glaze immediately to enjoy them at their peak of crispiness and tenderness.
Chef’s Secrets: Elevating Your Crispy Chicken Cutlets with Glaze
Don’t Skip the Pound: The Key to Uniform Juiciness
Pounding the chicken to an even 1/2-inch thickness is not just for tenderization; it ensures every part of the cutlet cooks at the same rate. This eliminates dry edges or undercooked centers, giving you uniformly juicy results.
Oil Temperature Matters for Max Crispiness
Maintaining an oil temperature of 350°F (175°C) is crucial for a truly crispy crust. Oil that’s too cold will lead to greasy, soggy breading, while oil that’s too hot will burn the coating before the chicken cooks through.
Use a thermometer, or test with a tiny piece of breading; it should immediately sizzle and float to the top. Do not overcrowd the pan, as this lowers the oil temperature.
The Power of Panko: Why It’s a Game Changer
Panko breadcrumbs are made from crustless white bread and have a unique, airy, and flaky texture. This allows them to absorb less oil during frying, resulting in a significantly lighter, crispier, and less greasy crust compared to traditional breadcrumbs.
Why Resting is Non-Negotiable for Tender Chicken
When meat cooks, its muscle fibers contract, pushing juices to the center. Cutting into the chicken immediately after frying causes these juices to rush out, leaving the meat dry. Resting allows the fibers to relax and the juices to redistribute, ensuring every bite is moist and tender.
Adjusting Your Glaze to Perfection
Always taste your glaze before serving! You can easily adjust the sweetness with a touch more brown sugar, add extra savoriness with another dash of soy sauce, or introduce a mild kick with a pinch of red pepper flakes or a bit more ginger.
Troubleshooting Common Crispy Chicken Cutlet Challenges
My Chicken Cutlets Are Dry!
If your chicken is dry, it was likely overcooked or not pounded to an even thickness. Ensure your oil temperature is consistent and use a meat thermometer to pull the chicken at 165°F (74°C). Also, never skip the 5-minute resting period.
Why Did My Breading Fall Off?
Breading can detach if it wasn’t firmly pressed into the chicken, if the oil wasn’t hot enough, or if the pan was overcrowded. Ensure each layer is well-adhered and maintain a consistent oil temperature for immediate crisping.
The Glaze is Too Thin or Too Thick!
If your glaze is too thin, continue simmering and stirring gently; if it still won’t thicken, whisk a tiny bit more cornstarch with water and slowly add a splash to the simmering glaze. If it’s too thick, thin it out with a teaspoon of water or low-sodium chicken broth until it reaches your desired consistency.
My Cutlets Aren’t Crispy Enough.
Lack of crispiness often stems from oil that isn’t hot enough, overcrowding the pan, or insufficient Panko coating. Always verify your oil temperature, fry in batches, and ensure the cutlets are thoroughly coated.
Serving Suggestions: What to Pair with Your Glazed Cutlets
Classic Comfort Sides
These flavorful cutlets pair wonderfully with staple comfort foods. Consider serving them alongside fluffy white or brown rice to soak up the delicious glaze. A creamy side like homemade fluffy mashed potatoes offers a delightful textural contrast, or simple steamed green beans provide a touch of freshness.
Lighter, Fresher Options
For a lighter meal, a crisp green salad with a bright vinaigrette is an excellent choice. Roasted asparagus or quick stir-fried greens with a hint of sesame are also fantastic, healthy accompaniments.
Complementary Flavors
To round out your meal featuring crispy chicken cutlets, consider these refreshing accompaniments.
- For a bright and crunchy contrast to your chicken, try this spicy cucumber edamame salad, featuring cool vegetables and a hint of heat.
- Explore a different kind of crispness with this lemon soy wakame salad, offering a light, oceanic note that pairs well with tender chicken.
Creative Culinary Combinations
Elevate your meal with creative pairings like a vibrant sesame noodle salad, or quick pickled cucumbers for a tangy crunch. These glazed cutlets could even be sliced and tucked into soft bao buns for an adventurous twist, or served alongside perfectly roasted corn chunks.
Meal Prep & Storage Tips for Your Leftovers
Can I Prepare These Cutlets Ahead of Time?
You can bread the chicken cutlets up to 2 hours in advance. Arrange them in a single layer on a parchment-lined baking sheet, cover loosely with plastic wrap, and refrigerate. The glaze can be made up to 3 days ahead and stored in an airtight container in the fridge, reheating gently on the stovetop.
Proper Storage for Optimal Freshness
Store any leftover cooked Crispy Chicken Cutlets with Glaze and the glaze separately in airtight containers in the refrigerator for up to 3-4 days. This keeps the chicken from getting soggy and preserves the glaze’s quality.
Reheating for Optimal Crispness
For the best results, reheat the chicken cutlets in a preheated oven at 375°F (190°C) for 10-15 minutes, or in an air fryer at 350°F (175°C) for 5-7 minutes, until heated through and re-crisped. Avoid the microwave, which can make them rubbery and soggy. Reheat the glaze gently on the stovetop over low heat, stirring until warmed.
Frequently Asked Questions About Crispy Chicken Cutlets
Can I use different chicken cuts?
Yes, you can use boneless, skinless chicken thighs or chicken tenderloins. Thighs may require a slightly longer pounding time to achieve even thickness and a minute or two more frying time. Tenderloins are naturally thinner and will cook very quickly, so watch them closely.
Is there a gluten-free option for this recipe?
Absolutely! You can easily make this recipe gluten-free. Simply substitute the all-purpose flour with a gluten-free all-purpose flour blend and use gluten-free Panko breadcrumbs, which are widely available. The rest of the ingredients are naturally gluten-free.
How can I make the glaze spicier?
To add a kick, incorporate 1/2 to 1 teaspoon of sriracha or red pepper flakes into the glaze mixture along with the soy sauce and brown sugar. A dash of chili oil at the end can also provide a wonderful, aromatic heat.
What’s the best type of oil for frying chicken cutlets?
Vegetable, canola, or peanut oil are excellent choices for frying chicken cutlets due to their high smoke points and neutral flavors. Peanut oil can impart a slightly nutty taste, while vegetable and canola oils are nearly flavorless, allowing the chicken and glaze flavors to shine.
Can I bake or air fry these instead of deep frying?
While deep frying yields the crispiest result, you can certainly bake or air fry them. For baking, spray the breaded cutlets with cooking spray and bake at 400°F (200°C) for 15-20 minutes, flipping halfway. For air frying, spray thoroughly and cook at 375°F (190°C) for 12-15 minutes, flipping once, until golden and cooked through. The crispiness will be good, though slightly different from deep-frying.
Ready to Create Your Own Crispy Cutlet Masterpiece?
Now that you’re armed with all the secrets, tips, and a foolproof recipe, it’s time to create your own perfectly Crispy Chicken Cutlets with Glaze. This dish is designed to impress with minimal effort, guaranteeing rave reviews and a delicious meal for any occasion. Don’t be shy-give this recipe a try and share your stunning results!
Crispy Chicken Cutlets
Course: Main CourseCuisine: AsianDifficulty: easy4
servings15
minutes10
minutes550
kcal25
minutesDiscover the secret to perfectly moist and tender crispy chicken cutlets, complete with a savory and sweet glaze. This recipe guarantees a golden, crunchy crust every time, making it a delicious weeknight meal that’s easy to master.
Ingredients
2 boneless, skinless chicken breasts
1/2 cup all-purpose flour
2 large eggs, beaten
1 1/2 cups Panko breadcrumbs
1/2 teaspoon salt
1/4 teaspoon black pepper
Oil for frying (vegetable, canola, or peanut oil)
For the glaze:
1/2 cup soy sauce (low sodium preferred)
1/4 cup brown sugar
2 tablespoons rice vinegar
1 teaspoon grated fresh ginger (or 1/2 tsp ginger powder)
1 clove garlic, minced (or 1/4 tsp garlic powder)
1 tablespoon cornstarch
2 tablespoons water
For garnish:
2 tablespoons chopped fresh chives
Directions
- Prepare the Chicken (The Moisture Secret!): Place each chicken breast between two sheets of plastic wrap. Using a meat mallet or the flat side of a heavy pan, pound the chicken until it is about 1/2 inch thick and uniform in thickness. This ensures even cooking and prevents drying out. Cut each pounded breast in half to create four cutlets. Season both sides of the chicken cutlets evenly with salt and pepper.
- Set Up Breading Station: Prepare three shallow dishes. In the first dish, place the all-purpose flour. In the second dish, place the beaten eggs. In the third dish, place the Panko breadcrumbs.
- Bread the Chicken: Dredge each chicken cutlet first in the flour, shaking off any excess. Then dip it into the beaten egg, allowing any extra to drip off. Finally, press the chicken firmly into the Panko breadcrumbs, ensuring it is fully coated on all sides. Repeat for all cutlets.
- Fry the Chicken: Heat about 1 inch of oil in a large skillet or deep pan over medium-high heat until it reaches 350F (175C). If you don’t have a thermometer, a small piece of breading should sizzle immediately when dropped in. Carefully place 2-3 breaded chicken cutlets into the hot oil, ensuring not to overcrowd the pan. Fry for 3-4 minutes per side, or until golden brown and cooked through (internal temperature reaches 165F or 74C). The thin cutlets will cook quickly, preserving their juiciness.
- Rest the Chicken: Transfer the cooked chicken cutlets to a wire rack set over a paper towel-lined baking sheet to drain excess oil. Crucially, let them rest for at least 5 minutes before slicing or serving. This allows the juices to redistribute, guaranteeing tender, moist chicken.
- Prepare the Glaze: While the chicken rests, whisk together soy sauce, brown sugar, rice vinegar, ginger, and garlic in a small saucepan. In a separate small bowl, whisk cornstarch and water until smooth.
- Cook the Glaze: Bring the soy sauce mixture to a simmer over medium heat. Slowly whisk in the cornstarch slurry. Continue to cook, stirring constantly, until the sauce thickens to a glossy consistency, about 1-2 minutes.
- Serve: Arrange the rested, crispy chicken cutlets on a serving plate. Drizzle generously with the warm glaze and sprinkle with fresh chives. Serve immediately.
Notes
- Pounding chicken to uniform thickness and allowing it to rest are key steps for ultimate moistness.


