
There’s nothing quite like biting into a perfectly golden, intensely crunchy chicken cutlet, but achieving that consistent, restaurant-quality crispness at home can feel like a challenge. I’ve spent years perfecting this recipe for Crispy Chicken Cutlets, and I’m thrilled to share the secrets to a coating that stays shatteringly crisp, even when drenched in your favorite sauce. Get ready to elevate your weeknight meals with a dish that truly delivers on its promise of deliciousness and an irresistible texture.
Experience Unmatched Crispness: Why This Recipe is Your New Go-To
No More Soggy Surprises: The Sauce-Friendly Secret
This recipe directly addresses the common disappointment of soggy breading. Through specific techniques, we ensure the coating remains gloriously crisp, even after being drizzled with a flavorful sauce. Enjoy every bite without compromise.
For a similar crunch, try this crispy panko chicken bowl.
Effortless Elegance: Restaurant Quality, Home Kitchen Comfort
Bringing professional-level crunch and deep flavor to your table doesn’t require complex culinary gymnastics. This method simplifies the process, allowing home cooks to confidently achieve a dish that rivals their favorite restaurant’s offerings.
For extra crunch, consider a recipe for classic crispy fried chicken.
Quick & Satisfying: A Weeknight Wonder for Busy Cooks
With a total time of just 35 minutes, these Crispy Chicken Cutlets are perfectly suited for busy evenings. They offer a satisfying meal solution without compromising on taste or that sought-after crispy texture.
Gathering Your Culinary Arsenal: Key Ingredients for Perfection
The Star of the Show: Choosing Your Chicken Breasts
Select boneless, skinless chicken breasts of roughly equal size, about 6 ounces each. Uniform thickness, achieved through pounding, is essential for even cooking and a tender result.
The Breading Trio: Flour, Eggs, and the Magic of Panko
All-purpose flour creates the initial dry layer, helping the egg wash adhere effectively. Lightly beaten eggs act as the crucial binder, ensuring the breadcrumbs stick. Panko breadcrumbs are the real secret weapon, providing a light, airy, and exceptionally crispy coating far superior to regular breadcrumbs.
Essential Frying Oil: Heat Management for Golden Results
Vegetable, canola, or peanut oil are ideal for frying due to their high smoke points. Using sufficient oil, about 3 cups, ensures the chicken cooks evenly and quickly, contributing to a truly golden brown and delicious crust.
Homemade Tonkatsu Sauce: A Flavorful Companion
A simple blend of ketchup, Worcestershire sauce, soy sauce, sugar, water, and garlic powder creates a perfectly balanced, tangy-sweet Tonkatsu-style sauce. This homemade version elevates the dish with fresh, vibrant flavors.
Fresh Sides & Garnish: Completing Your Plate
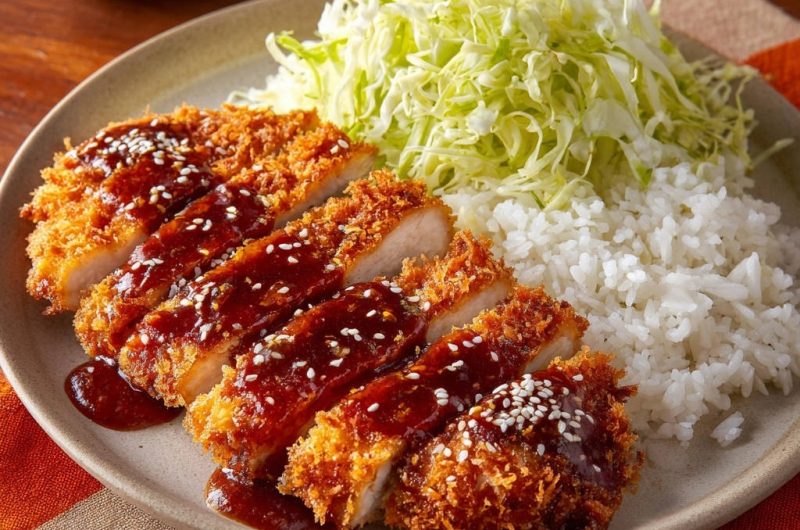
Shredded green cabbage and warm white rice provide a refreshing and comforting counterpoint to the rich, Crispy Chicken Cutlets. Toasted sesame seeds and sliced green onions add an aromatic finish and a burst of fresh flavor.
More Meals to Try
To go with your crispy chicken cutlets, consider these refreshing cabbage salads.
- For a bright and tangy contrast, try this Bacon Apple Red Cabbage Slaw, featuring crisp apples and a hint of sweetness.
- Another vibrant option is the Orange Walnut Feta Red Cabbage Slaw, which offers a delightful mix of citrus and nutty notes.
Essential Tools for Your Crispy Chicken Cutlets Adventure
Pounding Power: The Right Mallet Makes a Difference
A meat mallet or even a sturdy rolling pin is indispensable for pounding the chicken to a uniform 1/2-inch thickness. This ensures consistent cooking and helps the chicken cook quickly without drying out.
Heat Control: Thermometers and Heavy-Bottomed Pans
An accurate cooking thermometer is vital for maintaining the precise oil temperature of 350-375°F (175-190°C). A large, heavy-bottomed skillet or Dutch oven is preferred as it retains heat efficiently, preventing drastic temperature drops when chicken is added.
The Crisping Cradle: Why a Wire Rack is Non-Negotiable
A wire rack set over a baking sheet is critical for post-frying drainage. It allows air to circulate around the entire cutlet, preventing steam from forming on the bottom and preserving that hard-earned crispness.
Breading Station Basics: Shallow Dishes for Efficiency
Three shallow dishes are perfect for setting up an organized and efficient breading station. This setup makes the dredging process smooth and mess-free, ensuring each cutlet is perfectly coated.
Step-by-Step Mastery: Crafting Your Crispy Chicken Cutlets
Preparation Prowess: Thinning and Drying Your Chicken
Pound the Chicken: Place each chicken breast between two sheets of plastic wrap. Using a meat mallet or rolling pin, gently but firmly pound the chicken to an even 1/2 inch thickness. This crucial step guarantees uniform cooking and tenderness.
Pat It Dry: Pat the chicken very dry on both sides with paper towels. Eliminating surface moisture is fundamental; it prevents steam from creating a soggy breading and ensures superior crispness.
Season Generously: Season both sides of the chicken with 1/2 teaspoon salt and 1/4 teaspoon black pepper. This builds a delicious foundational flavor layer.
Building the Breading Barrier: The Three-Dish System
Setup Your Station: Prepare three shallow dishes. In the first, combine the flour with the remaining 1/2 teaspoon salt and 1/4 teaspoon black pepper. In the second, place the lightly beaten eggs. In the third, add the Panko breadcrumbs.
Flour First: Dredge each chicken cutlet first in the seasoned flour, ensuring it is fully coated. Gently shake off any excess flour; just a thin, even layer is needed to help the egg adhere.
Egg Wash: Next, dip the cutlet into the beaten eggs, allowing any extra to drip off. The egg creates a sticky surface for the breadcrumbs to cling to.
Panko Press: Finally, press the chicken firmly into the Panko breadcrumbs, ensuring the Panko adheres well to every part of the cutlet. Firmly pressing creates a thick, crunchy coating that stays on during frying.
The Perfect Fry: Achieving Optimal Oil Temperature
Heat the Oil: In a large, heavy-bottomed skillet or Dutch oven, heat the cooking oil over medium-high heat until it reaches 350-375°F (175-190°C). Consistent oil temperature is paramount for achieving that perfect crispness and preventing greasiness.
Temperature Test: If you don’t have a thermometer, drop a small piece of Panko into the oil. It should sizzle immediately and turn golden in about 30 seconds, indicating the oil is ready.
Frying for Flavor and Texture: The Golden Rule
Fry in Batches: Carefully place one or two breaded chicken cutlets into the hot oil, making sure not to overcrowd the pan. Overcrowding significantly drops the oil temperature, leading to soggy, greasy chicken.
Cook Until Golden: Fry for 3-5 minutes per side, or until they achieve a beautiful golden brown color and are cooked through. The internal temperature should reach 165°F (74°C) for food safety.
Post-Fry Perfection: Draining for Lasting Crispness
Drain on a Rack: Using tongs, carefully remove the cooked cutlets from the oil and immediately transfer them to a wire rack set over a baking sheet. This allows air to circulate underneath, preventing steam from forming and keeping the bottom side perfectly crispy.
Whisking Up the Tangy Tonkatsu Sauce
Combine Ingredients: While the chicken drains, combine all Tonkatsu Style Sauce ingredients in a small bowl. Whisk until smooth and well-combined, adjusting the flavor balance to your preference.
Optional Garnish: If using, stir in the sliced green onions for an added layer of freshness and a mild onion bite.
Assembling Your Masterpiece: The Ultimate Presentation
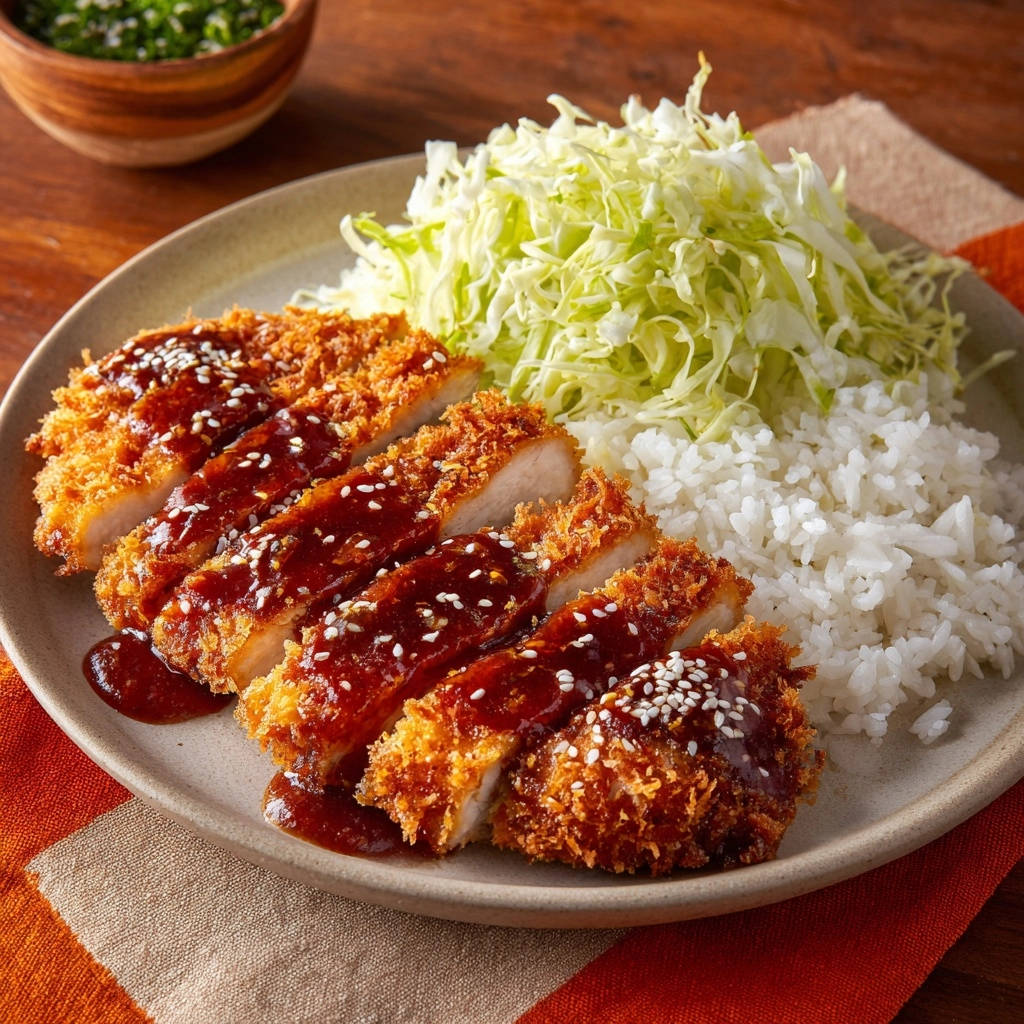
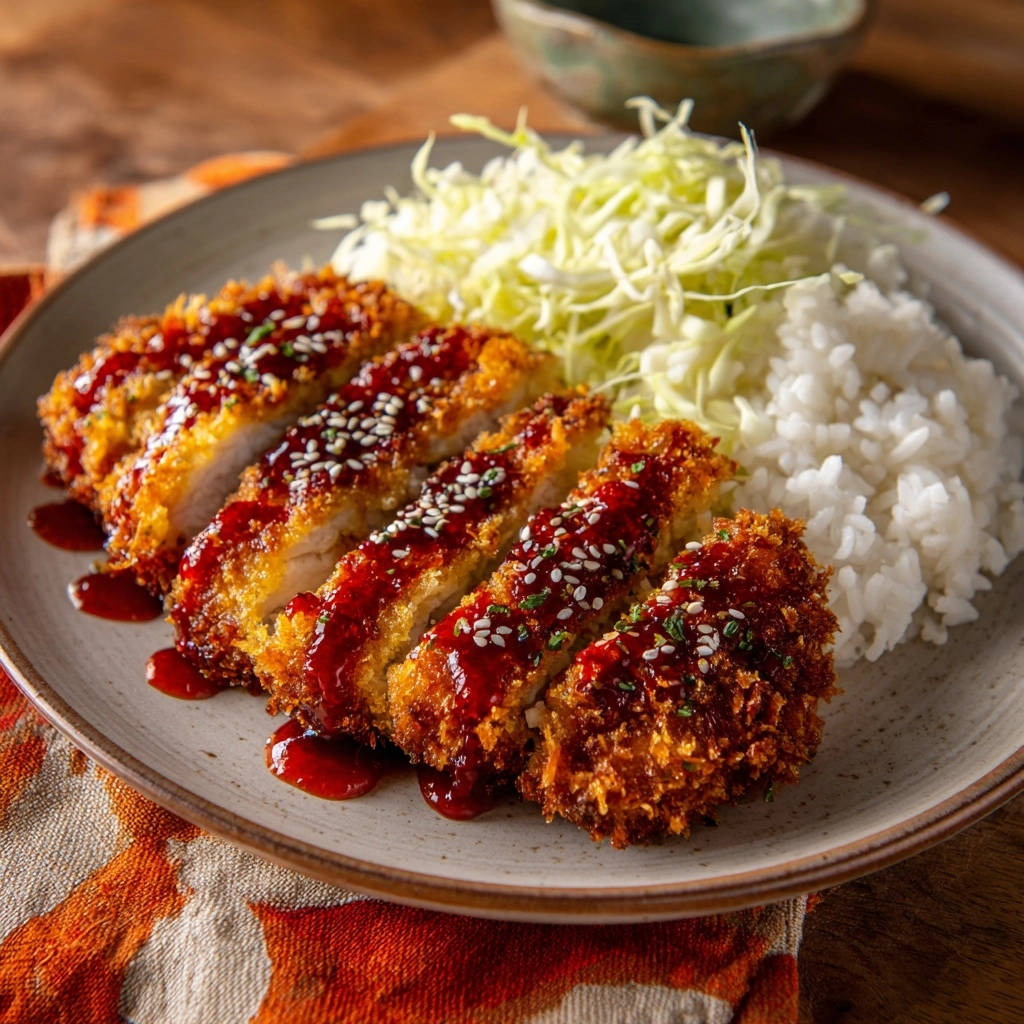
Slice and Arrange: Slice the golden Crispy Chicken Cutlets into thick, manageable strips. Arrange them artfully on plates alongside the fresh shredded green cabbage and warm cooked white rice.
Drizzle and Serve: Drizzle the homemade Tonkatsu Style Sauce generously over the chicken and sprinkle with toasted sesame seeds for aroma and crunch. Serve immediately to enjoy the ultimate crisp texture and vibrant flavors!
Elevating Your Game: Expert Tips for Crispy Chicken Cutlets
The Power of the Pat: Eliminating Moisture is Key. Never skip drying the chicken thoroughly with paper towels. Any residual moisture will turn to steam during frying, inevitably making your breading soft. This is the #1 secret to lasting crispness.
Panko Power: Don’t Substitute for Maximum Crunch. Panko breadcrumbs are specifically designed to be larger, flakier, and absorb less oil than regular breadcrumbs. This unique structure yields an incomparably lighter and crispier result, essential for this dish.
Mind the Heat: Consistent Oil Temperature Prevents Sogginess. Keep your frying oil consistently between 350-375°F (175-190°C). Too low, and the chicken will soak up too much oil, becoming greasy; too high, and the exterior will burn before the chicken cooks through.
Avoid the Crowd: Frying in Batches for Even Results. Overcrowding the pan is a common mistake. It drastically lowers the oil’s temperature, leading to inconsistent cooking, less crispy results, and a longer frying time. Fry one or two cutlets at a time.
Seasoning Smarts: Flavor at Every Layer. Don’t just season the breading. Season the chicken itself with salt and pepper, and add seasoning to the flour. This builds a robust, well-rounded flavor profile throughout the entire dish.
The Resting Rack: Your Secret Weapon Against Steam. Always transfer fried cutlets to a wire rack set over a baking sheet immediately after cooking. This allows air to circulate completely, preventing trapped steam from ruining the bottom’s crunchy coating.
Don’t Rush the Press: Adherence is Everything. When coating the chicken with Panko, press firmly and thoroughly. This ensures a thick, even layer of breadcrumbs that adheres well, making it less likely to fall off during the frying process.
Troubleshooting Common Crispy Chicken Cutlet Challenges
Problem: Soggy Breading After Frying
Soggy breading often results from not properly drying the chicken before breading, overcrowding the pan which lowers oil temperature, or not draining the fried cutlets on a wire rack. Ensure each of these steps is followed diligently for maximum crispness.
Problem: Breading Falling Off During Frying
This usually occurs if excess flour isn’t shaken off after the first dredge, preventing the egg from adhering properly. Alternatively, not pressing the Panko breadcrumbs firmly enough onto the chicken can cause them to detach.
Problem: Chicken Not Cooked Through (or Overcooked and Dry)
Inconsistent chicken thickness is a prime culprit; pound cutlets evenly. Incorrect oil temperature (too low) or frying for the wrong duration can also lead to undercooked or dry chicken. Always use a thermometer and monitor cooking times.
Problem: Oil Temperature Too Low or Too High
Oil that’s too cool results in greasy chicken that absorbs too much oil and isn’t crispy. Oil that’s too hot burns the breading before the chicken cooks through. Use a thermometer to maintain the ideal range of 350-375°F (175-190°C).
Beyond the Plate: Serving, Storage & Make-Ahead Tips
Perfect Pairings: What to Serve with Crispy Chicken Cutlets
The traditional shredded green cabbage and white rice are fantastic, offering a fresh counterpoint and comforting base. For added variety, consider serving with crisp lemon wedges, a light green salad with a vinaigrette, or even some roasted asparagus or broccoli.
Storing Leftovers: Keeping the Crisp Alive
Store leftover Crispy Chicken Cutlets in an airtight container in the refrigerator for up to 3 days. To reheat, avoid the microwave; instead, bake in a preheated oven at 375°F (190°C) for 10-15 minutes or in an air fryer at 350°F (175°C) for 5-8 minutes until warmed through and re-crisped.
Make-Ahead Marvel: Prep Steps for Speedy Dinners
To save time, pound and season the chicken cutlets up to a day in advance, storing them covered in the refrigerator. The Tonkatsu-style sauce can also be made ahead and stored in an airtight container in the fridge for several days, ready to whisk and serve.
Your Burning Questions Answered: Crispy Chicken Cutlet FAQs
Can I Bake or Air Fry these Crispy Chicken Cutlets Instead?
Yes, you can! For baking, place breaded cutlets on a wire rack over a baking sheet and bake at 400°F (200°C) for 20-25 minutes, flipping once. For air frying, spray lightly with oil and air fry at 375°F (190°C) for 12-15 minutes, flipping halfway. While they’ll be crispy, deep frying still yields the ultimate golden crunch.
What if I don’t have Panko breadcrumbs?
While Panko is ideal for maximum crunch, you can substitute with regular fine dry breadcrumbs. Note that the texture will be slightly denser and less airy. For a similar flakiness, try crushing cornflakes or dry seasoned stuffing mix.
Can I use a different type of meat?
Absolutely! This method works beautifully with other thinly pounded meats. Pork cutlets (schnitzel-style) or turkey cutlets are excellent choices. Adjust frying times as needed based on thickness, ensuring the internal temperature reaches 145°F (63°C) for pork or 165°F (74°C) for turkey.
How can I make this gluten-free?
To make this recipe gluten-free, simply substitute the all-purpose flour with a 1:1 gluten-free flour blend. For the breadcrumbs, use gluten-free Panko breadcrumbs, which are widely available and maintain that excellent crispy texture.
Is there a substitute for Worcestershire sauce in the Tonkatsu?
If you don’t have Worcestershire sauce, you can create a similar flavor profile. Combine 1 teaspoon soy sauce, 1/2 teaspoon apple cider vinegar, a pinch of sugar, and a dash of ground ginger as a substitute for each tablespoon of Worcestershire sauce required.
Your Crispy Chicken Cutlets Journey Awaits!
You now possess all the knowledge and expert tips to create truly exceptional Crispy Chicken Cutlets that boast a restaurant-level crunch right in your own kitchen. This recipe is more than just instructions; it’s a pathway to mastering a beloved dish that will impress and delight every time.
Don’t hesitate to embark on this culinary adventure. Dive in, trust the process, and prepare to savor the satisfying crispness. We’d love to hear about your experience and see your golden creations! Don’t forget to leave a comment below with your feedback and any personal touches you added.
Crispy Chicken Cutlets
Course: Main CourseCuisine: AsianDifficulty: easy2
servings20
minutes15
minutes1200
kcal35
minutesSay goodbye to soggy breading! This recipe reveals the secrets to achieving perfectly golden and crunchy chicken cutlets that stay crisp, even when sauced. Enjoy restaurant-quality results right in your home kitchen.
Ingredients
2 boneless, skinless chicken breasts (about 6 ounces each)
1/2 cup all-purpose flour
1 teaspoon salt, divided
1/2 teaspoon black pepper, divided
2 large eggs, lightly beaten
1 1/2 cups Panko breadcrumbs
3 cups cooking oil (vegetable, canola, or peanut oil) for frying
1 cup shredded green cabbage
1 1/2 cups cooked white rice
For the Tonkatsu Style Sauce:
1/4 cup ketchup
2 tablespoons Worcestershire sauce
1 tablespoon soy sauce
1 tablespoon granulated sugar
1 tablespoon water
1/2 teaspoon garlic powder
For Garnish:
1 tablespoon toasted sesame seeds
2 tablespoons sliced green onions (optional, for sauce)
Directions
- Prepare the Chicken: Place each chicken breast between two sheets of plastic wrap. Using a meat mallet or rolling pin, pound the chicken to about 1/2 inch thickness. Pat the chicken very dry on both sides with paper towels. This crucial step prevents steam from making your breading soggy. Season both sides of the chicken with 1/2 teaspoon salt and 1/4 teaspoon black pepper.
- Set Up Breading Station: Prepare three shallow dishes. In the first dish, combine the flour with the remaining 1/2 teaspoon salt and 1/4 teaspoon black pepper. In the second dish, place the beaten eggs. In the third dish, add the Panko breadcrumbs.
- Bred the Chicken: Dredge each chicken cutlet first in the seasoned flour, ensuring it is fully coated, then shake off any excess. Next, dip it into the beaten eggs, letting any extra drip off. Finally, press the chicken firmly into the Panko breadcrumbs, making sure the Panko adheres well to every part of the cutlet. Pressing firmly helps create a thick, crunchy coating that won’t fall off.
- Heat the Oil: In a large, heavy-bottomed skillet or Dutch oven, heat the cooking oil over medium-high heat until it reaches 350-375°F (175-190°C). If you don’t have a thermometer, a small piece of Panko should sizzle immediately and turn golden in about 30 seconds.
- Fry the Cutlets: Carefully place one or two breaded chicken cutlets into the hot oil, making sure not to overcrowd the pan. Overcrowding will drop the oil temperature and lead to soggy, greasy chicken. Fry for 3-5 minutes per side, or until golden brown and cooked through (internal temperature reaches 165°F or 74°C). The consistent oil temperature is key to achieving that perfect crispness.
- Drain Properly: Using tongs, carefully remove the cooked cutlets from the oil and place them on a wire rack set over a baking sheet. This allows air to circulate underneath, preventing the bottom from steaming and getting soggy.
- Make the Sauce: While the chicken drains, combine all Tonkatsu Style Sauce ingredients in a small bowl and whisk until smooth. If using, stir in sliced green onions.
- Serve: Slice the crispy chicken cutlets into thick strips. Arrange on plates with shredded cabbage and cooked white rice. Drizzle the Tonkatsu Style Sauce over the chicken and sprinkle with toasted sesame seeds. Serve immediately to enjoy the ultimate crisp texture!
Notes
- Ensure your oil is hot enough before frying for that perfect crisp; a breadcrumb dropped in should sizzle immediately. For even cooking, don’t overcrowd the pan, and let the cutlets rest on a wire rack to maintain their crispiness.


