
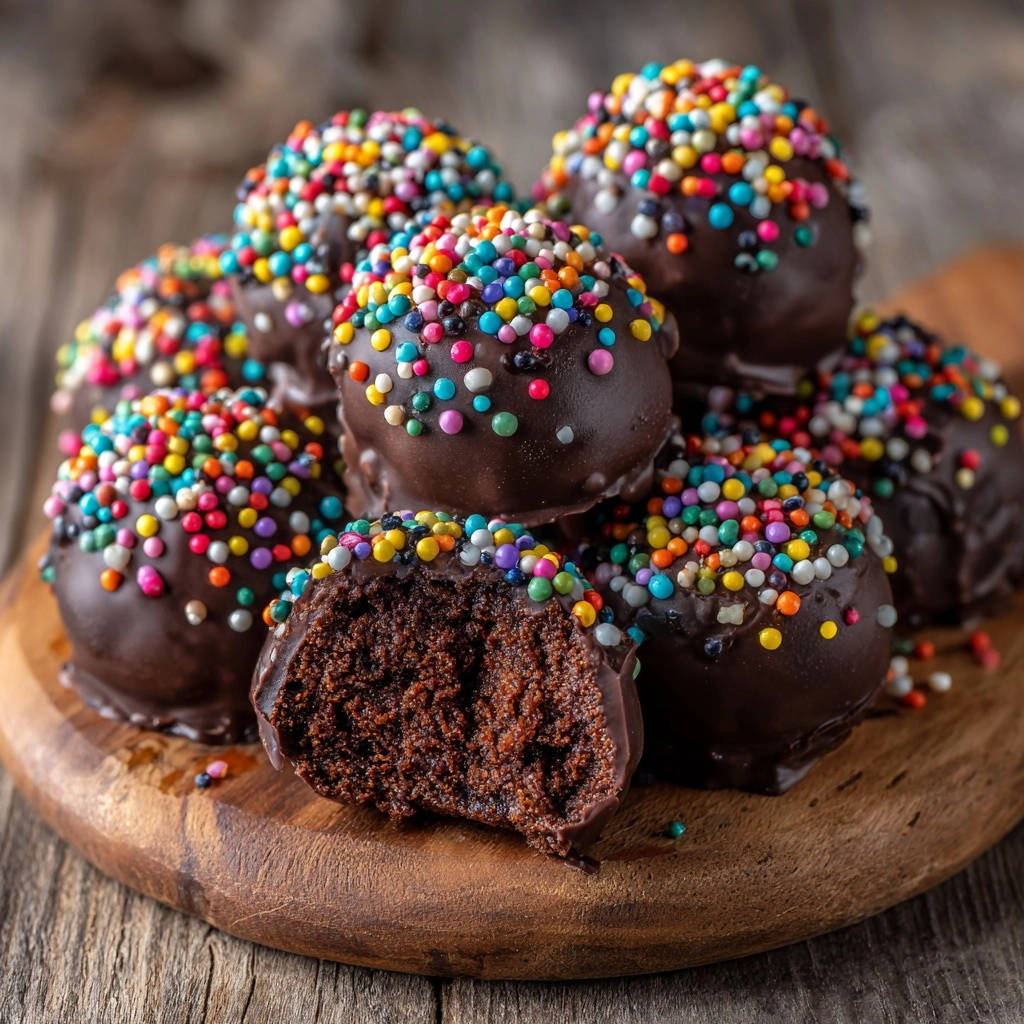
As a food content strategist, I’ve seen countless attempts at Decadent Chocolate Cake Pops fall short-either too dry, too crumbly, or strangely mushy. But after years of perfecting, I’ve finally cracked the code to achieving that ideal, irresistible texture every single time. This recipe delivers cake pops that are not just delicious, but perfectly moist, hold their shape flawlessly, and are a joy to make and eat.
The Secret to Decadent Chocolate Cake Pops: Never Crumbly, Always Perfect
What sets these Decadent Chocolate Cake Pops apart is the precise methodology behind their creation. We’re not just combining ingredients; we’re building texture layer by layer.
The core innovation lies in our binder-to-cake crumb ratio and the gentle, yet thorough, kneading process. This ensures your cake pops are always moist without being greasy, firm enough to dip easily, and never fall apart.
Beyond the Basics: Why Our Cake Pop Recipe Stands Out
Our recipe for Decadent Chocolate Cake Pops distinguishes itself through several critical steps that guarantee success.
We emphasize a gradual addition of the binder, allowing you to perfectly control the final consistency. This prevents common pitfalls like overly dry or overly wet cake balls.
The crucial chilling period ensures the cake pops are firm, making them effortless to dip in chocolate without losing their spherical shape. This attention to detail results in a professional-looking, delectable treat.
Gather Your Essentials: Ingredients for Irresistible Cake Pops
Crafting perfect Decadent Chocolate Cake Pops begins with selecting the right components. Each ingredient plays a specific role in achieving that signature texture and rich flavor.
The Star: Chocolate Cake Base
You’ll need one box of your favorite chocolate cake mix, prepared and baked according to package directions, or an equivalent amount of pre-baked chocolate cake (about an 8×8 inch pan size). Ensure your cake is completely cooled before crumbling.
A properly cooled cake is essential for achieving fine, uniform crumbs, which are the foundation of a smooth cake pop. For an incredibly rich start, you might even consider baking your own decadent chocolate cake from scratch.
The Texture Catalyst: Cream Cheese or Frosting
We use 1/2 cup of softened cream cheese, or plain chocolate frosting, as our binding agent. Cream cheese lends a subtle tang and luxurious moisture, while frosting offers a more straightforward sweetness.
Both options work beautifully, but the key is using a softened binder. This ensures it blends seamlessly with the cake crumbs for that ideal, firm-but-pliable consistency.
The Perfect Coat: Melting Wafers & Oil
Sixteen ounces of chocolate melting wafers or good quality chocolate chips form the glossy outer shell. Melting wafers are designed for easy melting and a smooth finish.
Adding 4 tablespoons of vegetable oil or coconut oil to your chocolate is crucial. This thins the chocolate, allowing for a perfectly smooth, even, and thin coating on each cake pop, preventing a thick, clumpy layer.
Finishing Touches: Sprinkles and Beyond
Colorful sprinkles are the classic decorative touch for cake pops, adding visual appeal and a playful texture. They’re applied immediately after dipping, before the chocolate sets.
Don’t be afraid to experiment with other toppings like edible glitter, chopped nuts, or even a contrasting chocolate drizzle for extra flair.
For more ideas on layered treats, explore these chocolate caramel cheesecake bars.
Tools for Cake Pop Triumph: What You’ll Need
Having the right tools simplifies the cake pop-making process and ensures professional-looking results.
Essential Mixing & Shaping Gear
Large Mixing Bowl: Crucial for easily crumbling and combining your cake base with the binder.
Parchment Paper: Prevents sticking when chilling and setting your cake pops.
Baking Sheets: Provides a flat surface for chilling and holding your rolled cake balls.
Dipping & Decorating Aids
Microwave-Safe Bowl: Ideal for melting your chocolate coating in controlled intervals.
Spoon or Dipping Fork: A deep spoon or a dedicated dipping fork helps fully submerge and evenly coat each cake pop, allowing excess chocolate to drip off.
Crafting Your Decadent Chocolate Cake Pops: Step-by-Step Mastery
Follow these detailed steps to create your own batch of perfectly moist and never-crumbly Decadent Chocolate Cake Pops.
Preparing the Perfect Cake Crumb Foundation
Start with your chocolate cake, fully baked and completely cooled. It’s essential that the cake is at room temperature to prevent a greasy texture when mixing.
Crumble the entire cake very finely into a large mixing bowl. Take your time to ensure there are no large lumps; a uniform crumb texture is vital for smooth, consistent cake pops.
The Crucial Consistency: Mixing for Ideal Texture
Now for the key step that guarantees your Decadent Chocolate Cake Pops are never crumbly or mushy. Add about half of the softened cream cheese or chocolate frosting to the cake crumbs.
Using your hands, thoroughly mix and knead the crumbs and cream cheese together. This tactile approach allows you to feel the mixture’s consistency directly.
The goal is a mixture moist enough to be pressed into a ball without crumbling, yet not so wet that it feels sticky or greasy. Add the remaining cream cheese or frosting just a little at a time, mixing and kneading thoroughly after each addition.
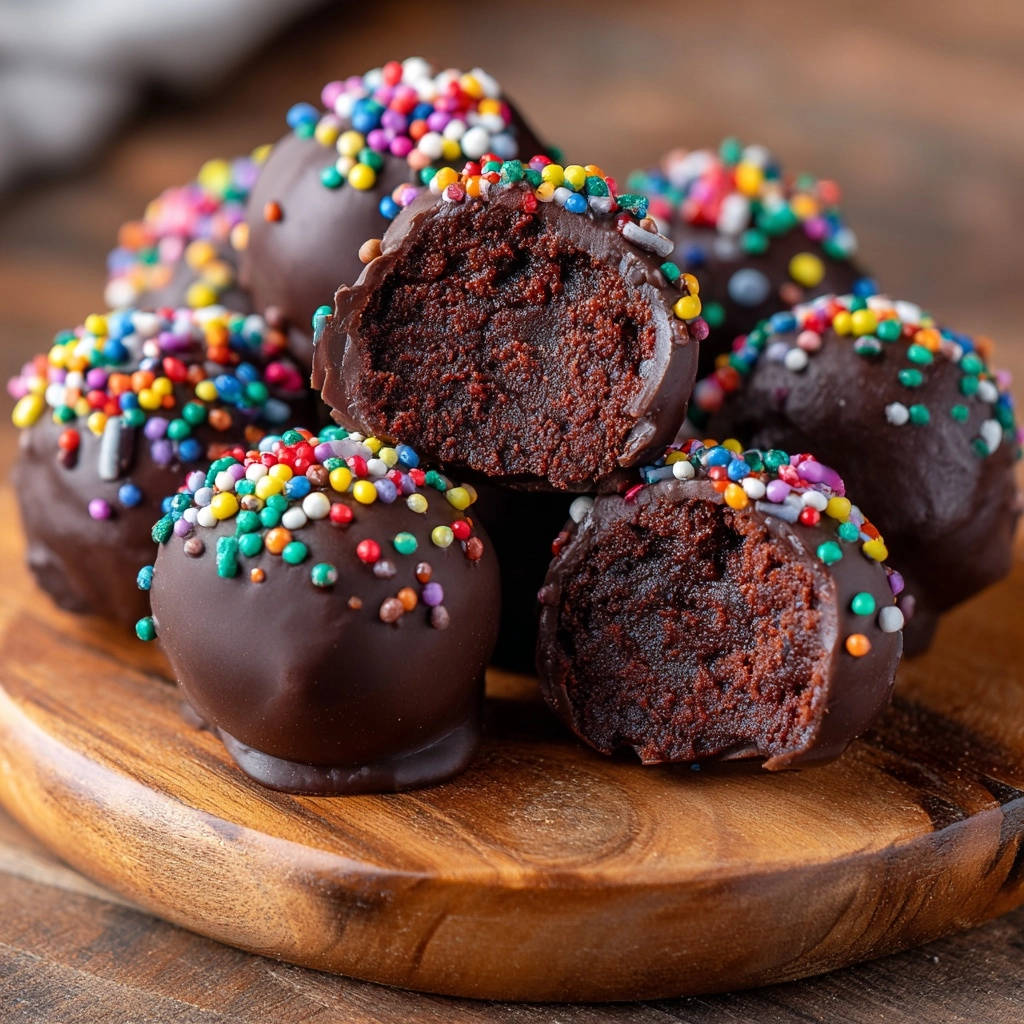
Continue until the mixture feels like firm cookie dough – it should hold its shape when rolled but still be soft and pliable. This precise, gradual addition prevents both dry, crumbly centers and overly mushy ones, ensuring perfect texture every time.
Shaping Your Bites of Bliss
Once the ideal consistency is achieved, roll the mixture into uniform 1-inch to 1.5-inch balls. Aim for consistency in size for even coating and baking (if you were baking them, which we aren’t here!).
Place the rolled cake balls neatly on a baking sheet lined with parchment paper. This prevents sticking and makes the next step easier.
Chilling for Success: The Firming Stage
This chilling step is absolutely essential for perfect cake pops. Place the baking sheet with the rolled cake balls into the refrigerator for at least 30 to 60 minutes, or until they are very firm to the touch.
A firm cake ball will maintain its shape during dipping and won’t fall apart in the warm chocolate. Don’t skip or rush this crucial step!
Mastering the Chocolate Coating
In a microwave-safe bowl, combine the chocolate melting wafers or chocolate chips with the vegetable oil or coconut oil. The oil is the secret to a smooth, dippable consistency.
Microwave in 30-second intervals, stirring well after each interval, until the chocolate is completely smooth and melted with no lumps. Stirring frequently prevents scorching and ensures even melting.
The oil helps thin the chocolate for a beautiful, smooth, and even coat, making your cake pops look professionally finished.
For even more delightful chocolate creations, check out these anti-soggy chocolate chip cheesecake bars.
The Grand Finale: Dipping and Decorating
Take the chilled cake balls out of the refrigerator. Work quickly, dipping each cake ball into the melted chocolate, ensuring it’s fully coated. Let any excess chocolate drip off gently back into the bowl.
Immediately after dipping, generously sprinkle each cake pop with colorful sprinkles. The chocolate will start to set quickly, so swift action is key for the sprinkles to adhere.
Patience Pays Off: Setting Your Masterpieces
Place the finished Decadent Chocolate Cake Pops back on the parchment-lined baking sheet to allow the chocolate to fully set. Room temperature setting works well.
For quicker setting, especially if you’re short on time, you can place them back in the refrigerator for a few minutes. Once the chocolate is firm and hard to the touch, they are ready to serve and enjoy!
Unlocking Cake Pop Perfection: Expert Tips & Tricks
Elevate your cake pop game with these pro tips designed to ensure absolute perfection.
Achieving the Ideal Cake-to-Binder Ratio
The texture of your cake pop mixture is paramount. It should feel like play-dough or firm cookie dough-moist enough to hold its shape when rolled, but not sticky or greasy.
If it feels too crumbly, add a tiny bit more binder (a teaspoon at a time) and knead until pliable. If it’s too wet, you might try adding a tablespoon of powdered sugar, but ideally, you’ve avoided this by gradual addition.
Temperature Control: The Key to Smooth Dipping
Ensure your cake balls are very cold from the refrigerator. This firmness prevents them from falling apart or creating ripples when dipped into the warm chocolate.
Your melted chocolate should be warm and fluid, but not hot. Overheated chocolate can cause the cake pops to sweat or disintegrate, leading to a messy finish.
Creative Decoration Ideas for Your Decadent Chocolate Cake Pops
Beyond traditional sprinkles, the possibilities for decorating your Decadent Chocolate Cake Pops are endless. Consider drizzling with white chocolate, dark chocolate, or caramel.
Roll them in finely chopped nuts, toasted coconut flakes, or even crushed freeze-dried fruit for an extra burst of flavor and texture. Edible glitter or pearl dust can add a touch of elegance.
Making Cake Pops on Sticks (Optional)
If you wish to use sticks, dip the tip of each stick into the melted chocolate first, then insert it about halfway into the chilled cake ball. This dab of chocolate acts as “glue,” securing the cake pop to the stick.
Allow this “glue” to set for a few minutes in the refrigerator before proceeding with full dipping. This prevents your cake pops from sliding off the sticks.
Common Cake Pop Challenges & How to Solve Them
Even with the best instructions, issues can arise. Here’s how to troubleshoot common cake pop problems.
“My Cake Pops Are Crumbly!”
This is the most common issue, indicating insufficient binder. Simply add another tablespoon or two of softened cream cheese or frosting to your mixture.
Knead it thoroughly until the consistency is pliable and holds together when squeezed. The mixture needs to be cohesive like cookie dough.
“Why Is My Chocolate Coating Too Thick/Thin?”
If your chocolate coating is too thick, it likely needs more oil. Add another teaspoon of vegetable or coconut oil, stir well, and microwave for 15 seconds if needed, then stir again until smooth and fluid.
If it’s too thin, it may be overheated, or you added too much oil. Unfortunately, it’s harder to thicken, but cooling it slightly may help. Always add oil gradually to prevent this.
“My Cake Pops Are Sliding Off the Stick!”
This problem usually stems from insufficient chilling or not using chocolate “glue.” Ensure your cake balls are very firm before inserting sticks.
Always dip the stick tip in chocolate before inserting it into the cake ball. Let this initial chocolate set in the fridge for a few minutes before dipping the entire pop.
“My Cake Pops Look Bumpy/Uneven!”
Uneven cake pops are often due to large crumbs in the cake mixture. Ensure you crumble the cake very finely at the start.
Also, make sure you roll the balls smoothly and evenly. Lastly, a uniform chocolate coating (thinned properly with oil) will cover any minor imperfections.
Enjoying Your Decadent Chocolate Cake Pops: Serving & Storage
Once your beautiful Decadent Chocolate Cake Pops are set, it’s time to enjoy them! Proper serving and storage will keep them at their best.
Best Ways to Serve Cake Pops
These bite-sized treats are perfect for any occasion! Arrange them on a festive platter for parties, stand them upright in a decorative container, or wrap them individually for gifts.
They make excellent additions to dessert tables, birthday parties, or as a fun surprise in lunchboxes. Their compact size makes them ideal for easy grabbing.
More Sweet Delights
If you enjoyed these chocolate cake pops, you might want to explore other sweet treats.
- For a warm, spiced breakfast or dessert, consider making Gooey Pecan Cinnamon Rolls, featuring a delightful cinnamon-sugar filling.
- If you’re in the mood for another chocolate bake with a beautiful swirl, try these Chocolate Swirl Muffins, known for their light texture.
Storing Leftover Cake Pops for Freshness
To keep your Decadent Chocolate Cake Pops fresh, store them in an airtight container in the refrigerator. This prevents them from drying out and keeps the chocolate coating firm.
They will remain delicious for up to 5-7 days when properly stored. Bring them to room temperature for about 15-20 minutes before serving for the best texture.
Can I Make These Ahead?
Absolutely! Cake pops are fantastic for making ahead. You can prepare the cake balls and chill them for up to 2-3 days before dipping.
Once dipped and set, they store beautifully in the refrigerator for almost a week, making them perfect for event preparation.
Frequently Asked Questions About Decadent Chocolate Cake Pops
Can I Use Gluten-Free Cake Mix?
Yes, you can certainly use a gluten-free chocolate cake mix. The consistency might be slightly different depending on the brand, so you may need to adjust the amount of binder (cream cheese or frosting) slightly to achieve the “firm cookie dough” texture.
What If I Don’t Have Melting Wafers?
If you don’t have melting wafers, you can use good quality chocolate bars or chips. Just ensure they are finely chopped (if using bars) before melting.
Remember to add the vegetable or coconut oil as directed, as this is crucial for achieving a smooth, dippable consistency with regular chocolate. For another delightful mini treat that uses simple chocolate, try our mini chocolate caramel cheesecakes.
How Long Do Decadent Chocolate Cake Pops Last?
When stored in an airtight container in the refrigerator, your Decadent Chocolate Cake Pops will stay fresh and delicious for about 5 to 7 days. Ensure they are fully covered to prevent them from absorbing refrigerator odors.
Can I Freeze Cake Pops?
Yes, cake pops freeze beautifully! Place the finished and set cake pops in a single layer on a baking sheet to freeze for about an hour until solid. Then transfer them to an airtight, freezer-safe container or bag.
They can be frozen for up to 1-2 months. Thaw them in the refrigerator overnight or at room temperature for a few hours before serving.
Your Decadent Chocolate Cake Pop Journey Starts Now!
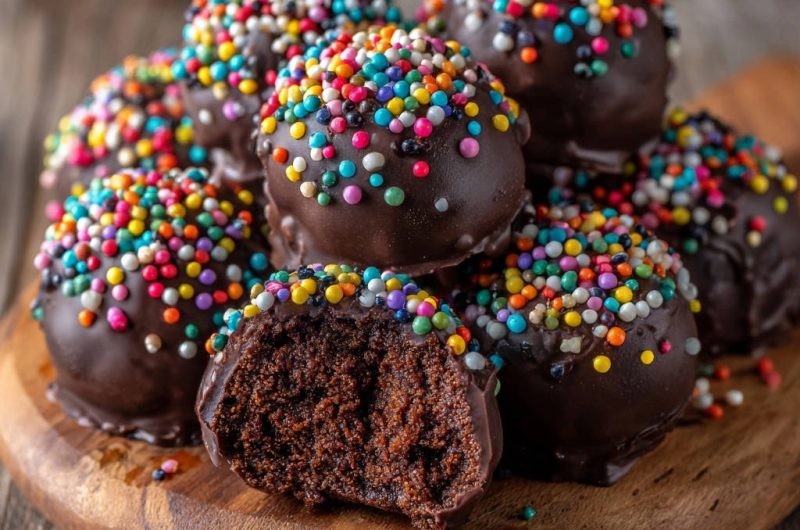
You now possess all the insider knowledge to create truly exceptional Decadent Chocolate Cake Pops. Say goodbye to crumbly, mushy disappointments and hello to perfectly moist, beautifully coated bites of bliss.
Share Your Sweet Success!
I can’t wait to see your creations! Whip up a batch, snap some photos, and share your sweet success with us. Tag us on social media using #DecadentCakePops and let us know your favorite decorating twist. Happy baking!
Chocolate Cake Pops
Course: DessertCuisine: AmericanDifficulty: easy20
Cake Pops30
minutes10
minutes240
kcal60
minutesStruggling with dry or mushy cake pops? This recipe cracks the code to perfectly moist, non-crumbly chocolate cake pops every time. Simple steps ensure an ideal texture and delicious outcome.
Ingredients
1 box chocolate cake mix (prepared according to package directions and baked, or equivalent amount of pre-baked chocolate cake, about an 8×8 inch pan size)
1/2 cup cream cheese, softened (or plain chocolate frosting)
16 ounces chocolate melting wafers or good quality chocolate chips
4 tablespoons vegetable oil or coconut oil
Colorful sprinkles
Directions
- Prepare Cake Crumbs: Once your chocolate cake is baked and cooled completely, crumble it very finely into a large mixing bowl. Ensure there are no large lumps; you want a uniform crumb texture.
- Achieve Perfect Consistency (The Key!): Add the softened cream cheese or chocolate frosting to the cake crumbs, starting with about half of the total amount. Use your hands to thoroughly mix and knead the crumbs and cream cheese together. The goal here is a consistency that is moist enough to be pressed into a ball without crumbling, but not so wet that it feels sticky or greasy. Add the remaining cream cheese or frosting just a little at a time, mixing and kneading thoroughly after each addition, until the mixture feels like firm cookie dough. It should hold its shape when rolled but still be soft and pliable. This precise method of gradual addition is critical to prevent dry, crumbly centers or overly mushy ones.
- Roll the Balls: Once the ideal consistency is achieved, roll the mixture into 1-inch to 1.5-inch balls. Place them neatly on a baking sheet lined with parchment paper.
- Chill Firmly: Place the baking sheet with the rolled cake balls into the refrigerator for at least 30 to 60 minutes, or until they are very firm to the touch. This chilling step is essential for easy dipping and helps the cake pops maintain their shape.
- Melt Chocolate Coating: In a microwave-safe bowl, combine the chocolate melting wafers or chocolate chips with the vegetable oil or coconut oil. Microwave in 30-second intervals, stirring well after each interval, until the chocolate is completely smooth and melted with no lumps. The oil helps thin the chocolate for a smoother, more even coat.
- Dip and Decorate: Take the chilled cake balls out of the refrigerator. Dip each cake ball into the melted chocolate, ensuring it’s fully coated. Gently tap off any excess chocolate back into the bowl. Immediately after dipping, generously sprinkle each cake pop with colorful sprinkles before the chocolate has a chance to set.
- Set and Enjoy: Place the finished cake pops back on the parchment-lined baking sheet to allow the chocolate to fully set. For quicker setting, you can place them back in the refrigerator for a few minutes. Once the chocolate is firm, they are ready to serve and enjoy!
Notes
- Chilling cake balls and precise consistency are key for perfect results.


