
For years, crafting beautiful layered desserts felt like a gamble, often ending in frustrating, messy slices that refused to hold their shape. I remember countless times my otherwise delicious Decadent Chocolate Layer Bars looked more like a crumbly heap than a refined treat. That all changed when I perfected a simple yet brilliant technique for chilling and cutting that guarantees picture-perfect portions every time.
This recipe delivers on rich chocolate, creamy texture, and satisfying crunch, but its true magic lies in the method ensuring each bar is neat, defined, and ready to impress. Get ready to bake a showstopper that will have everyone asking for your secret.
For a similar creamy texture, check out these chocolate caramel cheesecake bars.
Why These Decadent Chocolate Layer Bars Are Your New Go-To
The Secret to Flawless Presentation: No More Messy Slices!
The days of squishy, crumbling bars are officially over. This recipe’s unique chilling and cutting method ensures every single slice of these Decadent Chocolate Layer Bars emerges with sharp edges and distinct layers.
For an equally satisfying treat, try our creamy blueberry cheesecake bars.
You’ll achieve that bakery-quality presentation right in your own kitchen, making them perfect for any occasion.
Layers of Pure Bliss: What Makes This Recipe Special
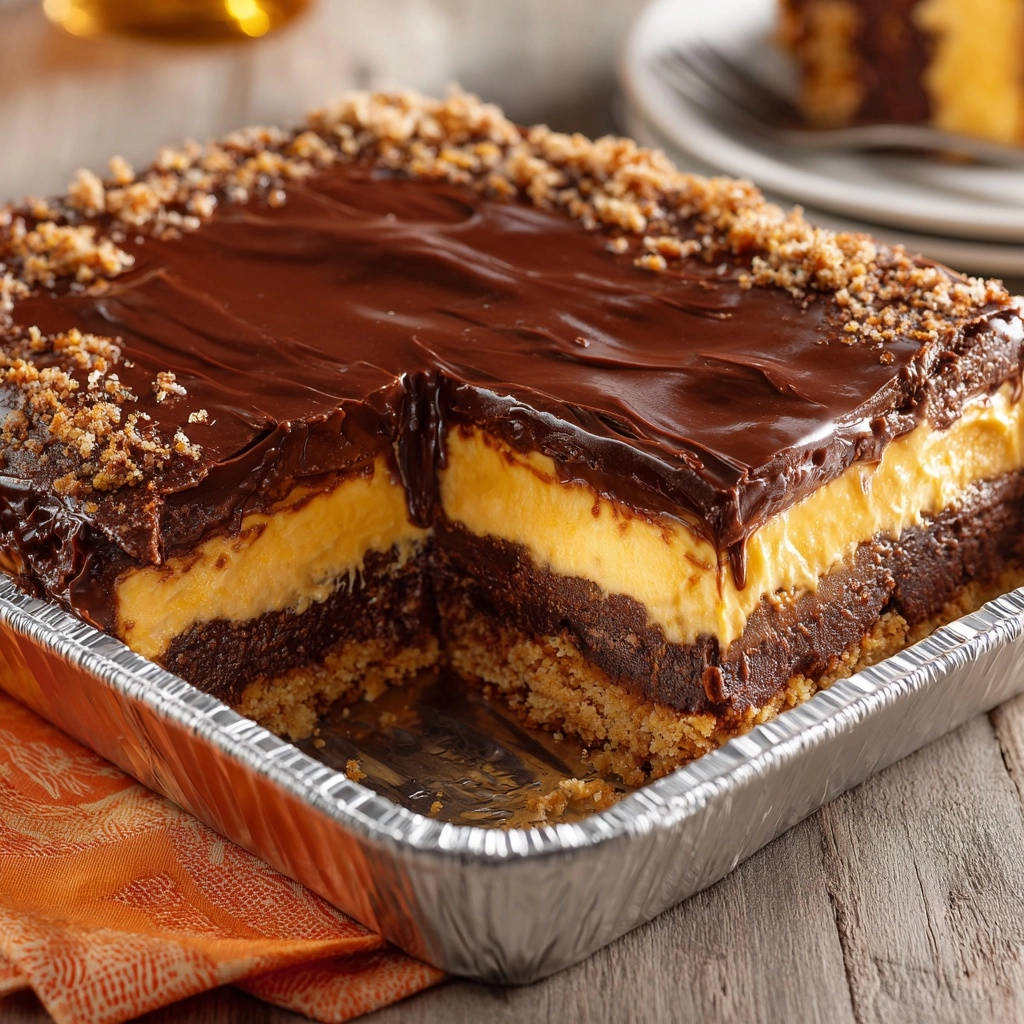
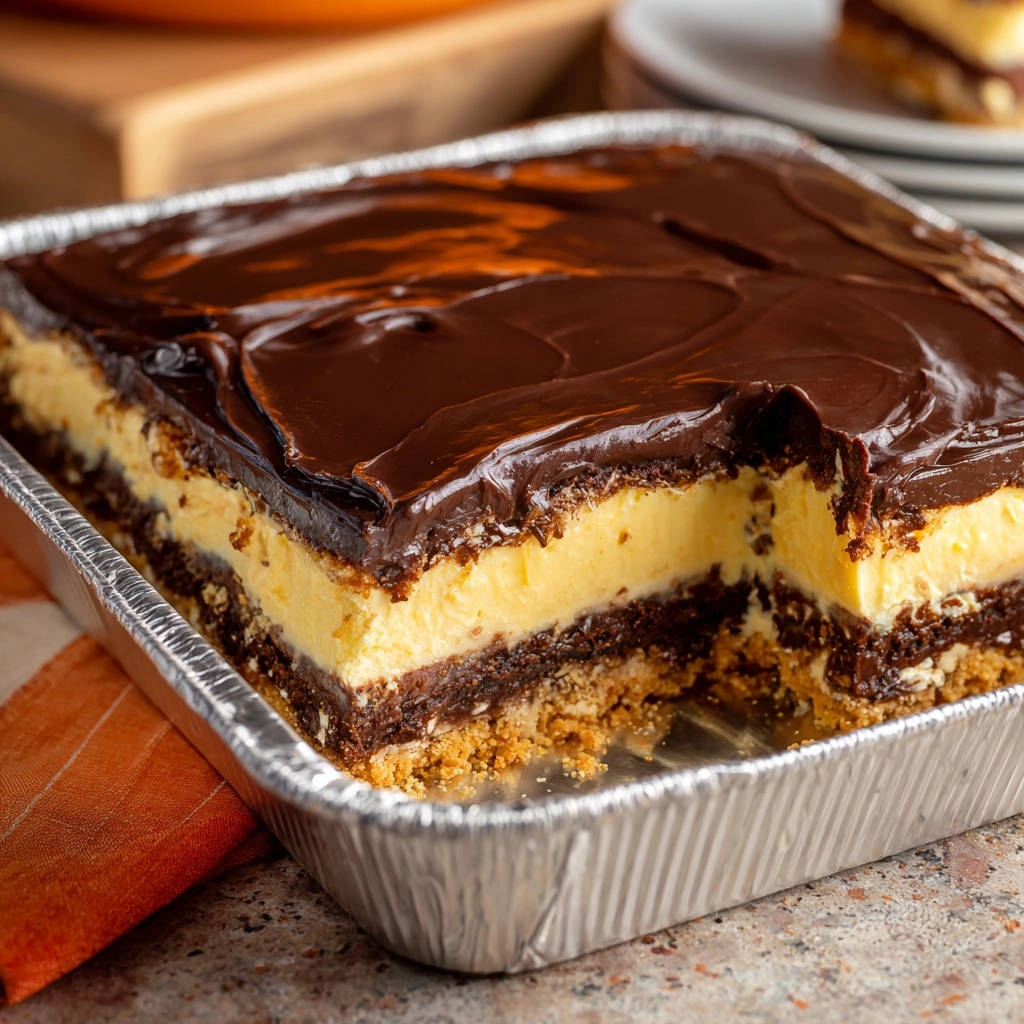
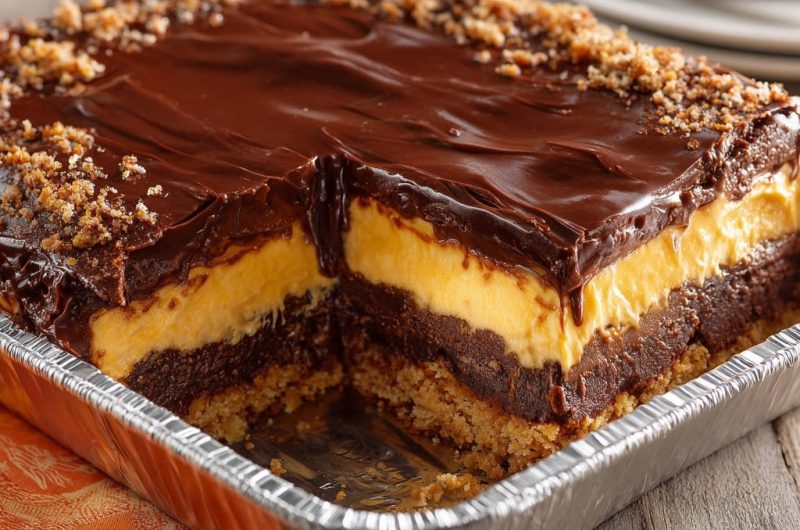
Imagine a symphony of textures and flavors: a sturdy graham cracker base, followed by a dense, fudgy brownie. Next comes a light, ethereal cream cheese layer, all crowned with a glossy, rich chocolate ganache and a sprinkle of toasted nuts.
It’s a dessert that’s truly greater than the sum of its parts, offering a delightful experience with every bite.
Quick Glance: Prep, Cook, and Chill Times
Here’s a snapshot of the time commitment for these magnificent treats:
Prep Time: 45 minutes
Cook Time: 25 minutes
Total Time: Approximately 4 hours 10 minutes (includes crucial chilling)
Servings: 12-16 generous bars
Building Blocks of Perfection: Your Decadent Chocolate Layer Bars Ingredients
For the Irresistible Graham Cracker Crust
The foundation of these bars starts with a simple yet essential graham cracker crust. Graham cracker crumbs provide a subtly sweet, crumbly base that contrasts beautifully with the richer layers above.
Melted unsalted butter binds the crumbs and sugar, creating a firm, flavorful crust. For a variation, consider using digestive biscuits or even crushed shortbread cookies.
Crafting the Rich, Fudgy Brownie Base
This isn’t just any brownie; it’s designed to be dense and fudgy, offering a robust chocolate experience. Melted unsalted butter adds unparalleled richness, contributing to that desirable moist texture.
High-quality unsweetened cocoa powder ensures a deep, intense chocolate flavor. Eggs bind the ingredients, while a touch of baking powder provides just enough lift without making the brownie cakey.
The Silky Smooth Cream Cheese Layer
This luscious layer introduces a delightful tang and creamy counterpoint to the deep chocolate. Softened cream cheese is absolutely critical for achieving a lump-free, velvety smooth texture that spreads like a dream.
Powdered sugar sweetens and thickens the mixture without graininess. Whole milk and vanilla extract enhance the flavor, while thawed whipped topping folds in air, making the layer light and airy rather than heavy.
Luxe Chocolate Ganache: The Crown Jewel
The glossy ganache is the perfect finishing touch, adding an extra layer of rich chocolate and a beautiful sheen. Semi-sweet chocolate chips provide a balanced chocolate flavor that isn’t overly bitter or sweet.
Heavy cream melts the chocolate into a smooth, pourable, and ultimately firm-setting topping. The combination creates a beautiful, crack-resistant surface when properly chilled.
Crunchy Topping: The Perfect Finish
A sprinkle of nuts adds essential textural contrast and visual appeal. Crushed pecans or walnuts offer a satisfying crunch that complements the soft layers beneath.
Feel free to get creative with other toppings like toasted shredded coconut, mini chocolate chips, or even a sprinkle of sea salt for a sophisticated touch.
Essential Tools for Decadent Chocolate Layer Bar Success
Baking Pan & Mixing Bowls
You’ll need a sturdy 9×13 inch baking pan, preferably light-colored metal, for even baking and browning. Multiple mixing bowls are essential for preparing each layer separately, ensuring no flavor cross-contamination or textural issues.
Having various sizes allows for efficient mixing and helps keep your workspace organized.
Whisks, Spatulas, and Measuring Gear
Basic kitchen utensils are your best friends here. A good whisk ensures your dry ingredients are well combined and your wet ingredients are smooth.
Rubber spatulas are indispensable for scraping bowls clean and gently folding in ingredients like whipped topping. Accurate measuring cups and spoons are, of course, vital for recipe precision.
The Secret Weapon: Your Hot Knife Setup
This is the game-changer for flawless slices. You’ll need a tall glass or jar filled with very hot water and a long, sharp, non-serrated chef’s knife. The heat prevents the ganache from cracking and the creamy layer from dragging.
This simple setup is paramount for achieving those clean, defined edges that make these Decadent Chocolate Layer Bars truly spectacular.
Your Step-by-Step Guide to Decadent Chocolate Layer Bars Perfection
Crafting the Golden Graham Cracker Crust
Preheat your oven to 350°F (175°C) and gather your crust ingredients. In a medium bowl, combine the graham cracker crumbs, granulated sugar, and melted butter. Mix until the crumbs are thoroughly moistened and well combined.
Press this mixture firmly and evenly into the bottom of a 9×13 inch baking pan. This firm press is crucial for a stable crust. Bake for 8 minutes to set the crust, then remove from the oven and allow it to cool slightly while you prepare the next layer.
Baking the Fudgy Brownie Foundation
In a large bowl, whisk together the melted butter and granulated sugar until smooth. Beat in the eggs one at a time, ensuring each is fully incorporated before adding the next, then stir in the vanilla extract for enhanced flavor.
In a separate bowl, whisk together the all-purpose flour, unsweetened cocoa powder, baking powder, and salt. Gradually add these dry ingredients to the wet, mixing only until just combined; do not overmix, as this can lead to a tough brownie.
Pour the brownie batter evenly over the slightly cooled graham cracker crust. Bake for 20 to 25 minutes, or until a toothpick inserted into the center comes out with moist crumbs, but not wet batter. Avoid overbaking, as this will dry out your fudgy brownie. Let it cool completely on a wire rack before proceeding.
Whipping Up the Dreamy Cream Cheese Filling
In a large bowl, beat the softened cream cheese with an electric mixer until it is smooth and creamy, with no lumps remaining. This ensures a luxurious texture.
Gradually beat in the powdered sugar until it is fully incorporated and the mixture is light. Mix in the whole milk and vanilla extract until just combined. Gently fold in the thawed whipped topping until no white streaks remain.
Carefully spread this light and creamy mixture evenly over the completely cooled brownie layer. A smooth, even layer is key for balanced flavors and presentation.
Preparing the Glossy Chocolate Ganache
In a microwave-safe bowl, combine the semi-sweet chocolate chips and heavy cream. Microwave on high for 30 seconds, then stir the mixture well to encourage melting. Continue to microwave in short 15-second intervals, stirring thoroughly after each, until the chocolate is fully melted and the ganache is smooth, glossy, and uniform.
Immediately pour the warm ganache over the creamy layer, spreading it gently and evenly with an offset spatula to cover the entire surface. Work quickly before the ganache begins to set.
The Game-Changer: Chilling for Flawless Layers
Immediately sprinkle the crushed pecans or walnuts over the warm ganache. The warmth of the ganache will help them adhere beautifully to the surface, preventing them from scattering later.
Now, for the most crucial step to achieve perfect slices: refrigerate the entire dessert for at least 3 to 4 hours, or ideally overnight. This thorough chilling is absolutely non-negotiable, as it allows all the layers, especially the creamy filling and the chocolate ganache, to set firmly. Attempting to cut before it’s completely chilled will inevitably result in messy, squishy layers.
Mastering the Art of Perfect Slices (The Hot Knife Method)
Once your Decadent Chocolate Layer Bars are fully chilled and firm, retrieve the pan from the refrigerator. Fill a tall glass with very hot tap water. Dip a sharp, non-serrated knife into the hot water for about 10-15 seconds to heat the blade thoroughly.
Wipe the knife completely dry with a paper towel. Make a single, clean, straight cut through the dessert. Repeat this dipping, wiping, and cutting process for every single cut. This technique keeps the knife warm and clean, preventing the ganache from cracking, the creamy layer from dragging, and ensuring each slice is perfectly neat, defined, and picture-ready.
Chef’s Secrets: Elevate Your Decadent Chocolate Layer Bars
Don’t Overmix Your Brownie Batter: Overmixing develops gluten in the flour, which leads to a tougher, more cake-like brownie texture. Mix only until the dry ingredients are just incorporated to maintain that desired fudgy richness.
The Importance of Fully Softened Cream Cheese: For a lump-free, silky smooth creamy layer, always ensure your cream cheese is at true room temperature. This allows it to beat easily into a perfectly smooth consistency without any stubborn bits.
Achieving the Perfect Ganache Consistency: Patience is key when melting the chocolate and cream. Gentle, consistent stirring in short intervals ensures a smooth, glossy ganache without lumps or unsightly separation. If it thickens too quickly, a tiny splash more of hot cream can bring it back.
Why Thorough Chilling is Non-Negotiable: While tempting to cut early, resisting this urge is paramount for pristine bars. The extended chilling time (3-4 hours minimum, preferably overnight) allows all the layers to firm up properly, preventing a messy, squishy dessert and making for clean slices.
Pro Tips for the Hot Knife Cutting Technique: Beyond heating, using a non-serrated chef’s knife yields the cleanest cuts. Critically, ensure the water is very hot, and always dry the knife completely between each and every cut to prevent water marks and sticking.
Customizing Your Toppings and Flavors: Unleash your creativity! Experiment with shredded coconut, a sprinkle of flaky sea salt, a drizzle of store-bought caramel sauce, or even mini chocolate chips for an elevated and personalized finish.
Troubleshooting Common Decadent Chocolate Layer Bar Challenges
“Why is My Crust Soggy?”
A soggy crust can be caused by not baking it sufficiently in the first step, allowing too much moisture to seep in. It could also happen if the crust wasn’t cooled adequately before the wet brownie batter was added, trapping steam.
Ensure you press the crumbs firmly and bake for the full 8 minutes, then let it cool slightly before adding the next layer.
“My Ganache Cracked or Separated!”
Ganache cracks often occur if the chocolate was overheated, causing it to seize, or if it wasn’t stirred enough to create a stable emulsion. Rapid cooling can also contribute to cracking.
Ensure even heating and thorough stirring. If it separates, try whisking in a tablespoon of hot water or cream very slowly until it comes back together.
“My Layers Are Sliding Apart!”
This usually points to insufficient chilling time. If the creamy layer or ganache isn’t fully set before cutting, the layers won’t adhere properly and can shift.
Applying subsequent layers while the previous one is still warm can also lead to instability. Always ensure each layer is cool or chilled as specified.
“Bars Are Too Sticky to Cut Cleanly”
Sticky, messy cuts are almost always a result of not chilling the bars long enough. The creamy and ganache layers need significant time to firm up completely.
Reiterate the critical importance of the thorough chilling (3-4 hours minimum) and the hot knife technique to achieve clean, non-sticky slices for your Decadent Chocolate Layer Bars.
Serving, Storing, and Making Ahead Your Decadent Chocolate Layer Bars
Presentation Perfect: Serving Suggestions
These stunning Decadent Chocolate Layer Bars are impressive on their own, but a simple garnish can elevate them further. Consider a light dusting of cocoa powder, a fresh raspberry, or a dollop of fresh whipped cream.
More Sweet Ideas
Round out your dessert table with these complementary chocolate creations.
- For more rich chocolate flavor, explore these Chocolate Swirl Muffins with their airy texture.
- If you enjoy layered desserts, you might also like these Gooey Pecan Cinnamon Rolls, featuring a delightful sweetness.
They pair wonderfully with a hot cup of coffee, a glass of cold milk, or as a delightful end to any meal.
Keeping Them Fresh: Storage Tips
Store any leftover bars in an airtight container in the refrigerator. This preserves their texture and keeps the layers firm.
Properly stored, these delicious treats will remain fresh and delightful for up to 4-5 days.
Can You Make These Ahead? Absolutely!
These Decadent Chocolate Layer Bars are an ideal make-ahead dessert, perfect for entertaining or meal prep. You can prepare the entire dessert a day or even two in advance, storing it in the refrigerator.
The extended chilling time only improves the flavors and firmness, making them even easier to slice when you’re ready to serve.
Your Decadent Chocolate Layer Bars Questions Answered
Can I use a different type of crust?
Absolutely! While graham crackers provide a classic taste, you can easily substitute other crushed cookies. Try vanilla wafers, digestive biscuits, or even chocolate-flavored cookies for a different twist. For more delicious bar ideas, explore our blueberry crumble bars recipe.
What if I don’t have whipped topping?
If you prefer not to use whipped topping, you can make your own stabilized whipped cream. Beat 1 cup of heavy cream with 2 tablespoons of powdered sugar and 1/2 teaspoon of vanilla until stiff peaks form. However, note that homemade whipped cream may not be quite as stable for long-term storage or cutting as the whipped topping. For another equally indulgent creamy dessert, check out our easy creamy berry crumble cheesecake bars.
Can I make these gluten-free?
Yes, you can! Simply substitute gluten-free graham crackers for the crust and a 1:1 gluten-free all-purpose flour blend for the brownie layer. Ensure your cocoa powder and other ingredients are certified gluten-free.
How long do these bars last in the refrigerator?
When stored in an airtight container in the refrigerator, these Decadent Chocolate Layer Bars will stay fresh and delicious for 4 to 5 days. The flavors often deepen and meld beautifully over time.
Can I freeze Decadent Chocolate Layer Bars?
Yes, these bars freeze beautifully! Once fully chilled and cut, place them in a single layer on a baking sheet to freeze for about an hour. Then, transfer the frozen bars to an airtight freezer-safe container, separating layers with parchment paper. They will last for up to 2-3 months. Thaw in the refrigerator before serving.
Ready to Indulge? Your Decadent Chocolate Layer Bar Journey Awaits!
There’s an undeniable joy in creating a dessert that looks as good as it tastes, and these Decadent Chocolate Layer Bars truly deliver. With a little patience and my proven slicing technique, you’ll master this layered chocolate masterpiece with confidence.
Imagine the smiles and compliments when you present these perfectly portioned, incredibly delicious bars. Gather your ingredients, embrace the process, and get ready to impress! Happy baking!
Chocolate Layer Bars
Course: DessertCuisine: AmericanDifficulty: medium12
servings45
minutes25
minutes450
kcal240
minutesDiscover the secret to perfectly neat and defined slices of layered dessert with these Decadent Chocolate Layer Bars. Featuring a graham cracker crust, fudgy brownie, creamy filling, and rich chocolate ganache, this recipe guarantees a show-stopping treat every time. Ideal for gatherings, it’s a dessert that’s as beautiful as it is delicious.
Ingredients
For the Crust:
1 and 1/2 cups graham cracker crumbs
1/4 cup granulated sugar
1/2 cup unsalted butter, melted
For the Brownie Layer:
1/2 cup unsalted butter, melted
1 cup granulated sugar
2 large eggs
1 teaspoon vanilla extract
1/2 cup all-purpose flour
1/3 cup unsweetened cocoa powder
1/4 teaspoon baking powder
1/4 teaspoon salt
For the Creamy Layer:
8 ounces cream cheese, softened
1/2 cup powdered sugar
1/4 cup whole milk
1 teaspoon vanilla extract
8 ounces whipped topping, thawed
For the Chocolate Ganache:
1 cup semi-sweet chocolate chips
1/2 cup heavy cream
For the Topping:
1/2 cup crushed pecans or walnuts
Directions
- Prepare the Crust: Preheat oven to 350 degrees Fahrenheit (175 degrees Celsius). In a medium bowl, combine the graham cracker crumbs, granulated sugar, and melted butter. Mix until well combined and moist. Press firmly and evenly into the bottom of a 9×13 inch baking pan. Bake for 8 minutes. Remove from oven and let cool slightly while you prepare the brownie layer.
- Make the Brownie Layer: In a large bowl, whisk together the melted butter and granulated sugar until smooth. Beat in the eggs one at a time, then stir in the vanilla extract. In a separate bowl, whisk together the flour, cocoa powder, baking powder, and salt. Gradually add the dry ingredients to the wet ingredients, mixing until just combined. Pour the brownie batter over the cooled crust in the pan and spread evenly. Bake for 20 to 25 minutes, or until a toothpick inserted into the center comes out with moist crumbs. Do not overbake. Let cool completely on a wire rack.
- Prepare the Creamy Layer: In a large bowl, beat the softened cream cheese until smooth and creamy. Gradually beat in the powdered sugar until fully incorporated. Mix in the whole milk and vanilla extract. Gently fold in the thawed whipped topping until no streaks remain. Spread this creamy mixture evenly over the cooled brownie layer.
- Make the Chocolate Ganache: In a microwave-safe bowl, combine the semi-sweet chocolate chips and heavy cream. Microwave on high for 30 seconds, then stir. Continue to microwave in 15-second intervals, stirring after each, until the chocolate is fully melted and the mixture is smooth and glossy. Pour the ganache over the creamy layer, spreading it gently and evenly to cover the entire surface.
- Add Topping and Chill Thoroughly (The Secret to Clean Slices!): Immediately sprinkle the crushed pecans or walnuts over the warm ganache. This helps them adhere. Now, here’s the absolute key for beautiful, clean slices: Refrigerate the dessert for at least 3 to 4 hours, or ideally overnight. This thorough chilling is crucial as it allows all the layers, especially the creamy filling and the ganache, to set firmly. Attempting to cut before it’s completely chilled will result in messy layers and a squishy dessert.
- The Cutting Technique for Perfect Bars: Once fully chilled, retrieve the pan from the refrigerator. Fill a tall glass with very hot water. Dip a sharp, non-serrated knife into the hot water for about 10-15 seconds, then wipe it completely dry with a paper towel. Make a clean, straight cut through the dessert. Repeat the dipping and wiping process for every single cut. This keeps the knife warm and clean, preventing the ganache from cracking and the creamy layer from dragging, ensuring each slice is perfectly neat and defined. Store any leftover bars in an airtight container in the refrigerator.
Notes
- Thorough chilling for at least 3-4 hours (ideally overnight) is crucial for clean, neat slices. Dip a sharp knife in hot water and wipe dry before each cut for best results.


