
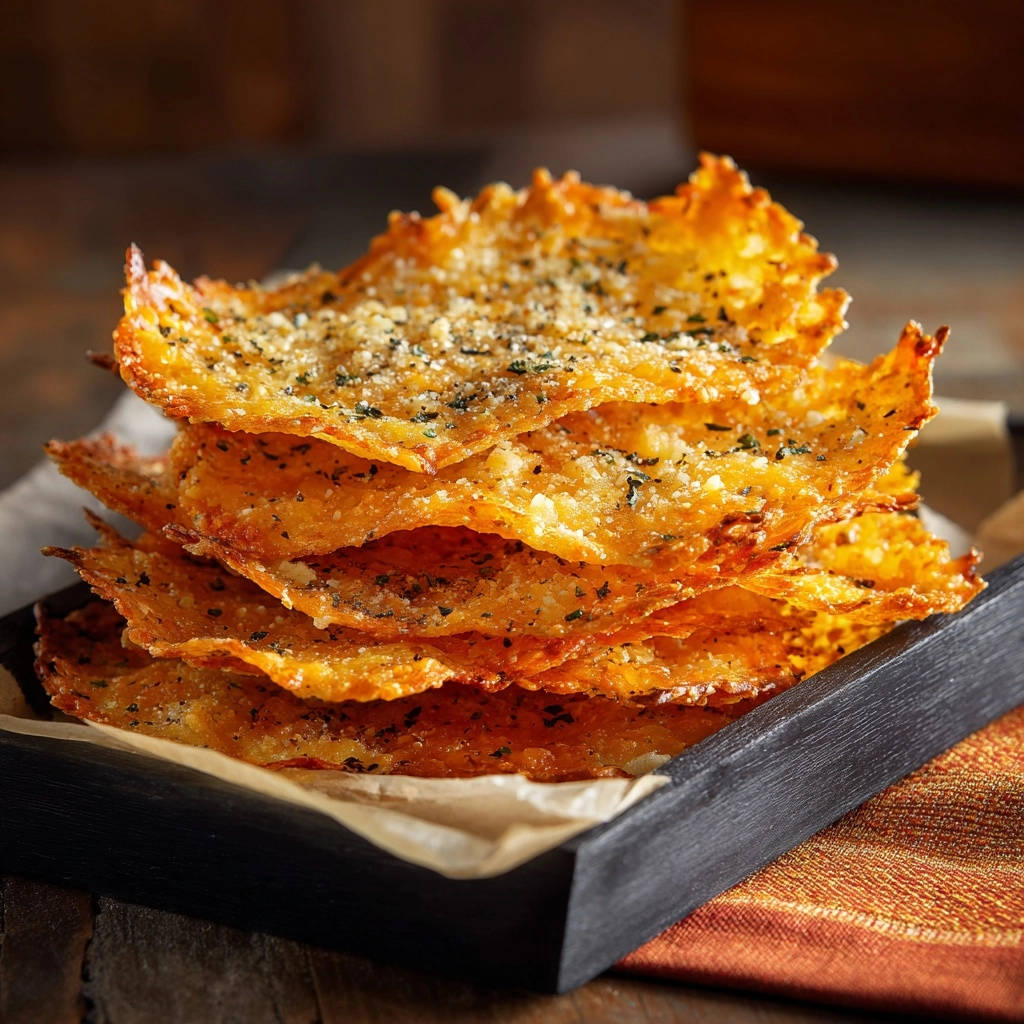
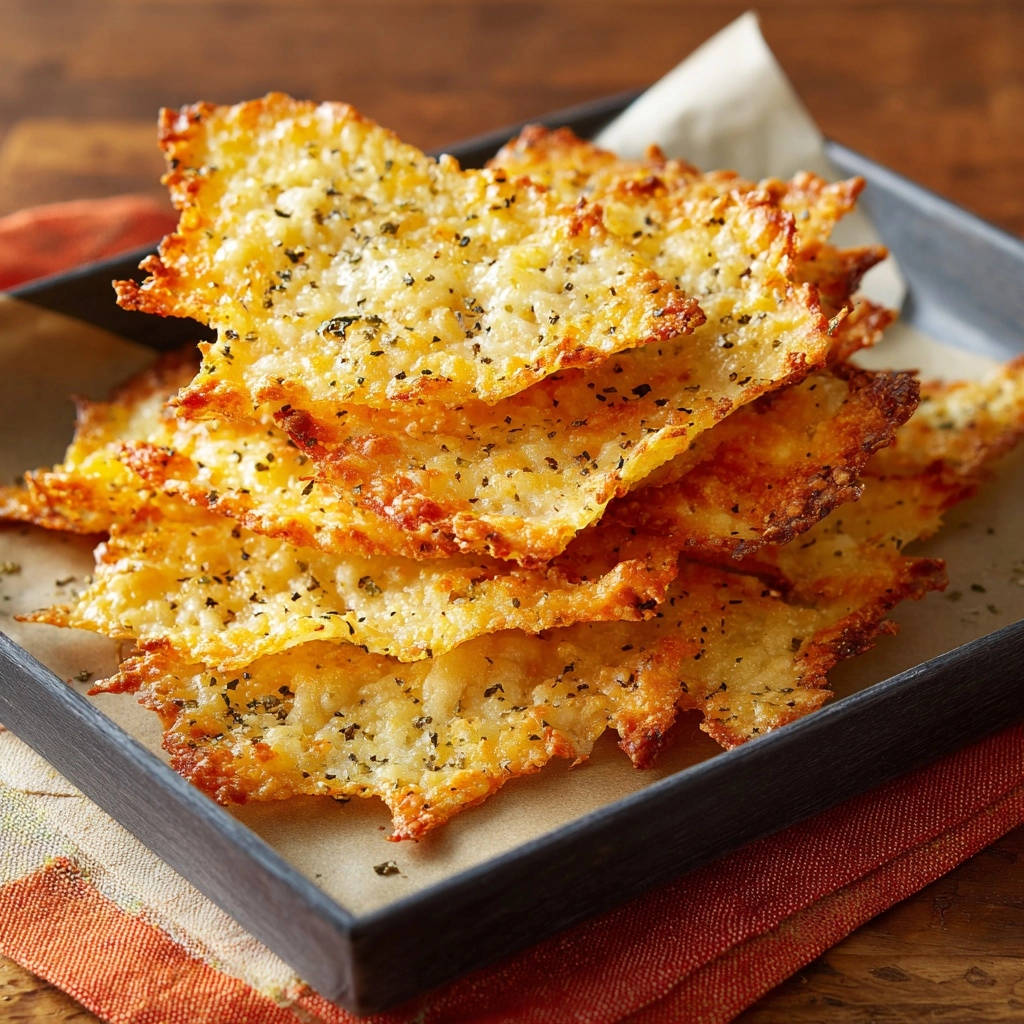
There’s nothing quite as satisfying as the irresistible crunch of perfectly made cheese crisps. However, I know the frustration of ending up with soft, bendy, or even burnt results.
After countless batches, I’ve finally perfected the method for consistently golden and shatteringly crisp Easy Parmesan Crisps, every single time. This recipe will transform your snack game, delivering flawless results with minimal effort.
Why This Easy Parmesan Crisps Recipe Belongs in Your Kitchen
Many recipes promise perfect cheese crisps, but often leave you with inconsistent results. This method is specifically designed to eliminate common pitfalls like chewiness or uneven browning.
Our focus is on delivering an impeccably golden and reliably crisp texture, turning a simple ingredient into a gourmet experience. It’s a reliable staple you’ll turn to again and again.
The Essential Building Blocks: What You’ll Need
Choosing the Right Parmesan
For truly exceptional Easy Parmesan Crisps, the cheese choice is paramount. Finely shredded Parmesan melts evenly, promoting a uniform spread and consistent crispness.
Using a high-quality Italian cheese blend can also work beautifully, provided it has a similar fine shred. Avoid coarse shreds, as they can lead to uneven melting and a less delicate crunch.
Aromatic Flourishes: Parsley and Pepper
Dried parsley adds a subtle herby note and a touch of visual appeal to each crisp. It brightens the savory cheese flavor without overpowering it.
Freshly ground black pepper introduces a gentle warmth and a peppery kick. This simple seasoning enhances the overall taste profile, making each Parmesan wafer more dynamic.
No Hidden Surprises: A Short & Sweet List
One of the beauties of this recipe is its simplicity. You only need three core ingredients to create these delightful crispy cheese snacks.
This minimal ingredient list underscores just how easy and accessible these homemade treats are to prepare.
Your Journey to Perfect Easy Parmesan Crisps: A Step-by-Step Guide
-
Step 1: Preheat and Prepare Your Baking Canvas
Preheating your oven to 375°F (190°C) is fundamental for consistent results. A hot oven ensures the cheese begins to melt and crisp immediately, preventing it from just spreading too thinly.
Lining your baking sheet with parchment paper or a silicone baking mat is crucial. This provides a non-stick surface, guaranteeing easy release and promoting even heat distribution for perfectly golden edges.
-
Step 2: Crafting Uniform Mounds for Optimal Crispness
Carefully spoon small, uniform mounds of shredded cheese onto your prepared baking sheet. Aim for approximately 1 1/2 tablespoons of cheese per crisp.
Leave about 2 inches of space between each mound, allowing them to spread without merging. This specific portion size ensures your Easy Parmesan Crisps are thin enough to achieve that desired shatteringly crispy texture.
-
Step 3: A Dash of Flavor: Seasoning Each Crisp
Lightly sprinkle each cheese mound with your dried parsley and freshly ground black pepper. This simple step infuses flavor directly into the crisp as it bakes.
Even distribution of seasonings ensures every bite offers a balanced savory experience and attractive visual appeal.
-
Step 4: The Golden Watch: Baking to Perfection
Bake your crisps for 8 to 12 minutes. The key here is vigilant observation, as ovens vary and cheese can go from perfect to burnt quickly.
Look for edges that are beautifully golden brown, cheese that is bubbly, and a slight caramelization forming. This visual cue signifies optimal crispness; under-baking will result in a chewy texture.
-
Step 5: The Essential Cool Down for Shattering Crispness
Once baked, immediately remove the baking sheet from the oven. Resist the urge to touch or move the crisps at this stage.
Allow them to cool completely on the baking sheet. As they cool, the cheese undergoes a structural change, firming up and transforming into that wonderfully crisp, delicate texture. Premature removal will cause breakage or a bendy outcome.
-
Step 6: Release and Relish Your Flawless Crisps
After your Easy Parmesan Crisps have fully cooled and hardened, gently peel them off the parchment paper or silicone mat.
They should lift off easily, revealing their perfect shape and golden finish. Now they are ready for serving and enjoying!
Chef’s Secrets: Expert Tips for Next-Level Parmesan Crisps
The Right Baking Surface Makes All the Difference
Parchment paper is a reliable choice, preventing sticking and allowing for easy removal. It promotes even crisping across the bottom of each crisp.
Silicone baking mats offer even better non-stick properties and are reusable. They can help achieve a slightly more uniform golden brown, as they distribute heat very consistently.
Precision in Portioning: Your Key to Thin Crisps
Using a consistent amount of cheese, like the recommended 1.5 tablespoons, is vital. This ensures each crisp spreads to a similar thinness, which is fundamental for achieving a uniform, shatteringly crisp texture.
Adequate spacing (2 inches) between cheese mounds is equally important. It prevents them from merging and allows hot air to circulate freely around each crisp, promoting even baking.
Don’t Rush the Cool-Down!
This is arguably the most critical step for achieving true crispness. The cooling process allows the fat and protein structure of the cheese to re-solidify into a brittle matrix.
Attempting to remove them before they are completely cool will inevitably lead to soft, chewy, or broken crisps. Patience here is truly a virtue for perfect Parmesan wafers.
Monitor Your Oven Like a Hawk
Oven temperatures can fluctuate significantly, even in well-calibrated appliances. Relying solely on a timer can be misleading.
Begin checking your Easy Parmesan Crisps around the 8-minute mark, observing the color of the edges. Trusting these visual cues ensures you pull them out at the peak of golden perfection, preventing burning or under-baking.
Creative Flavor Twists and Toppings
Enhance your crisps with other natural seasonings before baking. A tiny pinch of garlic powder can add a savory depth.
For another way to enjoy fresh herbs, consider this silky parsley pesto pasta.
For a mild kick, a sprinkle of chili flakes works wonders. Freshly chopped rosemary or thyme, finely minced, can also introduce an aromatic complexity. Even a few sesame seeds add a pleasant nutty crunch.
Troubleshooting Common Parmesan Crisp Conundrums
Why Are My Crisps Chewy or Bendy?
Chewiness or bendiness is almost always a sign of under-baking. The cheese hasn’t had enough time to fully caramelize and dry out.
Ensure your crisps bake until the edges are distinctly golden brown, not just pale yellow. Trust the visual cues over the timer, and don’t be afraid to add another minute or two.
Why Do My Easy Parmesan Crisps Stick to the Pan?
Sticking usually indicates you didn’t use parchment paper or a silicone baking mat. These non-stick surfaces are crucial for easy release.
It could also happen if the crisps were removed before being completely cooled and firmed up. Always allow full cooling time on the prepared surface.
My Crisps Burned Too Quickly!
Burning quickly suggests your oven might run hot, or the cheese mounds were too thin or spread too far. Ensure your oven temperature is accurate.
Start checking around the 7-minute mark if this is a recurring issue. A slightly cooler oven or slightly thicker mounds could also help.
Why Did My Cheese Spread Too Much?
Excessive spreading can occur if your oven isn’t preheated enough, causing the cheese to melt slowly and spread out widely before crisping.
It could also be due to using too much cheese per mound, or placing them too close together on the baking sheet. Stick to the 1.5 tablespoon guideline and ensure ample spacing.
Serving Suggestions & Creative Pairings for Your Easy Parmesan Crisps
Elevating Soups and Salads
Crush a few crisps over a bowl of warm tomato soup or a creamy butternut squash bisque for an instant textural contrast. They offer a sophisticated alternative to croutons.
Nestle a whole Parmesan wafer artfully into a fresh green salad. The salty crunch perfectly complements crisp greens and tangy vinaigrettes, making your salad feel more substantial.
A Sophisticated Appetizer or Snack
Serve these delicate Easy Parmesan Crisps on their own as an elegant, low-carb appetizer. They’re a crowd-pleaser that comes together in minutes.
They also make a fantastic savory snack for any time of day. Their satisfying crunch and rich flavor curb cravings effectively, making them a perfect keto-friendly snack or gluten-free treat.
Alongside Wine and Dips
Pair them with a glass of crisp white wine or a light-bodied red. Their savory profile makes them an excellent accompaniment for a sophisticated happy hour.
They’re perfect for dipping into creamy spinach dip, hummus, or a flavorful olive tapenade. The robust cheese flavor stands up beautifully to bold accompaniments.
Kid-Friendly Favorites
Children often adore these cheesy, crunchy bites. They’re a fun, healthy alternative to processed snacks and a great way to get a little extra calcium into their diet.
Serve them alongside their favorite fruit or a simple sandwich for a balanced, exciting meal component. These homemade cheese crisps are always a hit.
Storing Your Homemade Parmesan Crisps for Lasting Crunch
Airtight is Right: Keeping Them Fresh
Once completely cooled, store your Easy Parmesan Crisps in an airtight container at room temperature. This protects them from humidity, which is their enemy.
Properly stored, they will maintain their exquisite crispness for up to 3 days. However, their deliciousness often means they rarely last that long!
Reviving Slightly Softened Crisps
If your crisps lose a bit of their crunch due to humidity, don’t despair! You can easily revive them.
Simply place them on a parchment-lined baking sheet and bake in a 300°F (150°C) oven for 3-5 minutes, or until re-crisped. Let them cool completely before serving again.
Frequently Asked Questions About Easy Parmesan Crisps
Can I use pre-shredded cheese from a bag for these Easy Parmesan Crisps?
Yes, you can certainly use pre-shredded Parmesan from a bag. However, results can vary.
Sometimes, pre-shredded cheeses contain anti-caking agents that can affect how they melt and crisp. For the absolute best, most consistent results, shredding your own fresh Parmesan is recommended.
Can I make these Parmesan Crisps in an air fryer?
Absolutely! Air fryers are fantastic for making Easy Parmesan Crisps, often even faster than an oven.
Arrange cheese mounds on parchment paper in a single layer in your air fryer basket. Cook at 350°F (175°C) for 4-6 minutes, checking frequently for golden brown edges. Cooking times will vary by air fryer model.
Are these Parmesan Crisps naturally gluten-free?
Yes, since this recipe uses only Parmesan cheese, parsley, and pepper, these Easy Parmesan Crisps are naturally gluten-free. They are a wonderful gluten-free snack option.
They are a safe and delicious choice for those with gluten sensitivities or following a gluten-free diet.
How can I make my Easy Parmesan Crisps spicier?
To add a spicy kick, you can incorporate a pinch of cayenne pepper or a small amount of finely minced fresh jalapeño (remove seeds for less heat) to the cheese mounds before baking.
A dash of red pepper flakes is also an excellent addition for a natural, noticeable heat that complements the savory cheese beautifully.
Can I prepare the cheese mounds ahead of time?
While technically possible, it’s generally not recommended to prepare the cheese mounds too far in advance.
The shredded cheese can start to dry out or clump together, which might impact how evenly it melts and spreads. For optimal crispness, assemble and bake immediately.
Ready to Impress? Share Your Golden Creation!
You now possess the secrets to creating consistently perfect, shatteringly crisp Easy Parmesan Crisps. These delightful savory bites are incredibly versatile, fitting seamlessly into any snack or meal occasion.
I encourage you to try this foolproof recipe and experience the joy of homemade gourmet snacking. Don’t forget to share your golden creations with us on social media!

Parmesan Crisps
Course: SnacksCuisine: ItalianDifficulty: easy4
servings5
minutes8
minutes130
kcal13
minutesThere’s nothing quite like the savory crunch of a perfectly made cheese crisp. This simple method will have you snacking on impeccably golden and shatteringly crisp Parmesan crisps in no time!
Ingredients
1 cup finely shredded Parmesan cheese (or an Italian cheese blend)
1 teaspoon dried parsley
1/2 teaspoon freshly ground black pepper
Directions
- Preheat your oven to 375°F (190°C). Line a large baking sheet with parchment paper or a silicone baking mat. This step is crucial for easy release and even cooking.
- Arrange small mounds of shredded cheese onto the prepared baking sheet, leaving about 2 inches of space between each mound. Aim for about 1 1/2 tablespoons of cheese per crisp to ensure they are thin enough to get truly crispy.
- Lightly sprinkle each cheese mound with dried parsley and freshly ground black pepper.
- Bake for 8 to 12 minutes, or until the edges are golden brown and the cheese is bubbly and slightly caramelized. This is the key to crispness and avoiding chewiness: watch them closely! The color will deepen quickly, so stay near the oven. If they are not golden enough, they will remain soft after cooling.
- Carefully remove the baking sheet from the oven. Let the cheese crisps cool completely on the baking sheet. As they cool, they will firm up and become wonderfully crisp. Attempting to remove them too soon will result in breakage or a chewy texture.
- Once fully cooled, gently peel the crispy Parmesan crisps off the parchment paper or silicone mat. Store them in an airtight container at room temperature for up to 3 days, though they rarely last that long!
Notes
- Watch closely during baking; cooling completely on the sheet is crucial for crispness. Store in an airtight container.


