
There’s nothing quite as satisfying as a truly comforting, loaded side dish, but I’ve faced the frustration of bland or watery cauliflower myself. It took some experimentation, but I’ve cracked the code to making Loaded Cheesy Cauliflower that’s incredibly flavorful, perfectly creamy, and absolutely never watery.
This recipe isn’t just about ingredients; it’s about technique that transforms simple cauliflower into a decadent, reliable dish. Prepare to impress everyone with this robust and utterly delicious side!
Why This Loaded Cheesy Cauliflower is Your New Go-To Side
The “Never Watery” Secret: Roasting for Deep Flavor
The biggest challenge with cheesy cauliflower dishes is often excess moisture, leading to a watery sauce. Our secret lies in thoroughly roasting the cauliflower florets at a high temperature.
This crucial step doesn’t just cook the cauliflower; it drives out moisture and encourages caramelization. Those beautiful browned edges translate directly into deeper, richer flavors, guaranteeing a non-watery and profoundly satisfying dish.
Achieving Unbeatable Creaminess and Texture
This recipe balances incredible creaminess with delightful texture. A perfectly constructed roux forms the foundation for a silky-smooth cheese sauce, hugging every floret.
We also offer a clever trick: gently mashing some of the roasted cauliflower directly into the sauce. This creates an even creamier consistency while leaving other florets whole provides a pleasing textural contrast in every bite.
A Crowd-Pleaser: Perfect for Family Dinners & Potlucks
This Loaded Cheesy Cauliflower is a universal favorite, adored by both vegetable lovers and those typically wary of cauliflower. It delivers the comforting, hearty feel of a classic loaded potato dish, but with a vibrant, low-carb twist.
It’s robust enough to stand on its own as a main for a lighter meal, yet versatile enough to complement any roast or grilled protein. Expect rave reviews at your next family dinner or potluck gathering!
If you’re looking for another comforting side dish, check out this loaded cheddar scalloped potatoes.
The Heart of the Dish: Essential Ingredients for Your Best Loaded Cheesy Cauliflower
Star of the Show: Selecting Your Cauliflower
Choose a large, firm head of cauliflower with tight, white florets and fresh, green leaves. This indicates freshness and optimal flavor.
Cutting florets to a uniform size ensures they roast evenly, preventing some from being undercooked or over-charred.
The Cheesy Dream Team: Cheddar and Monterey Jack
We use a classic combination of sharp cheddar for its robust, familiar flavor, and Monterey Jack for its exceptional melt and mild creaminess.
If you’re a fan of sharp cheddar, you’ll also enjoy the delicious loaded cheddar mashed potatoes.
Always shred your own block cheese if possible. Pre-shredded varieties often contain starches that can make your cheese sauce grainy.
Building Flavor: Bacon, Butter, and Aromatics
Crispy bacon bits add a smoky, salty counterpoint and delightful crunch, essential for that “loaded” experience. Butter enriches the roux, providing a luxurious base for the sauce.
Garlic powder and onion powder infuse the cheese sauce with savory depth without adding extra moisture. They are pantry staples that deliver big flavor.
The Creamy Foundation: Milk and Flour for the Roux
Whole milk is highly recommended for its richness, contributing to a truly decadent and creamy sauce. If unavailable, 2% milk can be substituted, but the sauce will be slightly less rich.
All-purpose flour forms the roux with butter, thickening the sauce and ensuring a smooth, velvety consistency. Cooking the flour briefly eliminates any raw taste.
Gathering Your Arsenal: Essential Kitchen Tools for Perfect Results
Large Baking Sheet: Crucial for even roasting and caramelization, allowing florets to spread in a single layer.
Large Saucepan: For crafting the velvety cheese sauce without crowding, ensuring consistent heat distribution.
Whisk: Your best friend for a lump-free roux and smooth sauce, preventing any separation or clumping.
Potato Masher or Fork: For achieving your preferred cauliflower texture, from chunky to extra creamy.
Serving Dish: To present your magnificent creation attractively and keep it warm.
Your Step-by-Step Journey to Loaded Cheesy Cauliflower Perfection
Preheat and Prep Cauliflower: Preheat your oven to 400°F (200°C). Cut the cauliflower into uniform florets and spread them in a single layer on a large baking sheet. Uniform size is important for even cooking.
Season and Roast: Drizzle the florets with olive oil, salt, and pepper. Toss gently to ensure even coating. Roast for 20-25 minutes until tender and beautifully browned at the edges, which is vital for preventing wateriness and enhancing flavor. This caramelization is the foundation of the dish’s depth.
Crisp the Bacon: While the cauliflower roasts, cook the bacon in a separate pan until perfectly crispy. Drain excess fat on paper towels, then crumble and set aside. Ensure the bacon is truly crispy for the best texture contrast.
Build the Roux: In a large saucepan, melt the butter over medium heat. Whisk in the flour and cook for about 1 minute, stirring constantly, to create a smooth roux. This step cooks out the raw flour taste and acts as the sauce’s thickening agent.
Whisk in Milk: Gradually add the milk, whisking continuously until the sauce is smooth and begins to thicken, usually taking 3-5 minutes. Patience here prevents lumps and ensures a silky texture.
Season the Sauce: Stir in the garlic powder, onion powder, and an additional pinch of salt and pepper to taste. Adjust seasoning as desired, tasting carefully to balance flavors.
Melt the Cheese: Remove the saucepan from the heat. Stir in both shredded cheddar and Monterey Jack cheeses until they are fully melted and the sauce is wonderfully smooth and glossy. Removing from heat prevents the cheese from seizing or becoming oily.
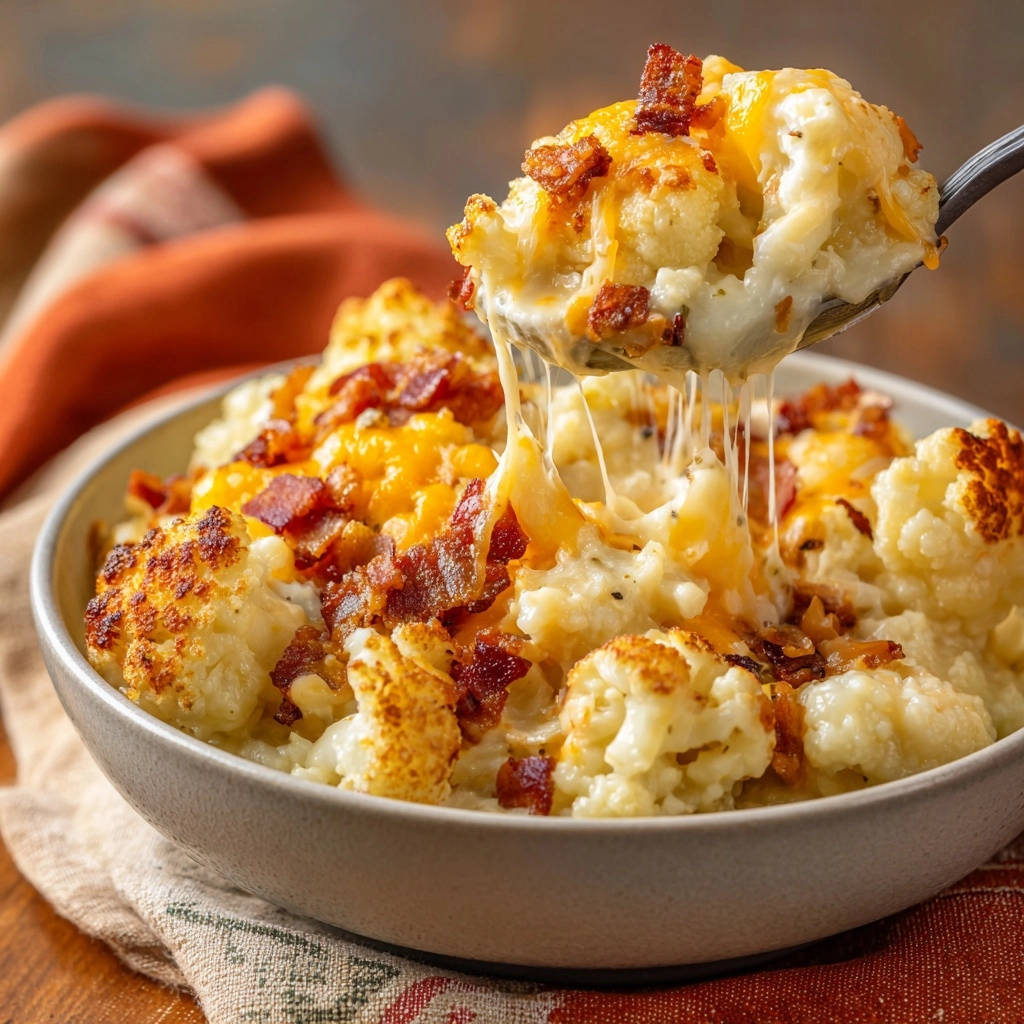
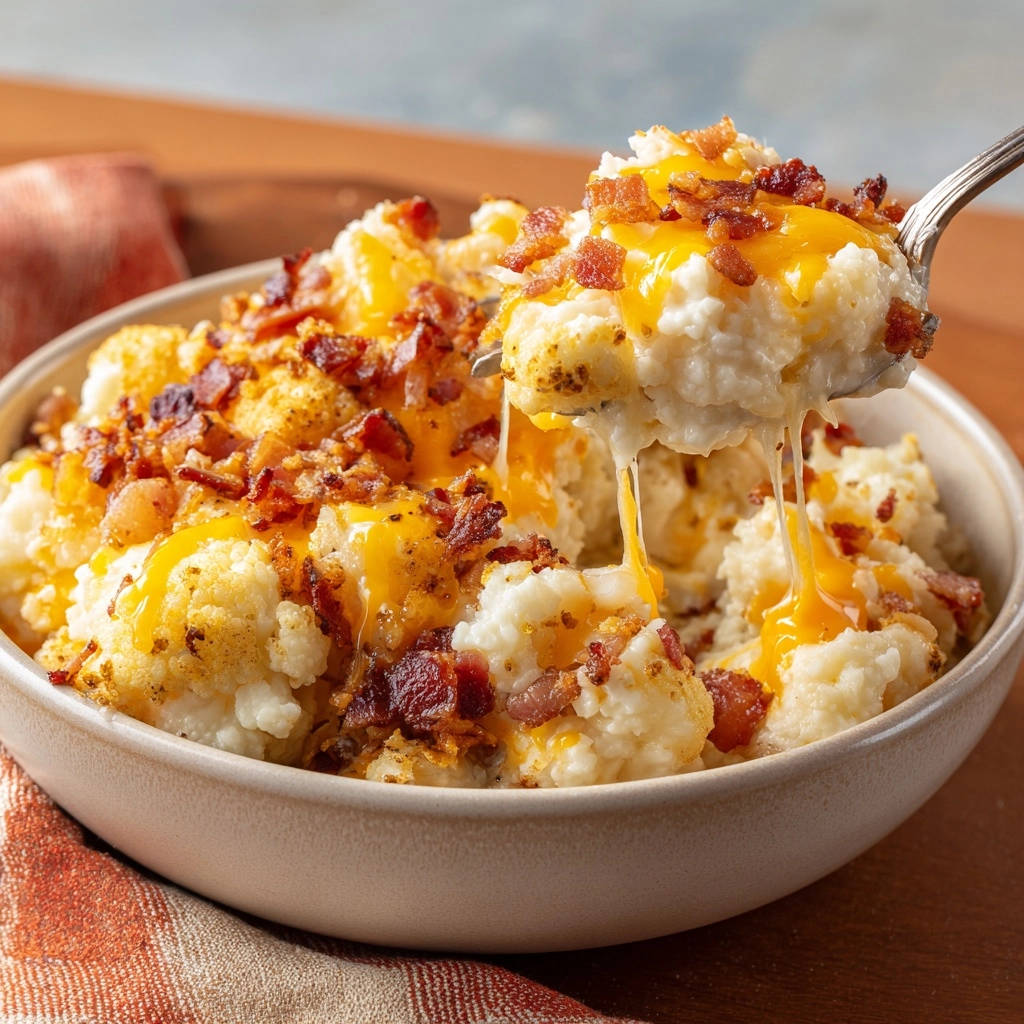
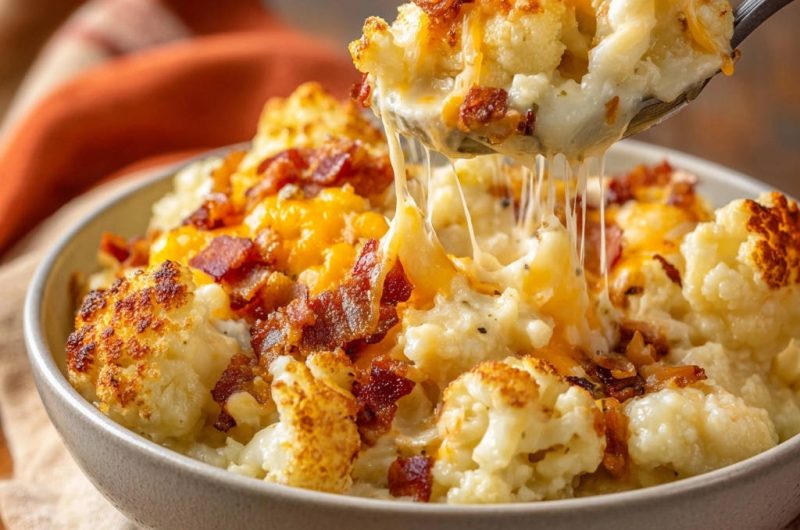
Combine and Customize Texture: Add the roasted cauliflower to the warm cheese sauce. For a creamier consistency, gently mash some of the cauliflower with a fork or potato masher, leaving some florets whole for delightful texture contrast. This allows for personal preference.
Serve and Garnish: Transfer your Loaded Cheesy Cauliflower to a serving bowl. Top generously with the crumbled crispy bacon and an optional sprinkle of extra shredded cheese. Serve immediately and savor every bite! The bacon adds the perfect finishing touch.
Chef’s Secrets: Elevate Your Loaded Cheesy Cauliflower Game
Don’t Skip the Roast: The caramelization from roasting is non-negotiable for deep flavor and a non-watery dish. High heat and a single layer are key! It’s the foundational step for success.
Gradual Whisking is Gold: When adding milk to the roux, go slowly and whisk constantly. This prevents lumps and ensures a silky-smooth cheese sauce, the hallmark of expertise.
Cheese Quality Matters: Opt for block cheese and shred it yourself. Pre-shredded cheeses often contain anti-caking agents that can make your sauce gritty or prevent a smooth melt.
Seasoning Layers: Season at different stages – with the cauliflower, in the roux, and with the cheese sauce – to build complex flavor that permeates every component.
Temperature Control for Cheese: Remove the sauce from heat before stirring in cheese. Too much direct heat can make cheese seize, resulting in a greasy or separated sauce.
Creative Twists: Flavor Variations & Customizations
Spice it Up: Adding a Kick
For a touch of heat, stir in a pinch of cayenne pepper or a dash of hot sauce with the other seasonings. A few finely diced jalapeños roasted with the cauliflower also add a vibrant kick.
Cheese Lovers’ Paradise: Exploring Other Blends
Experiment with other great melting cheeses like Gruyere, Fontina, or even a smoked Gouda for different flavor profiles. A touch of cream cheese can also enhance richness and creaminess.
Herbaceous Touches: Freshness and Aroma
Stir in fresh chopped chives or parsley just before serving for a burst of freshness and color. A sprinkle of fresh thyme or rosemary with the roasting cauliflower adds an aromatic depth.
Beyond Bacon: Alternative Toppings
While bacon is classic, consider crispy fried onions for a textural crunch, or toasted breadcrumbs for a satisfying, buttery topping. A drizzle of truffle oil adds an earthy, luxurious touch.
Make it a Meal: Protein Boosts
Transform this side into a main course by stirring in cooked, shredded chicken, leftover ham, or sautéed mushrooms. This turns your cheesy cauli into a hearty, balanced meal.
Serving Suggestions & Perfect Pairings
The Ultimate Side Dish: What to Serve Alongside
This Loaded Cheesy Cauliflower is a superb companion to roasted chicken, grilled steak, or baked salmon. Its richness beautifully complements simpler main courses, elevating the entire meal.
Round Out Your Meal
If you enjoyed this creamy cauliflower, try these complementary dishes.
- For a hearty meal, explore a loaded baked potato soup that shares a similar comforting profile.
- You might also like a loaded cheese baked potato for another satisfying option.
It also pairs wonderfully with holiday roasts like turkey or prime rib, offering a delightful low-carb alternative to traditional potato sides.
Wine & Beverage Pairings: Enhancing the Experience
For wine, a crisp Chardonnay (unoaked or lightly oaked) cuts through the richness beautifully, or a light-bodied Pinot Noir offers a nice contrast. Non-alcoholic options include sparkling cider or a robust ginger ale.
Making it a Light Lunch: Simple Combinations
Enjoy a smaller portion of this comforting side with a crisp green salad dressed with a light vinaigrette. It’s a satisfying and flavorful lunch that won’t weigh you down.
Make Ahead, Storage, and Reheating Tips
Can You Prep Ahead?
You can roast the cauliflower and cook the bacon up to a day in advance, storing them separately. The cheese sauce can also be made a day ahead and gently reheated before combining.
However, for the best texture and freshness, it’s ideal to assemble the full dish just before serving.
Storing Leftovers: Best Practices
Store any leftover Loaded Cheesy Cauliflower in an airtight container in the refrigerator for up to 3-4 days. Ensure it’s cooled completely before sealing.
Reheating for Optimal Taste
Reheat in the oven at 300°F (150°C) until warmed through, about 15-20 minutes, covered with foil to prevent drying. You can also gently reheat on the stovetop over low heat, adding a splash of milk if the sauce seems too thick.
Microwaving is an option for individual portions, but the texture might be slightly softer. Stir well after heating.
Freezing for Future Feasts
While possible, freezing can alter the texture of the cauliflower and sauce, making it slightly more watery upon thawing. If freezing, cool completely and store in a freezer-safe container for up to 2 months.
Thaw overnight in the refrigerator before reheating gently in the oven or on the stovetop.
Troubleshooting Your Loaded Cheesy Cauliflower
Why is my cauliflower watery?
The most common culprit is insufficient roasting. Ensure your florets are spread in a single layer and roasted until deeply browned, allowing moisture to evaporate.
Overcrowding the baking sheet steams the cauliflower instead of roasting it, retaining water. Use multiple sheets if necessary.
My cheese sauce is lumpy or grainy.
Lumps usually occur if the milk isn’t added gradually enough or whisked constantly into the roux. Graininess can happen if you use pre-shredded cheese with anti-caking agents, or if the cheese is added to sauce that’s too hot.
Ensure your sauce is off the heat when melting the cheese for a smooth, velvety finish.
The dish tastes bland.
Flavor builds in layers! Make sure you season the cauliflower adequately before roasting, and then taste and adjust the seasoning (salt, pepper, garlic, onion powder) in the cheese sauce. Don’t be shy with seasoning.
How do I fix overly thick or thin sauce?
If the sauce is too thick, gradually whisk in a splash of warm milk until it reaches your desired consistency. If it’s too thin, you can try simmering gently for a few more minutes to reduce, or make a very small additional roux and whisk it in.
Frequently Asked Questions About Loaded Cheesy Cauliflower
Is this recipe gluten-free?
As written, this recipe uses all-purpose flour for the roux, so it is not gluten-free. To make it gluten-free, substitute a gluten-free all-purpose flour blend or cornstarch (using a cornstarch slurry) for the flour.
Can I use frozen cauliflower?
Yes, but with modifications. Frozen cauliflower contains more water. Thaw it completely, then pat it very dry before tossing with oil and roasting. You might need to roast it for a slightly longer time to achieve the desired browning and moisture reduction.
What kind of milk is best for the cheese sauce?
Whole milk is highly recommended for the richest, creamiest sauce. Its fat content contributes significantly to the luxurious texture. Lower-fat milks can be used but may result in a slightly thinner or less decadent sauce.
How can I make this dish lighter?
To lighten it, you can use 2% milk instead of whole milk, and reduce the amount of cheese slightly. You could also use turkey bacon instead of pork bacon, and reduce the amount of butter in the roux.
Is this suitable for meal prepping?
Yes, this creamy cauliflower bake works well for meal prepping. You can follow the make-ahead and storage tips to enjoy portions throughout the week. Reheat gently for the best texture.
Share Your Loaded Cheesy Cauliflower Masterpiece!
We hope this guide inspires you to create the most incredible Loaded Cheesy Cauliflower your taste buds have ever encountered. This recipe is designed to bring comfort, flavor, and a touch of culinary triumph to your kitchen, proving that healthy sides can be utterly decadent.
Once you’ve whipped up your batch of perfectly creamy, never watery cauliflower, we’d absolutely love to see your creation! Share your photos and experiences in the comments below, or tag us on social media. Your success stories inspire fellow home cooks!
Cheesy Cauliflower
Course: Side DishCuisine: AmericanDifficulty: easy4
servings15
minutes30
minutes550
kcal45
minutesSay goodbye to bland, watery cauliflower! This recipe reveals the simple trick to perfectly roasted, incredibly flavorful cauliflower. Smothered in a rich, cheesy sauce and topped with crispy bacon, it’s the ultimate comforting side dish that’s never watery.
Ingredients
1 large head cauliflower, cut into florets
2 tablespoons olive oil
1/2 teaspoon salt, plus more to taste
1/4 teaspoon black pepper, plus more to taste
4 slices bacon, cooked crispy and crumbled
2 tablespoons butter
2 tablespoons all purpose flour
1 1/2 cups milk (whole milk recommended)
1/2 teaspoon garlic powder
1/2 teaspoon onion powder
1 cup shredded cheddar cheese
1/2 cup shredded Monterey Jack cheese (or additional cheddar)
Directions
- Preheat your oven to 400 degrees F (200 degrees C).
- Spread the cauliflower florets in a single layer on a large baking sheet. Drizzle with olive oil, salt, and pepper. Toss to coat evenly. This is the crucial step for flavor and preventing wateriness!
- Roast for 20 to 25 minutes, or until the cauliflower is tender and has developed some beautiful browned, caramelized edges. This browning is key to driving out moisture and building deep flavor, ensuring your dish is never watery.
- While the cauliflower roasts, cook your bacon until crispy. Drain on paper towels, then crumble. Set aside.
- In a large saucepan over medium heat, melt the butter. Whisk in the all purpose flour and cook for 1 minute, stirring constantly, to create a roux.
- Gradually whisk in the milk, a little at a time, until the sauce is smooth and thickens, about 3 to 5 minutes.
- Stir in the garlic powder, onion powder, and a pinch more salt and pepper.
- Remove the saucepan from the heat. Stir in the shredded cheddar and Monterey Jack cheeses until completely melted and smooth.
- Add the roasted cauliflower to the cheese sauce. You can mash some of the cauliflower gently with a fork or potato masher if you prefer a creamier consistency, leaving some florets whole for texture, just like in the picture.
- Transfer the loaded cauliflower to a serving bowl. Top with the crumbled crispy bacon and a sprinkle of extra shredded cheese, if desired. Serve immediately and enjoy that rich, flavorful, and perfectly textured side!
Notes
- Roasting the cauliflower until tender and browned is key to driving out moisture and building deep flavor.


