
Most home bakers struggle with the “Scone Paradox.” You either end up with a dry, crumbly rock that requires a gallon of tea to swallow, or a gummy, cake-like wedge that feels more like a muffin in disguise. These Glazed Cinnamon Spice Scones break that cycle by delivering a shatteringly crisp exterior and a light, airy center that smells like a cozy autumn morning.
For a similar crumbly texture, try this moist Pumpkin Spice Crumb Cake next.
The secret lies in the interplay between warm cinnamon, earthy nutmeg, and a specific temperature-controlled technique. Instead of the traditional “cutting in” method which often warms the fat too quickly, we use a frozen butter grating trick. This ensures every bite is packed with flavor without the dreaded density of a standard homemade scone.
I’ve found that the real magic happens when you stop treating the dough like bread. The less you touch it, the better it becomes. By using frozen butter and a quick flash-chill in the freezer, you guarantee a towering rise and a flaky texture that rivals any high-end pastry shop.
The Science of Flakiness in Cinnamon Scones
Achieving that perfect flaky lift isn’t luck; it’s pure chemistry. When you place cold dough into a hot 400°F oven, the tiny pockets of frozen butter begin to melt rapidly. As the water content in the butter evaporates, it creates steam that pushes the layers of flour apart before the structure sets.
This process, known as steam leavening, is exactly why we avoid the “muffin-like” texture. Muffins rely on a high ratio of liquid to flour, creating a soft, uniform crumb. Scones, however, need those distinct islands of fat to remain solid until they hit the heat. If the butter melts into the flour during mixing, you lose the air pockets and end up with a heavy, greasy brick.
Furthermore, controlling gluten development is vital. Gluten provides structure, but too much of it makes a scone tough. By keeping the ingredients cold and the mixing time short, we inhibit gluten strands from toughening up. This ensures your cinnamon spice treat remains tender enough to pull apart with your fingers.
Essential Components for Glazed Cinnamon Spice Scones
Success starts with your pantry. While the list looks simple, each ingredient plays a specific role in the final mouthfeel. We use granulated sugar here because it provides a clean sweetness and a crisper edge than brown sugar, which adds too much moisture for a traditional scone crumb.
Baking powder acts as our primary chemical leavener, giving the dough an initial boost while the steam does the heavy lifting. It’s important to ensure your baking powder is fresh; if it’s been sitting in the back of the cupboard for a year, your scones will likely stay flat and sad.
Selecting the Right Flour and Spices
All-purpose flour is the gold standard for this recipe. It has just enough protein to hold the scone together without making it chewy like bread flour. If you use cake flour, the scone might become too fragile and fall apart under the weight of the glaze.
For the “spice” profile, don’t settle for old, dusty jars. Freshly ground cinnamon and a grating of whole nutmeg provide a vibrant, aromatic punch. The nutmeg, in particular, acts as a flavor enhancer that makes the cinnamon taste deeper and more complex.
The Role of High-Fat Dairy
Heavy cream is non-negotiable if you want a bakery-quality result. Its high fat content coats the flour proteins, leading to a much more tender mouthfeel than whole milk or skim options. Using milk often results in a “bread-like” texture that lacks the richness expected in a premium scone.
Why Frozen Butter is Your Secret Weapon
Most recipes call for “chilled” butter, but frozen butter is the real game-changer. When you use a box grater to shred frozen butter, you create uniform “shreds” that are easy to distribute. These shreds stay solid much longer than cubed butter, even as you work the dough with your hands.
The grating technique ensures that the fat is evenly dispersed throughout the dry ingredients without the risk of over-processing. Because the butter pieces are so small and cold, they don’t “smear” into the flour. This separation is what creates those beautiful, visible layers once the scones are baked and pulled apart.
Step-by-Step: Mixing the Perfect Scone Dough
When it’s time to mix, put away the electric mixer. A simple whisk for the dry ingredients and a sturdy fork for the wet ingredients are all you need. The goal is to reach the “shaggy dough” stage, where the flour is mostly moistened but the mixture still looks a bit messy and uneven.
Using a fork is better than a spoon because the tines allow the ingredients to combine without compressing the air out of the dough. If you press too hard or stir too long, you’ll squeeze out those precious air pockets we worked so hard to create with the grated butter.
Incorporating the Grated Butter
Once you’ve grated your butter into the flour, use a light “tossing” motion. Think of it like tossing a salad. You want every single shred of butter to be lightly coated in the flour mixture. This creates a waterproof barrier that prevents the liquid ingredients from over-hydrating the flour, which helps delay gluten formation.
Combining Wet and Dry Ingredients
Pour your cold cream and egg mixture into the center of the flour well. Stir gently until the dough just starts to come together. If you see a few streaks of dry flour at the bottom of the bowl, that’s perfectly fine. It’s much better to have a slightly under-mixed dough than one that has been overworked into a rubbery ball.
The Folding Technique for Maximum Lift
Once the dough is on your floured surface, don’t knead it like pizza dough. Instead, use a “letter fold” method. Gently pat the dough into a rectangle, then fold it over itself three or four times. This creates physical layers of butter and flour, much like the process used for puff pastry or croissants.
Each fold creates a new “sheet” of dough. When the oven heat hits, these layers will separate and lift, giving you those tall, “cathedral” peaks. Be gentle during this process; you want to encourage the layers without melting the butter with the warmth of your palms.
Shaping and Cutting Your Cinnamon Spice Wedges
Pat the folded dough into a neat 8-inch disc, about an inch thick. Use a very sharp knife or a bench scraper to cut the disc into eight even wedges. It is crucial to press straight down with the knife rather than sawing back and forth.
A dull blade or a sawing motion “seals” the edges of the dough, which traps the steam inside and prevents the scone from rising upward. A clean, sharp cut leaves the layers exposed, allowing them to expand freely in the oven for maximum height.
The Critical “Flash Chill” Before Baking
This is the step most home bakers skip, but it’s the most important for a professional finish. Place your cut wedges on the baking sheet and pop the whole tray into the freezer for 10 minutes. This “flash chill” firms the butter back up to a frozen state and allows the gluten to relax.
When the butter is rock-hard right before hitting the heat, the steam release is much more explosive. This ensures the scones expand upward into tall peaks rather than spreading outward into flat puddles. It also helps the scones hold their sharp, triangular shape during the bake.
Baking to Golden Perfection
Before sliding the tray into the oven, brush the tops with a little extra heavy cream. This “wash” encourages a beautiful deep golden browning and creates a slightly crisp crust. Bake at 400°F for 18 to 22 minutes, keeping a close eye on the edges.
You’ll know they are done when the edges are a rich brown and the centers feel firm to a light touch. Don’t overbake them! If you wait until the entire scone is dark brown, the inside will be dry. The carry-over heat will finish cooking the very center as they cool on the pan.
Crafting the Opaque Cinnamon Glaze
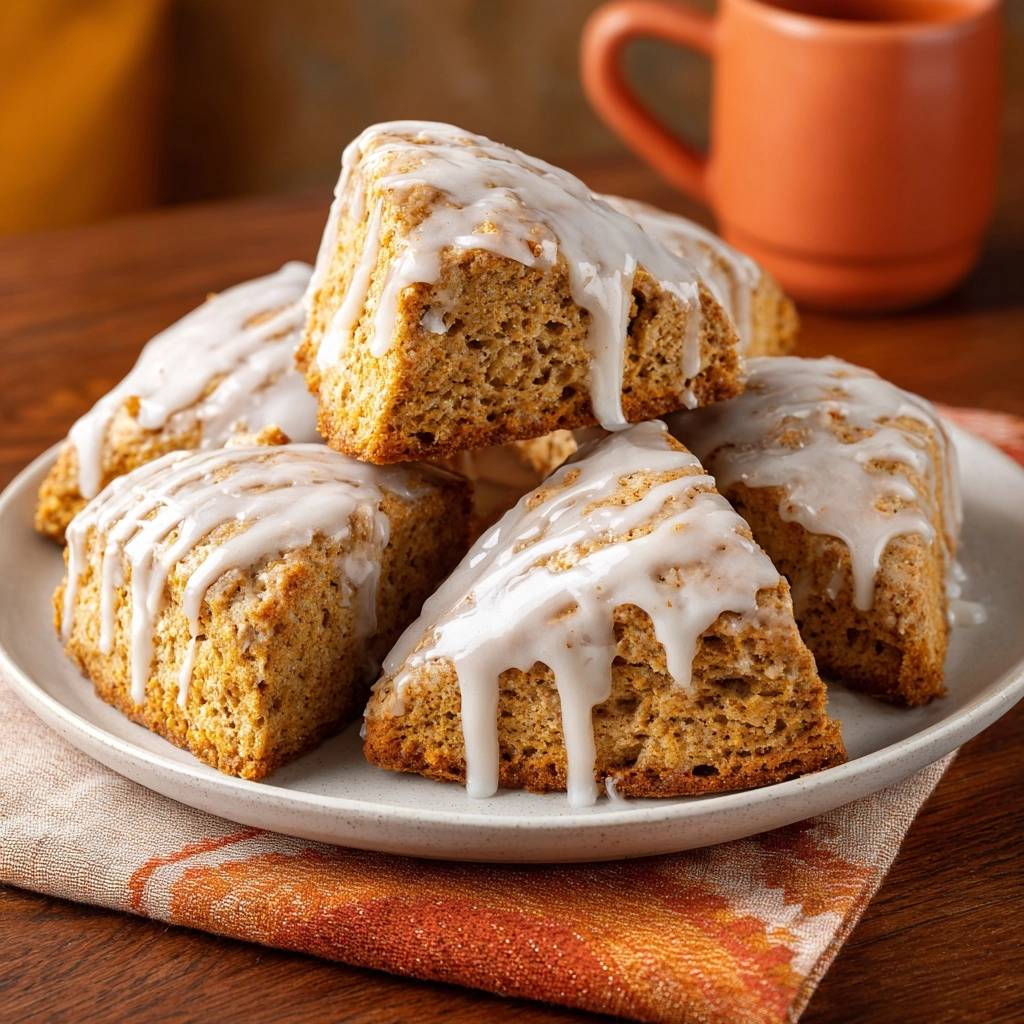
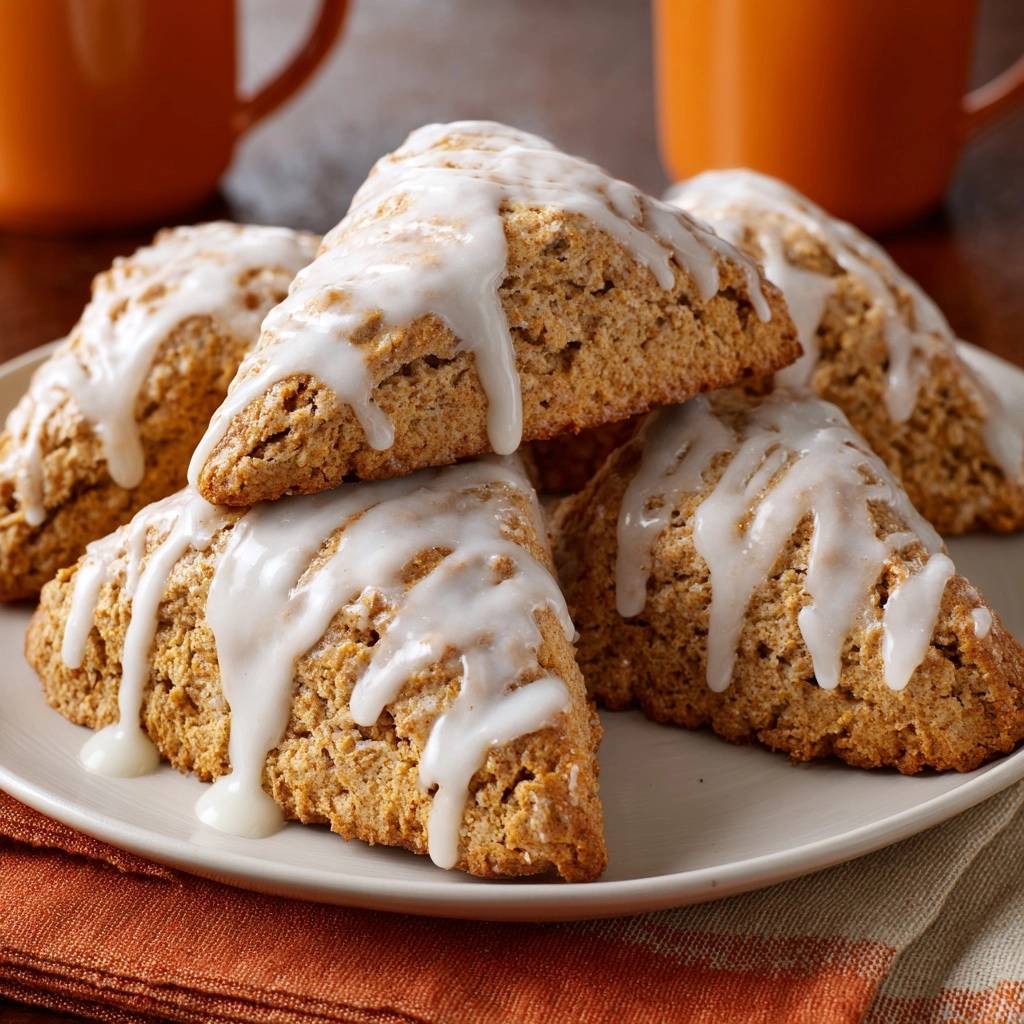
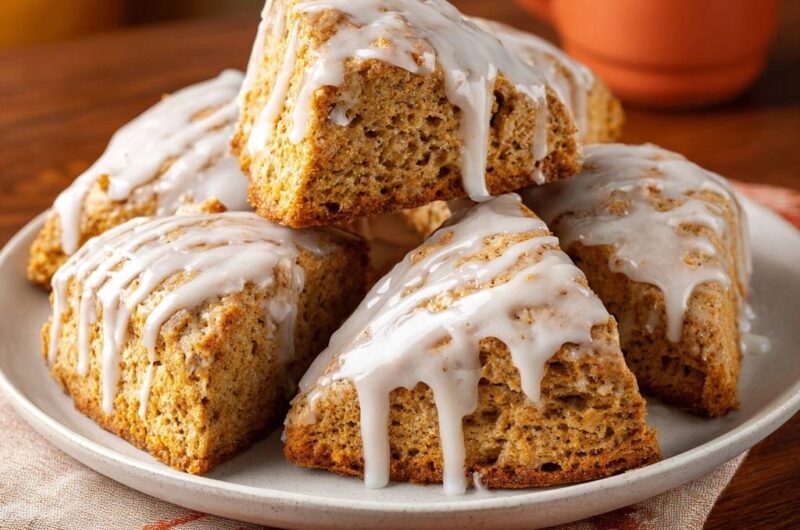
A great glaze should be thick and opaque, not a thin watery mess that disappears into the bread. Whisk your powdered sugar with just enough cream to create a “thick drip” consistency. It should flow slowly off the spoon like lava.
Drizzle the glaze while the scones are still slightly warm. This allows the bottom layer of the glaze to set into the nooks and crannies while the top layer stays smooth and shiny. The hint of vanilla in the glaze ties the cinnamon and nutmeg spices together perfectly.
Troubleshooting Common Scone Failures
If your scones spread into flat discs, your butter was likely too warm or you skipped the freezer chill. Always ensure your butter is frozen and your cream is ice-cold. If the scones feel heavy or “leaden,” you probably overmixed the dough or used expired baking powder.
For burnt bottoms and raw middles, check your oven rack position. Scones do best on the middle rack. If your oven runs hot on the bottom, try doubling up your baking sheets (stacking one on top of the other) to provide an extra layer of insulation against the direct heat.
Make-Ahead Strategies and Storage Tips
Scones are best served fresh and warm, but you can easily prep them in advance. You can freeze the unbaked wedges on a tray, then transfer them to a freezer bag. When you’re ready for breakfast, just bake them straight from frozen, adding 2-3 minutes to the total baking time.
Store leftover baked scones in an airtight container at room temperature for up to two days. To revive them, avoid the microwave, which makes them rubbery. Instead, pop them in a 350°F oven for 5 minutes. This restores the crisp exterior and softens the spice-filled center to its original glory.
Expert Scone Baking FAQ
Can I use a food processor instead of a grater?
You can, but you must be extremely careful. Pulse only a few times until the butter is the size of peas. The danger with a food processor is that the blades move so fast they can generate heat, which might melt the butter or overwork the gluten, leading to a tough scone.
Why did my scones taste slightly like soap or metal?
This usually happens if the baking powder wasn’t whisked thoroughly into the dry ingredients, leaving a concentrated clump. It can also happen if you use too much baking powder. Always level off your measuring spoons and whisk the flour mixture well before adding the wet ingredients.
Can I substitute the heavy cream with a dairy alternative?
For the best texture, a high-fat sub is necessary. Full-fat canned coconut milk is the best alternative because it mimics the fat content of heavy cream. Thinner liquids like almond or rice milk will result in a flatter, less tender scone that lacks the signature richness.
How do I get higher “cathedral” peaks on my scones?
The key is the folding technique and the sharp cut. By folding the dough 3-4 times, you create internal layers. By using a sharp, floured knife and pressing straight down, you keep those layers open so they can “bloom” upward in the heat of the oven.
Does altitude affect the spice levels or the rise?
At high altitudes, dough rises faster because there is less air pressure. You may need to slightly increase the oven temperature by 15 degrees and reduce the baking powder by about 1/8 teaspoon to prevent the scones from rising too fast and then collapsing.
Scones
Course: Breakfast and BrunchCuisine: AmericanDifficulty: easy8
servings15
minutes20
minutes310
kcal35
MinutesThese cinnamon spice scones use a unique frozen butter grating method and a chilling step to ensure a light, flaky crumb. Topped with a sweet vanilla glaze, they offer a perfect balance of spice and sweetness without the heaviness of traditional home-baked scones.
Ingredients
2 cups all-purpose flour
1/3 cup granulated sugar
1 tablespoon baking powder
2 teaspoons ground cinnamon
1/2 teaspoon ground nutmeg
1/2 teaspoon salt
1/2 cup unsalted butter, frozen
1/2 cup heavy cream, cold (plus 1 tbsp for brushing)
1 large egg, cold
1 teaspoon vanilla extract
1 cup powdered sugar
2 tablespoons heavy cream or whole milk (for glaze)
Directions
- Preheat your oven to 400 degrees F (200°C) and line a large baking sheet with parchment paper.
- In a large bowl, whisk together the flour, sugar, baking powder, cinnamon, nutmeg, and salt until well combined.
- To solve the density problem, use the large holes of a box grater to grate the frozen butter directly into the dry ingredients. This creates tiny, cold pockets of fat that steam during baking, creating a flaky lift rather than a dense, heavy texture.
- Use a pastry cutter or two forks to toss the butter shreds lightly with the flour until every piece is coated. The mixture should look like coarse crumbs.
- In a small bowl, whisk the cold heavy cream, egg, and vanilla. Pour this into the flour mixture.
- Stir with a fork just until a shaggy dough forms. Do not overmix. Overworking the dough develops gluten, which is the primary cause of tough, dense scones.
- Turn the dough onto a lightly floured surface. Gently fold the dough over itself 3-4 times to create layers. Pat into an 8-inch disc about 1-inch thick. Cut into 8 even wedges.
- Place wedges on the baking sheet, leaving at least 2 inches between them. For the best rise, place the tray in the freezer for 10 minutes before baking to re-chill the butter.
- Brush the tops lightly with a tablespoon of heavy cream. Bake for 18 to 22 minutes until the edges are deep golden brown and the centers are set.
- Allow scones to cool for at least 10 minutes. While cooling, whisk the powdered sugar and 2 tablespoons of cream/milk to create a thick, opaque glaze. Drizzle generously over the warm scones so it drips down the sides as shown in the image. Serve warm.
Notes
- The secret to the non-dense texture is grating frozen butter and chilling the dough in the freezer for 10 minutes before baking to ensure the fat remains cold.


