
Imagine biting into a muffin that actually shatters slightly under your teeth before giving way to a cloud-like, citrus-scented center. The contrast between the crunchy, crystalline sparkling sugar on top and the tender, airy interior is what separates a mediocre breakfast from a true bakery experience. Most home bakers struggle with muffins that turn out heavy, rubbery, or dense like a brick, but that ends today.
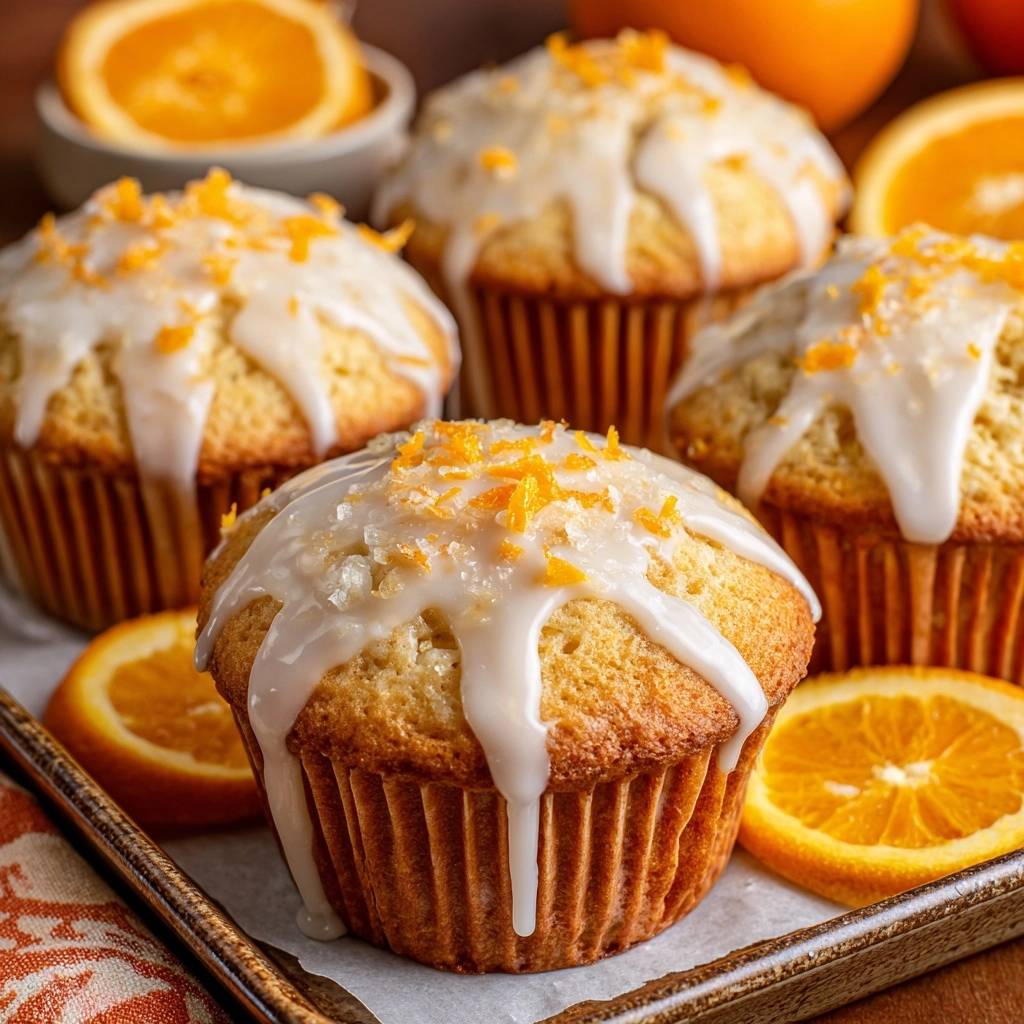
The secret to these Glazed Zesty Orange Muffins lies in the “Non-Dense Muffin Trick.” It’s a combination of temperature precision and a specific mixing philosophy that ensures your muffins stand tall with a beautiful mushroom top. You’re looking for a high-domed, golden-brown crust that holds a thick, opaque citrus glaze without becoming soggy or weighed down.
I’ve found that the real magic happens when you stop treating the batter like a cake mix. While cakes love a smooth, aerated batter, these muffins thrive on a bit of “organized chaos” in the bowl. The secret is using room temperature ingredients to keep the fats from seizing, which creates a perfectly emulsified crumb that stays moist for days.
The Chemistry of Light and Airy Citrus Muffins
Baking is essentially a series of chemical reactions that happen in a very specific order. When you mix the acidity of sour cream and fresh orange juice with baking powder, you’re creating a massive release of carbon dioxide. This gas gets trapped in the flour’s structure, pushing the batter upward to create those sought-after air pockets.
However, this reaction only works perfectly if your ingredients are at the right temperature. If you pour cold milk or eggs into melted butter, the butter will immediately “seize” into tiny, hard clumps. This prevents a proper emulsion, leading to an uneven bake and a greasy mouthfeel. Room temperature ingredients allow the fats and liquids to bond smoothly, ensuring every bite is uniform.
Furthermore, the thickness of this specific batter is intentional. A thin batter will spread out, but a thick, lumpy batter has the structural integrity to climb the walls of the muffin tin. This resistance is what forces the muffin to grow upward rather than outward, resulting in that professional, domed appearance.
Why Sour Cream Outperforms Milk Alone
Sour cream is the secret weapon for a tender crumb because it adds both fat and acidity without thinning the batter too much. While milk provides moisture, sour cream adds a richness that lingers on the palate. The high fat content actually shortens the gluten strands, which is a fancy way of saying it makes the muffin much harder to over-toughen.
In addition, the thickness of sour cream helps support the “lift” during the initial high-heat blast in the oven. It creates a sturdy framework that holds the air bubbles in place while the heat sets the structure. This results in a muffin that feels light when you pick it up but has a substantial, moist bite.
The Role of Fresh Zest vs. Extracts
If you want a flavor that actually tastes like a sun-ripened orange, you cannot rely on extracts alone. The flavedo, or the bright orange outer layer of the peel, contains volatile oils that provide a complex, floral citrus aroma. Extracts often taste one-dimensional or slightly medicinal by comparison.
For an even deeper flavor, try rubbing the orange zest into the granulated sugar with your fingertips before mixing. This mechanical action breaks the tiny oil sacs in the zest, infusing the sugar with a fragrant orange scent. You’ll notice the sugar becomes damp and smells incredibly intense, which translates to a better flavor in the finished bake.
Essential Components for Glazed Zesty Orange Muffins
Quality ingredients are the foundation of this recipe, starting with all-purpose flour. You might be tempted to use cake flour for “lightness,” but it lacks the protein needed to support the heavy glaze and the high dome. All-purpose flour provides the perfect middle ground of strength and tenderness.
Using unsalted butter is equally important because it allows you to control the sodium profile precisely. Different brands of salted butter have varying salt levels, which can easily overwhelm the delicate citrus notes. By adding your own salt, you ensure the orange flavor remains the star of the show.
Don’t skip the vanilla extract, either. While these are orange muffins, vanilla acts as a flavor enhancer, much like salt does for savory food. It rounds out the sharp acidity of the citrus and gives the muffins a “bakery-style” depth that tastes more sophisticated than just plain fruit.
Selecting the Right Oranges for Maximum Zest
Navel oranges are generally the best choice for baking because they have thick, oil-rich skins that are easy to zest. They also provide a sweet, consistent juice that isn’t overly acidic. Valencia oranges are great for juice but can be trickier to zest because their skins are thinner.
If you enjoy this zesty orange flavor, you’ll also appreciate the bright citrus in snowy orange jam cookies.
If you can find Cara Cara oranges, they offer a beautiful pinkish hue and a slightly berry-like undertone. Regardless of the variety, always wash your oranges thoroughly before zesting. You want to remove any wax or debris so you’re getting nothing but pure, clean citrus oil in your batter.
The Importance of Coarse Sparkling Sugar
The coarse sparkling sugar isn’t just for looks; it provides a “crystalline visual texture” and a necessary crunch. Standard granulated sugar will simply dissolve into the wet glaze, disappearing completely. Sparkling sugar has larger crystals that resist melting, even when sitting on top of the icing.
This crunch acts as a textural foil to the soft muffin and the creamy glaze. It also catches the light, giving the muffins a professional, high-end aesthetic. It’s that final touch that makes people ask which bakery you bought them from.
Step-by-Step: Achieving the Perfect Muffin Dome
The most critical part of this recipe is the “Two-Temperature Bake.” You’ll start the oven at a blistering 425°F. This creates an immediate “steam burst” that forces the batter to rise rapidly before the crust sets. This is how you get those tall, impressive tops that look like they belong in a pastry case.
After the initial burst, you immediately drop the temperature to 375°F. This allows the interior to cook through gently without burning the outside. If you baked them at 425°F the whole time, the outsides would be charred before the centers were done. This transition is the professional secret to the perfect shape.
Watch the muffins closely during the last few minutes. You’re looking for a deep golden brown on the edges and a pale gold in the center. The tops should feel springy to the touch, and a toothpick should come out with just a few moist crumbs attached, not wet batter.
The Folding Technique: Preventing Gluten Over-Activation
When you combine the wet and dry ingredients, you must use a “folding” motion rather than stirring. Take a rubber spatula, cut through the center of the bowl, scrape the bottom, and lift the batter over the top. Rotate the bowl and repeat until the flour streaks just barely disappear.
The batter should look lumpy and thick, not smooth like a pancake mix. If you over-mix, you develop the gluten proteins, which creates a rubbery, gummy texture. Think of it this way: the less you touch the batter, the more tender your muffin will be. Stop the very second you don’t see dry flour.
Filling the Tins for Maximum Height
Forget the old rule about filling muffin tins only two-thirds full. For this recipe, you want to fill them all the way to the brim of the liner. Because the batter is thick and the initial oven heat is high, the muffins will grow upward into a mushroom shape rather than spilling over the sides.
Using a large cookie scoop or a measuring cup helps ensure every muffin is the same size. This consistency is vital for an even bake. If some tins are fuller than others, the smaller ones will dry out while the larger ones remain raw in the middle.
Crafting the Opaque Citrus Glaze
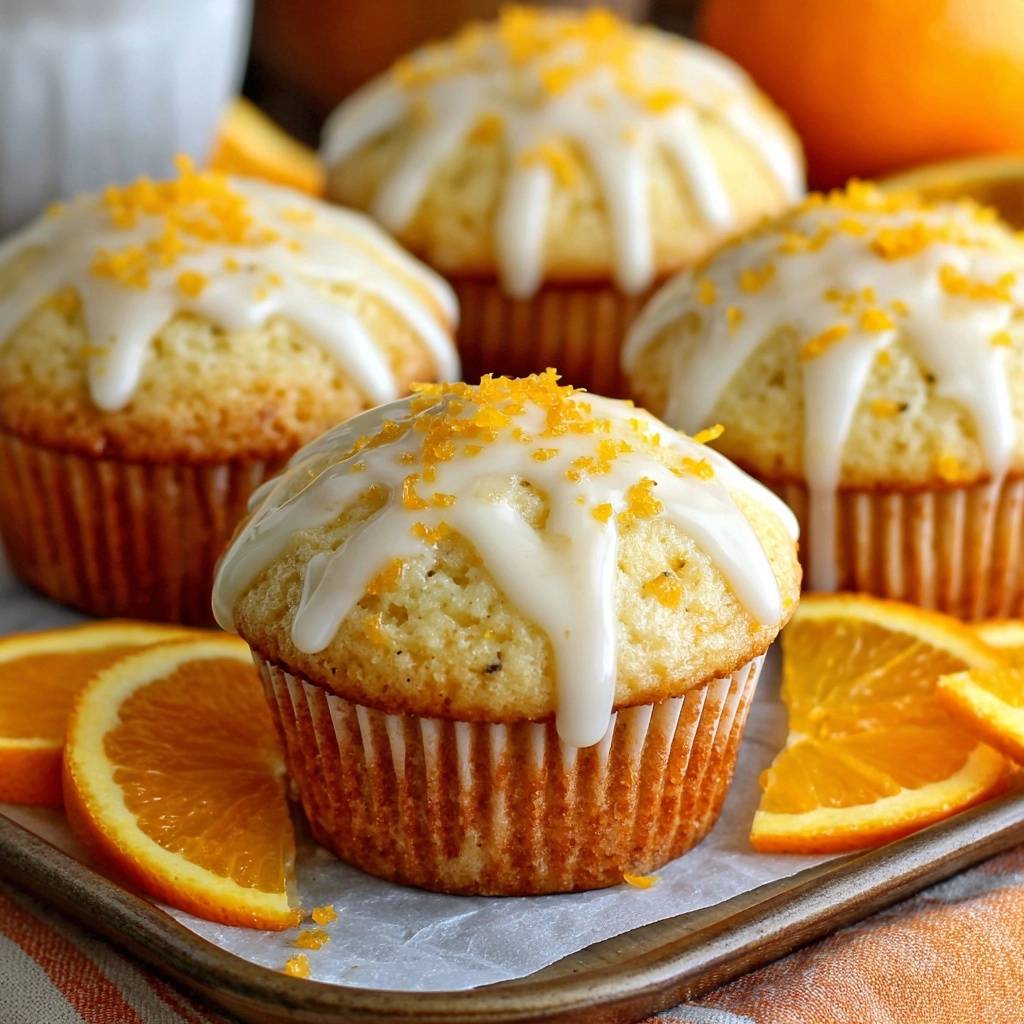
A great glaze should be thick, white, and slow-dropping. If it’s too thin, it will simply soak into the muffin, making it soggy and losing that beautiful visual contrast. You want the glaze to sit proudly on top, with just a few heavy “drips” running down the sides.
The key is the ratio of powdered sugar to liquid. Start with a small amount of orange juice and whisk until smooth. If it’s too runny, add more powdered sugar a tablespoon at a time. It should reach the “ribbon stage,” where the glaze falling from the whisk holds its shape on the surface for a few seconds before disappearing.
Achieving the Heavy Drip Aesthetic
Timing is everything when it comes to glazing. If the muffins are too hot, the glaze will melt and run off. If they are completely cold, the glaze won’t “grip” the surface as well. Aim for that “warm but not hot” window, usually about 10 to 15 minutes after they come out of the oven.
Spoon the glaze onto the center of the muffin and let gravity do the work. Once you’ve achieved the look you want, immediately sprinkle the fresh zest and sparkling sugar. The wet glaze acts as a glue, ensuring those toppings stay put instead of falling off the moment you take a bite.
Troubleshooting Common Muffin Failures
If your muffins didn’t turn out exactly as planned, don’t worry. Baking is a skill that improves with every batch. Most issues come down to a few common variables like oven calibration or mixing speed. Let’s look at why things might have gone sideways.
One pro tip: always check your baking powder. If it’s older than six months, it might have lost its potency. You can test it by dropping a teaspoon into some hot water; if it doesn’t bubble vigorously, it’s time to buy a fresh container. This is the most common reason for flat muffins.
Why My Muffins Came Out Flat
Flat muffins are usually the result of an oven that wasn’t hot enough or a batter that sat too long before going into the oven. That initial 425°F blast is non-negotiable. If your oven hasn’t fully preheated, you won’t get the steam burst needed for that high dome.
Additionally, if you over-mix the batter, you pop all the tiny air bubbles you worked so hard to create. This leaves the batter “deflated” before it even hits the heat. Keep the mixing brief and get those tins into the oven as soon as the batter is ready.
Correcting a Gummy or Dense Interior
A gummy interior usually means the muffins were underbaked or left in the tin for too long. When muffins sit in a hot metal tin after baking, they begin to “sweat.” This trapped steam turns the bottom of the muffin soggy and dense. Always move them to a wire rack after five minutes.
If they are dense but fully cooked, you likely over-worked the gluten. Next time, try using even fewer strokes when folding the wet and dry ingredients. Remember, lumps are your friend in the world of muffin baking!
Preserving Freshness and Storage Techniques
These muffins are best on the day they are made, but you can keep them fresh for up to three days. Store them in an airtight container at room temperature. To prevent the glaze from getting sticky, place a paper towel in the container to absorb any excess moisture.
If you live in a very humid environment, the sugar topping may eventually soften. You can “revive” the muffins by popping them in a 300°F oven for about 3 to 5 minutes. This will crisp up the edges without melting the glaze completely, making them taste almost as good as new.
Freezing Muffins Without Ruining the Glaze
You can freeze these muffins for up to two months. For the best results, freeze them unglazed. Wrap each muffin tightly in plastic wrap and place them in a freezer bag. When you’re ready to eat, thaw them at room temperature and then apply a fresh batch of glaze.
If you must freeze them glazed, use the “flash-freeze” method. Place the muffins on a baking sheet in the freezer for an hour until the glaze is rock hard. Then, wrap them individually. This prevents the icing from sticking to the plastic wrap and ruining the beautiful dome.
Expert Baking FAQ
Can I substitute Greek yogurt for sour cream?
Yes, you can use full-fat Greek yogurt as a 1:1 replacement for sour cream. It provides a similar level of acidity and moisture, though the flavor might be slightly tangier. Avoid using non-fat yogurt, as the lack of fat will result in a drier, less tender muffin crumb.
How do I prevent the orange zest from clumping in the batter?
The best way to prevent clumping is to whisk the zest into the wet ingredients (like the eggs and milk) before combining them with the dry ingredients. Alternatively, use the “sugar rub” method mentioned earlier. Massaging the zest into the granulated sugar separates the pieces and ensures an even distribution throughout every muffin.
Why did my glaze turn translucent instead of white?
A translucent glaze usually means there was too much liquid or the muffins were too hot when you applied it. To get that thick, opaque look, you need a very high ratio of powdered sugar to juice. It should feel almost too thick to stir. If it’s still clear, whisk in more powdered sugar until it looks like white craft glue.
Can I use bottled orange juice instead of fresh?
While you can use bottled juice in a pinch, fresh juice is highly recommended. Bottled juice is often pasteurized, which can dull the bright, citrusy notes. Since you need the zest from a fresh orange anyway, it’s best to just squeeze the juice from that same fruit for the most vibrant flavor profile.
What is the best way to reheat a glazed muffin without melting the icing?
Reheating a glazed muffin is tricky because the sugar will naturally melt. The best method is to use a toaster oven at a low temperature (around 250°F) for just a few minutes. This warms the center without liquefying the glaze. Avoid the microwave, as it will make the muffin rubbery and turn the glaze into a sticky syrup.
Orange Muffins
Course: Breakfast and BrunchCuisine: AmericanDifficulty: easy12
muffins15
minutes20
minutes295
kcal35
MinutesThese zesty orange muffins solve the common problem of dense home-baked goods by using room temperature ingredients and a gentle folding method. They feature a high-domed crust, a tender crumb, and a vibrant orange glaze.
Ingredients
2 cups all-purpose flour
1 cup granulated sugar
1 tablespoon baking powder
1/2 teaspoon salt
1/2 cup unsalted butter, melted and cooled
1/2 cup sour cream, room temperature (for moisture and crumb structure)
1/2 cup whole milk, room temperature
2 large eggs, room temperature
2 tablespoons fresh orange zest
1/4 cup fresh orange juice
1 teaspoon vanilla extract
For the Glaze & Topping:
1 1/2 cups powdered sugar (increased for the thick, opaque visual)
2-3 tablespoons fresh orange juice
1 tablespoon fresh orange zest
2 tablespoons coarse sparkling sugar (for the crystalline visual texture)
Directions
- Preheat your oven to 425°F (218°C). Line a standard muffin tin with paper liners. Starting at a high temperature is the professional secret to creating the steam burst needed for tall, domed muffin tops.
- In a large bowl, whisk together the flour, sugar, baking powder, and salt.
- In a separate medium bowl, whisk the eggs, sour cream, milk, melted butter, orange juice, orange zest, and vanilla. Using room temperature ingredients is the key to preventing the butter from seizing, ensuring a perfectly emulsified batter.
- To solve the density issue, pour the wet ingredients into the dry ingredients. Use a rubber spatula to gently fold the mixture together. Stop the very second the flour streaks disappear. The batter should be thick and slightly lumpy; over-mixing at this stage creates a dense, gummy texture.
- Divide the batter evenly among the muffin cups, filling them all the way to the top edge of the liner.
- Place the muffins in the oven and immediately reduce the heat to 375°F (190°C). Bake for 18 to 22 minutes or until the tops are golden brown and a toothpick comes out clean. Let them cool in the pan for 5 minutes before moving to a wire rack.
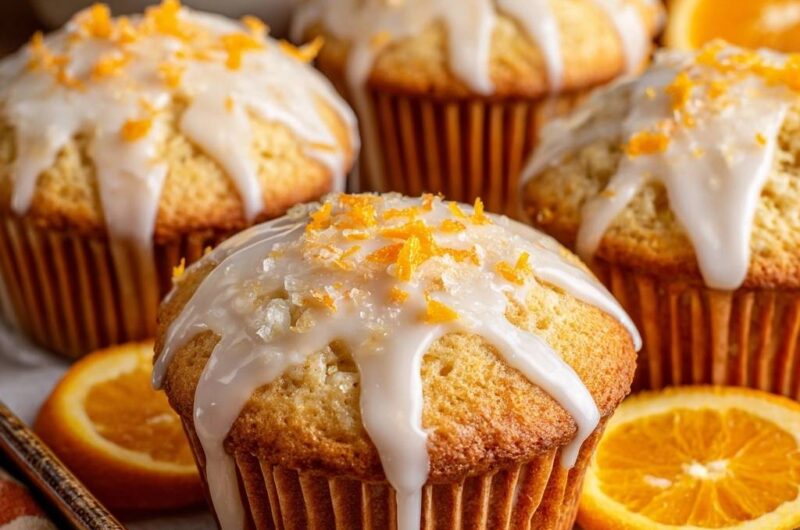
- While the muffins cool, whisk the powdered sugar and orange juice together. The glaze should be thick and slow-dropping to achieve the heavy “drip” look seen in the image.
- Once the muffins are slightly warm but not hot, spoon the glaze over the centers, allowing it to drip naturally down the sides. Immediately sprinkle with fresh orange zest and coarse sparkling sugar so they adhere to the wet icing.
Notes
- The secret to the high dome is starting the oven at 425 degrees Fahrenheit and immediately reducing it to 375 degrees Fahrenheit. Ensure all wet ingredients are at room temperature to prevent the melted butter from seizing.


