
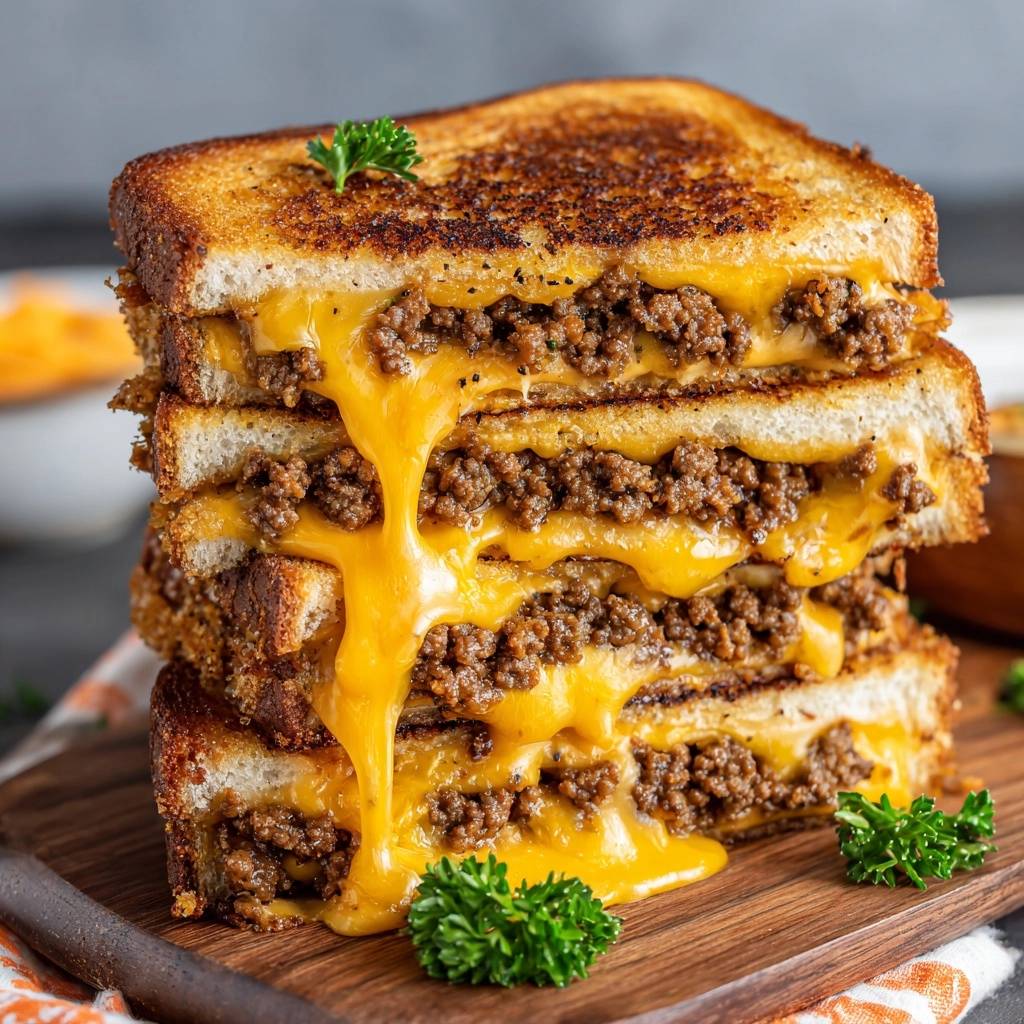
Imagine biting into a sandwich where the bread doesn’t just crunch—it shatters. You’re met with a wave of savory, seasoned beef held together by a molten river of sharp and creamy cheeses. Most people avoid putting ground beef in a grilled cheese because they fear the dreaded “soggy bottom,” but we’ve solved that problem entirely.
The secret to this Loaded Ground Beef Grilled Cheese lies in a specific moisture-management technique. By controlling the fat and using a strategic layering system, you get all the richness of a patty melt with the crispy, buttery soul of a classic grilled cheese. It’s a high-protein, heavy-duty meal that feels like a total win every time you make it.
For a similar cheesy experience, consider trying cheddar parsley cheese bread.
For more juicy beef ideas, try these cheeseburger stuffed rolls.
However, achieving that perfect textural contrast requires more than just throwing meat between bread. Therefore, the real trick is the “moisture barrier” method. By placing specific cheese types in a specific order, we create a shield that keeps the beef juices away from the bread fibers, ensuring every bite stays crisp until the very end.
The Structural Integrity of a Beefy Melt
When you add a half-pound of ground beef to a sandwich, you’re changing the physics of the dish. Unlike a thin slice of deli ham, ground beef is heavy and holds onto internal moisture. If you place hot, juicy beef directly against toasted bread, the steam will turn your golden crust into a mushy mess within seconds.
In addition, the weight of the beef can cause a standard sandwich to fall apart during the flip. To combat this, we use the “Moisture Barrier” concept. By placing a solid slice of sharp cheddar directly onto the bread first, we create a fat-based seal. This seal prevents any residual beef juices from migrating into the bread crumb while it cooks.
Furthermore, the shredded cheese on top of the beef acts as a structural adhesive. As it melts down through the crumbles, it binds the meat to the top slice of bread. Consequently, you end up with a unified “matrix” of beef and cheese that stays put, even when you’re taking a massive, messy bite.

Essential Components for the Loaded Ground Beef Grilled Cheese
Quality ingredients are the foundation of this sandwich, starting with the beef. You should strictly use 85/15 or 90/10 lean ground beef. While fat usually equals flavor, too much rendered grease in a grilled cheese is the enemy of a crispy crust. Leaner blends provide plenty of “umami” without the puddle of oil.
Secondly, the seasoning blend of garlic powder, onion powder, and smoked paprika is vital. The smoked paprika adds a subtle “off-the-grill” depth that mimics a backyard burger. In addition, using high-quality salted butter that has been softened to room temperature ensures you can spread it evenly without tearing the bread.
Selecting the Right Bread for Structural Support
You need a bread with a tight crumb and significant thickness to support this much filling. Sourdough is the gold standard here because its sturdy structure can handle the weight of the beef. Texas Toast is a great secondary option if you prefer a softer, pillowy interior with a fried-bread exterior.
However, you should avoid airy breads like Ciabatta with large “holes” or thin sandwich bread. If the cheese and beef juices find a hole in the bread, they will leak through to the pan and burn. Therefore, a solid, thick-cut slice is mandatory for maintaining the sandwich’s structural integrity.
The Dual-Cheese Strategy: Sharp Cheddar and Colby Jack
We use two different cheeses because they serve two different purposes. The sharp cheddar slices are our “foundation.” They have a lower oil content and a punchy flavor that stands up to the seasoned beef. Because they come in slices, they provide that essential flat barrier against the bread.
In contrast, the shredded Colby Jack is all about the “stretch.” It has a high moisture content and melts beautifully, creating those long, gooey cheese pulls. By using shredded cheese on the interior, it fills the gaps between the beef crumbles, effectively welding the sandwich together from the inside out.
The Science of the Butter-Mayo Crust
If you want a crust that looks like it came out of a professional kitchen, you have to mix your butter with mayonnaise. While butter provides that classic dairy flavor, it has a low smoke point and can burn before the thick interior of the sandwich is hot. Mayonnaise, however, contains egg proteins and oil.
Therefore, the egg in the mayo facilitates a more intense Maillard reaction, which is the chemical process that browns food. This mixture allows you to cook the sandwich longer at a lower temperature. Consequently, you get a deep, mahogany-gold crust that is much more even than what butter alone could produce.
In addition, the mayo adds a tiny hint of tanginess that cuts through the richness of the cheddar. I’ve found that a 3:1 ratio of butter to mayo is the “Golden Ratio.” It spreads like a dream and creates a crunch that you can actually hear when you tap it with a knife.
Phase One: Preparing the Seasoned Beef Crumble
Start by browning your beef over medium-high heat. It is crucial to break the meat into very small, uniform crumbles using a wooden spoon or a meat masher. Smaller crumbles mean more surface area for the cheese to grab onto, which prevents the meat from tumbling out of the sandwich later.
For more ideas on how to keep your ground beef from getting soggy, check out these cheesy taco beef bread boats.
As the beef cooks, you’ll notice the aroma change as the garlic and onion powders begin to toast in the rendered fat. This is where the flavor is built. You aren’t just graying the meat; you’re looking for those little brown, crispy bits on the edges of the beef that signal deep caramelization.
The Double-Drain and Flash-Sear Technique
This is the most important step for the “Anti-Soggy” guarantee. Once the beef is browned, move it to a fine-mesh strainer over a bowl. Let it sit for a full 3 minutes. You will be surprised at how much hidden liquid and fat drains away during this rest period.
After draining, return the beef to the hot skillet for just 60 seconds on high heat. This “flash-sear” evaporates any remaining surface moisture and creates “micro-crusts” on the meat. This step locks the flavor in and ensures the beef is “dry” enough to not compromise the bread, yet remains juicy on the inside.
Phase Two: Assembling the Loaded Layers
Assembly is a blueprint for success. Start with your bottom bread slice, butter-side down, in a cool skillet. Lay down your cheddar slice first. This is your shield. Next, pile a heavy mound of that flash-seared beef right in the center, spreading it slightly toward the edges.
Then, add a generous handful of the shredded Colby Jack over the beef. This shredded layer is the “glue.” Finally, place the top slice of bread on, butter-side up. By following this specific order, you ensure that the beef is sandwiched between two different types of “adhesive,” which keeps the filling secure during the flip.
Phase Three: The Low-and-Slow Grilling Method
Most people make the mistake of putting a grilled cheese into a screaming hot pan. However, because this sandwich is so thick, the bread will burn before the 1.5 cups of cheese have a chance to melt. Therefore, you must start in a cool or barely warm skillet over medium-low heat.
This slow-start method allows the heat to gently conduct through the thick sourdough and into the center of the beef. You’ll hear a gentle sizzle that gradually builds. After about 3 or 4 minutes, the bottom should be a perfect golden brown, and you’ll see the bottom layer of cheese starting to soften and slump.
The Spatula Press for Fusion
During the final minute of cooking on the second side, use a heavy spatula to press down firmly on the sandwich. You aren’t trying to smash the bread flat, but you want to apply enough pressure to “fuse” the layers. This pressure forces the melting Colby Jack into the crevices of the beef crumbles.
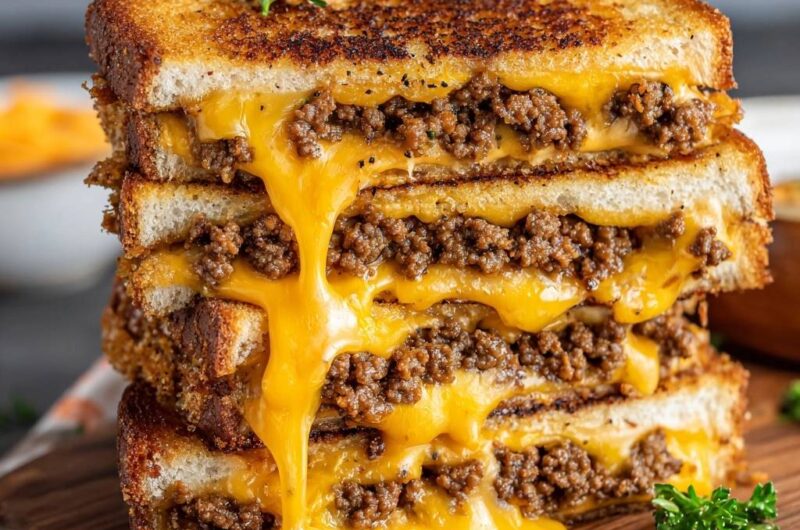
This “fusion” moment is what creates the cascading cheese effect. When you lift the spatula, the cheese should be bubbling and perhaps even dripping down the sides of the bread to create those crispy “cheese skirts” on the pan. Once the bread is deep brown and the cheese is molten, it’s ready.
Troubleshooting the Perfect Beef Grilled Cheese
If you find your bread is browning too fast but the cheese is still cold, simply turn the heat to low and cover the pan with a lid for 60 seconds. The lid traps steam, which quickly melts the cheese without further browning the bread. Just be sure to remove the lid for the final 30 seconds to re-crisp the crust.
In addition, if your beef is falling out, it usually means you didn’t use enough shredded cheese or didn’t press down firmly enough with the spatula. The shredded cheese is the only thing holding the beef in place, so don’t be shy with it! Always ensure the shredded cheese is distributed all the way to the edges of the beef mound.
Optimal Pairings for a Heavy Beef Sandwich
Because this sandwich is incredibly rich and savory, you want to pair it with something bright or acidic. A classic tomato soup works well, but make sure it has a good hit of acidity to cut through the beef fat. Alternatively, a side of vinegar-based coleslaw provides a refreshing crunch that cleanses the palate between bites.
What to Try Next
Looking for something to go with your loaded ground beef grilled cheese? Here are a couple of ideas.
- For a way to add some extra bread goodness, consider these cheesy garlic pull-apart rolls, offering a similar comforting vibe.
- A fresh salad can balance out a rich sandwich, so try this green bean salad with caramelized onions, feta & almonds for a mix of textures and tastes.
I also love serving this with spicy pickled peppers or cornichons. The sharp vinegar “pop” from the pickles balances the heavy cheddar and beef perfectly. Avoid serving this with heavy potato sides like fries or potato salad, as the meal can quickly become overwhelmingly dense and heavy.
Expert Tips for Customizing Your Melt
You can easily customize this melt as long as you follow the “Anti-Soggy” rule. If you want to add onions, caramelize them separately and squeeze them in a paper towel to remove excess moisture before adding them to the sandwich. The same goes for pickled jalapeños—pat them dry first!
Furthermore, avoid adding “wet” ingredients like raw tomato slices or lettuce inside the sandwich while it’s cooking. These release water when heated and will ruin your crispy crust. If you want that fresh element, serve it on the side or add it after the sandwich has finished grilling and resting.
Frequently Asked Questions
Can I use frozen ground beef for this recipe?
Yes, you can use frozen beef, but you must thaw it completely in the refrigerator first. Frozen meat often releases more water than fresh meat during the cooking process. Therefore, you must be extra diligent during the “flash-sear” phase to ensure all that extra moisture has evaporated before the beef touches the bread.
What is the best substitute for Sourdough?
If you can’t find sourdough, a thick-cut Brioche or Ciabatta works well. However, be aware that Brioche has a much higher sugar content than sourdough. This means it will brown and burn much faster, so you will need to keep your stove heat even lower to prevent scorching the exterior before the cheese melts.
How do I reheat a Loaded Ground Beef Grilled Cheese?
Never use a microwave to reheat this sandwich, as it will turn the bread into a rubbery, soggy mess. Instead, use an air fryer at 350°F for about 3-5 minutes or a toaster oven. This dry heat restores the “shatter-crisp” texture of the crust while gently warming the beef and re-melting the cheese.
Why is my cheese not stretching?
If you are using pre-shredded cheese from a bag, it is likely coated in potato starch or cellulose to prevent clumping. This coating interferes with the melting process. For the ultimate “cascading” cheese pull, buy a block of Colby Jack and grate it yourself right before you assemble the sandwich.
Resting and Serving for Maximum Texture
Once the sandwich comes off the heat, let it rest on a cutting board for at least 60 seconds. Just like a steak, the cheese needs a moment to “set.” If you cut into it immediately, the molten cheese will run out like water. A short rest allows it to thicken slightly into a gooey, stable ribbon.
When you’re ready, use a sharp serrated knife to slice the sandwich diagonally. This provides the best visual presentation of the beef and cheese layers. Finally, sprinkle over some fresh curly parsley for a pop of color and a hit of freshness. Serve it immediately while the crust is at its peak crispness.
Ground Beef Grilled Cheese
Course: Main CourseCuisine: AmericanDifficulty: easy2
servings10
minutes15
minutes680
kcal25
MinutesThis recipe solves the common problem of greasy bread by using a specific searing and draining technique for the beef. Combined with a blend of cheddar and colby jack, this sandwich offers a perfect crunch and a gooey, cheesy center.
Ingredients
1/2 pound lean ground beef (85/15 or 90/10)
1/2 teaspoon garlic powder
1/2 teaspoon onion powder
1/2 teaspoon smoked paprika
Salt and black pepper to taste
4 thick slices sourdough or Texas toast
4 slices sharp cheddar cheese
1.5 cups shredded colby jack cheese
3 tablespoons salted butter, softened
1 tablespoon mayonnaise
Fresh curly parsley for garnish
Directions
- Brown the ground beef in a skillet over medium-high heat, breaking it into very small, uniform crumbles. Season with garlic powder, onion powder, smoked paprika, salt, and pepper.
- To solve the soggy bread issue, move the cooked beef to a fine-mesh strainer and let it sit for 3 minutes to remove all excess fat. Then, return the beef to the hot pan for 60 seconds to flash-sear the edges, locking in flavor without the grease.
- In a small bowl, mix the softened butter and mayonnaise. This secret spread creates a higher smoke point and a more even, golden-brown crust than butter alone.
- Spread the butter-mayo mixture generously on one side of each bread slice.
- Place two slices of bread, butter-side down, in a cool non-stick skillet. Layer one slice of cheddar on each piece of bread (this acts as a moisture barrier). Add a heavy mound of the seared beef, then top with a generous handful of shredded colby jack. Top with the remaining bread slices, butter-side up.
- Turn the heat to medium-low. This slow-start method is the key to melting the thick cheese layers completely before the bread burns.
- Grill for 3 to 4 minutes per side. Press down firmly with a spatula during the last minute of cooking to fuse the beef into the melting cheese, creating the “cascading” effect seen in the image.
- Once the bread is deep golden brown and the cheese is bubbling and dripping down the sides, remove from the heat. Let it rest for 1 minute to set the crust before slicing. Garnish with fresh curly parsley and serve immediately.
Notes
- The butter and mayonnaise mixture creates a higher smoke point for a more even crust. Using cheddar as the first layer acts as a moisture barrier to keep the bread crisp.


