
I used to avoid braising bone-in chicken because that beautiful crispy skin I worked so hard for always turned into sad, rubbery mush during the long simmer. If you’ve struggled with soggy skin, you know the culinary disappointment this causes.
This reliable technique completely changes the game, guaranteeing a perfect, intact crust on your final Mediterranean Chicken and Potato Braise by mastering strategic liquid placement.
The Braising Struggle Is Over: Guaranteed Crispy Chicken Skin
Why Traditional Braising Creates Rubber Skin
Moisture and steam are the absolute enemies of texture you build through high-heat searing.
When chicken skin is fully submerged or exposed to heavy internal condensation, the collagen structure breaks down instantly.
The delicious, deep texture achieved in the searing step is sadly destroyed by wet, steamy conditions over extended cooking times.
How Strategic Placement Solves Everything
The secret to success lies in ensuring the chicken skin never touches the braising liquid during the simmering phase.
We arrange the chicken on a stable bed of potatoes and onions, allowing the meat to braise gently in the aromatic steam and broth underneath.
This setup yields supremely juicy, tender meat while the skin above remains exposed to the dry, hot air inside the pot, resulting in a perfect crust.
And for another take on tender chicken and potatoes, explore braised lemon herb chicken and potatoes.
The Time Investment vs. Reward (Prep & Cook Time Breakdown)
While the total cook time is just over an hour, the majority of that time is hands-off simmering.
This extended period is crucial for allowing the aromatics and savory spices to fully infuse the chicken, potatoes, and the resulting sauce.
The minimal prep time and passive cooking ultimately result in a deeply flavored, cohesive meal that tastes complex and rich.
A Pantry of Perfection: Building the Braise Flavor Profile
The Foundation: Bone-In Chicken and the Right Oil
Bone-in chicken (thighs and drumsticks) is necessary because the bones and connective tissues release collagen during the long braise.
This release naturally thickens the sauce and adds a profound, savory depth to the finished dish.
A good quality olive oil with a slightly higher smoke point is crucial for the intense initial sear required to lock in the skin’s texture.
The Mediterranean Spice Trio: Turmeric, Cumin, and Smoked Paprika
This blend is essential for giving the Mediterranean Chicken and Potato Braise its signature warmth, color, and aroma.
Ground turmeric provides a beautiful, sunny hue and a foundational earthy note that permeates the broth.
Smoked paprika delivers necessary smoky depth, while cumin adds that signature earthy Mediterranean warmth, balancing the salty, tangy additions.
Potatoes and Olives: The Essential Braising Bed
Baby yellow potatoes are the preferred starch because they hold their shape exceptionally well under long, moist heat.
Pitted large green olives offer a sharp, tangy, and briny counterpoint to the rich chicken and savory spices.
While delicious, black olives (like Kalamata) often possess a sweeter flavor and softer texture that doesn’t offer the crucial contrast required here.
Essential Tools for Your Braising Success
Choosing the Right Dutch Oven (Size Matters)
A heavy-bottomed Dutch oven or a deep, wide pan is non-negotiable for this braise.
Its heavy construction ensures even heat distribution, preventing scorching and providing ample surface area for searing all chicken pieces at once.
The Importance of a Meat Thermometer
Using a reliable instant-read meat thermometer ensures food safety and prevents the dark meat from drying out.
For thighs and legs, aim for an internal temperature of 175°F (79°C); this higher temperature allows the collagen to fully break down for supremely tender results.
Step-by-Step Mastery: Cooking Your Mediterranean Braise
-
Preparation for Maximum Crisp: Patting Dry and Seasoning
This is the hidden key to achieving texture: ensuring the skin is bone-dry before it ever hits the hot oil.
Seasoning heavily now with salt and pepper is crucial, ensuring the deep flavor penetrates the meat before the heat locks it in.
-
Phase 1: Achieving the Critical Skin Lock-In Sear
Heat the olive oil over medium-high heat until shimmering, then place the chicken skin-side down.
Do not touch the chicken for 6 to 8 minutes; it must be undisturbed until the skin is deep golden brown to form the ‘lock’ that protects it during simmering.
Remove the chicken and set it aside, reserving the rendered fat and browned bits in the pot.
-
Building the Aromatic Base
Reduce the heat to medium and add the sliced onion, cooking for about 5 minutes until soft and translucent.
Add the minced garlic, then introduce the spices-turmeric, paprika, and cumin-and stir continuously for 1 minute until fragrant.
Blooming the spices in the hot oil wakes up their flavor, providing a complex depth that cold, un-bloomed spices cannot match.
For a similar depth from mushrooms, you might also enjoy these braised chicken thighs.
-
Setting the Foundation and Bringing to a Simmer
Add the chicken broth and the halved potatoes to the pot.
Stir well, scraping up all the savory browned bits (fond) from the bottom; this dissolved fond significantly enhances the final sauce.
Bring the liquid up to a gentle simmer before moving to the next crucial step.
-
Phase 2: The Strategic Placement Braise (The Critical Technique)
Arrange the seared chicken pieces back into the pot, skin-side up, resting them directly on the bed of potatoes and onions.
This placement is paramount: ensure the liquid only comes about halfway up the sides of the chicken, leaving the entire skin surface fully exposed above the liquid line.
This ensures the meat braises in aromatic steam and heat without wetting the precious crispy skin.
-
Controlled Simmering and Finishing
Cover the pot very loosely, using the lid slightly ajar to allow excess steam to escape.
Reduce the heat to low and simmer for 40 to 45 minutes, or until the chicken is tender and fully cooked (175°F).
Allowing steam to escape prevents condensation from collecting and dripping back down onto the chicken skin.
-
Incorporating Olives and Reducing the Sauce
Stir the green olives into the sauce during the final 5 minutes of cooking just to warm them through.
If the sauce looks too thin, temporarily remove the chicken and potatoes and rapidly reduce the remaining sauce for 2 minutes before returning the solids to the pot.
-
Serving and Garnish
Give the braise a final taste for salt levels and serve immediately.
Garnish generously with fresh cilantro or parsley for a bright, herbal contrast to the rich braising liquid.
Round Out Your Meal
To complement your Mediterranean Chicken and Potato Braise, consider these dishes for a fuller experience.
- For a fresh contrast, serve alongside this Simple Summer Salad, which keeps things light and bright.
- If you’re craving another Mediterranean flavor, this Mediterranean Bow-Tie Pasta Salad offers a different texture and taste.
Braise Optimization: Chef’s Tips for Maximum Flavor and Texture
Don’t Rush the Sear: Never cut the searing time short; the 6 to 8 minutes of undisturbed searing is non-negotiable.
If your sear isn’t deep brown and firm, your skin will still soften during the lengthy braise.
Control the Lid: Ensure the lid is genuinely ajar during the simmering phase.
If you cover the pot completely, steam condenses rapidly, drips back down, and destroys the crispy texture you worked hard to achieve.
Taste and Adjust Broth Seasoning: Use low-sodium broth to maintain control over the salt levels.
Taste the sauce before adding the chicken back in during step 5 and adjust the salt content now for an optimally seasoned final dish.
Can I Use Boneless Chicken? (And Should I?): Yes, you may substitute boneless thighs, but reduce the cooking time significantly by 15-20 minutes.
Be aware that braising boneless meat will result in less flavor depth because you lose the richness contributed by the bones and connective tissue.
Troubleshooting Your Mediterranean Chicken and Potato Braise
Problem: The Sauce is Too Watery at the End
The solution is rapid reduction, which concentrates both the flavor and the texture of the sauce.
Remove the finished chicken and potatoes, then bring the remaining liquid to a vigorous, rolling boil on high heat.
Boil rapidly for 2 minutes until it coats the back of a spoon, then return the solids to the thickened sauce.
Problem: My Chicken Skin Is Still Softening
If your skin softened, you likely made one of two key errors: insufficient initial sear time or an overly tight lid.
Ensure your searing time is long enough to develop a dark, hard crust, and always guarantee steam can escape the pot during the simmer.
Problem: The Potatoes Aren’t Fully Tender
Your braise may simply need 5-10 minutes longer to cook the root vegetables through.
If the chicken has already reached its internal temperature of 175°F, remove the chicken first to prevent it from drying out while the potatoes finish cooking alone in the liquid.
Serving Suggestions, Prep Strategy, and Smart Storage
What Sides Pair Best with This Braise?
A light, simple side salad dressed with lemon and a small amount of olive oil provides excellent freshness.
Fluffy couscous or rice are perfect for soaking up the aromatic braising sauce.
Always serve with a crusty piece of rustic bread; it is essential for mopping up every last drop of the rich sauce.
Make-Ahead and Freezing Advice
All prep work-chopping onions, mincing garlic, and measuring spices-can be done up to 24 hours ahead of time.
We advise against freezing the finished braise; potatoes develop a mushy, grainy texture upon thawing, which ruins the experience.
Reheating without Losing the Crisp
To preserve the crispy skin, never reheat the full dish sealed in a pot or in the microwave.
Separate the chicken pieces from the sauce and potatoes and reheat the chicken in a hot 400°F oven or air fryer for 5-7 minutes to re-crisp the skin.
Gently warm the sauce and potatoes on the stovetop and then combine the crispy chicken right before serving.
Frequently Asked Questions About Mediterranean Braising
How is a Braise Different from a Stew?
Braising involves cooking food in a relatively small amount of liquid, which usually only comes halfway up the food.
It relies heavily on searing, steam, and low, slow heat for tenderness.
A stew, conversely, involves fully submerging all ingredients in liquid and typically skips the initial heavy sear.
Can I Substitute Other Vegetables for Baby Potatoes?
Yes, dense root vegetables like carrots, parsnips, or celery root make good substitutes as they hold their structure well during long cooking.
Caution must be taken against using high-water content vegetables, such as zucchini, which will thin the concentrated sauce too much for this Mediterranean Chicken and Potato Braise.
Are Green Olives Necessary, or Can I Use Kalamata?
Green olives are highly recommended because they provide a necessary firm bite and a bright, briny tang that powerfully contrasts the rich, spiced sauce.
While Kalamata olives can be used, their flavor profile is often too assertive and slightly sweet, and their texture is usually softer than desired for this specific dish.
Ready to Impress? Share Your Mediterranean Chicken and Potato Braise Masterpiece!
Achieving truly crispy skin on braised chicken is a triumphant moment for any home cook, and now you have the simple, strategic technique to master it every time.
There is nothing quite like a one-pot meal that delivers deep, complex flavor with zero sacrifice on texture.
Try this recipe this weekend and let us know in the comments how the secret crispy skin technique worked for you!
Gather your ingredients, follow the steps precisely, and enjoy the best Mediterranean Chicken and Potato Braise you’ve ever made.
Chicken and Potato Braise
Course: Main CourseCuisine: MediterraneanDifficulty: medium4
servings15
minutes1
hour5
minutes550
kcal80
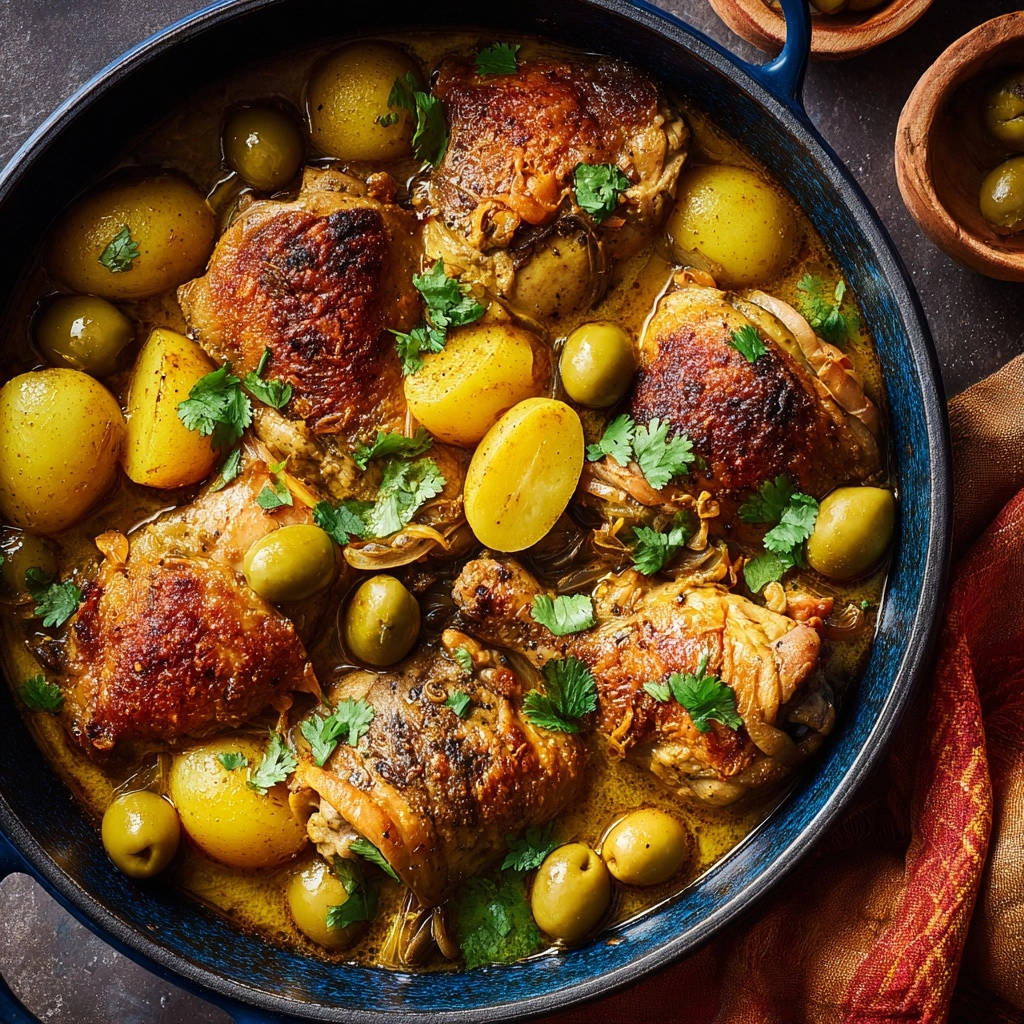
minutesNever suffer rubbery skin again! This recipe utilizes a simple technique involving a heavy sear and strategic placement to guarantee the chicken stays crispy while the rest of the braise simmers into a tender, flavorful main course.
Ingredients
4 skin-on, bone-in chicken thighs and drumsticks, excess skin trimmed
1 teaspoon coarse sea salt, divided
1/2 teaspoon black pepper
2 tablespoons olive oil
1 large yellow onion, thinly sliced
3 cloves garlic, minced
1 tablespoon ground turmeric
1 teaspoon smoked paprika
1/2 teaspoon ground cumin
1 cup chicken broth (low sodium)
1 pound baby yellow potatoes, halved
1/2 cup pitted large green olives
2 tablespoons fresh cilantro or parsley, chopped, for garnish
Directions
- Prepare the Chicken for Searing: Pat the chicken pieces extremely dry using paper towels. This step is critical for developing texture. Season heavily with 3/4 teaspoon of the salt and all of the pepper.
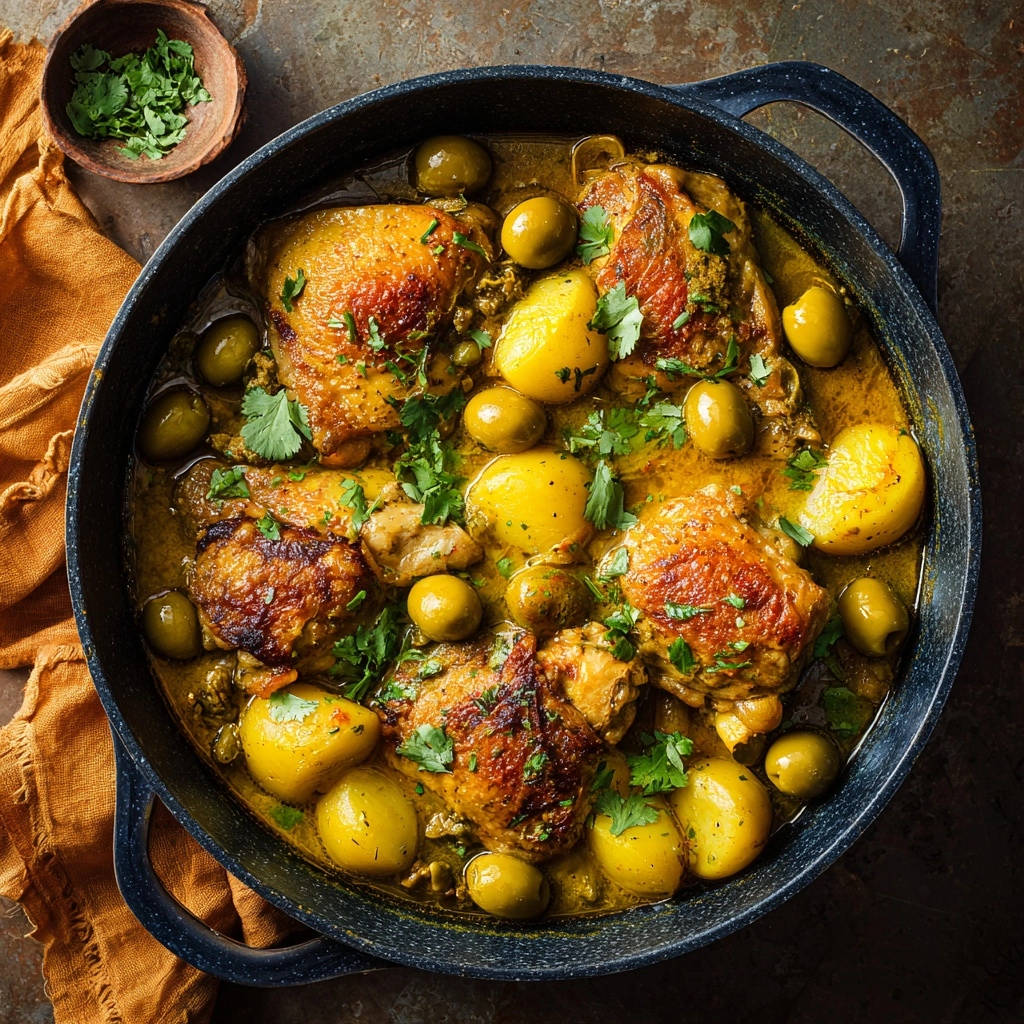
- The Crispy Skin Lock-In: Heat the olive oil in a large Dutch oven or deep pan (like the one shown) over medium-high heat until shimmering. Place the chicken skin-side down and sear undisturbed for 6 to 8 minutes until the skin is deeply golden brown and crisp. This initial heavy sear locks in the texture. Remove the chicken and set aside, reserving the rendered fat in the pot.
- Build the Flavor Base: Reduce the heat to medium. Add the sliced onion to the pot and cook for 5 minutes until softened. Add the minced garlic, turmeric, paprika, and cumin, stirring continuously for 1 minute until fragrant.
- Set the Foundation: Add the remaining 1/4 teaspoon salt, chicken broth, and the halved potatoes to the pot. Stir well, scraping up any browned bits from the bottom. Bring the liquid to a gentle simmer.
- Strategic Braising (The Secret Technique): Once simmering, arrange the seared chicken pieces back into the pot, skin-side up. Crucially, ensure the liquid only comes about halfway up the sides of the chicken meat, leaving the entire skin surface above the liquid and resting mostly on the bed of potatoes and onions. This placement ensures the chicken braises in the steam and broth while the skin remains exposed.
- Simmer and Finish: Cover the pot very loosely, allowing some steam to escape (or use a lid slightly ajar). Reduce the heat to low and simmer for 40 to 45 minutes, or until the chicken is cooked through and tender (internal temperature of 175 degrees F for thighs/legs).
- Final Touch: Stir the green olives into the sauce during the last 5 minutes of cooking. If the sauce looks too thin, remove the chicken and potatoes and reduce the sauce rapidly for 2 minutes before returning them to the pot.
- Serve immediately, garnished generously with fresh cilantro or parsley.
Notes
- Ensure the liquid only comes halfway up the chicken meat during braising to keep the skin crispy.


