
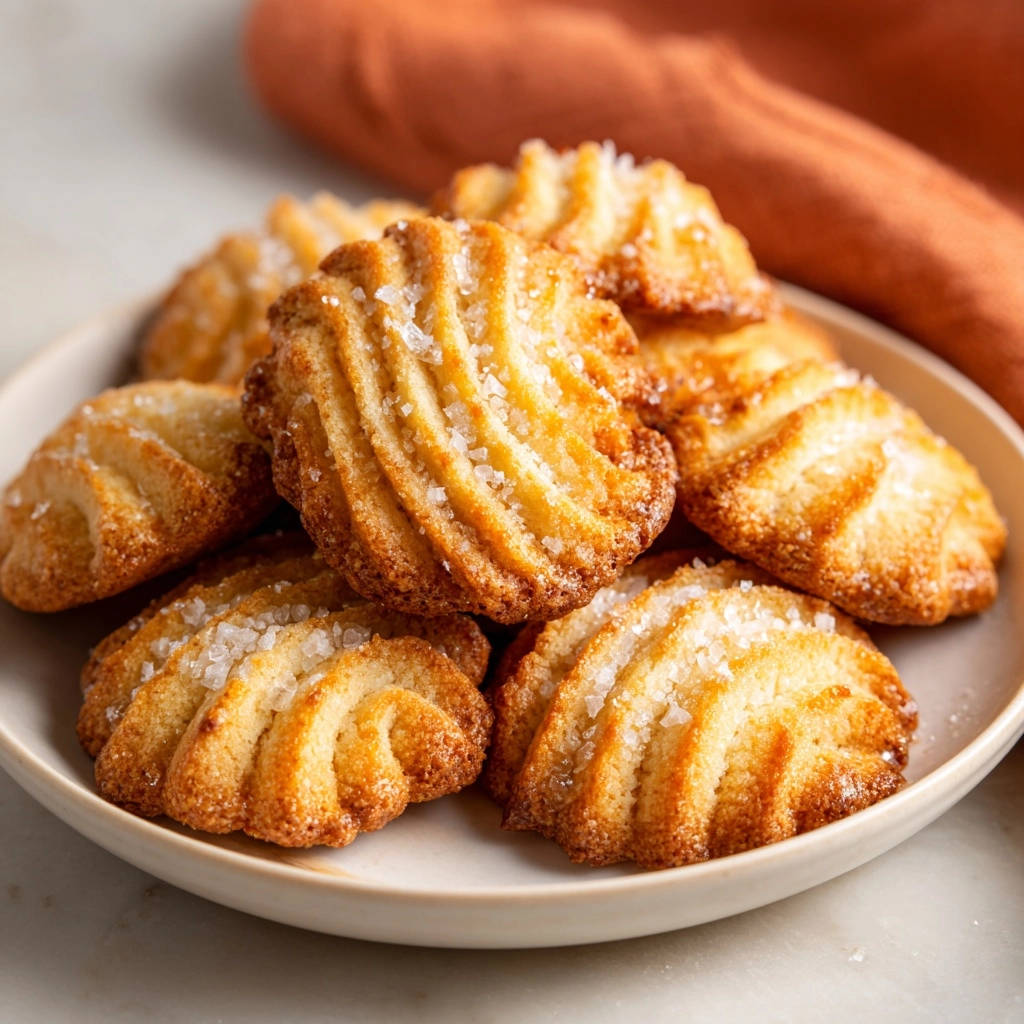
There’s nothing quite like biting into a perfect butter cookie – crisp on the edges, yet impossibly tender in the center. I’ve often encountered what looked like beautiful ridged butter cookies, only to find them disappointingly dry and crumbly. My secret for consistently achieving that melt-in-your-mouth perfection in every batch of these classic ridged butter cookies lies in a simple, yet critical, technique: mindful mixing.
This recipe transforms a basic butter cookie into an unforgettable treat, ensuring a tender texture and rich flavor every time. Forget dry, tough cookies; these are designed to impress with their delicate structure and elegant ridged appearance, perfect for gifting or a special indulgence.
Why This Recipe is Your Go-To for Tender Ridged Butter Cookies
This isn’t just another butter cookie recipe; it’s a meticulously crafted guide to foolproof tenderness. Many recipes for ridged butter cookies fall short, resulting in a crumbly texture that lacks the delightful mouthfeel we all crave.
Our method focuses on precision, particularly during the mixing stages, to prevent the overdevelopment of gluten. This ensures your cookies are always light, delicate, and never tough or dry. You’ll achieve those coveted crisp edges and a soft, yielding interior that makes these cookies truly special.
Essential Tools for Beautifully Ridged Butter Cookies
Having the right equipment makes all the difference in achieving those elegant ridged shapes and ensuring a smooth baking process.
Piping Power: Bags and Tips for Elegant Shapes
A sturdy piping bag and a large star or fluted tip are absolutely essential for creating the signature ridged design of these butter cookies. Thin bags can burst under pressure, so invest in a good quality reusable or heavy-duty disposable option. The star tip is what gives you those beautiful grooves and decorative edges.
Mixing Magic: Stand Mixer vs. Handheld Options
An electric mixer, either a stand mixer with a paddle attachment or a powerful handheld mixer, is crucial for properly creaming the butter and sugar. This step incorporates vital air into the dough, contributing significantly to the cookie’s final tender texture.
Baking Basics: Sheets and Parchment for Perfect Release
Good quality baking sheets that conduct heat evenly prevent hot spots and ensure consistent baking. Lining them with parchment paper is non-negotiable; it guarantees easy release of your delicate ridged butter cookies and makes cleanup a breeze.
The Ingredients: Crafting Your Perfect Ridged Butter Cookies
Each ingredient plays a specific role in creating the ultimate tender and flavorful ridged butter cookies.
Butter’s Role: Unsalted and Softened for Optimal Texture
Unsalted butter is paramount as it gives you complete control over the salt content in your cookies. Ensure it’s perfectly softened to room temperature – not melted – for optimal creaming. This allows it to incorporate maximum air, leading to a light and tender crumb.
Sweetness & Structure: Granulated Sugar and All-Purpose Flour Essentials
Granulated sugar provides the perfect balance of sweetness and contributes to the cookie’s crisp edges and delicate browning. All-purpose flour forms the structural base; measuring it correctly is crucial to prevent a dense or tough cookie.
Flavor Foundations: Egg and Vanilla Extract’s Contribution
A large egg acts as a binder, adding richness and helping to emulsify the dough for a smoother texture. High-quality vanilla extract is the soul of these ridged butter cookies, imparting a warm, aromatic flavor that truly shines.
The Finishing Touch: Coarse Sugar for Sparkle and Crunch
Coarse sugar or turbinado sugar isn’t just for decoration; it provides a delightful textural contrast with its slight crunch. This adds another layer of sensory pleasure to each bite of your ridged butter cookies.
Step-by-Step: Piping Ridged Butter Cookies to Perfection
Follow these steps carefully to ensure tender, beautifully shaped ridged butter cookies every time.
- Get Ready to Bake: Oven & Prep
Preheat your oven to 375 degrees F (190 degrees C) to ensure a stable baking temperature from the moment your cookies go in. Line baking sheets with parchment paper; this prevents sticking and ensures your delicate cookies lift off easily.
- The Tender Secret: Creaming Butter & Sugar
In a large bowl, use an electric mixer to cream together the softened butter and granulated sugar until the mixture is light and fluffy, usually about 2-3 minutes. This critical step incorporates air, which is fundamental for achieving a tender, melt-in-your-mouth texture in your ridged butter cookies.
- Enriching the Mix: Egg & Vanilla
Beat in the large egg and vanilla extract until they are just combined into the butter mixture. Take a moment to scrape down the sides of the bowl with a spatula, ensuring all ingredients are thoroughly incorporated and there are no unmixed pockets.
- Dry Ingredients Harmony
In a separate small bowl, whisk together the all-purpose flour and salt. This pre-mixing step ensures the leavening agent and salt are evenly distributed throughout the flour, leading to consistent flavor and texture in every cookie.
- The Golden Rule: Mixing Dry into Wet
Gradually add the dry ingredients to the wet mixture, mixing on low speed only until just combined. This is THE most crucial step for tender ridged butter cookies; stop mixing as soon as you see no dry streaks of flour. Overmixing develops gluten, which will make your cookies tough and dry, so be very gentle.
- Load the Piping Bag
Spoon the soft, pliable dough into a sturdy piping bag fitted with a large star tip or fluted tip. This specific tip is designed to create those beautiful, distinct ridges that give these butter cookies their characteristic elegance.
- Pipe Your Creations
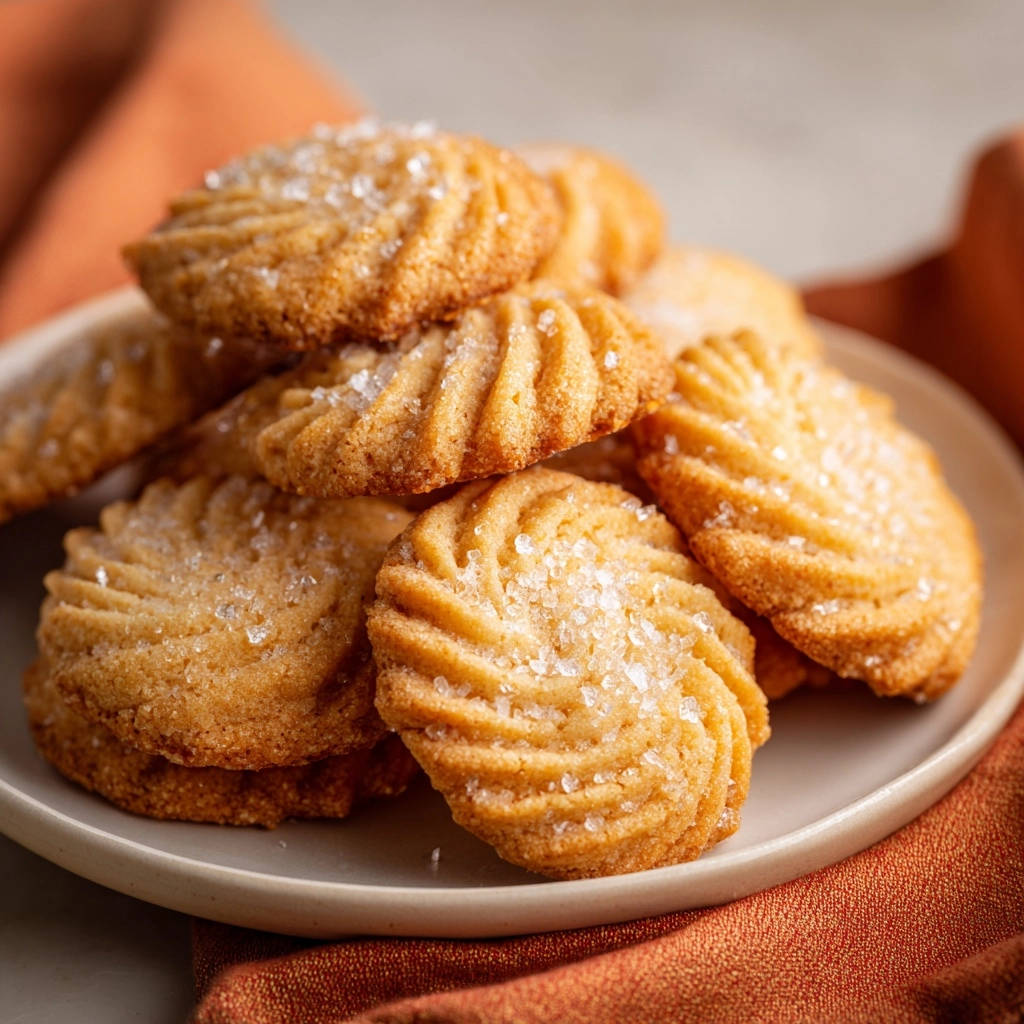
Pipe your desired shapes, such as classic S-curves, rosettes, or even simple round swirls, onto the prepared baking sheets. Remember to leave about 1 inch of space between each cookie to allow for a slight spread during baking.
- Sugar Sparkle: The Topping
Generously sprinkle the tops of the piped cookies with coarse sugar or turbinado sugar. This adds a beautiful sparkle and a delightful textural crunch, enhancing the overall experience of your ridged butter cookies.
- Baking Brilliance: Timing is Key
Bake for 10-12 minutes, or until the edges are just lightly golden brown. Keep a close eye on them; this precise baking time is essential for preventing dryness. Pulling them out just as they achieve that hint of golden ensures a tender interior.
- Cooling with Care
Once baked, remove the ridged butter cookies from the oven and allow them to cool on the baking sheets for a few minutes. This initial cooling helps them firm up slightly before you transfer them to a wire rack to cool completely, preventing breakage.
Chef’s Secrets for Unforgettable Ridged Butter Cookies
Elevate your baking with these expert tips, ensuring your ridged butter cookies are truly exceptional.
Mastering the “No Overmix” Rule for Perfect Tenderness
The cardinal rule for any tender cookie is to avoid overmixing once the flour is added. Flour, when agitated, develops gluten, which creates a chewy or tough texture. Mix only until the dry ingredients are just incorporated, leaving some small lumps of butter visible in the dough is perfectly fine.
The Art of Creaming Butter and Sugar to Incorporate Air
Take your time creaming the butter and sugar at the beginning. This process isn’t just about combining ingredients; it’s about incorporating air into the butter, making it light and fluffy. This trapped air is what expands in the oven, giving your ridged butter cookies their delicate, tender crumb.
Chilling Dough: Is it Necessary for Ridged Butter Cookies?
For this specific recipe, chilling the dough isn’t strictly necessary if your kitchen is cool and your butter isn’t overly warm. The dough is designed to be pipeable. However, if you find your kitchen warm or the dough too soft to pipe cleanly, a brief 15-20 minute chill can firm it up, making it easier to handle and helping the ridges hold shape better.
Oven Watch: Preventing Dryness and Achieving Golden Edges
Oven temperatures can vary significantly, so relying solely on the clock isn’t enough. Watch your cookies closely, removing them when the edges are just barely golden. The centers might still look a little pale, but they will firm up as they cool, ensuring maximum tenderness and preventing them from becoming dry.
Alternative Piping Designs and Creative Decorating Ideas
While S-curves and rosettes are classic, don’t limit your creativity! Try piping simple rounds, zig-zags, or even small loops. Once baked and cooled, you can drizzle them with melted chocolate, dust with powdered sugar, or add a small dollop of jam for an extra flourish. If you enjoy creating beautiful baked goods, you might also love making a batch of our easy cinnamon swirl coffee cake for another delightful treat.
Troubleshooting Common Ridged Butter Cookie Challenges
Even expert bakers encounter hiccups. Here’s how to tackle common issues with your ridged butter cookies.
Why Are My Ridged Butter Cookies Spreading Too Much?
Excessive spreading often occurs if your butter was too soft or melted, if the dough was too warm, or if your oven temperature was too low. Ensure your butter is softened, not warm, and consider chilling the piped cookies for 10-15 minutes before baking to help them hold their shape.
My Cookies Are Too Dry or Crumbly – What Went Wrong?
This is almost always due to one of two reasons: overmixing the flour, which develops too much gluten, or overbaking. Mix the flour only until just combined, and remove cookies from the oven as soon as their edges turn lightly golden.
The Ridges Aren’t Holding Their Shape After Baking.
If your delicate ridges disappear, the dough might have been too warm and soft, or the oven temperature wasn’t consistent. A slightly cooler dough (a quick chill) and ensuring your oven is accurately preheated can resolve this. Also, ensure your star tip is clean and clear.
What if My Dough is Too Stiff to Pipe Easily?
A stiff dough usually means your butter wasn’t soft enough to begin with. Allow your butter to come to proper room temperature (it should yield easily to a finger press, but not be greasy). If already mixed, you can try letting the dough sit at room temperature for 10-15 minutes to soften slightly before piping.
Serving, Storage, and Make-Ahead Tips for Your Ridged Butter Cookies
Maximize the enjoyment of your delicious ridged butter cookies with these practical tips.
Perfect Pairings: What to Serve with Your Delightful Cookies
These elegant ridged butter cookies are wonderful on their own, but they truly shine when paired with a warm beverage. Serve them with a rich cup of coffee, a delicate black or herbal tea, or even a glass of cold milk. For an extra special touch, present them alongside a scoop of vanilla ice cream or a fresh fruit platter. You could also accompany them with a drizzle of homemade orange caramel candy for a gourmet dessert experience.
Storing for Freshness: Keeping Your Ridged Butter Cookies at Their Best
To maintain their crispness and tender texture, store your cooled ridged butter cookies in an airtight container at room temperature. They will stay fresh and delicious for up to 5-7 days. Avoid storing them next to other strongly flavored items, as butter cookies can absorb ambient aromas.
Can You Prepare the Ridged Butter Cookie Dough Ahead of Time?
Absolutely! This dough is excellent for making ahead. Once prepared, wrap it tightly in plastic wrap and refrigerate for up to 2-3 days. When ready to bake, let the dough sit at room temperature for about 30 minutes to an hour until it softens enough to be easily piped.
Freezing Baked Ridged Butter Cookies for Later Enjoyment
Baked ridged butter cookies freeze beautifully. Once completely cooled, arrange them in a single layer on a baking sheet and freeze until solid. Then, transfer them to an airtight freezer-safe container or bag, separating layers with parchment paper. They can be frozen for up to 2-3 months. Thaw at room temperature for about 30 minutes before serving. For those who appreciate making desserts ahead, consider our classic blueberry scones, which also store beautifully.
Frequently Asked Questions About Ridged Butter Cookies
Get quick answers to common questions about making these tender treats.
Can I Make These Ridged Butter Cookies Gluten-Free?
While this recipe is written for all-purpose flour, you can experiment with a 1:1 gluten-free baking flour blend. Be aware that the texture might be slightly different, potentially a bit more crumbly, and you might need to adjust the mixing time to prevent dryness, as gluten-free flours can absorb liquid differently.
What’s the Best Type of Butter to Use for This Recipe?
Always opt for high-quality unsalted butter for ridged butter cookies. European-style butters, with their higher fat content, can yield an even more tender and flavorful cookie. Ensure it’s unsalted so you control the salt balance perfectly.
Why Do I Need a Piping Bag to Make Ridged Butter Cookies?
A piping bag with a star or fluted tip is essential to achieve the characteristic ridged design. While you could technically slice and bake a log of dough for a simple butter cookie, you wouldn’t get those elegant, crisp ridges that define this particular treat without piping.
Can I Add Other Flavorings Besides Vanilla to My Dough?
Yes, absolutely! Vanilla is classic, but you can easily customize the flavor. Try adding a teaspoon of almond extract for a marzipan-like note, the zest of half a lemon or orange for a bright citrusy flavor, or even a pinch of cardamom for a sophisticated twist. Just ensure any liquid additions don’t significantly alter the dough’s consistency.
Ready to Impress? Share Your Ridged Butter Cookies Masterpiece!
Now that you’re armed with the secrets to perfectly tender ridged butter cookies, it’s time to preheat your oven and create your own batch of these delightful treats. Experience the joy of biting into a cookie that’s truly crisp, buttery, and melts in your mouth, never dry or crumbly.
Don’t forget to share your beautifully piped creations with friends, family, or even just indulge yourself. You’ll quickly discover why this will become your trusted, go-to recipe for the most exquisite ridged butter cookies.
Butter Cookies
Course: DessertCuisine: AmericanDifficulty: easy4
4 dozen cookies20
minutes10
minutes240
kcal30
minutesDiscover the secret to perfectly tender and flavorful butter cookies that are never dry or crumbly. This recipe uses one simple trick to ensure beautiful, delicate cookies with crisp edges every time. Impress your friends and family with these irresistible treats.
Ingredients
1 cup (2 sticks) unsalted butter, softened
3/4 cup granulated sugar
1 large egg
1 teaspoon vanilla extract
2 1/4 cups all-purpose flour
1/4 teaspoon salt
2 tablespoons coarse sugar or turbinado sugar for topping
Directions
- Preheat your oven to 375 degrees F (190 degrees C). Line baking sheets with parchment paper.
- In a large bowl, using an electric mixer, cream together the softened butter and granulated sugar until light and fluffy. This step is crucial for incorporating air and achieving a tender texture later.
- Beat in the egg and vanilla extract until well combined. Scrape down the sides of the bowl as needed.
- In a separate small bowl, whisk together the all-purpose flour and salt.
- Gradually add the dry ingredients to the wet ingredients, mixing on low speed just until combined. This is the key to avoiding dry, tough cookies; do not overmix the dough once the flour is added. Overmixing develops gluten, which makes cookies hard.
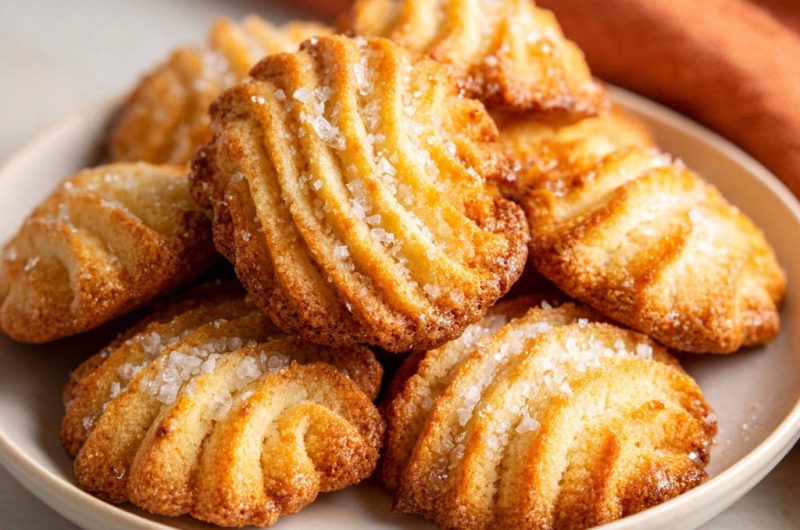
- Spoon the dough into a sturdy piping bag fitted with a large star tip (or a fluted tip if you want the ridged shape seen in the image).
- Pipe desired shapes (like S-curves or rosettes) onto the prepared baking sheets, leaving about 1 inch between cookies.
- Sprinkle the tops of the piped cookies generously with coarse sugar or turbinado sugar.
- Bake for 10-12 minutes, or until the edges are lightly golden brown. Keep a close eye on them; baking just until golden prevents them from becoming too dry.
- Remove cookies from the oven and let them cool on the baking sheets for a few minutes before transferring them to a wire rack to cool completely. Enjoy your perfectly tender butter cookies!
Notes
- Do not overmix dough once flour is added to prevent tough cookies. Watch closely while baking for lightly golden edges.


