
Making truly exceptional Salted Caramel Chocolate Bars often feels like a delicate balancing act, with the caramel layer threatening to be either too rigid or annoyingly runny. But after years of perfecting, I’ve cracked the code to that elusive “just right” consistency.
This recipe delivers flawlessly balanced and beautifully sliceable Salted Caramel Chocolate Bars every single time, making it my absolute go-to for an impressive yet approachable homemade dessert.
For those who enjoy wonderfully balanced chocolate bars, explore these chocolate caramel cheesecake bars for a different take.
Why These Salted Caramel Chocolate Bars Will Be Your New Go-To
The Secret to Perfectly Sliceable Bars
The frustration of a messy slice is real, but this recipe champions clean cuts. Our multi-stage chilling process for both the caramel and chocolate, combined with a simple cutting technique, guarantees elegant, picture-perfect squares.
For a similar clean-slice experience, check out butterscotch blondie bars and their anti-soggy method.
You’ll achieve professional-looking results without any added fuss, ensuring every bar holds its stunning layers.
That “Just Right” Caramel Layer: Never Too Hard, Never Too Runny
Forget the guesswork and the chewy mishaps. The precise temperature guidance for our gooey caramel ensures it sets into a wonderfully soft yet stable layer.
It’s a melt-in-your-mouth experience that holds its shape beautifully, making these irresistible chocolatey treats a true delight.

Effortless Elegance for Any Occasion
Despite their sophisticated layers and gourmet appeal, these Salted Caramel Chocolate Bars are surprisingly straightforward to prepare. They look incredibly impressive, yet the steps are manageable for any home baker.
They’re the ideal sweet and salty bars to bring to a gathering, wrap as a gift, or simply enjoy as a luxurious treat at home.
Complementary Bites
Round out your dessert experience with these sweet and crunchy additions.
- For an extra layer of nutty sweetness, try these crunchy salted caramel glazed walnuts, mirroring the caramel notes in your bars.
- If you’re craving more chocolate and fruit, these assorted fruit and chocolate scones offer a delightful baked treat.
Mastering Your Salted Caramel Chocolate Bars: Essential Kitchen Tools
The Unsung Hero: Your Candy Thermometer
For caramel perfection, a candy thermometer is non-negotiable. It removes all the guesswork from cooking sugar to its precise consistency.
Achieving the exact temperature of 235°F (113°C) is the key to a soft, stable caramel that won’t be too hard or too runny, ensuring your homemade dessert truly shines.
Prepping for Success: The Right Pan & Parchment
An 8×8 inch baking pan is ideal for the thickness of these bars. Lining it with parchment paper, leaving a generous overhang on two sides, is absolutely crucial.
This simple trick allows you to easily lift the entire slab of bars from the pan once chilled, preventing sticking and ensuring effortless removal.
Sharp Slices Start with a Sharp Knife
To achieve those coveted clean, pristine cuts, a large, sharp knife is your best friend. For an extra edge, gently warm the blade under hot water and wipe it dry between each cut.
This technique prevents the chocolate from cracking and the caramel from dragging, yielding perfectly defined squares of these decadent bars.
The Building Blocks of Bliss: Ingredients for Your Salted Caramel Chocolate Bars
For the Irresistible Shortbread Crust
Softened unsalted butter provides the rich foundation for a tender, crumbly shortbread. Powdered sugar contributes to its delicate texture and subtle sweetness.
All-purpose flour gives the crust its structure, while a touch of salt perfectly balances the richness, creating a buttery base that’s both sturdy and melt-in-your-mouth.
Crafting the Perfect Caramel Core
Unsalted butter, granulated sugar, and light brown sugar combine to form the deep, rich caramel flavor. The brown sugar adds a lovely molasses note and chewiness.
Heavy cream is vital for achieving the desired creamy, smooth consistency, while vanilla extract provides a warm, aromatic depth that beautifully complements the other flavors in this chocolatey treat.
The Rich Chocolate Topping & Finishing Touch
Semi-sweet chocolate chips offer a balanced sweetness for the top layer, ensuring it’s not overly rich when paired with the caramel. A touch of unsalted butter helps the chocolate melt smoothly and gives it a beautiful sheen when set.
Finally, flaky sea salt is more than just a garnish; its delicate crunch and briny burst are essential for cutting through the sweetness and elevating the entire experience of these sweet and salty bars.
Step-by-Step Perfection: Crafting Your Salted Caramel Chocolate Bars
- Prepare Your Pan and Preheat Oven:
Ensure your 8×8 inch pan is properly lined with parchment paper, leaving a generous overhang to facilitate easy removal of the finished bars. Preheat your oven to 350F (175C).
This simple step is critical for a smooth baking and cooling process, preventing sticking and making cutting effortless for your homemade dessert.
- Master the Shortbread Crust:
In a large bowl, cream softened butter and powdered sugar until light and fluffy. Gradually incorporate the flour and salt until a crumbly dough forms, then press it firmly into the prepared pan.
Bake for 20-22 minutes until edges are lightly golden. Cooling it slightly on a wire rack prevents a soggy bottom when the caramel is added, ensuring a crisp foundation for your Salted Caramel Chocolate Bars.
- Achieve the “Just Right” Caramel Layer:
In a heavy-bottomed saucepan, combine butter, granulated sugar, light brown sugar, and heavy cream. Cook over medium heat, stirring constantly until dissolved, then bring to a gentle boil.
Crucially, reduce heat and cook, stirring frequently, until the mixture reaches 235F (113C) on a candy thermometer. This precise temperature guarantees a soft, stable, and perfectly sliceable caramel layer that will set beautifully.
Immediately remove from heat and stir in vanilla extract for depth of flavor, then prepare to pour this gooey caramel goodness.
- Pour and Chill the Caramel:
Carefully pour the hot caramel over the slightly cooled shortbread crust, spreading it evenly. Allow it to sit at room temperature for 15-20 minutes before chilling in the refrigerator for at least 1 hour until firm.
This chilling step is absolutely essential for the caramel to set properly, ensuring clean layers and preventing a messy chocolate topping application, which is key for pristine Salted Caramel Chocolate Bars.
- Prepare the Silky Chocolate Topping:
In a microwave-safe bowl, melt chocolate chips and 1 tablespoon unsalted butter in 30-second intervals, stirring until smooth. Alternatively, use a double boiler for a gentle melt.
Properly melted chocolate will spread beautifully and set without cracking, providing a glossy finish that complements the sweet and salty bars underneath.
- Top with Chocolate and Flaky Sea Salt:
Pour the melted chocolate over the chilled caramel layer, spreading it evenly with an offset spatula. Immediately and generously sprinkle with flaky sea salt.
The flaky sea salt is not just for garnish; it enhances the caramel’s sweetness and balances the richness of the chocolate, creating that iconic “salted caramel” experience that defines these irresistible treats.
- Final Chill and Slice:
Return the pan to the refrigerator for at least 1-2 hours until the chocolate is fully set. Once completely firm, use the parchment paper overhang to lift the entire slab from the pan.
For the cleanest slices, use a large, sharp knife warmed slightly with hot water and wiped dry between cuts. Slice into desired squares and enjoy your homemade Salted Caramel Chocolate Bars masterpiece!
Chef’s Secrets: Elevating Your Salted Caramel Chocolate Bars
Caramel Consistency: The Golden Temperature
The 235°F (113°C) mark on your candy thermometer is paramount for this recipe. Cooking the caramel beyond this temperature results in a tough, unpleasantly hard texture that’s difficult to slice and chew.
Conversely, undercooking means your gooey caramel will be too soft and runny, making for a messy bar that won’t hold its layers. Trust the thermometer for that perfect, yielding texture.
The Power of Chilling: Don’t Rush Perfection
The two distinct chilling periods are non-negotiable for success. The initial chill for the caramel allows it to firm up just enough to support the chocolate layer without melting or mixing.
The final chill ensures both layers are completely set and firm, which is absolutely critical for clean, sharp slices of your chocolatey treat. Patience here truly pays off.
Achieving Pristine Slices Every Time
Beyond warming your knife, consider using a ruler as a guide to ensure perfectly even squares. Press down firmly and swiftly, rather than sawing, to avoid tearing the layers.
Wiping your knife clean after each cut prevents any sticky residue from transferring to the next bar, keeping every slice picture-perfect.
Flaky Sea Salt: A Must-Have Finishing Touch
Do not skimp on the quality or quantity of flaky sea salt. Its coarse texture and concentrated briny flavor are essential for balancing the sweetness of the caramel and chocolate.
It adds that crucial textural contrast and flavor pop that makes these Salted Caramel Chocolate Bars truly exceptional, transforming a good dessert into a gourmet experience.
Quality Ingredients Matter
While this recipe is robust, using high-quality unsalted butter, premium chocolate chips, and a good vanilla extract will noticeably elevate the final taste of your sweet and salty bars.
Better ingredients contribute to richer flavors and smoother textures, making every bite of your homemade dessert a delight.
Common Questions & Quick Fixes for Your Caramel Bars
Why is My Caramel Too Hard?
If your caramel turns out too hard, it’s most likely due to overcooking. The temperature likely exceeded 235°F (113°C).
Next time, remove the caramel from the heat immediately when it hits the target temperature, ensuring your candy thermometer is accurately calibrated.
Why is My Caramel Too Runny?
A runny caramel means it was undercooked, not reaching the crucial 235°F (113°C) setting point. It needs more time on the heat for the sugar to properly invert and thicken.
Ensure you are consistently stirring and monitoring the temperature with a reliable candy thermometer until it hits the mark.
My Chocolate Topping Cracked!
Cracked chocolate often results from extreme temperature changes. If the caramel layer was too cold when the warm chocolate was poured on, or if the bars were chilled too rapidly, the chocolate can seize and crack.
Ensure your caramel layer has sat for 15-20 minutes at room temperature to temper slightly before topping with chocolate. Also, allow the bars to cool gradually in the refrigerator rather than plunging into a very cold freezer.
Bars are Hard to Cut Neatly
This is usually a chilling issue. The bars weren’t chilled long enough for all layers to firm up completely. Both the caramel and chocolate need ample time to set.
Always ensure the bars are thoroughly chilled, ideally for at least 2-3 hours after the chocolate is applied, and use the warmed, sharp knife technique for the cleanest slices.
Enjoying Your Creation: Storage & Make-Ahead Tips
Optimal Storage for Freshness
To maintain their optimal texture and flavor, store your Salted Caramel Chocolate Bars in an airtight container. Keep them in the refrigerator for up to one week.
You can also layer them between sheets of parchment paper to prevent sticking. For extended freshness, they can be frozen for up to one month; thaw in the refrigerator before serving.
Planning Ahead: Can You Make Them in Advance?
These Salted Caramel Chocolate Bars are an excellent make-ahead dessert! You can prepare them up to 3-4 days in advance and store them in the refrigerator.
Their flavor and texture often improve slightly with a day or two for the flavors to meld, making them perfect for parties or events.
Creative Ways to Serve Your Salted Caramel Chocolate Bars
Classic Presentation
For a simple yet elegant presentation, arrange your perfectly sliced Salted Caramel Chocolate Bars on a clean serving platter. The neat layers and flaky sea salt are visually stunning on their own.
They make an excellent addition to a dessert buffet or a delightful afternoon coffee break.
Elevate with Ice Cream or Coffee
For an extra decadent experience, serve a square of these rich bars alongside a scoop of vanilla bean ice cream. The cold, creamy ice cream is a perfect contrast to the chewy caramel and chocolate.
They also pair wonderfully with a warm cup of coffee or a gourmet latte, creating a truly luxurious sweet and salty indulgence.
Your Top Questions Answered: Salted Caramel Chocolate Bars Edition
Can I Use Different Kinds of Chocolate?
Absolutely! While semi-sweet chocolate chips are traditional, you can experiment with dark chocolate for a more intense flavor profile or milk chocolate for a sweeter, creamier topping.
Just ensure you use good quality chocolate that melts smoothly for the best results on your homemade bars.
Is a Candy Thermometer Really Necessary?
For precise and consistent results, especially with caramel, a candy thermometer is highly recommended. It takes the guesswork out of hitting that critical 235°F (113°C) temperature.
Without it, achieving the “just right” caramel texture is significantly more challenging, often leading to a caramel that’s too hard or too runny.
Can These Be Made Gluten-Free?
Yes, you can adapt this recipe to be gluten-free. Simply substitute the all-purpose flour in the shortbread crust with a 1:1 gluten-free baking flour blend.
Ensure your blend contains xanthan gum or add 1/4 teaspoon for proper texture in your gluten-free Salted Caramel Chocolate Bars.
How Long Do These Bars Last?
When stored correctly in an airtight container in the refrigerator, these Salted Caramel Chocolate Bars will maintain their peak freshness and deliciousness for up to one week.
For longer storage, they can be frozen, individually wrapped, for up to a month.
Ready to Impress? Share Your Salted Caramel Chocolate Bars Masterpiece!
Now that you’re armed with all the insider tips and a meticulously detailed recipe, it’s time to bring these glorious Salted Caramel Chocolate Bars to life in your own kitchen.
There’s immense satisfaction in creating such a stunning, flavorful sweet treat that promises perfect slices every time. Go ahead, make these irresistible bars and delight everyone who gets a taste!
Salted Caramel Chocolate Bars
Course: DessertCuisine: AmericanDifficulty: medium16
servings25
minutes35
minutes350
kcal180
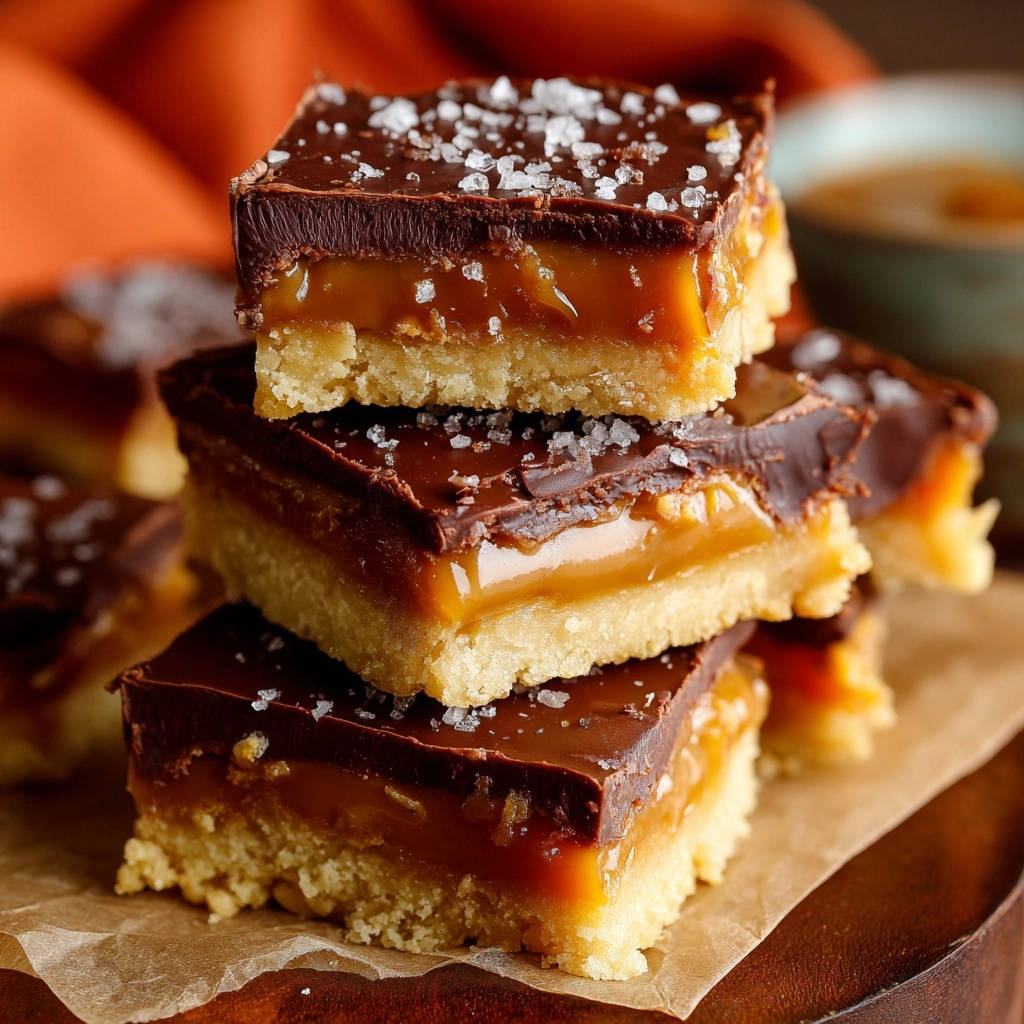
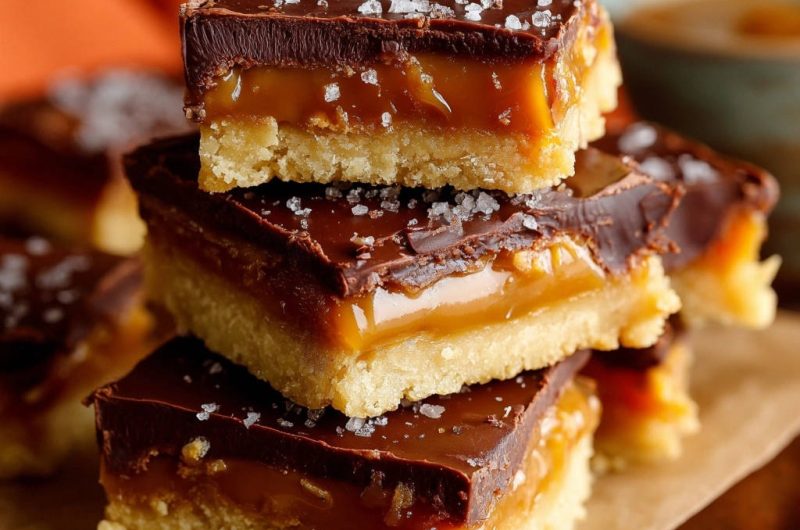
minutesThese Salted Caramel Chocolate Bars feature a buttery shortbread crust, a perfectly gooey caramel layer, and a rich chocolate topping sprinkled with flaky sea salt. Master the art of soft, stable caramel for bars that slice beautifully every time. An irresistible treat for any occasion.
Ingredients
For the Shortbread Crust:
1 cup unsalted butter, softened
1/2 cup powdered sugar
1 3/4 cups all-purpose flour
1/4 teaspoon salt
For the Caramel Layer:
1 cup unsalted butter
1/2 cup granulated sugar
1/2 cup packed light brown sugar
1/2 cup heavy cream
1 teaspoon vanilla extract
For the Chocolate Topping:
1 1/2 cups semi-sweet chocolate chips
1 tablespoon unsalted butter
Flaky sea salt, for sprinkling
Directions
- Preheat oven to 350F (175C). Line an 8×8 inch baking pan with parchment paper, leaving an overhang on two sides for easy removal.
- For the Shortbread Crust: In a large bowl, cream together the softened butter and powdered sugar until light and fluffy. Gradually add the flour and salt, mixing until just combined and a crumbly dough forms. Press the dough evenly into the bottom of the prepared pan. Bake for 20-22 minutes, or until the edges are lightly golden. Let cool slightly on a wire rack while you prepare the caramel.
- For the Caramel Layer: In a heavy-bottomed saucepan, combine the butter, granulated sugar, light brown sugar, and heavy cream. Cook over medium heat, stirring constantly, until the butter melts and the sugars dissolve. Bring the mixture to a gentle boil, then reduce heat to medium-low and cook, stirring frequently, for 8-12 minutes. This is the crucial step for perfect caramel: continue cooking and stirring until the mixture reaches 235F (113C) on a candy thermometer. This ensures a soft, yet stable caramel that is never too hard or sticky. Immediately remove from heat and stir in the vanilla extract.
- Pour the hot caramel evenly over the cooled shortbread crust. Let the bars sit at room temperature for about 15-20 minutes to begin setting, then transfer to the refrigerator and chill for at least 1 hour, or until the caramel is firm to the touch. This chilling is essential for neat slicing later.
- For the Chocolate Topping: In a microwave-safe bowl, combine the chocolate chips and 1 tablespoon unsalted butter. Microwave in 30-second intervals, stirring well after each, until the chocolate is completely melted and smooth. Alternatively, melt over a double boiler.
- Pour the melted chocolate mixture over the chilled caramel layer, spreading it evenly with an offset spatula. Immediately sprinkle generously with flaky sea salt.
- Return the pan to the refrigerator and chill for at least 1-2 hours, or until the chocolate is fully set.
- Once completely chilled and set, use the parchment paper overhang to lift the entire slab from the pan. Place on a cutting board and use a large, sharp knife (warmed slightly with hot water and wiped dry between cuts for the cleanest slices) to cut into squares. Enjoy!
Notes
- Ensure adequate chilling and use a warmed, sharp knife for the cleanest slices.


