
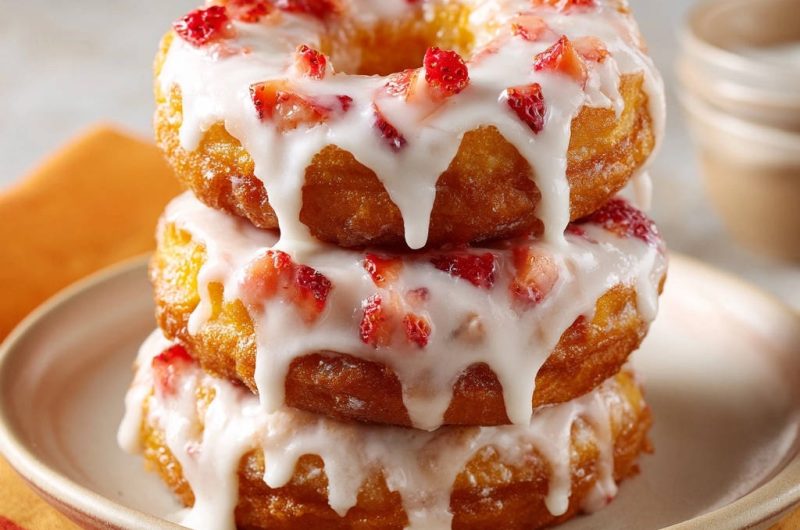
For years, I struggled to achieve truly perfect homemade donuts, often ending up with a delicious flavor but a frustratingly greasy, heavy texture. But after countless experiments, I finally cracked the code to creating light, airy, and gloriously crisp Strawberry Glazed Donuts that are never oily, giving you bakery-quality results right in your own kitchen.
Get ready to bake up a storm! This recipe requires a Prep Time of 2 hours 30 minutes (including rising time), a Cook Time of 15 minutes, for a Total Time of 2 hours 45 minutes, yielding approximately 12 delightful donuts.
The Secret to Fluffy, Non-Greasy Strawberry Glazed Donuts, Revealed!
Many home bakers find deep-frying intimidating, fearing a greasy outcome. The fundamental secret to these perfectly non-greasy Strawberry Glazed Donuts isn’t a complex ingredient, but rather a simple, precise technique: consistent oil temperature.
By diligently monitoring and maintaining the oil at precisely 350°F (175°C), we ensure the donuts cook quickly and evenly, forming a crisp exterior without absorbing excess oil. This specific detail transforms a potentially heavy treat into a wonderfully light and airy indulgence, making all the difference.
Beyond Basic: What Makes Our Donuts Truly Special?
This recipe isn’t just about avoiding greasiness; it’s about elevating the entire donut experience.
You’ll achieve professional results without the fuss, creating treats that taste and feel like they came from your favorite local bakery.
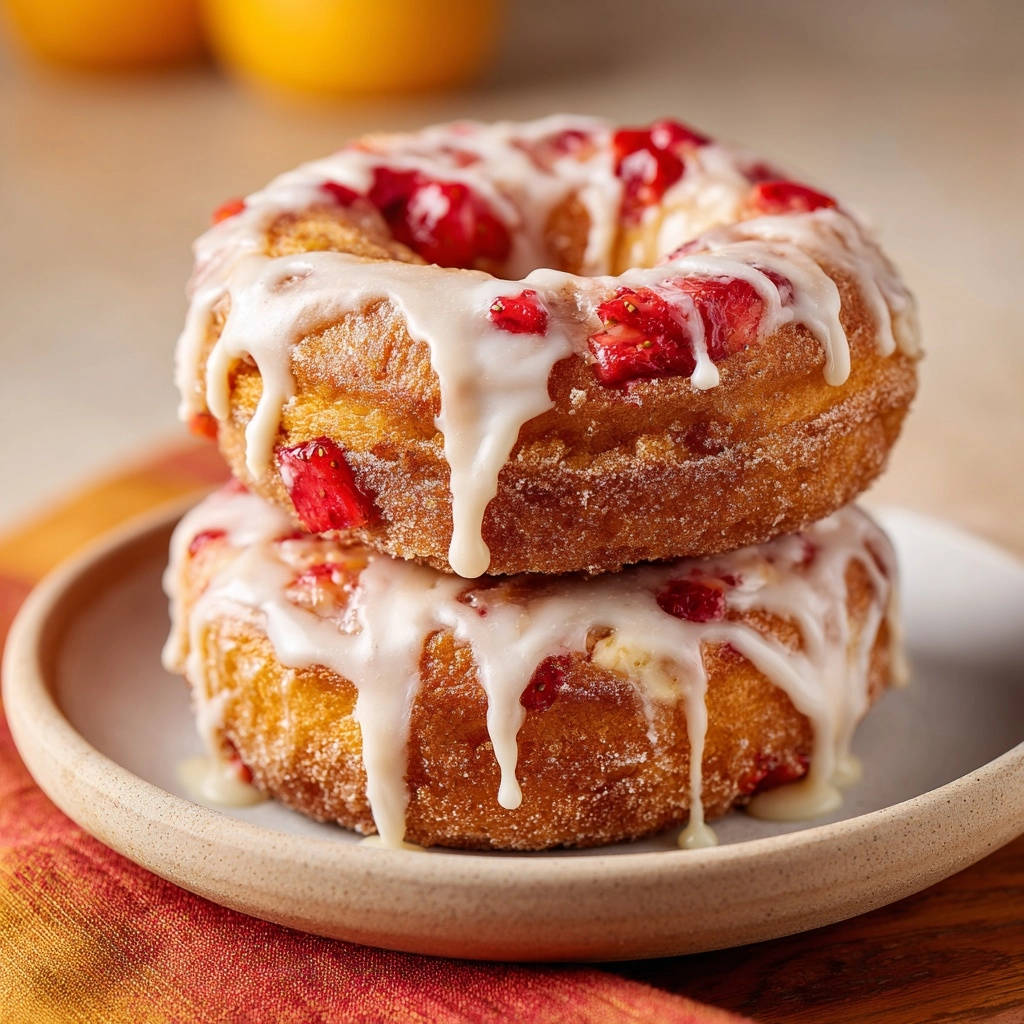
Say goodbye to heavy, oily donuts; ours are always light, incredibly fluffy, and feature that delightful slight chew that makes fried donuts so irresistible.
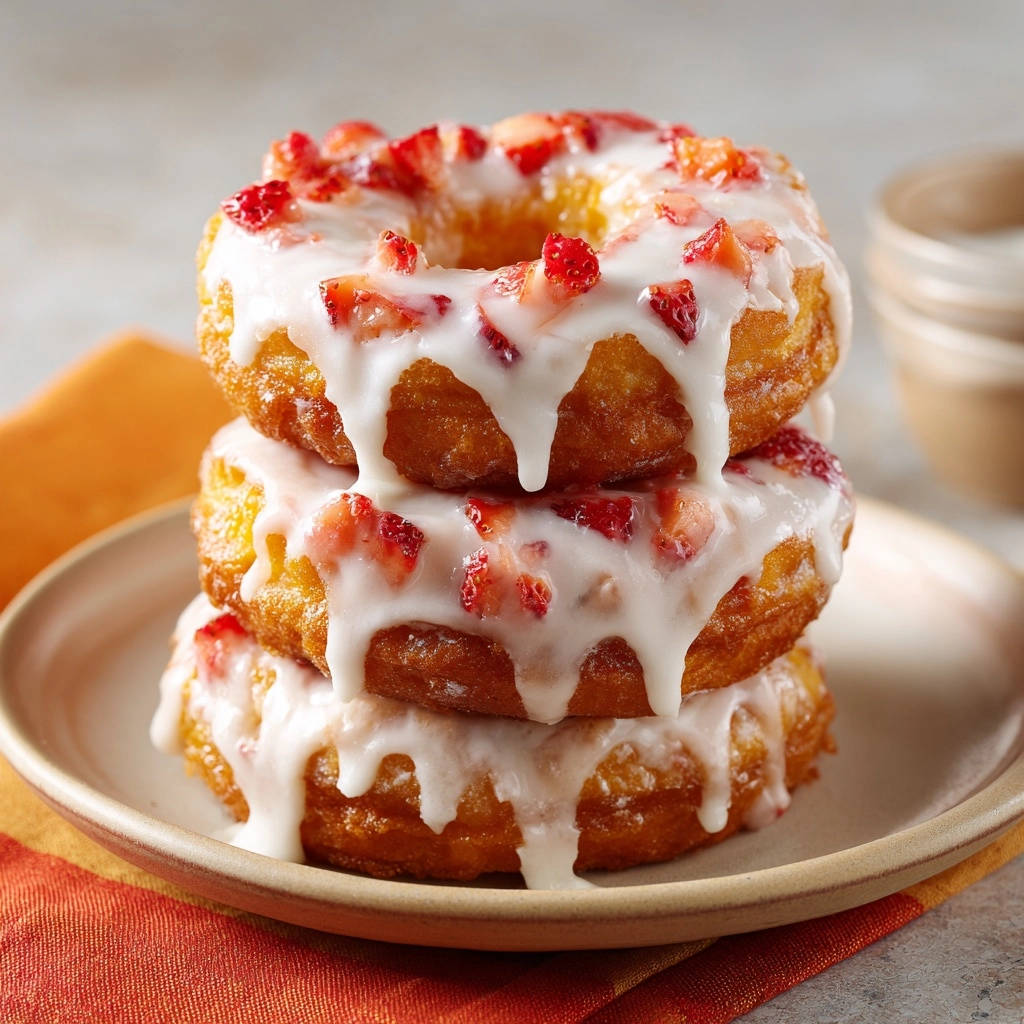
The delicate balance of the sweet, vanilla-infused glaze and the burst of fresh, vibrant strawberries creates an irresistible flavor profile that truly sets these donuts apart.
Essential Ingredients for Your Homemade Donut Masterpiece
Understanding each ingredient’s role is key to mastering these exceptional Strawberry Glazed Donuts. Quality ingredients are the foundation of a delicious result.
Crafting the Perfect Donut Dough
Warm Milk & Active Dry Yeast: The foundation of your fluffy rise. The milk, ideally between 105-115°F (40-46°C), is crucial for activating the yeast; too cold and it won’t bloom, too hot and it will kill the yeast.
Granulated Sugar: More than just sweetness; sugar feeds the yeast, aiding its activity and contributing to a beautiful golden-brown crust during frying, as well as tenderizing the dough.
Large Egg: This acts as a binding agent, adds richness and a lovely golden color to the dough, and contributes significantly to the final tender, soft crumb of your donuts.
Unsalted Butter, Melted: Butter provides moisture, richness, and a desirable tender texture to the dough. Using unsalted butter allows you to control the overall salt content of the recipe precisely.
Salt: Essential for balancing the sweetness, enhancing all the other flavors, and also helps to regulate the yeast’s activity, ensuring a steady, controlled rise.
All-Purpose Flour: The primary structure builder. Proper kneading develops the gluten in the flour, which gives the dough its elasticity and chew, crucial for a good donut texture.
The Silky Strawberry Glaze Components
Powdered Sugar: The essential base for a smooth, lump-free glaze. Its fine texture dissolves instantly, creating that perfectly silky consistency, unlike granulated sugar which would leave a gritty texture.
Milk or Water: Used to adjust the glaze’s consistency. Always start with the minimum amount (3 tablespoons) and add more in small increments until your desired pourable, yet thick, glaze is achieved.
Vanilla Extract: Provides a classic, warm aromatic depth that beautifully complements and enhances the sweet, fresh flavors of the strawberries.
The Fresh, Fruity Topping
Finely Diced Fresh Strawberries: These provide a burst of natural sweetness, a vibrant pop of color, and a delightful fresh flavor. Emphasizing “finely diced” ensures the pieces adhere well to the glaze and provide optimal texture in every bite.
Tools for Donut Triumph: What You’ll Need
Having the right equipment on hand ensures a smooth and successful donut-making experience.
Large Mixing Bowls: You’ll need at least two: one for combining the dough ingredients and another, lightly oiled, for the initial proofing to allow the dough to double in size.
Donut Cutter or Two Round Cutters: A dedicated donut cutter yields perfect rings. If unavailable, use a larger cookie cutter (around 3 inches) for the donut and a smaller one (about 1 inch) for the center hole.
Heavy-Bottomed Pot or Dutch Oven: This is crucial for maintaining a stable and consistent oil temperature during frying. Its thick construction helps prevent rapid temperature fluctuations, which is key to non-greasy donuts.
Kitchen Thermometer: Absolutely essential for precise oil temperature control. A clip-on deep-fry thermometer or an instant-read thermometer will help you maintain the critical 350°F (175°C) to prevent oil absorption.
Slotted Spoon or Tongs: For safely and easily placing donuts into and removing them from the hot oil. A slotted spoon also helps drain excess oil quickly.
Wire Rack Set Over a Baking Sheet: This setup allows air circulation around the fried donuts, enabling excess oil to drip off and preventing sogginess, which can happen if placed directly on paper towels.
Parchment Paper Squares: Cut into small squares, these are invaluable for placing your cut donuts on during their second rise. They prevent sticking and make transferring the delicate dough into the hot oil much easier.
From Dough to Delight: A Detailed Guide to Making Strawberry Glazed Donuts
Follow these steps closely, and you’ll achieve perfectly light and fluffy Strawberry Glazed Donuts every time.
Activate the Yeast: In a large mixing bowl, combine the warm milk, which should feel like bathwater (105-115°F/40-46°C), with the active dry yeast and 1 tablespoon of granulated sugar. Let this mixture sit undisturbed for 5-10 minutes until a noticeable foamy layer forms on the surface, clearly indicating that your yeast is alive and active.
Form the Dough: Once your yeast is foamy, stir in the remaining granulated sugar, the large egg, the melted unsalted butter, and the salt. Gradually begin incorporating the all-purpose flour, mixing steadily with a wooden spoon or a stand mixer with a dough hook until a soft, shaggy dough forms and pulls away from the sides of the bowl.
Knead and First Rise: Turn the dough out onto a lightly floured surface and knead it gently for about 5-7 minutes. You’re aiming for a dough that feels smooth, elastic, and no longer sticky. Transfer the kneaded dough to a lightly oiled bowl, turning it once to coat all sides, then cover the bowl tightly with plastic wrap and let it rise in a warm, draft-free place for 1 to 1.5 hours, or until it has visibly doubled in size.
Shape the Donuts: Once the dough has risen, gently punch it down to release the air. On a lightly floured surface, use a rolling pin to roll the dough evenly to about 1/2 inch thick. Now, using your donut cutter or two different sized round cookie cutters, cut out your donut shapes and their characteristic centers. Gather any dough scraps, gently reroll them, and cut out more donuts until all the dough is used.
Second Rise (Proofing): Carefully place each cut donut and donut hole onto individual lightly floured parchment paper squares. Arrange them on a baking sheet, cover loosely with plastic wrap, and allow them to rise again for another 30-45 minutes. During this second rise, the donuts will become noticeably puffy and light, indicating they are ready for frying.
The Frying Secret: Precise Oil Temperature: In a large, heavy-bottomed pot or Dutch oven, pour in 3-4 inches of vegetable oil. Heat the oil to precisely 350°F (175°C). This precise temperature control is the fundamental “secret” to preventing your donuts from becoming greasy; use a reliable kitchen thermometer and monitor the temperature closely throughout the entire frying process, adjusting the heat as needed.
Fry to Golden Perfection: Carefully transfer 2-3 donuts (using the parchment paper squares to gently drop them in, then removing the paper) into the hot oil at a time. It’s crucial not to overcrowd the pot, as this will drastically drop the oil temperature and lead to greasy donuts. Fry for 1-2 minutes per side, or until they are beautifully puffed and golden brown on both sides.
Drain Properly: As soon as the donuts are golden, immediately remove them from the hot oil using a slotted spoon or tongs. Transfer them directly to a wire rack that has been set over a baking sheet. This allows any excess oil to drip away and air to circulate, which is essential to prevent them from becoming soggy, as paper towels can trap steam.
Prepare the Glaze: While your freshly fried donuts cool slightly on the wire rack, whisk together the powdered sugar, starting with 3 tablespoons of milk or water (adding more if needed to reach your desired consistency), and the vanilla extract in a shallow bowl. Whisk until the glaze is completely smooth and lump-free.
Glaze the Donuts: Once the donuts are cool enough to comfortably handle but still slightly warm to the touch, dip one side of each donut into the prepared glaze. Allow any excess glaze to drip off briefly before returning them to the wire rack. The slight warmth helps the glaze adhere and set beautifully.
If you’re adjusting liquids for frosting consistency, you might also enjoy the approach used for achieving a crisp finish in classic cinnamon snickerdoodles.
Add Strawberry Topping: Immediately after glazing, and before the glaze has a chance to fully set, generously sprinkle the finely diced fresh strawberries over the wet glaze. This ensures the vibrant, fresh strawberries adhere perfectly to your delightful donuts.
Serve and Enjoy: Serve your perfectly non-greasy, light, and fluffy homemade Strawberry Glazed Donuts warm for the ultimate indulgent experience. They are truly best enjoyed fresh!
Expert Tips for Bakery-Worthy Donuts Every Time
Elevate your donut game with these professional insights, ensuring consistent success.
Don’t Overmix the Dough: While kneading is necessary for gluten development, overmixing can make your donuts tough. Mix just until the ingredients are combined and knead only until the dough is smooth and elastic, nothing more.
Monitor Oil Temperature Constantly: This cannot be stressed enough. The difference between perfect, non-greasy donuts and heavy, oily ones is often just a few degrees. A reliable kitchen thermometer is your absolute best friend here, so keep it handy and check frequently.
Use Fresh Yeast: Expired or inactive yeast is the leading cause of dense donuts that fail to rise properly. Always double-check the expiration date on your yeast packet and ensure it foams up nicely during activation, confirming its potency.
Provide a Warm Place for Rising: Dough loves a warm, draft-free environment to rise consistently and robustly. A slightly warmed oven (turned off, with just the oven light on) is often an ideal spot for both rises.
The Parchment Paper Trick: This simple method of placing cut donuts on individual parchment squares before their second rise is a game-changer. It makes transferring the delicate, proofed dough to the hot oil much easier, helping them maintain their perfect shape without deflating.
Glaze While Warm (But Not Hot): Glazing slightly warm donuts allows the glaze to adhere beautifully and absorb just enough for that perfect, slightly melted finish that screams freshness. If they’re too hot, the glaze will simply melt and run off; if too cold, it won’t adhere as well.
Strawberry Glazed Donuts: Serving Suggestions & Storage Secrets
Make the most of your homemade delights with these serving and storage tips.
How to Serve Your Freshly Made Delights
These homemade Strawberry Glazed Donuts are undeniably best enjoyed warm and fresh, ideally within an hour or two of being glazed. Their light, airy texture and the vibrant fresh strawberry topping make them an absolutely delightful treat for any occasion.
Serve them alongside a freshly brewed cup of coffee for a perfect breakfast, as a special addition to brunch, or as an indulgent dessert after a meal. A comforting mug of tea or a cold glass of milk also pairs wonderfully.
Keeping Your Donuts Fresh
While their peak freshness is undoubtedly right after making, leftover Strawberry Glazed Donuts can be stored at room temperature in an airtight container for up to 1-2 days. For optimal texture and flavor, it’s best to avoid refrigerating them, as the cold air can dry out the dough and alter the delicate texture of the glaze, making it sticky.
Can You Make Them Ahead?
Yes, you can certainly prepare the donut dough the night before to save time. After the first rise, gently punch down the dough, place it back in its lightly oiled bowl, cover tightly with plastic wrap, and allow it to rise slowly in the refrigerator overnight. In the morning, let the dough come to room temperature for about 30 minutes before proceeding with shaping and the second rise. For the best taste and texture, the glaze and fresh strawberry topping are always best made and applied just before dipping and serving.
Troubleshooting Common Donut Dilemmas
Even expert bakers encounter challenges. Here are solutions to common donut-making issues.
Problem: Donuts are Greasy and Heavy
Solution: The most common culprit for greasy donuts is incorrect oil temperature. If the oil is too cool, the donuts will absorb too much oil, resulting in a heavy and oily texture. Conversely, if the oil is too hot, the outside will brown too quickly while the inside remains raw. Always use a kitchen thermometer and maintain a steady 350°F (175°C) throughout the entire frying process.
Problem: Donuts are Dense and Don’t Rise Properly
Solution: This issue usually points to inactive yeast or insufficient rising time. Ensure your milk is the correct warm temperature (105-115°F) to activate the yeast without killing it. Also, allow the dough ample time to fully double in size for both the first and second rises. Over-kneading can also contribute to a dense texture by developing too much gluten, making the donuts chewy instead of light.
Problem: Glaze is Too Runny or Too Thick
Solution: Achieving the perfect glaze consistency is about careful adjustment. If your glaze is too runny, add more powdered sugar, one tablespoon at a time, whisking thoroughly after each addition until it thickens. If it’s too thick, add a tiny bit more milk or water, a teaspoon at a time, until you achieve a consistency that coats the donut without being overly transparent or gloopy.
Problem: Strawberries Don’t Stick to the Glaze
Solution: This indicates that the glaze may have set too quickly before the strawberries were applied. To ensure perfect adhesion, sprinkle the finely diced fresh strawberries immediately after dipping each donut into the wet glaze. If the glaze has partially set, you can quickly re-dip a small portion of the donut or gently press the strawberries onto the surface.
Your Top Questions About Homemade Donuts, Answered
Demystifying homemade donuts one question at a time.
Can I make these donuts without a deep fryer?
Yes, absolutely! A large, heavy-bottomed pot or Dutch oven with high sides is perfectly suitable for deep frying these donuts. The key is to ensure you have enough oil for the donuts to float freely, about 3-4 inches deep, and to diligently maintain a consistent temperature using your kitchen thermometer.
What if I don’t have a donut cutter?
No problem at all! You can easily improvise by using two different sized round cookie cutters-a larger one (around 3 inches) for the main donut shape and a smaller one (about 1 inch) for the center hole. Alternatively, you can simply roll the dough into small balls for delicious donut holes, or cut irregular shapes for a rustic fritter-like treat.
Can I use frozen strawberries for the topping?
While fresh strawberries are highly recommended for their superior texture and vibrant appearance, you could potentially use frozen. If you do, ensure they are fully thawed, drained very well of any excess liquid, and thoroughly patted dry with paper towels before finely dicing. This crucial step prevents any moisture from making the glaze watery or soggy.
Can I make a different flavored glaze for these donuts?
Absolutely! This base donut recipe is incredibly versatile. Feel free to customize the glaze by omitting the vanilla extract and adding citrus zest (lemon or orange), almond extract, or even cocoa powder for entirely different flavor profiles. If you love exploring various fried dough creations, you might enjoy our recipe for easy fluffy glazed fried dough bites, which offers great inspiration for diverse toppings.
For more baked delights, explore matcha chocolate chip frosted cookies with a similar focus on texture.
Are there alternative frying methods, like baking or air frying?
While the dough could technically be adapted for baking or air frying, it’s important to note that the texture and rise will be significantly different from the “never greasy,” light, and airy fried experience this recipe promises. The “secret” to these specific Strawberry Glazed Donuts lies squarely in the precise temperature-controlled deep-frying method, which yields their unique, craveable texture.
Ready to Indulge? Share Your Strawberry Glazed Donuts Masterpiece!
You now possess the “secret” to crafting truly exceptional Strawberry Glazed Donuts-light, airy, perfectly crisp, and never greasy. This recipe transforms a sometimes-intimidating baking project into a rewarding and utterly delicious experience, perfect for sharing with loved ones or savoring all by yourself.
Don’t just make donuts; create memories! We can’t wait to see your delightful creations. Share your photos and experiences in the comments below or tag us on social media.
Looking for more homemade bakery treats to impress? Explore our collection, like these classic apple crumble bars, and continue your delicious culinary journey!
What Else to Make
Since you enjoyed these strawberry donuts, consider these other sweet treats.
- For a similarly delightful fruit-forward breakfast, try this Raspberry Dutch Baby Pancake with its impressive rise.
- If you liked the texture of the donuts, you’ll appreciate the soft crumb of this Golden Fluffy Loaf, achieved with the tangzhong method.
Donuts
Course: DessertCuisine: AmericanDifficulty: medium12
donuts2
hours15
minutes350
kcal120
minutesDiscover the secret to making perfectly light, airy, and non-greasy homemade donuts. These bakery-worthy treats feature a crisp golden exterior, a fluffy interior, and are topped with a delightful strawberry glaze.
Ingredients
For the Donuts:
1 cup warm milk (105-115 degrees F)
2 1/4 teaspoons active dry yeast (one standard packet)
1/4 cup granulated sugar
1 large egg
1/4 cup unsalted butter, melted
1 teaspoon salt
3 1/2 cups all-purpose flour, plus more for dusting
Vegetable oil, for frying
For the Glaze:
2 cups powdered sugar
3-4 tablespoons milk or water
1/2 teaspoon vanilla extract
For the Topping:
1/2 cup fresh strawberries, finely diced
Directions
- In a large bowl, combine the warm milk, yeast, and 1 tablespoon of the granulated sugar. Let it sit for 5-10 minutes until foamy, indicating the yeast is active.
- Stir in the remaining granulated sugar, egg, melted butter, and salt. Gradually add the all-purpose flour, mixing until a soft dough forms.
- Turn the dough out onto a lightly floured surface and knead for about 5-7 minutes, until smooth and elastic. Place the dough in a lightly oiled bowl, turn to coat, then cover with plastic wrap and let rise in a warm place for 1 to 1 1/2 hours, or until doubled in size.
- Once risen, gently punch down the dough. On a lightly floured surface, roll the dough to about 1/2 inch thick. Using a donut cutter or two different sized round cutters, cut out donut shapes and the centers. Reroll scraps and cut more donuts.
- Place the cut donuts and donut holes on lightly floured parchment paper squares. Cover loosely with plastic wrap and let rise for another 30-45 minutes, or until puffy.
- This is the secret to non-greasy donuts: Heat 3-4 inches of vegetable oil in a large, heavy-bottomed pot or Dutch oven to 350 degrees F (175 degrees C). Use a kitchen thermometer to monitor the temperature closely. Maintaining this precise temperature is key to preventing the donuts from absorbing too much oil and becoming greasy.
- Carefully place 2-3 donuts into the hot oil, ensuring you do not overcrowd the pot, which would drop the oil temperature. Fry for 1-2 minutes per side, or until golden brown.
- Immediately remove fried donuts with a slotted spoon or tongs and place them on a wire rack set over a baking sheet to drain any excess oil. Do not place them directly on paper towels, as this can trap steam and make them soggy.
- While the donuts cool slightly, whisk together the powdered sugar, milk (start with 3 tablespoons and add more if needed for desired consistency), and vanilla extract in a shallow bowl until smooth.
- Once the donuts are cool enough to handle but still slightly warm, dip one side of each donut into the glaze. Place them back on the wire rack to allow the glaze to set and drip.
- Immediately sprinkle the finely diced fresh strawberries over the wet glaze before it fully sets. Serve warm and enjoy your perfectly non-greasy, fluffy homemade donuts!
Notes
- Maintaining precise oil temperature (350°F) is key to non-greasy results.


