
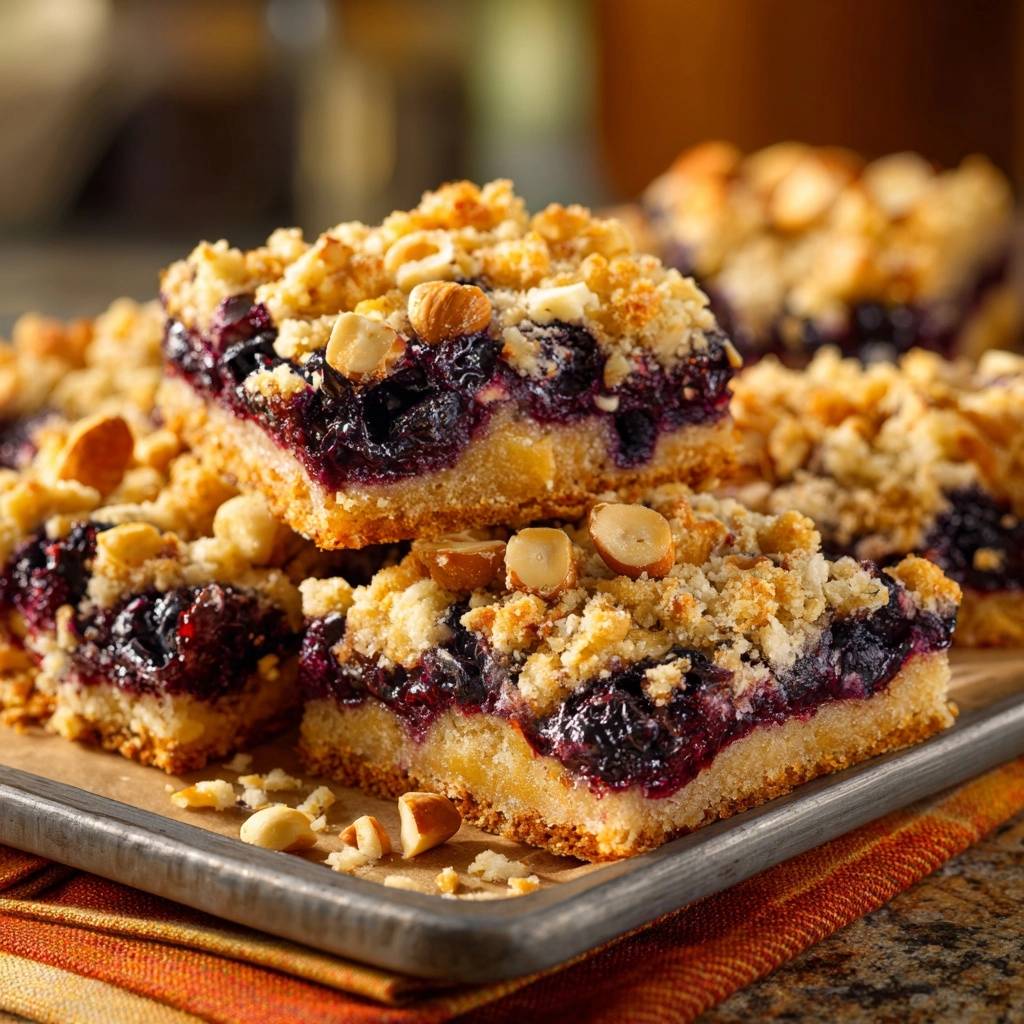
Blueberry bars usually turn into a soggy mess because those juicy berries leak right through the crust. However, this recipe fixes that frustration with a simple pre-bake step. You’ll get a crisp, golden base that holds up perfectly under the jammy fruit, yielding 24 bars in just 20 minutes prep and 40-45 minutes total bake time.
Therefore, you end up with nutty crunch clashing beautifully against sweet, bubbling blueberries. The hazelnuts add that irresistible toasty bite. Imagine the buttery crumble giving way to warm berry goodness in every mouthful.
Here’s the expertise that seals the deal: that 15-minute pre-bake at 375°F partially sets the starches in the crust. In addition, it creates a moisture barrier so the berries never soak through. No more mushy disappointments.
Crust and Topping Components Breakdown
Cold butter forms the backbone of this crumble. It creates those pea-sized crumbs that bake into a tender yet crisp texture. Therefore, always cube it straight from the fridge.
Brown sugar brings caramel depth and keeps things moist without sogginess. Light brown works best here for subtle sweetness. However, dark brown amps up the molasses vibe if you want bolder flavor.
Hazelnuts deliver serious crunch and nutty richness. Chop them fine but not to dust. Fresh ones outperform pre-roasted, though a quick toast deepens their oiliness for extra pop.
If you enjoy the nutty crunch of hazelnuts, you’ll want to explore classic cinnamon snickerdoodles with a crisp finish.
Flour provides structure, while salt balances the sweetness. Use all-purpose for reliability. Unsalted butter prevents over-salting, so you control the taste perfectly.
Flour and Brown Sugar Base
Flour builds the crumbly framework that stays firm under berry weight. It absorbs just enough fat for tenderness. Therefore, measure by spooning lightly into the cup, not scooping.
Brown sugar retains moisture for chew without gumminess. Its molasses tenderizes the dough beautifully. In addition, it promotes even browning during the bake.
Cold Butter and Hazelnut Integration
Cubed cold butter ensures flaky, pea-sized pieces when pulsed. Warm butter melts too fast and leads to dense crust. So, chill your food processor bowl if it’s warm.
Hazelnuts integrate for crunch; divide them so half goes in the base dough. Toasting is optional but boosts nuttiness. However, skip if you’re short on time, as raw still shines.
Salt’s Subtle Enhancement
That half teaspoon salt sharpens all the sweet notes. It makes the crumble pop against the berries. Therefore, don’t skip it, even if your butter has a touch.
Blueberry Filling Essential Elements
Fresh blueberries burst with antioxidants and natural pectin for thickness. Their plumpness creates the ideal jammy layer. Five cups fill the pan just right for hearty bars.
Granulated sugar draws out juices gently. Cornstarch then thickens them into a glossy set. Vanilla adds cozy depth that ties everything together.
Frozen berries work in a pinch but thaw and drain first to cut excess water. However, fresh peak-season ones give the brightest flavor and firmest texture.
Blueberries: Fresh Peak Selection
Pick ripe, firm blueberries that yield slightly to pressure. Avoid mushy ones that leak too much water. Therefore, they hold shape better in the filling for defined bars.
Cornstarch and Sugar Thickening
Three tablespoons cornstarch perfectly binds five cups of berry juices. It activates at 375°F into a clear, jammy gel. Too much turns gummy, so measure precisely.
Science of Crisp Crust in Blueberry Hazelnut Crumble Bars
The pre-bake triggers partial starch gelatinization in the crust. This forms a seal against berry moisture. Without it, juices penetrate and soften everything.
Hazelnut oils repel water, keeping the topping crisp even over bubbling fruit. The Maillard reaction during full bake browns edges to golden perfection. Therefore, watch for that color shift.
For a similar crispness, explore the anti-crumbly method in cranberry pistachio shortbread bars.
Picture the crust’s starches swelling just enough to block sogginess, like a tiny dam. In addition, the nuts’ fats create air pockets for lightness.
Pre-Bake Seals the Barrier
Fifteen minutes at 375°F sets the gluten without over-browning. Edges turn golden, signaling readiness. Cool 10 minutes to lock in the barrier.
Hazelnut Crunch Chemistry
Nut fats stay stable against steam from berries. They crisp up reliably. Therefore, sprinkle generously for maximum texture contrast.
Equipment Choices for Perfect Results
A food processor pulses to uniform crumbs fast. Pastry cutter works too but takes elbow grease. However, aim for even pea-sized bits either way.
Use a metal 9×13 pan for quick, even heat. Line with parchment overhang for easy lift-out. Glass takes longer to heat, so add 5 minutes bake time.
Wire rack cooling lets air circulate underneath. This prevents a steamy bottom. An oven thermometer ensures true 375°F accuracy.
Food Processor vs. Manual Mixing
Pulsing gives speedy, consistent crumbs without overworking. Stop at coarse texture. Manual mixing builds arm strength but risks unevenness.
Baking Pan and Parchment Prep
Parchment overhang acts like handles for clean removal. Metal conducts heat best for crisp results. Avoid nonstick spray; parchment suffices.
Phase 1: Prepping and Parbaking Base
Preheat to 375°F and line your 9×13 pan with parchment. Pulse flour, brown sugar, salt, and half the hazelnuts. Add cold butter cubes and pulse to coarse crumbs.
Press two-thirds of the dough evenly into the pan, about 1/4-inch thick. Bake 15 minutes until edges golden. Cool 10 minutes; you’ll smell sweet nuttiness rising.
This parbake feels firm to the touch when done. Don’t skip the cool-down. It maintains structure for the filling.
Pulsing Dough to Crumb Texture
Pulse in short bursts until pea-sized. Overprocessing makes paste-like dough. Listen for the rhythm; it stops sounding gritty when ready.
Firm Press and Initial Bake
Press firmly for even density. Bake smells toasty at 15 minutes. Cool slightly so warmth sets the seal without cracking.
Phase 2: Filling Assembly and Full Bake
Toss blueberries with sugar, cornstarch, and vanilla. They glisten and juice slightly. Spoon evenly over warm crust; no need to spread hard.
Mix remaining hazelnuts into reserved crumbs. Sprinkle thickly over filling. Bake 25-30 minutes until golden and bubbling.
Rotate midway for even browning. Cool 2 hours on a rack for sliceable texture. Lift out and cut into 24 bars.
Even Filling Distribution
Spoon gently to avoid pressing crust. Berries settle naturally. This keeps the barrier intact.
Topping Sprinkle and Final Bake
Thick crumble ensures crunch. Bubbles signal doneness. Full cool prevents crumbling edges.
Avoiding Soggy Crust Pitfalls
Skip pre-bake and sogginess wins. Insufficient cornstarch leaves runniness. Always wait the full 10-minute cool after parbaking.
Don’t overload berries; five cups max. Undercooling means messy slices. Pro tip: chill 30 minutes post-cool for extra clean cuts.
Flavor Twists on Blueberry Hazelnut Crumble Bars
Swap hazelnuts for almonds or pecans. Add lemon zest to berries for zing. Mixed berries like raspberry bring tartness.
Gluten-free 1:1 flour blend holds up fine. Use vegan butter for dairy-free. Scale to 8×8 pan by halving everything; bake times stay similar.
Nut and Berry Substitutions
Walnuts add earthiness. Raspberries cut sweetness. Keep nut chop consistent for texture.
More Sweet Ideas
Round out your dessert table with these complementary baked goods.
- For a fruity and rich addition, consider these assorted fruit and chocolate scones, offering a different texture alongside your crumble bars.
- If you’re planning a brunch or a lighter sweet option, these diner-style fluffy pancakes provide a comforting and classic choice.
Gluten-Free Adaptation
1:1 blends mimic wheat structure. Add 1/4 tsp xanthan if needed. Results stay crumbly and crisp.
Make-Ahead and Storage Strategies
Parbake crust a day ahead; cover and fridge. Assemble unbaked and freeze up to 2 months. Thaw overnight, then bake fresh.
Store baked bars airtight up to 5 days fridge or 3 months freezer. Wrap individually for grab-and-go. Thaw at room temp for best crunch.
Freezing Unbaked Bars
Freeze in parchment sling. Portion straight from freezer to oven. Add 5 minutes bake time.
Pairing Ideas for Blueberry Hazelnut Crumble Bars
Vanilla ice cream melts into warm crevices for creamy contrast. Greek yogurt adds tang. Hot coffee cuts the sweet.
Tea lovers, try Earl Grey for bergamot lift. They travel great to picnics. Goat cheese alongside surprises with savory balance.
Troubleshooting Blueberry Hazelnut Crumble Bars
Runny Filling Fixes
Increase cornstarch to 4 tablespoons next time. Cook filling on stovetop 5 minutes first to thicken. Ensure full bake until bubbles thicken.
Crust Adhesion Issues
Pulse less for looser crumbs that bind on press. Chill dough 10 minutes before pressing. Firm even layer prevents crumbling.
Overbrowned Topping Solutions
Tent foil after 20 minutes. Lower oven to 350°F if hot spots persist. Check with thermometer for accurate temp.
FAQ
How do I store Blueberry Hazelnut Crumble Bars and can they be frozen?
Store in an airtight container at room temperature up to 3 days or fridge up to 5 days. They freeze beautifully wrapped individually for 3 months; thaw at room temp. Texture stays crisp if not refrozen.
Why is my crust soggy and how do I fix it?
Sogginess comes from skipping the pre-bake or not cooling 10 minutes after. The parbake seals starches against juices. Next time, bake base 15 minutes firm, cool fully before filling.
Can I substitute ingredients in Blueberry Hazelnut Crumble Bars?
Swap hazelnuts for almonds or pecans equally. Use frozen blueberries thawed and drained. Gluten-free 1:1 flour works 1:1; vegan butter sub fine. Avoid reducing cornstarch or bars run.
What if my filling is too runny?
Too little cornstarch or underbaking causes this. Measure 3 tablespoons exactly for 5 cups berries. Bake until thick bubbles form, and cool 2 hours minimum for full set.
How do I get the crumble topping extra crunchy?
Toast nuts first for deeper flavor and crisp fats. Pulse to coarse crumbs, not fine. Thick sprinkle and midway pan rotation ensure even golden crunch without sogginess.
Can I make these bars ahead for a party?
Yes, parbake crust day before and fridge. Assemble and bake morning of, or freeze unbaked up to 2 months. They slice clean after 2-hour cool and hold shape hours at room temp.
Blueberry Hazelnut Crumble Bars
Course: DessertCuisine: AmericanDifficulty: medium24
bars20
minutes40
minutes250
kcal180
MinutesBlueberry bars often end up with a mushy bottom from juicy berries soaking through. This recipe delivers a crisp, golden crust every time thanks to a quick pre-bake step that sets the base before the filling goes on, locking in perfect texture.
Ingredients
Crust and Topping:
2 cups all-purpose flour
1 cup packed light brown sugar
1 cup unsalted butter, cold and cubed
1 cup chopped hazelnuts, divided
1/2 teaspoon salt
Filling:
5 cups fresh blueberries
1/2 cup granulated sugar
3 tablespoons cornstarch
1 teaspoon vanilla extract
Directions
- Preheat oven to 375 degrees F. Line a 9×13-inch baking pan with parchment paper, leaving overhang for easy removal.
- Make the crust dough: In a food processor, pulse 2 cups flour, brown sugar, salt, and 1/2 cup hazelnuts until combined. Add cold butter cubes and pulse until mixture resembles coarse crumbs (pea-sized pieces).
- Press 2/3 of the dough firmly into the prepared pan to form an even crust. This is the no-soggy secret start: Bake for 15 minutes until edges are golden and set. Remove from oven and cool for 10 minutes. This pre-bake seals the crust, creating a moisture barrier so berries never make it soggy.
- While crust cools, prepare filling: In a bowl, toss blueberries with sugar, cornstarch, and vanilla until evenly coated. The cornstarch thickens juices during baking for a jammy, not runny, layer.
- Spoon filling evenly over the warm crust. Stir remaining 1/2 cup hazelnuts into the reserved dough crumbs, then sprinkle thickly over filling for nutty crunch.
- Bake 25-30 minutes more until topping is golden brown and blueberries bubble. Cool completely in pan on a wire rack (at least 2 hours) for clean cuts. Lift out using parchment, slice into bars, and serve. Store in airtight container up to 3 days.
Notes
- Store in an airtight container up to 3 days. Pre-baking the crust for 15 minutes creates a moisture barrier to prevent sogginess.


