
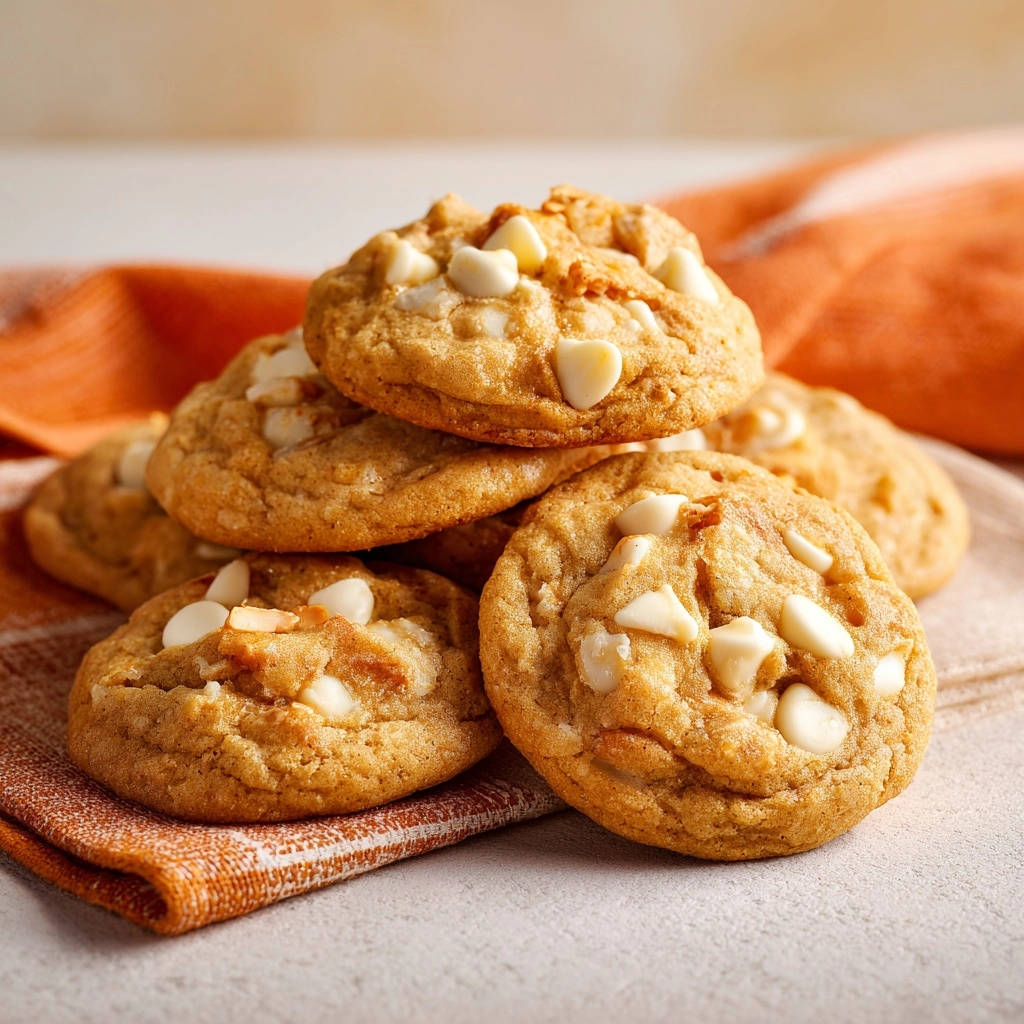
Crafting truly Chewy White Chocolate Chip Cookies can feel like a quest; we’ve all faced the disappointment of a dry, flat, or overly crisp batch. Years of perfecting my technique have led me to this foolproof recipe, a culmination of subtle tweaks that consistently deliver wonderfully soft, delightfully chewy, and utterly irresistible results.
This recipe isn’t just about mixing ingredients; it’s about understanding how to achieve that coveted perfect texture every single time, making it a joy for any baker to create these beloved treats.
Why This Recipe Delivers Irresistibly Soft & Chewy Bites Every Time
The Melted Butter & Brown Sugar Advantage
The secret to the unparalleled chewiness and depth of flavor in these Chewy White Chocolate Chip Cookies lies in a specific ingredient combination. Starting with perfectly melted butter, rather than softened, changes the fat’s interaction with the dry ingredients, promoting a tender crumb.
Coupled with a higher ratio of moist, packed light brown sugar, this creates a dough that retains exceptional moisture throughout baking, ensuring every bite is soft and deeply flavorful.
Foolproof Texture: No More Flat or Dry Cookies
Achieving that coveted soft and chewy texture often eludes home bakers, but this recipe is designed to eliminate common pitfalls. We strategically pull the cookies from the oven when their centers are just slightly underbaked, preventing them from drying out.
The residual heat on the baking sheet allows them to finish setting gently as they cool, locking in that wonderfully soft, pillowy texture that makes these homemade white chocolate cookies so addictive.

Quick Prep, Effortless Satisfaction
Despite their gourmet taste and texture, these chewy white chocolate chip cookies boast an incredibly straightforward preparation. With only 15 minutes of hands-on prep and a total time of under 30 minutes, they’re perfect for impromptu cravings or busy schedules.
This recipe proves that exceptional homemade treats don’t require extensive effort, delivering effortless satisfaction with every batch.
Your Essential Toolkit for Cookie Success
Basic Baking Gear You’ll Need
- Mixing Bowls: You’ll need at least one medium and one large bowl for separating dry and wet ingredients.
- Whisk: Essential for thoroughly combining dry ingredients and aerating wet ones.
- Measuring Cups and Spoons: Accurate measurements are crucial for consistent results.
- Baking Sheets: Two standard baking sheets ensure you can bake a full batch efficiently.
- Parchment Paper: Prevents sticking, promotes even baking, and simplifies cleanup.
Helpful Additions for a Smoother Process
- Electric Mixer: While not strictly necessary, a hand-held or stand mixer makes creaming butter and sugar quicker and more efficient.
- Cookie Scoop: Ensures uniformly sized cookies, leading to more even baking and a professional appearance.
- Wire Rack: Crucial for cooling cookies completely, preventing sogginess and maintaining crisp edges.
The Heart of the Cookie: Understanding Your Ingredients
Flour, Leavening, and Balance: The Dry Ensemble
All-Purpose Flour: Provides the fundamental structure for our cookies, ensuring they hold their shape without being overly dense.
Baking Soda: Acts as a leavening agent, reacting with the brown sugar to create lift and aid in the cookie’s characteristic spread and chewiness.
Salt: A small but mighty ingredient, salt enhances all the other flavors, balancing the sweetness and making the white chocolate truly shine.
The Power Duo: Melted Butter & Sugars
Melted Unsalted Butter: The cornerstone of chewiness, melted butter contributes richness and prevents the cookie from becoming cake-like, promoting a dense, soft interior.
Packed Light Brown Sugar: This is our secret weapon for moisture. Its molasses content guarantees a soft, deeply chewy texture and adds a subtle caramel note to the flavor profile.
Granulated Sugar: Works in conjunction with brown sugar to aid in spread and contributes to the golden edges, ensuring a delightful textural contrast.
Binding & Enhancing: Egg and Vanilla
Large Egg: Acts as a crucial binder, holding the dough together and contributing to both the structure and richness of the cookies.
Vanilla Extract: Aromatic vanilla complements and enhances the sweetness of the white chocolate, adding depth and warmth to every bite.
Choosing Your White Chocolate Chips Wisely
The quality of your white chocolate chips significantly impacts the final taste and texture of your homemade white chocolate cookies. Opt for good quality chips that contain real cocoa butter, not just hydrogenated oils.
Higher quality chips melt more smoothly and provide a creamier, more luxurious flavor, making a noticeable difference in these delectable treats.
Crafting Perfection: A Step-by-Step Guide to Chewy White Chocolate Chip Cookies
-
Preheat and Prep:
Set your oven to 375°F (190°C). Line two baking sheets with parchment paper to prevent sticking and ensure even baking.
-
Whisk the Dry Ingredients:
In a medium bowl, thoroughly whisk together the all-purpose flour, baking soda, and salt. This ensures these leavening and seasoning agents are evenly distributed throughout the dough, crucial for consistent results.
-
Combine Wet Ingredients (The Chewiness Secret!):
In a large bowl, combine the melted and cooled unsalted butter with the packed light brown sugar and granulated sugar. Whisk vigorously for about 1 minute until the mixture is smooth and well combined. Starting with melted butter and using a higher ratio of brown sugar is a primary key for achieving maximum moisture and that signature chewy texture.
-
Incorporate Egg and Vanilla:
Beat in the large egg and vanilla extract into the butter-sugar mixture until they are fully incorporated and the mixture appears slightly lighter and creamier. This step adds richness and binds the ingredients together.
-
Gently Mix Dry into Wet:
Gradually add the reserved dry ingredient mixture to the wet ingredients. Mix on low speed with an electric mixer or use a wooden spoon until just combined. Exercise caution not to overmix the dough, as excessive mixing develops gluten, which can lead to tough, dry cookies instead of chewy ones.
-
Fold in the White Chocolate Chips:
Using a spatula, gently fold the white chocolate chips into the dough until they are evenly distributed. Avoid overmixing during this step as well.
-
Scoop and Space:
Drop rounded tablespoons of cookie dough onto your prepared baking sheets, leaving approximately 2 inches (5 cm) of space between each cookie. This allows them to spread without merging.
-
Bake to Perfection (The Soft Center Method!):
Bake for 10 to 12 minutes, or until the edges are lightly golden and appear set, but the centers still look slightly soft and puffy. This is the ultimate secret for that chewy texture; pulling them from the oven when the centers are slightly underbaked allows them to finish setting as they cool, preventing any dryness and ensuring a perfectly tender interior.
-
Cooling is Critical:
Let the cookies cool on the baking sheets for a crucial 5 minutes before transferring them to a wire rack to cool completely. This essential step helps them firm up and finish baking gently without losing their prized soft, chewy interior, making them easier to handle.
Unlock the Secrets: Expert Tips for Your Best Chewy White Chocolate Chip Cookies
Don’t Rush the Cooling Butter: Ensure your melted butter is fully cooled to room temperature before mixing. Hot butter can start to cook the eggs and affect the dough’s consistency, leading to greasier, flatter cookies.
The Visual Cue for Doneness: Trust your eyes over the clock. Look for those lightly golden edges and slightly puffy, still-soft centers. This visual cue is more reliable than strict timing for achieving perfect chewiness, especially for these chewy white chocolate chip cookies.
Embrace the Parchment Paper: It’s not just for easy cleanup! Parchment paper helps regulate the bottom heat, preventing overbrowning and ensuring your cookies cook evenly from the base. Wax paper is not a substitute.
Room Temperature Egg Matters: A room temperature egg emulsifies better with the other ingredients, creating a smoother, more uniform dough. If you forget, place it in a bowl of warm water for a few minutes before adding it to the mix.
Elevate Flavor with Salt Flakes: A tiny sprinkle of flaky sea salt on top of the warm cookies immediately after baking can enhance the white chocolate flavor and add a sophisticated, balanced touch. This simple addition truly elevates these soft and chewy cookies.
Troubleshooting Common Cookie Conundrums
Why Are My Cookies Too Flat?
Flat cookies often stem from butter that was too warm or melted. Ensure your butter is melted and then cooled to room temperature. Overbeating the butter and sugar mixture can also incorporate too much air, leading to collapse.
Additionally, check your baking soda’s freshness; old leavening agents lose their potency, resulting in less lift and a flatter cookie profile.
My Cookies Came Out Dry and Crumbly, What Happened?
The most common culprit for dry, crumbly cookies is overbaking. Remember the visual cue: golden edges and slightly soft centers. Also, overmixing the flour develops gluten, making the cookies tough rather than tender.
Incorrect measurements, especially of fat and sugar, can throw off the moisture balance. Always spoon and level flour, and pack brown sugar tightly.
The Dough is Too Sticky to Handle or Scoop
If your dough is excessively sticky, a brief chill in the refrigerator (30-60 minutes) can work wonders. Chilling firms up the butter, making the dough much easier to handle and scoop.
You can also lightly flour your hands or cookie scoop. If you find your dough consistently too sticky, slightly increasing the flour by a tablespoon or two can help without significantly altering the final texture of your chewy white chocolate chip cookies.
Beyond the Bake: Serving, Storing, and Make-Ahead Magic
Creative Ways to Serve Your Chewy White Chocolate Chip Cookies
These warm, soft, and chewy white chocolate chip cookies are a delight on their own, perhaps with a tall glass of cold milk or a freshly brewed cup of coffee. For an extra indulgent treat, serve them alongside a scoop of vanilla bean ice cream.
If you’re looking for another decadent treat, you should also try molten raspberry chocolate lava cookies.
Consider transforming them into elegant ice cream sandwiches, or crumble them over a simple fruit compote for a textural contrast. They also make a fantastic base for a truly luscious homemade chocolate chip ice cream, perfect for a special dessert.
Keeping Them Fresh: Storage Tips for Longevity
To maintain their exceptional chewiness and flavor, store your baked cookies in an airtight container at room temperature. Placing a slice of plain bread in the container can help absorb excess moisture and keep them soft for longer.
Enjoy these delicious treats within 3-5 days for optimal freshness. Avoid refrigerating, as it can dry them out.
Make-Ahead Marvels: Dough Prep & Freezing Options
This recipe is perfect for make-ahead convenience. You can prepare the entire dough and chill it in the refrigerator for up to 3 days. Simply let it come closer to room temperature before scooping and baking.
For longer storage, scoop individual cookie dough balls onto a parchment-lined tray and freeze until solid. Once frozen, transfer them to a freezer-safe bag or container for up to 3 months. Bake directly from frozen, adding 2-4 minutes to the baking time, for freshly baked cookies on demand. This is ideal for those who love freshly baked treats without the fuss.
Your Chewy White Chocolate Chip Cookie Questions Answered
Can I Substitute Other Types of Chocolate?
Absolutely! While these are specifically Chewy White Chocolate Chip Cookies, you can certainly substitute dark, milk, or semi-sweet chocolate chips for a different flavor profile. The baking time and texture should remain largely the same.
For a slightly different twist, explore matcha chocolate chip frosted cookies.
For a fun variation, try a mix of white and dark chocolate for a “zebra” cookie effect, offering a beautiful contrast in both taste and appearance.
What if I Don’t Have Light Brown Sugar?
Light brown sugar is crucial for the chewiness and moisture in this recipe due to its molasses content. If you only have dark brown sugar, you can use it, but the cookies will be even chewier and have a slightly deeper, more robust molasses flavor.
In a pinch, you can create a makeshift brown sugar by mixing 1 cup of granulated sugar with 1 tablespoon of molasses. However, it’s highly recommended to use actual light brown sugar for the best results in these classic white chocolate chip cookies.
Can I Make These Cookies Gluten-Free?
Yes, you can adapt this recipe to be gluten-free. Substitute the all-purpose flour with a high-quality 1:1 gluten-free baking flour blend that contains xanthan gum. Ensure the blend is specifically designed for baking cookies.
Some minor textural differences might occur, but many blends yield excellent results, allowing everyone to enjoy these delicious soft and chewy cookies.
How Long Do Chewy White Chocolate Chip Cookies Stay Fresh?
When stored properly in an airtight container at room temperature, these cookies maintain their optimal freshness and chewiness for about 3 to 5 days. After that, they may start to dry out slightly, though they remain perfectly edible.
For longer storage, consider freezing the baked cookies. Simply place them in a single layer in a freezer-safe bag or container once completely cool, and they will stay fresh for up to 2 months.
Is Chilling the Dough Necessary for This Recipe?
While this particular recipe doesn’t explicitly require chilling the dough for excellent results, a short chill (30 minutes to an hour) can enhance flavor and slightly reduce spread. It allows the flour to fully hydrate and the flavors to meld.
However, the melted butter and brown sugar ratio in this recipe already contributes significantly to its structure and chewiness, so you can confidently bake these Chewy White Chocolate Chip Cookies without chilling if time is short.
The Final Bite: Indulge in Your Homemade Masterpiece
There’s a unique satisfaction in pulling a batch of perfectly baked Chewy White Chocolate Chip Cookies from your oven, filling your home with that irresistible aroma. This recipe empowers you to achieve that ideal soft, chewy texture every time, turning a simple sweet craving into a moment of pure joy.
What Pairs Well?
Enjoy more baked treats with these similar recipes.
- For a sweet breakfast treat, try these cinnamon sugar jam-filled waffles, perfect alongside your cookies.
- If you’re craving more comforting baked goods, consider the warm cinnamon swirl coffee cake for another delightful option.
Whether you’re baking for family, friends, or just yourself, these golden-edged, soft-centered cookies are guaranteed to become a cherished staple in your baking repertoire. Don’t hesitate to dive in and create your own batch of these delightful treats today!
White Chocolate Chip Cookies
Course: DessertCuisine: AmericanDifficulty: easy4
18 cookies15
minutes10
minutes240
kcal25
minutesCraving perfectly soft and chewy white chocolate chip cookies? This recipe reveals the secrets to achieving that irresistible texture every single time, from using melted butter to precise baking times. You won’t believe how easy it is to get that perfect texture!
Ingredients
1 1/2 cups all-purpose flour
1/2 teaspoon baking soda
1/4 teaspoon salt
1/2 cup (1 stick) unsalted butter, melted and cooled
3/4 cup packed light brown sugar
1/4 cup granulated sugar
1 large egg
1 teaspoon vanilla extract
1 cup white chocolate chips
Directions
- Preheat your oven to 375 degrees Fahrenheit. Line two baking sheets with parchment paper.
- In a medium bowl, whisk together the all-purpose flour, baking soda, and salt. Set aside.
- In a large bowl, combine the melted and cooled unsalted butter with the packed light brown sugar and granulated sugar. Whisk thoroughly for about 1 minute until smooth and well combined. Starting with melted butter and using a higher ratio of brown sugar is key for moisture and chewiness.
- Beat in the egg and vanilla extract until fully incorporated and the mixture is lightened.
- Gradually add the dry ingredient mixture to the wet ingredients, mixing on low speed or with a spoon until just combined. Be careful not to overmix, as too much mixing can lead to tough cookies.
- Fold in the white chocolate chips until evenly distributed throughout the dough.
- Drop rounded tablespoons of cookie dough onto the prepared baking sheets, leaving about 2 inches between each cookie.
- Bake for 10 to 12 minutes, or until the edges are lightly golden and set, but the centers still look slightly soft and puffy. This is the ultimate secret for that chewy texture; pulling them from the oven when the centers are slightly underbaked allows them to finish setting as they cool, preventing dryness.
- Let the cookies cool on the baking sheets for 5 minutes before transferring them to a wire rack to cool completely. This crucial step helps them firm up without losing their soft, chewy interior.
Notes
- For ultimate chewiness, use melted butter, more brown sugar, and slightly underbake. Cool on sheets for 5 min.


