
For years, I served beautiful, fork-tender pot roast surrounded by a weak, thin liquid-the ultimate Sunday dinner letdown. That challenge led me to perfect this technique for making a truly Classic Braised Beef Pot Roast where the gravy is rich, luxurious, and never watery.
This recipe is special because it incorporates a non-negotiable step at the end-a simple cornstarch slurry-that guarantees a deep, professional-level sauce, establishing a new family favorite built on trust and flavor.
The Gravy Game Changer: Why This Classic Pot Roast Works
The Secret to a Thick, Luscious Sauce
The biggest pitfall in traditional braising is ending up with a sauce diluted by meat juices and melted fat. Our solution is simple and foolproof: a cornstarch slurry added after the braising is complete.
Unlike flour, which requires fat to activate, cornstarch thickens the strained liquid rapidly on the stovetop, resulting in a glossy, profoundly flavored gravy that clings perfectly to the shredded beef.
Depth of Flavor from Deglazing and Acid
Flavor building starts with deglazing. After searing, we cook the onions in the pot, allowing them to soften and scrape up the priceless brown residue, or “fond,” from the bottom.
The addition of apple cider vinegar, coupled with brown sugar, is essential. The vinegar provides a necessary tang to cut through the richness of the beef, while the sugar balances the acidity and promotes caramelization, achieving an incredibly complex flavor profile.

Achieving Fork-Tender Texture Every Time
The magic of pot roast lies in the breakdown of tough connective tissue, primarily collagen, into gelatin. This requires time and consistent low heat.
Cooking a beef chuck roast low and slow, specifically at 325°F for 3.5 to 4 hours, allows this transformation to occur reliably. When the meat is ready, it should offer absolutely no resistance when pierced with a fork.
Building the Best Braise: Essential Ingredients and Substitutions
Selecting the Perfect Beef Chuck Roast
Chuck roast is the optimal choice for this dish because it is highly marbled with fat and laced with connective tissue, ensuring juiciness and flavor.
Avoid leaner cuts like round or sirloin tip; they will dry out and remain tough even after extensive cooking. Aim for a three-pound roast that is uniformly thick.
The Role of Flour in Searing and Saucing
The initial dredge in seasoned flour serves a critical dual function. First, it helps wick away surface moisture, ensuring the roast achieves a superior, deep brown crust during searing (the Maillard reaction).
For more deeply satisfying flavor, try slow-simmered beef stew next.
Second, this thin flour coating contributes a base level of thickening to the braising liquid before the final cornstarch slurry is introduced, adding body and richness.
The Flavor Trinity: Broth, Vinegar, and Brown Sugar
We use a combination of unsalted beef stock (for deep collagen richness) and beef broth (for concentrated flavor) to create the braising liquid base.
A quarter cup of apple cider vinegar is essential for acidity, preventing the final dish from tasting flat, while a tablespoon of brown sugar (or molasses) provides a depth of sweetness that counters the savory richness.
What to Serve Alongside: The Ultimate Side Dishes
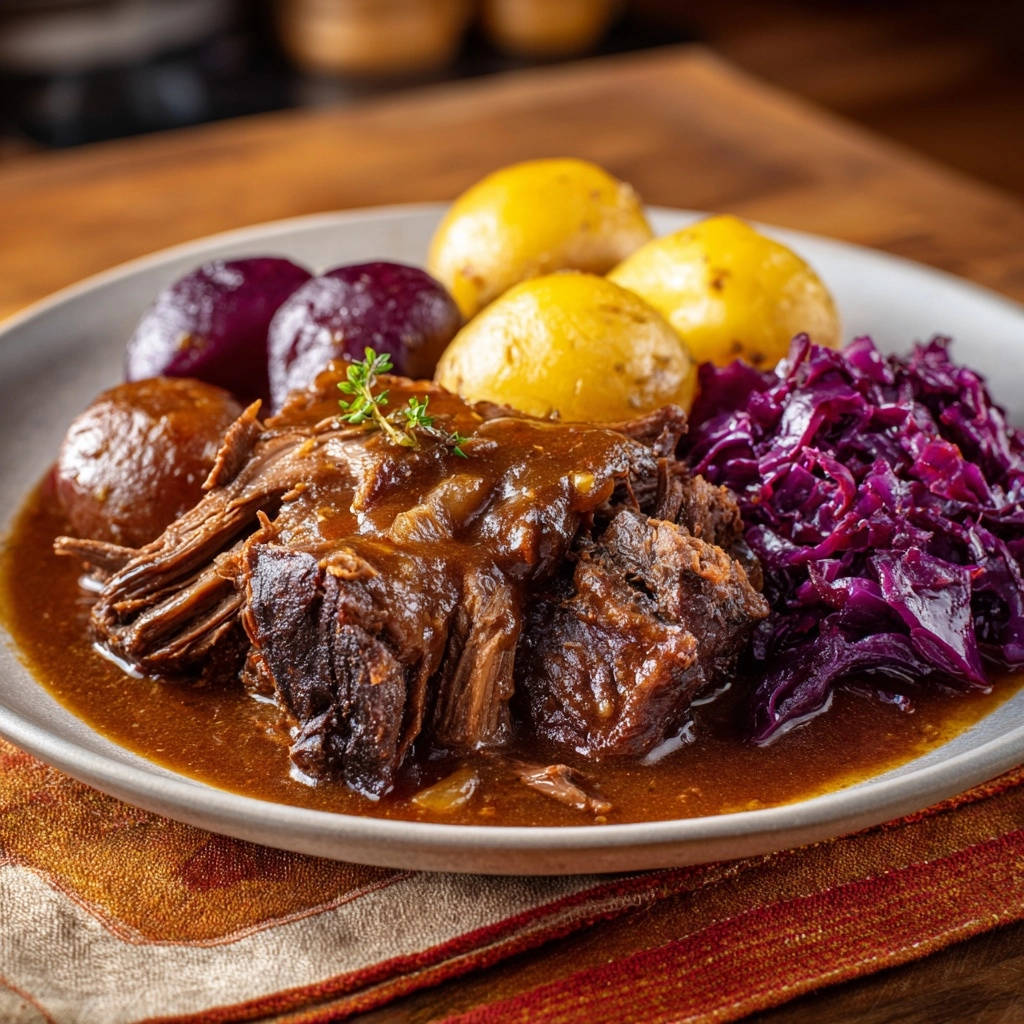
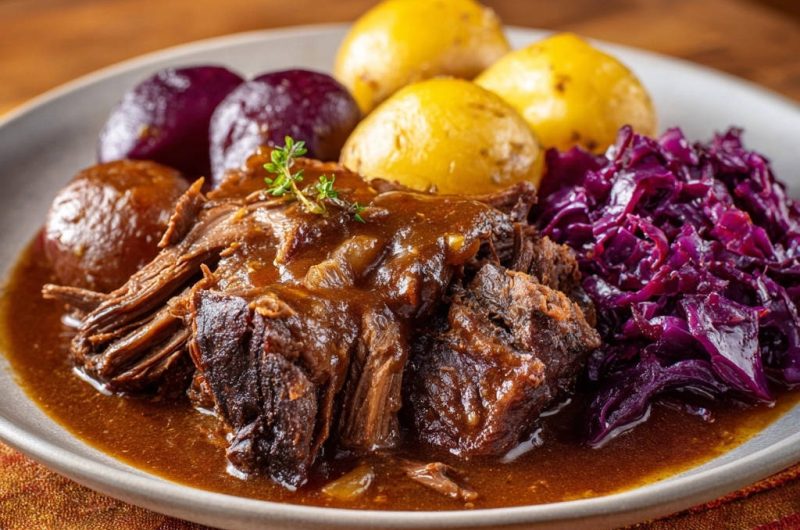
The traditional companions-potatoes and cabbage-are included to complement the hearty beef. Small yellow potatoes offer a creamy texture perfect for absorbing the excess gravy.
For another savory braised beef idea, explore slow-braised beef and apricot stew.
Braised red cabbage, simmered briefly with its own splash of vinegar and sugar, provides a tart counterpoint that cuts through the fat of the pot roast beautifully.
Essential Tools for Your Pot Roast Success
The Non-Negotiable Dutch Oven
A heavy, enameled cast iron Dutch oven is mandatory for superior braising. Its mass ensures exceptional heat retention, which is vital for maintaining a consistent low temperature in the oven.
Crucially, it handles high heat for searing without scorching and distributes heat evenly for the long, slow cook.
Other Helpful Kitchen Gear
Sturdy Tongs: Essential for turning the heavy roast during the searing phase without tearing the beef or losing the precious crust.
Wire Whisk: Necessary for thoroughly blending the cornstarch and cold water into a smooth slurry, which is key to preventing lumps in your finished gravy.
Quality Cutting Board: Required for resting the hot roast and for the inevitable shredding process. Choose one with a juice groove to capture any liquid.
What to Serve Alongside?
To complete your comforting beef pot roast meal, consider these complementary dishes.
- For an equally satisfying experience, try these creamy mashed potatoes, perfect for soaking up that extra pot roast gravy.
- Add another layer of savory goodness with this thyme beef stuffing, which offers a moist texture that pairs well with tender braised beef.
Classic Braised Beef Pot Roast: Step-by-Step Instructions
Phase 1: Preparation and Searing
-
Dredge and Prepare the Beef:
Ensure the beef is completely patted dry before coating it in the seasoned flour mixture. A dry surface is essential for a proper sear, which locks in flavor.
-
Achieve a Deep, Uniform Sear:
Use high heat and avoid overcrowding the pot, searing all sides of the beef until deeply caramelized (about 3-4 minutes per side). This crucial step builds the foundation of the final flavor profile.
Phase 2: Building the Aromatic Base and Braising
-
Sauté Aromatics and Deglaze:
Cook the onions until soft, scraping up the browned bits (fond) left by the beef. This deglazing process releases immense flavor into the sauce base.
Add garlic only during the last minute to prevent it from burning, which can lead to bitterness.
-
Add Liquid and Begin the Braise:
Return the roast to the pot and pour in the liquids and seasonings (broth, stock, vinegar, sugar, herbs). The liquid should come about halfway up the sides of the roast, not fully submerged.
-
Slow Cook to Perfection:
Cover the Dutch oven tightly and place it in the preheated 325°F oven. Maintain the tight cover throughout the 3.5 to 4 hours of cooking; moisture loss equals tough beef.
Phase 3: The Crucial Thickening and Finishing Touch
-
Rest and Prep the Liquid:
Remove the finished roast and tent it with foil to rest. Discard the bay leaves. Skim off excess fat from the liquid using a large spoon or fat separator.
-
Execute the Cornstarch Slurry (The Secret Step):
Bring the liquid to a simmer on the stovetop. Whisk the cornstarch into cold water (the slurry) until completely smooth before slowly whisking it into the simmering liquid.
Stir constantly for 2-3 minutes until the gravy coats the back of a spoon. This method prevents lumps and guarantees the desired thickness.
-
Shred, Coat, and Serve:
Shred the rested beef and return it to the thickened sauce, stirring gently to fully coat the meat in the rich, luscious gravy. Serve immediately.
Troubleshooting Your Pot Roast: Common Mistakes and Quick Fixes
Why Is My Pot Roast Still Tough?
If the meat is tough, it simply needs more time. Connective tissues require prolonged heat to break down completely.
Cover the pot and return it to the oven for another 30 to 60 minutes until it yields easily to a fork. Never raise the temperature, just extend the cooking time.
How to Fix an Overly Salty Sauce
The simplest fix for overly salty braising liquid is dilution. Add small amounts of unsalted stock or water until the salinity level is acceptable.
Alternatively, the starch from a raw potato will absorb salt; cut a peeled potato in half, simmer it in the sauce for 15 minutes, then discard before serving.
Dealing with Scorched Bits at the Bottom of the Pot
Scorching usually happens when the heat is too high while searing or sautéing the aromatics. If the bottom of the pot is slightly burnt, do not scrape the black bits (which will taste bitter) when deglazing.
Carefully transfer the braising liquid to a separate clean saucepan, leaving the burnt layer behind, then proceed with the thickening step.
Chef’s Secrets: Elevate Your Classic Braised Beef Pot Roast Game
Master the Dry Pat: The single most effective way to ensure a great sear is to pat the beef completely dry using paper towels immediately before seasoning.
Rest for Maximum Moisture: Always allow the pot roast to rest for 15-20 minutes after removing it from the oven, just as you would a steak, to allow the juices to redistribute before shredding.
Brown Sugar vs. Molasses: While brown sugar works perfectly, using a teaspoon of unsulphured molasses instead will impart a deeper, smokier, more complex background note to the sauce.
Herb Power: Use fresh herbs (like rosemary or thyme sprigs) tied together with butcher’s twine and discard them after cooking. They infuse a cleaner flavor than dried herbs that might break down into the sauce.
Frequently Asked Questions About Braised Beef
What is the difference between beef broth and beef stock in braising?
Beef stock is generally made from bones and connective tissue, meaning it contains high amounts of natural gelatin, which adds crucial body and mouthfeel to the finished sauce.
Beef broth, typically made from meat, provides a more pronounced savory flavor. Using both ensures a perfect balance of richness and taste complexity for your braised beef.
Can I make this Classic Braised Beef Pot Roast in a slow cooker or instant pot?
Yes, you can adapt this recipe, but the first two steps-searing and deglazing-must be done on the stovetop first, as they build essential flavor.
The slow cooker requires about 8 hours on low; the Instant Pot requires about 90 minutes under high pressure, followed by natural release. Regardless of method, always finish the sauce on the stovetop using the cornstarch slurry.
How important is searing the beef before braising?
Searing is absolutely vital. While it doesn’t “seal in juices” (a common myth), the Maillard reaction that occurs during high-heat searing creates hundreds of complex, savory flavor compounds.
Without a proper sear, your final beef pot roast will lack depth and richness.
Can I use different vegetables in this pot roast?
Traditional root vegetables like carrots, celery, and turnips are excellent additions to a slow cooked pot roast.
To prevent them from becoming mushy, add them roughly halfway through the braising time (about 2 hours in), ensuring they cook long enough to soften but retain some structure.
Storing and Serving: Maximizing Your Classic Braised Beef Pot Roast Yield
Best Practices for Refrigeration and Freezing
Cool the finished pot roast and gravy completely before storing in an airtight container. It will last safely for 3-4 days in the refrigerator.
For longer storage, freeze the fully cooked dish in freezer-safe bags or containers for up to 3 months. Thaw slowly overnight in the refrigerator.
Make-Ahead Tips for the Ultimate Weeknight Meal
Pot roast is one of the best make-ahead meals. Complete the recipe up through the slow cooking (Step 6), allowing the roast to rest and the liquid to cool.
The next day, gently reheat the liquid, skim the fat (which will have solidified), execute the thickening step (Step 7), shred the beef, and combine. The flavor deepens overnight.
Reheating Without Drying Out the Beef
The best way to reheat is low and slow. Place the shredded beef and gravy in an oven-safe dish, cover tightly, and reheat at 300°F until warmed through.
Alternatively, reheat gently on the stovetop over low heat, stirring occasionally. Avoid microwaving large quantities, as it can dry out the edges of the beef.
Ready to Create Your New Family Tradition?
This Classic Braised Beef Pot Roast delivers deeply satisfying flavor and unparalleled tender texture. More importantly, it provides the roadmap to a perfect gravy, banishing watery sauces from your kitchen forever.
Stop settling for mediocre Sunday dinners. Follow these steps for the perfect sear, the ideal braise, and that luxurious, unforgettable sauce. Give this recipe a try and let me know how it transforms your table!
Braised Beef Pot Roast
Course: Main CourseCuisine: AmericanDifficulty: medium6
servings20
minutes4
hours750
kcal240
minutesSay goodbye to watery pot roast gravy! This classic recipe guarantees incredibly tender, fork-shredded beef submerged in a rich, deeply flavored sauce. The secret is a quick cornstarch slurry added right at the end for ultimate thickness.
Ingredients
3 pound beef chuck roast, trimmed and patted dry
2 tablespoons all-purpose flour
2 teaspoons coarse salt, divided
1 teaspoon black pepper, divided
2 tablespoons neutral cooking oil (canola or vegetable)
1 large yellow onion, roughly chopped
2 cloves garlic, minced
1 cup beef broth
2 cups unsalted beef stock
1/4 cup apple cider vinegar (for flavor complexity)
1 tablespoon brown sugar (or molasses)
2 teaspoons dried thyme
2 bay leaves
2 tablespoons cornstarch
1/4 cup cold water
4 cups red cabbage, shredded (for the side dish)
1 pound small yellow potatoes, cooked
Optional: Fresh thyme sprig for garnish
Directions
- Prepare the Beef: Pat the chuck roast completely dry. In a shallow dish, mix the flour, 1 teaspoon of salt, and 1/2 teaspoon of pepper. Dredge the beef thoroughly in the flour mixture, shaking off any excess. This initial flour layer is crucial for color and initial thickening.
- Sear the Roast: Heat the cooking oil in a large Dutch oven over medium-high heat until shimmering. Carefully sear the roast on all sides until deeply browned and caramelized, about 3 to 4 minutes per side. Remove the roast and set it aside.
- Build the Base: Reduce the heat to medium. Add the chopped onion to the Dutch oven and cook for 5 to 7 minutes until softened and lightly browned, scraping up any browned bits from the bottom. Add the minced garlic and cook for 1 minute until fragrant.
- Braise: Return the roast to the pot. Pour in the beef broth, beef stock, apple cider vinegar, brown sugar, remaining salt and pepper, thyme, and bay leaves. The liquid should come about halfway up the sides of the roast. Bring the liquid to a simmer.
- Slow Cook: Cover the Dutch oven tightly and transfer to a preheated oven at 325 degrees F. Braise for 3.5 to 4 hours, or until the beef is fork-tender and easily shredded.
- Shred the Beef: Carefully remove the roast from the pot and place it on a cutting board. Tent loosely with foil. Discard the bay leaves from the braising liquid.
- The Pain-Point Solution (Never Watery Sauce): Skim off any excess fat from the surface of the braising liquid. Bring the liquid to a strong simmer on the stovetop. In a small bowl, whisk together the 2 tablespoons of cornstarch and 1/4 cup of cold water until smooth (this is your slurry). Slowly whisk the slurry into the simmering liquid, ensuring it incorporates fully. Let it simmer for 2 to 3 minutes, stirring constantly, until the sauce thickens significantly and coats the back of a spoon. Taste and adjust seasoning as needed.
- Finish: Shred the beef using two forks and return it to the thickened sauce, stirring gently to coat.
- Serve: Serve the rich braised beef and gravy alongside the cooked yellow potatoes and the braised red cabbage (simply simmer the shredded cabbage with a splash of water, vinegar, and sugar until tender). Garnish with a fresh thyme sprig.
Notes
- The cornstarch slurry (Step 7) is the key to achieving a thick, professional gravy consistency.


