
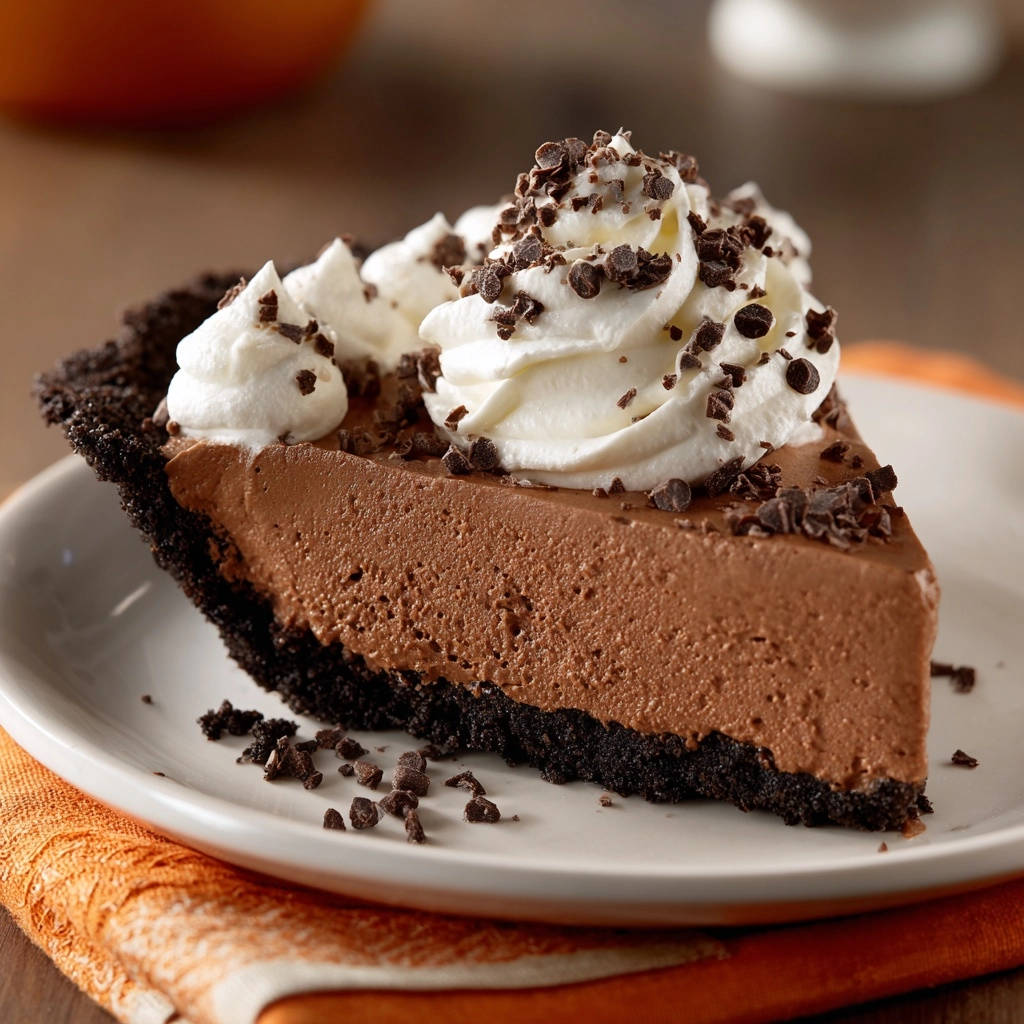
There’s nothing quite as frustrating as anticipating a slice of luscious chocolate mousse pie, only for it to slump onto the plate. I’ve been there, and through countless trials, I’ve discovered the simple, yet transformative, secrets to crafting a truly Decadent Chocolate Mousse Pie that holds its elegant shape and boasts an unbelievably light, airy texture every single time. This recipe is your reliable guide to achieving that coveted, picture-perfect slice.
Why This Decadent Chocolate Mousse Pie Is Your New Go-To Dessert
This isn’t just another chocolate pie recipe; it’s engineered for success and supreme enjoyment.
For an even smoother texture, consider trying these chocolate mousse pots.
My method ensures a never-fail firmness, allowing each slice to stand tall without compromising the essential airy, melt-in-your-mouth texture that defines a true mousse. Say goodbye to runny fillings.
Beyond its structural integrity, this recipe is surprisingly easy to follow. With clear steps and expert tips, even novice bakers can achieve impressive, bakery-quality results.
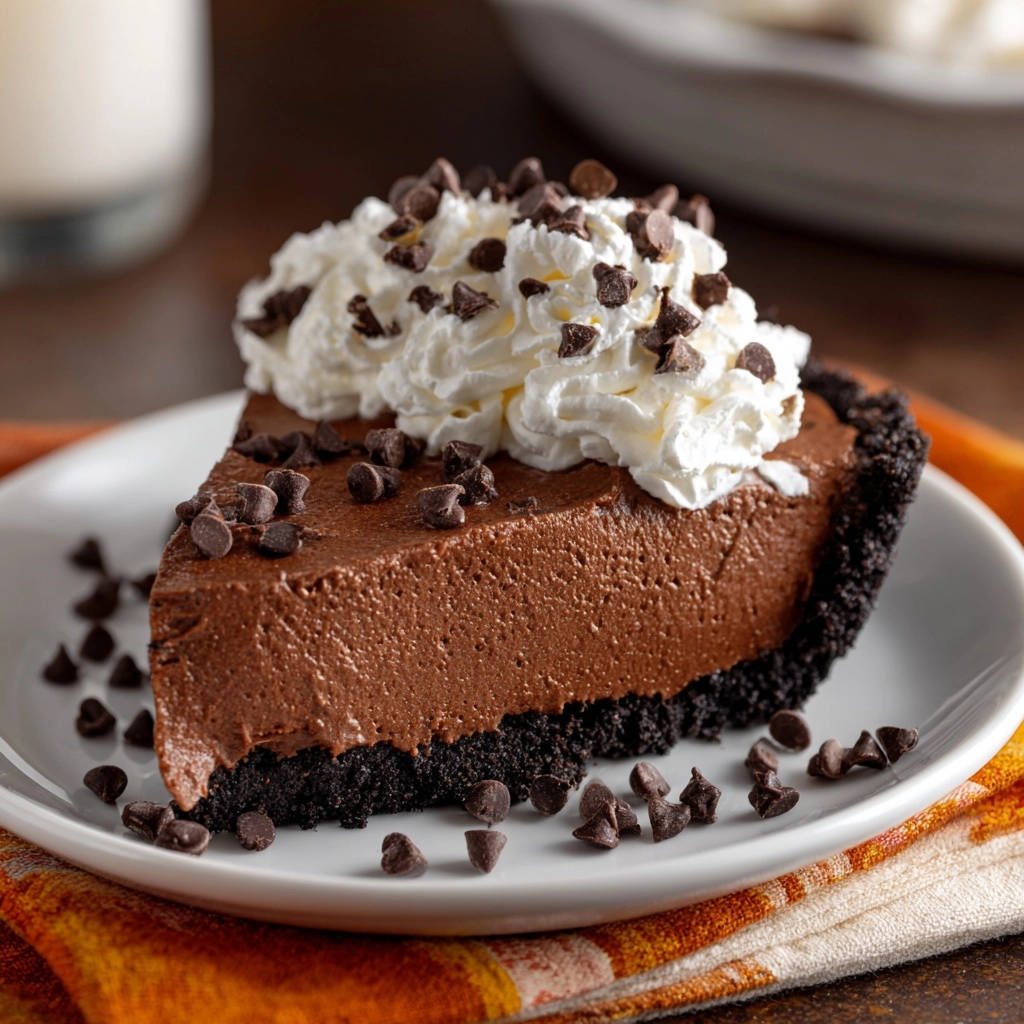
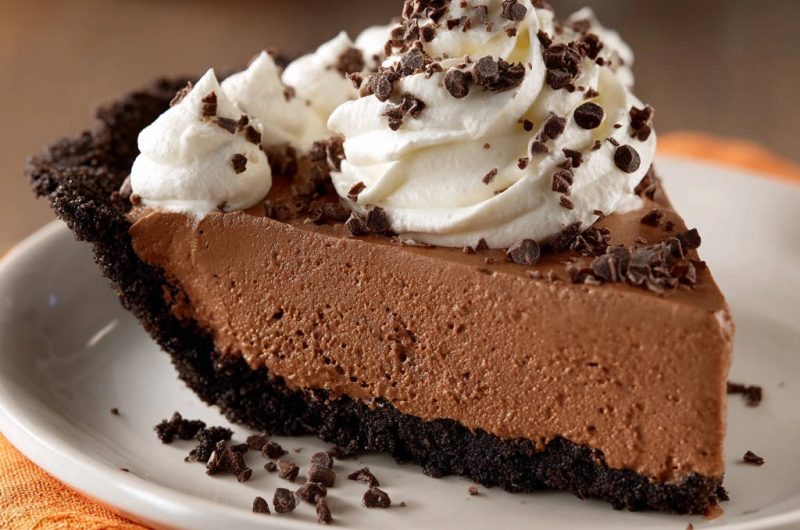
The combination of a crisp chocolate cookie crust and a velvety, rich chocolate filling creates an impressive presentation, perfect for any special occasion or a comforting weeknight treat.
For another take on rich chocolate, try this dreamy mint chocolate pie.
Building Blocks of Bliss: Ingredients for Your Mousse Masterpiece
Quality ingredients are the foundation of an exceptional Decadent Chocolate Mousse Pie. Here’s what you’ll need and why each component matters.
The Crust Foundation
The base of our pie provides a delightful contrast to the creamy mousse.
1½ cups chocolate sandwich cookie crumbs: Using full chocolate sandwich cookies, including the cream filling, adds depth of flavor and helps the crust bind beautifully. About 18-20 cookies will yield the right amount of crumbs.
¼ cup unsalted butter, melted: Melted butter acts as the crucial binding agent, ensuring your cookie crust is firm, not crumbly, and easy to slice.
Velvety Chocolate Mousse Filling
The heart of this pie is its rich, airy chocolate mousse.
1½ cups semi-sweet or dark chocolate chips: The quality of your chocolate directly impacts the richness of your mousse. Semi-sweet offers a balanced sweetness, while dark chocolate provides a more intense, sophisticated flavor. Opt for good quality chips that melt smoothly.
½ cup heavy cream (for melting chocolate): This small amount of cream helps create a silky-smooth chocolate ganache, forming the stable base for your mousse. It aids in melting the chocolate evenly.
2 teaspoons vanilla extract: A classic flavor enhancer, vanilla brings out the deep chocolate notes and adds a subtle warmth to the mousse.
¼ teaspoon salt: Just a pinch of salt is essential to balance the sweetness and elevate the chocolate flavor, making it taste even richer.
2 cups cold heavy cream (for whipping): This is the key to an airy mousse. The cream must be very cold to whip to stiff peaks, incorporating ample air for that cloud-like texture.
½ cup powdered sugar: Also known as confectioners’ sugar, it dissolves easily into the cold cream, sweetening it without adding a grainy texture.
Complementary Treats
Round out your chocolate mousse pie experience with these sweet baked goods.
- For a warm, spiced start to your meal, try these glazed cinnamon spice scones, offering a lovely contrast to the rich chocolate.
- If you’re craving more unique cinnamon flavors, consider these cookies and cream cinnamon rolls, bringing a different kind of sweet indulgence.
Pillowy Whipped Topping & Garnish
The crowning glory of your pie adds another layer of creamy indulgence.
1 cup cold heavy cream: Again, very cold cream ensures a light, fluffy whipped topping.
2 tablespoons powdered sugar: Sweetens the topping and helps stabilize the whipped cream.
½ teaspoon vanilla extract: Enhances the flavor of the whipped cream, complementing the chocolate.
2 tablespoons mini chocolate chips or chocolate shavings: These are perfect for garnish, adding a touch of visual appeal and extra chocolatey goodness.
Essential Tools for Decadent Mousse Pie Perfection
Having the right equipment makes preparing this Decadent Chocolate Mousse Pie a breeze.
9-inch Pie Plate: The standard size for this recipe, ensuring the right proportions of crust to filling.
Electric Mixer (Handheld or Stand): Absolutely crucial for whipping cream to stiff peaks quickly and efficiently. It saves arm strength and ensures consistent results.
Heatproof Bowl & Saucepan (for double boiler) or Microwave-Safe Bowl: For gently melting the chocolate without scorching it. A double boiler offers more control.
Large, Chilled Mixing Bowl: Essential for whipping the heavy cream. A cold bowl helps the cream whip faster and achieve maximum volume.
Rubber Spatula: Indispensable for gently folding the whipped cream into the chocolate mixture, preserving the airy texture of the mousse.
Your Path to a Flawless Decadent Chocolate Mousse Pie: Step-by-Step
Follow these detailed steps to create a show-stopping Decadent Chocolate Mousse Pie.
Crafting the Cookie Crust Foundation
Start by combining the chocolate cookie crumbs and melted unsalted butter in a medium bowl. Use a fork or your hands to mix until the crumbs are evenly moistened and resemble wet sand.
Press this mixture very firmly into the bottom and up the sides of your 9-inch pie plate. The firmer you press, the more stable your crust will be, preventing crumbling when sliced.
Place the crust in the freezer while you prepare the filling. This quick chill helps set the butter, making the crust extra firm and preventing it from becoming soggy when the mousse is added.
The Secret to a Stable Chocolate Base
In a heatproof bowl, combine the 1½ cups of chocolate chips and ½ cup heavy cream. Melt this mixture gently. You can use a double boiler, stirring until smooth, or microwave in 30-second intervals, stirring after each, until fully melted and glossy.
Stir in the 2 teaspoons vanilla extract and ¼ teaspoon salt until well combined. The salt truly brings out the chocolate’s depth.
This next step is absolutely critical for a stable mousse: You must let the chocolate mixture cool down to room temperature. This will take about 20-30 minutes, with occasional stirring. It should still be pourable but feel cool to the touch. Adding warm chocolate to cold whipped cream will melt the cream, resulting in a runny, unstable mousse.
Achieving Perfectly Whipped Cream
In a large, chilled bowl, whip the 2 cups cold heavy cream with ½ cup powdered sugar using an electric mixer on medium-high speed. Chill your bowl and beaters in the freezer for 10-15 minutes beforehand; this dramatically helps the cream whip up faster and holds stiff peaks longer.
Continue whipping until stiff peaks form. This means when you lift the beaters, the cream should stand up firmly on its own. Be vigilant: do not overmix, or the cream will become grainy and separate, resembling butter.
Gently Folding for Maximum Airiness
Now, it’s time to combine the two main components of your mousse. Take about one-third of the whipped cream and gently fold it into the cooled chocolate mixture until just combined. This “lightening” step makes the chocolate base easier to incorporate with the remaining whipped cream without deflating it.
Next, add the remaining whipped cream in two more additions. With a rubber spatula, fold very gently from the bottom up, turning the bowl as you go, until no white streaks remain and the mixture is uniformly chocolate brown and airy. The key is gentle, patient folding to preserve all that precious air you whipped into the cream. Overmixing here will deflate the mousse, making it dense and runny.
The Crucial Extended Chilling Period
Carefully pour the prepared chocolate mousse filling into the chilled cookie crust. Use your spatula to smooth the top, creating an even surface.
Refrigerate the pie for at least 4 hours, or preferably overnight, until it is completely firm and set. This extended chilling time is absolutely essential for the mousse to stabilize properly. Patience here guarantees beautiful, clean slices that hold their shape.
Finishing with a Flourish
Just before serving, prepare your fresh whipped topping. In a clean, chilled bowl, whip the 1 cup cold heavy cream with 2 tablespoons powdered sugar and ½ teaspoon vanilla extract until soft or medium peaks form. You want it fluffy but not overly stiff.
Pipe or dollop the whipped cream generously onto the chilled pie slices or the entire pie. Then, sprinkle with mini chocolate chips or elegant chocolate shavings for a professional finish.
Now, slice and serve your perfectly firm, absolutely delicious Decadent Chocolate Mousse Pie!
Chef’s Secrets: Elevate Your Decadent Chocolate Mousse Pie
These professional tips will help you perfect your chocolate mousse pie every time.
Optimizing Ingredient Temperatures for Success
Always ensure your heavy cream for whipping is as cold as possible; even chill your mixing bowl and beaters for 10-15 minutes before starting. This dramatically increases the cream’s ability to whip up to stiff peaks quickly and hold its volume. Simultaneously, guarantee your melted chocolate base is fully cooled to room temperature before folding in the whipped cream. Warm chocolate will instantly deflate your perfectly whipped cream, leading to a runny, failed mousse.
Mastering the Delicate Folding Technique
The art of folding is crucial for maintaining the airy texture of your mousse. Instead of stirring vigorously, use a rubber spatula to gently scoop from the bottom of the bowl up and over the top, turning the bowl slightly with each fold. This motion carefully incorporates the ingredients without pressing out the air. Stop folding as soon as no white streaks remain; over-mixing will knock out the air and make your mousse heavy.
The Power of Patience: Chilling Done Right
The extended chilling period isn’t just a suggestion; it’s a non-negotiable step for a truly firm, sliceable mousse. A minimum of 4 hours allows the chocolate and cream to fully set and marry, preventing a sloppy presentation. Overnight chilling is even better for optimal firmness and flavor development. Do not rush this step!
Preventing a Soggy Crust
To guarantee a crisp, chocolatey crust, press the cookie crumb and butter mixture into the pie plate very firmly and evenly. Ensure it’s packed tightly, especially up the sides. Freezing the crust while you prepare the filling also helps solidify the butter, creating a barrier that prevents the crust from absorbing moisture from the mousse, keeping it wonderfully crisp.
Troubleshooting Common Decadent Chocolate Mousse Pie Hiccups
Even seasoned bakers encounter challenges. Here’s how to fix common issues with your Decadent Chocolate Mousse Pie.
Why Is My Mousse Runny and Not Setting?
This is the most common issue. The primary culprit is usually the chocolate base not being cool enough before folding in the whipped cream; warm chocolate will melt the cream. Overmixing the whipped cream (which can make it grainy and less stable) or overmixing the mousse itself (deflating the air) can also contribute. Finally, insufficient chilling time is a major factor – ensure at least 4 hours, preferably overnight, in the refrigerator for proper setting.
My Whipped Cream Won’t Get Stiff!
The likely reasons are that your heavy cream, bowl, or beaters weren’t cold enough. Heavy cream whips best when very cold. Ensure you’re using full-fat heavy cream (at least 36% milk fat); low-fat or “light” cream won’t whip to stiff peaks. If it separates and looks grainy, you’ve overwhipped it into butter; unfortunately, there’s no going back from that point.
My Pie Crust is Soft or Crumbly!
A soft crust often means there wasn’t enough melted butter to bind the crumbs properly, or the mixture wasn’t pressed firmly enough into the pie plate. Ensure you pack it down tightly, using the bottom of a glass or your knuckles. Insufficient freezing or chilling time before adding the filling can also contribute to a less stable crust.
Serving Your Decadent Chocolate Mousse Pie & Storage Solutions
Make the most of your stunning Decadent Chocolate Mousse Pie with these serving and storage tips.
Creative Serving Suggestions
Beyond the classic mini chocolate chips, consider garnishing your pie with fresh raspberries or sliced strawberries for a vibrant contrast and a touch of tartness. A dusting of cocoa powder or a drizzle of homemade caramel sauce can also elevate the presentation. For elegant slicing, dip a sharp knife in hot water and wipe it dry between each slice; this ensures clean, crisp edges.
Proper Storage for Lasting Freshness
Your Decadent Chocolate Mousse Pie will stay fresh and delicious in the refrigerator for up to 3-4 days. Ensure it is tightly covered with plastic wrap or stored in an airtight container to prevent it from absorbing any refrigerator odors and to maintain its texture. The crust can soften slightly over time, but the mousse will remain delightful.
Can You Make This Decadent Pie Ahead of Time?
Absolutely! This is an ideal make-ahead dessert. You can prepare the entire pie, including the filling and crust, a day or even two in advance. Simply keep it well-covered in the refrigerator. The key is to add the freshly whipped topping and any delicate garnishes just before serving, as fresh whipped cream is always best enjoyed immediately.
Frequently Asked Questions About This Decadent Mousse Pie
Here are answers to some common questions about making this exquisite chocolate dessert.
Can I use a different type of chocolate in the mousse?
Yes, you can certainly customize the chocolate. Using milk chocolate will result in a sweeter, milder mousse, while a higher percentage dark chocolate will yield a more intense and less sweet flavor. For a rich and slightly bitter twist, you might also enjoy making a Decadent Chocolate Pecan Tart, which showcases deep chocolate notes beautifully.
Is this recipe naturally gluten-free?
No, the traditional chocolate sandwich cookie crust is not gluten-free. However, you can easily make this recipe gluten-free by substituting the regular chocolate sandwich cookies with gluten-free versions available in most grocery stores. All other ingredients are typically gluten-free, but always double-check labels for hidden gluten.
How can I make this Decadent Chocolate Mousse Pie dairy-free?
To make this pie dairy-free, you’ll need to use dairy-free chocolate sandwich cookies for the crust (or a gluten-free/dairy-free cookie alternative), dairy-free semi-sweet or dark chocolate chips, and full-fat canned coconut cream (chilled overnight and scooped from the thick top layer) instead of heavy cream. Ensure your vegan butter for the crust is also dairy-free. The texture will be slightly different but still incredibly delicious.
What’s the best way to get clean slices?
The secret to clean slices is a fully chilled pie and a warm, dry knife. Before each cut, run your knife under hot water for a few seconds, then wipe it completely dry. Slice straight down, then pull the knife straight up. Repeating this process for each slice prevents sticking and creates beautifully defined portions of your rich chocolate pie.
Share Your Decadent Chocolate Mousse Pie Masterpiece!
There’s immense satisfaction in creating something truly delicious, and this Decadent Chocolate Mousse Pie is a dessert that consistently delivers. I encourage you to try this recipe, trust the process, and witness the magic of a perfectly firm, yet gloriously airy chocolate pie come to life in your kitchen. Whether it’s for a special gathering or a quiet indulgence, this pie is sure to impress.
Once you’ve made your own, don’t forget to share your photos and experiences! I love seeing your culinary triumphs. If you’re looking for another delightful chocolate treat, you might also enjoy my recipe for Easy Chocolate Lava Cake, perfect for a quick, molten delight.
Chocolate Mousse Pie
Course: DessertCuisine: AmericanDifficulty: medium8
servings30
minutes10
minutes450
kcal240
minutesThere’s nothing more disappointing than slicing into a beautiful chocolate mousse pie, only to find the filling slump or spread all over the plate. This recipe shares the simple secret to achieving that perfect, firm, yet wonderfully airy texture every single time. Learn the trick to ensuring your pie slices beautifully, holding its shape, with surprisingly easy steps.
Ingredients
For the Chocolate Cookie Crust:
1 and 1/2 cups chocolate sandwich cookie crumbs (about 18-20 cookies)
1/4 cup unsalted butter, melted
For the Chocolate Mousse Filling:
1 and 1/2 cups semi-sweet or dark chocolate chips
1/2 cup heavy cream, for melting chocolate
2 teaspoons vanilla extract
1/4 teaspoon salt
2 cups cold heavy cream, for whipping
1/2 cup powdered sugar
For the Topping:
1 cup cold heavy cream
2 tablespoons powdered sugar
1/2 teaspoon vanilla extract
2 tablespoons mini chocolate chips or chocolate shavings, for garnish
Directions
- To prepare the crust: In a medium bowl, combine the chocolate cookie crumbs and melted butter. Press the mixture firmly into the bottom and up the sides of a 9-inch pie plate. Place the crust in the freezer while you prepare the filling.
- To make the chocolate base: In a heatproof bowl, combine the 1 and 1/2 cups chocolate chips and 1/2 cup heavy cream. Melt gently over a double boiler or in the microwave in 30-second intervals, stirring until smooth. Stir in the 2 teaspoons vanilla extract and 1/4 teaspoon salt. This step is crucial for a stable mousse: Let the chocolate mixture cool down to room temperature, about 20-30 minutes, stirring occasionally. It should still be pourable but not warm to the touch.
- To whip the cream: In a large, chilled bowl, whip the 2 cups cold heavy cream with 1/2 cup powdered sugar using an electric mixer on medium-high speed until stiff peaks form. This means the cream should hold its shape firmly when the beaters are lifted. Do not overmix, or it will become grainy.
- To combine the mousse: Gently fold about one-third of the whipped cream into the cooled chocolate mixture until just combined. This lightens the chocolate base. Then, add the remaining whipped cream in two more additions, folding very gently with a spatula until no white streaks remain and the mixture is uniformly chocolate brown and airy. Overmixing will deflate the mousse, making it runny. The key is gentle, patient folding to preserve the air.
- Assemble and chill: Pour the prepared chocolate mousse filling into the chilled cookie crust. Smooth the top with a spatula. Refrigerate the pie for at least 4 hours, or preferably overnight, until it is completely firm and set. This extended chilling time is essential for the mousse to stabilize and ensure perfect slices.
- For the topping: Just before serving, in a clean, chilled bowl, whip the 1 cup cold heavy cream with 2 tablespoons powdered sugar and 1/2 teaspoon vanilla extract until soft or medium peaks form. Pipe or dollop the whipped cream onto the chilled pie slices, then sprinkle with mini chocolate chips or chocolate shavings. Slice and serve your perfectly firm, delicious chocolate mousse pie!
Notes
- Ensure chocolate base cools to room temperature before folding in whipped cream. Extended chilling time (at least 4 hours, preferably overnight) is crucial for a firm, stable mousse.


