
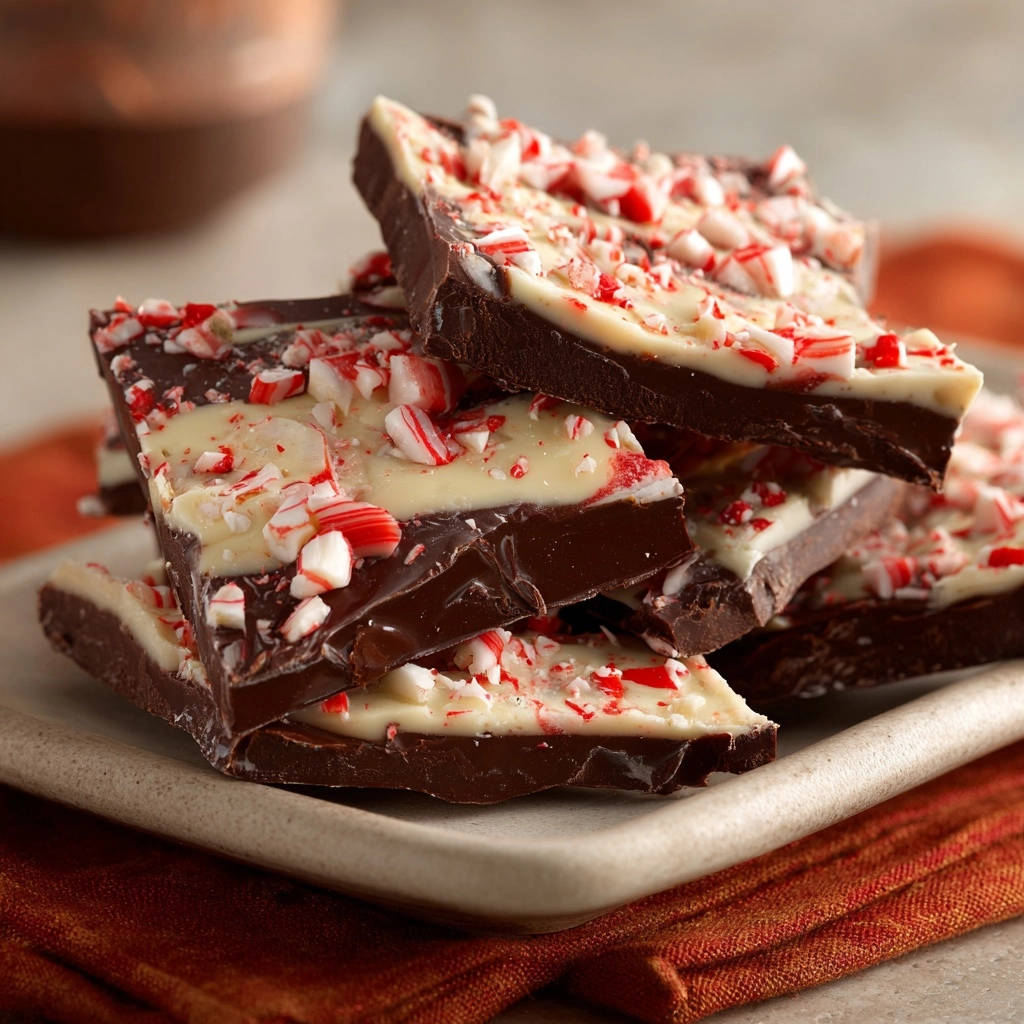
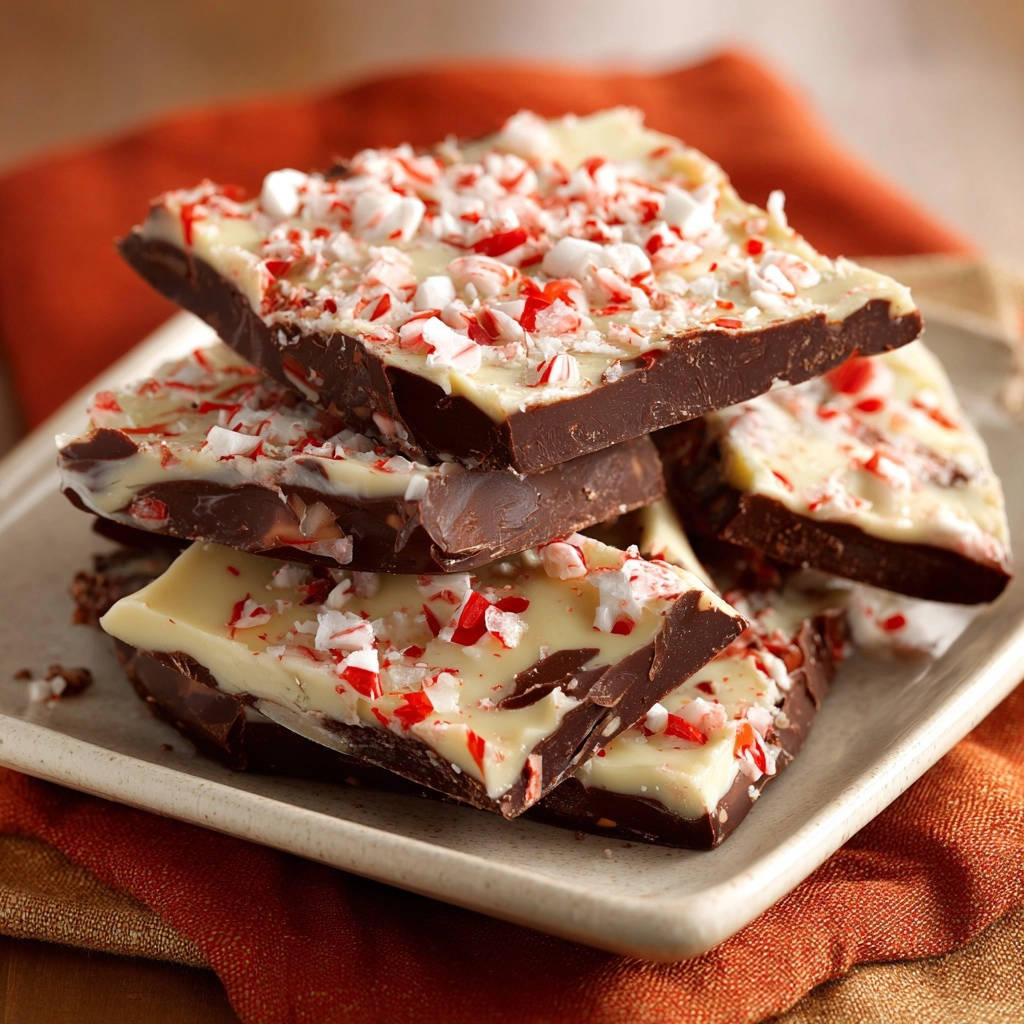
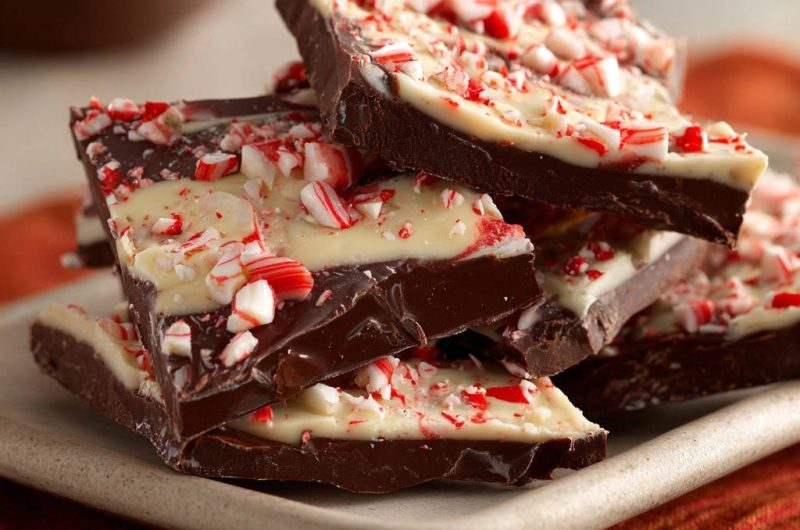
For years, I struggled to achieve that picture-perfect, crisp layer in my homemade Decadent Peppermint Bark, often ending up with smudged colors or brittle pieces that separated. This recipe changed everything, revealing the simple secret to stunning, professional-looking bark. Now, my Decadent Peppermint Bark consistently looks professionally made and holds its shape beautifully – just wait until you discover how simple it truly is to achieve.
Why This Decadent Peppermint Bark Will Be Your New Holiday Staple
The Magic of “No-Smudge” Layers Explained
The cornerstone of this recipe’s success lies in its precise chilling technique. By setting the dark chocolate layer to the perfect firm-but-not-brittle stage, we prevent any smudging or blending when the white chocolate is poured.
This careful timing ensures each vibrant layer stands distinct, delivering the clean lines you crave in your homemade bark. It’s the simple yet vital step that guarantees a professional finish.
For a different take on rich layers, consider salted pecan and pretzel bark.
Effortless Elegance: Impress Guests with Minimal Fuss
Despite its elegant appearance, crafting this Decadent Peppermint Bark is surprisingly straightforward. Minimal active preparation time and clear instructions mean you can achieve impressive results without feeling overwhelmed.
It’s the ideal treat for impressing guests or sharing as thoughtful homemade gifts, all while enjoying a stress-free baking experience.
A Beloved Seasonal Treat, Perfected
Peppermint bark is more than just a sweet; it’s a quintessential holiday tradition, bringing joy and a festive spirit. This perfected recipe honors that tradition by elevating the classic flavors and textures to new heights.
Each bite offers that satisfying snap and refreshing cool mint, making it an anticipated seasonal delight that truly shines.
Gathering Your Essentials: Ingredients for Divine Peppermint Bark
The Foundation: Choosing Quality Dark Chocolate
The quality of your dark chocolate significantly impacts both the taste and texture of your bark. Opt for a good quality bar, ideally 60-70% cacao, for a rich, deep flavor that melts smoothly and sets beautifully.
Chopping it finely ensures even melting, preventing scorching and promoting a uniform base for your Decadent Peppermint Bark.
The Bright Touch: Selecting Premium White Chocolate
Just like the dark chocolate, your white chocolate choice is paramount for success. Premium white chocolate, made with real cocoa butter, will melt into a silky-smooth consistency and avoid the common issue of seizing.
Lower quality white chocolate often contains more oils and less cocoa butter, making it prone to grainy textures or resistance to melting properly.
Crunch and Cool: Perfect Peppermint Candies
The refreshing crunch comes from crushed peppermint candies, typically candy canes or hard round peppermints. For the best result, aim for a mix of fine powder and small, irregular chunks.
Place candies in a sturdy zip-top bag, remove excess air, and use a rolling pin or meat tenderizer to crush them. This creates visual appeal and a delightful textural contrast.
Essential Tools for Your Bark-Making Journey
Baking Sheet and Parchment Paper: Crucial for easy removal and clean layers without sticking.
Double Boiler Setup (or Microwave-Safe Bowls): For gentle, even chocolate melting, minimizing scorching risk.
Offset Spatula: The secret weapon for spreading thin, perfectly smooth chocolate layers.
For a different kind of chocolate treat, consider these no-crumble processor chocolate pecan truffles.
Sturdy Bowl and Rolling Pin: Ideal for efficiently crushing peppermint candies to your desired consistency.
Crafting Flawless Peppermint Bark: Your Step-by-Step Guide
- Prepare Your Workspace:
Line a baking sheet with parchment paper, ensuring ample overhang on all sides. This simple step is absolutely key for easy bark removal and handling later without any mess or sticking.
- Melt the Dark Chocolate:
Gently melt your chopped dark chocolate using a double boiler method for the best results, or carefully in the microwave in 30-second intervals, stirring well after each. Continue stirring until it is perfectly smooth and free of any lumps.
Always use low, gentle heat to prevent scorching and ensure the chocolate remains fluid and workable for spreading.
- Spread the Dark Layer:
Pour the melted dark chocolate onto the prepared sheet. Use an offset spatula or the back of a spoon to quickly and evenly spread it into a thin rectangle, approximately 1/4 inch thick. Work efficiently but smoothly to achieve a uniform base.
- The Critical Chill for Clean Layers:
Transfer the baking sheet to the refrigerator and chill for 20-30 minutes, until the dark chocolate is firm but not rock-hard or brittle. This precise chilling prevents layer blending and separation – it’s the core secret to this Decadent Peppermint Bark recipe’s success!
If it’s too soft, the white chocolate will blend, and if too hard, layers might separate when broken.
- Melt the White Chocolate:
While the dark chocolate sets, melt the chopped white chocolate using the same careful double boiler or microwave method. Stir diligently until it is completely smooth and ready to pour exactly when the dark layer is perfectly set.
- Layer and Sprinkle:
Pour the melted white chocolate evenly over the just-set dark chocolate layer. Quickly and gently spread it across the entire surface to create the second, vibrant layer. Immediately sprinkle the crushed peppermint candies evenly over the warm white chocolate, gently pressing larger pieces into the chocolate if desired.
Working quickly ensures the candies adhere beautifully before the chocolate begins to set, guaranteeing an even distribution.
- Final Set:
Return the baking sheet to the refrigerator for at least 1 hour, or until both chocolate layers are completely firm and the Decadent Peppermint Bark is easily removable from the parchment paper. This patience is rewarded with perfect snap!
- Break and Store:
Once fully set, lift the parchment paper from the baking sheet. Break the bark into irregular pieces by hand for a rustic look, or cut into clean squares using a sharp, warm knife. Store your finished Decadent Peppermint Bark in an airtight container at room temperature for up to two weeks, though it rarely lasts that long!
Chef’s Secrets: Elevating Your Decadent Peppermint Bark Game
Temperature Control is Key: Ensure your kitchen isn’t too warm, which can make chocolate difficult to work with and prone to blooming. If necessary, work quickly or cool down your space.
Mind the Chill Time Precisely: As highlighted in the recipe, under-chilling the dark chocolate leads to smudged layers, while over-chilling can cause separation. Stick closely to the 20-30 minute window for that crucial first layer.
Gentle Spreading is Paramount: When layering the white chocolate, use a very light hand with your offset spatula. Too much pressure can disturb the bottom layer and compromise your crisp lines.
Vary Your Peppermint Crush: A mix of fine powder and larger chunks of peppermint candy creates an appealing texture and visual interest. For crushing, use a ziplock bag and a rolling pin.
Consider a Tempering Guide (Advanced): For truly professional, snap-able, and bloom-resistant chocolate that’s stable at room temperature, explore chocolate tempering techniques. While not strictly required for this simple recipe, it’s an advanced skill for chocolate enthusiasts.
Clean Cuts for Gifting: For perfectly clean squares or rectangles, warm your sharp knife under hot water, wipe it completely dry, and then cut. Repeat this process for each slice. This creates a beautiful, professional presentation for gifting.
Decadent Peppermint Bark Dilemmas Solved: Common Issues & Quick Fixes
Why Did My Layers Smudge or Blend Together?
This typically happens when the dark chocolate layer hasn’t set sufficiently before the white chocolate is added. Ensure you chill the dark chocolate until it’s firm to the touch, and also check that your melted white chocolate isn’t excessively hot.
My Bark Separated When I Broke It! What Happened?
Separation often occurs if the dark chocolate layer was chilled too long, making it brittle, or if the white chocolate was too cool when poured. The ideal state for the dark chocolate is firm but still slightly flexible, allowing the layers to adhere well.
My Chocolate Seized – Now What?
Chocolate seizes when it comes into contact with even a tiny amount of water or is overheated. Unfortunately, seized chocolate is difficult to rescue for bark. It’s best to discard it and start with fresh chocolate, being extra careful with your melting method, especially with a double boiler.
The Peppermint Candies Aren’t Sticking
If your peppermint candies aren’t sticking, it means the white chocolate layer has cooled and set too much before you sprinkled them. The key is to work quickly and sprinkle the candies immediately after spreading the white chocolate. You can gently press larger pieces in to help them adhere.
Serving & Storing Your Peppermint Bark Masterpiece
Presenting Your Peppermint Perfection
Your beautiful Decadent Peppermint Bark deserves a stunning presentation! Arrange irregular pieces on a festive platter, package them in decorative bags or tins for thoughtful gifts, or even crumble some over ice cream for an extra-special dessert.
Keeping It Fresh: Storage Best Practices
Store your peppermint bark in an airtight container at room temperature (around 68-72°F or 20-22°C) for up to two weeks. Avoid refrigerating if possible, as the temperature fluctuations can cause condensation and lead to ‘sugar bloom,’ where the surface develops a whitish, dull appearance.
Make-Ahead Magic: Planning for Holidays
This Decadent Peppermint Bark is an ideal make-ahead treat, perfect for holiday preparations. Since it keeps well for up to two weeks, you can prepare it well in advance, freeing up your time closer to your celebrations.
Your Decadent Peppermint Bark Questions Answered
Can I Use Chocolate Chips Instead of Chopped Bars?
While you can use chocolate chips, high-quality chopped chocolate bars are recommended for superior results. Chocolate chips often contain stabilizers that can affect how smoothly they melt and the final texture of your bark. Using good quality bars ensures a truly decadent experience.
What Kind of Peppermint Candies are Best?
Regular candy canes or round hard peppermint candies work perfectly for this recipe. Avoid soft, chewy mints. For the best texture, aim for a mix of finely crushed powder and some slightly larger pieces of candy.
Can I Make This Dairy-Free or Vegan?
Absolutely! You can easily adapt this recipe by using high-quality dairy-free dark chocolate and vegan white chocolate alternatives. Ensure your chosen brands melt smoothly to achieve the best layered effect.
How Long Does Peppermint Bark Last?
When stored properly in an airtight container at room temperature, your Decadent Peppermint Bark will stay fresh and delicious for up to two weeks. While it can be refrigerated, room temperature storage helps prevent sugar bloom.
Can I Add Other Toppings?
Yes, feel free to get creative with other toppings! A sprinkle of sea salt, chopped nuts, or even a drizzle of contrasting chocolate (like milk chocolate) could add another layer of flavor and visual appeal to your bark.
Share Your Decadent Peppermint Bark Creations!
We’re confident this recipe will become your go-to for making truly Decadent Peppermint Bark with perfectly crisp, clean layers. We can’t wait to see your beautifully crafted creations! Tag us on social media or leave a comment below with your experience and any tips you discovered.
More Sweet Treats and Savory Bites
Enjoying this peppermint bark is just the start. Consider these other delightful recipes to round out your meal or satisfy a sweet craving.
- For a warm, cozy drink to complement the chocolate, try this Homemade Pumpkin Spice Latte, featuring comforting spices.
- If you’re looking for something savory to balance the sweetness, this Cheesy Sausage Biscuit Bake offers a satisfying contrast.
Looking for more festive inspiration? Explore our collection of sweet delights, like our amazing Chewy Chocolate Caramel Nut Bark, to continue your culinary adventures.
Peppermint Bark
Course: DessertCuisine: AmericanDifficulty: easy12
servings15
minutes10
minutes240
kcal60
minutesDiscover the secret to perfectly crisp and clean peppermint bark layers that look professionally made and hold their shape beautifully. This simple recipe ensures your bark holds its shape and prevents smudging or separation. A game-changer for creating stunning, two-toned chocolate treats!
Ingredients
12 ounces good quality dark chocolate, chopped
12 ounces good quality white chocolate, chopped
8-10 regular size peppermint candies (candy canes), crushed
Directions
- Line a baking sheet with parchment paper, allowing some overhang on the sides for easy lifting.
- Melt the dark chocolate: Place the chopped dark chocolate in a heatproof bowl set over a saucepan of simmering water (a double boiler method), ensuring the bottom of the bowl does not touch the water. Stir occasionally until the chocolate is smooth and fully melted. Alternatively, melt in the microwave in 30-second intervals, stirring well after each, until smooth.
- Pour the melted dark chocolate onto the prepared baking sheet. Spread it evenly into a thin rectangle, about 1/4 inch thick, using an offset spatula or the back of a spoon. Work quickly but smoothly.
- Allow the dark chocolate layer to set: Transfer the baking sheet to the refrigerator and chill for 20-30 minutes, or until the dark chocolate is firm but not overly cold or brittle. This is the crucial step for perfect layers; if it’s too soft, the white chocolate will blend, and if it’s too hard, the layers might separate when broken.
- Melt the white chocolate: While the dark chocolate sets, melt the chopped white chocolate using the same double boiler or microwave method as the dark chocolate, stirring until completely smooth.
- Pour the melted white chocolate over the set dark chocolate layer. Quickly and gently spread it evenly across the dark chocolate, creating the second layer.
- Immediately sprinkle the crushed peppermint candies evenly over the warm white chocolate layer. Gently press some of the larger pieces into the chocolate if desired.
- Chill to set: Return the baking sheet to the refrigerator for at least 1 hour, or until both chocolate layers are completely firm and the bark is easily removable from the parchment paper.
- Break the bark: Once fully set, lift the parchment paper from the baking sheet. Break the bark into irregular pieces by hand or cut into squares using a sharp knife. Store in an airtight container at room temperature for up to 2 weeks.
Notes
- Store in an airtight container at room temperature for up to 2 weeks.


