

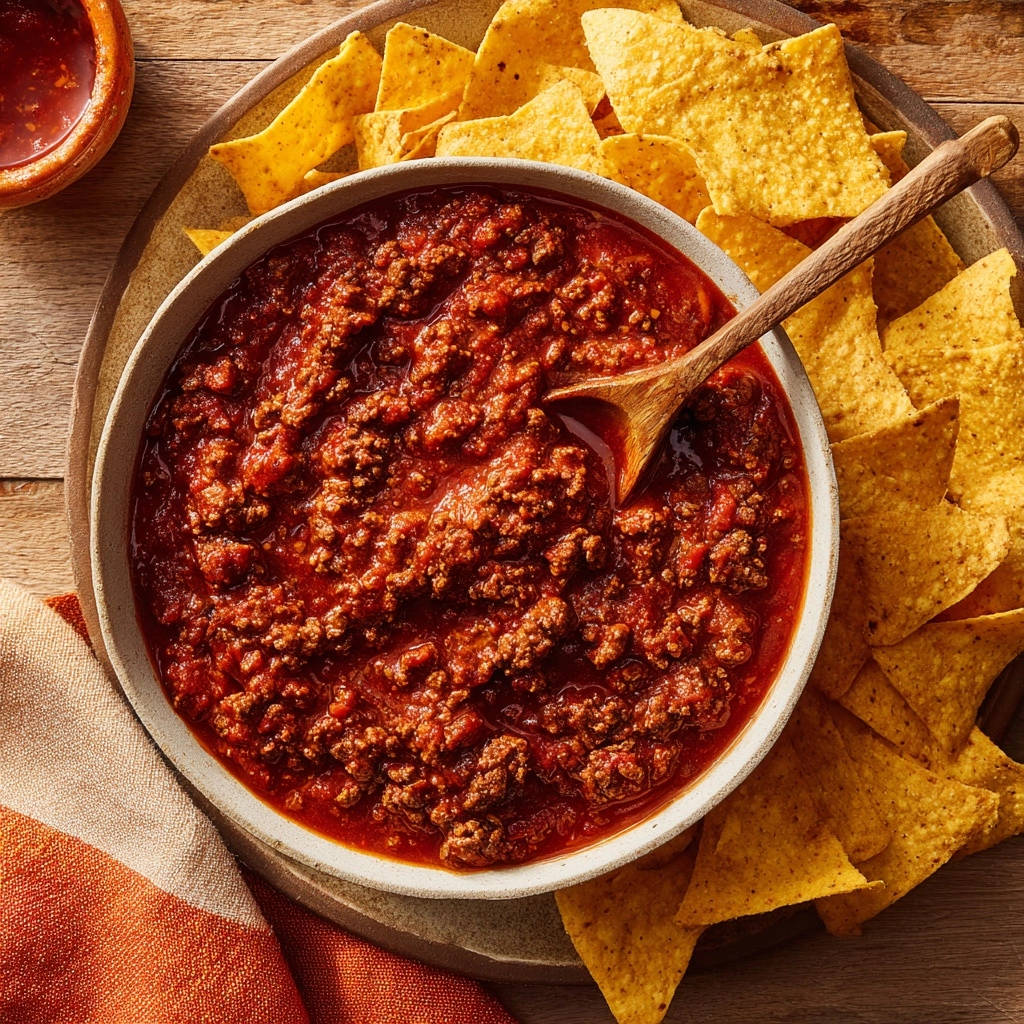
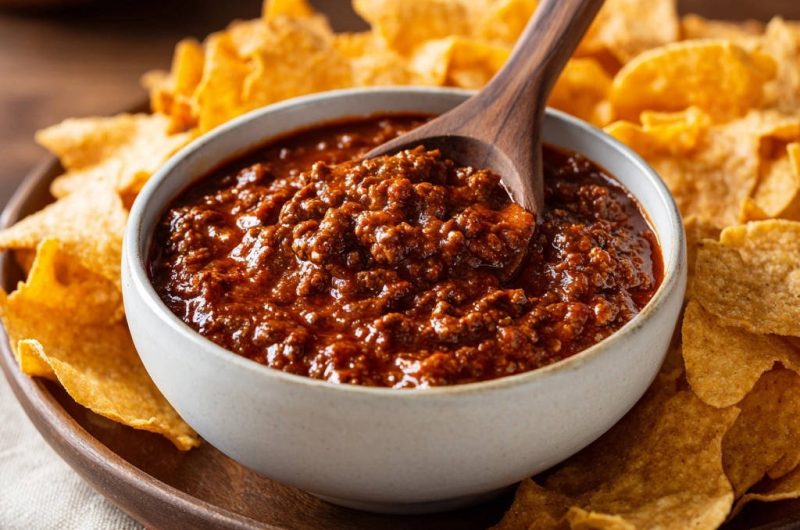
For years, I struggled to replicate that rich, non-greasy texture of true diner chili-the kind that clings perfectly to a chip. This recipe for Diner-Style Beef Chili Dip is the solution, transforming often-oily homemade versions into a thick, glossy masterpiece.
The secret lies in one critical technique that ensures deep flavor saturation without any visible oil slicks, resulting in a foolproof appetizer or game day essential.
Beyond Basic Chili: Why This Dippable Texture Stands Out
The Common Challenge of Greasy Homemade Chili
A major frustration in making chili is the inevitable film of oil that collects on top, especially when using standard ground beef.
This excess fat separates during simmering, leading to a watery, slick sauce that ruins the experience of a good dip.
When chili is too oily or thin, dippers like tortilla chips become soggy and the flavor is masked by residue.
The Secret to True Diner Consistency (It’s All About the Fat)
The characteristic silky, dense consistency of the best diner chili comes from ruthlessly removing rendered fat early in the cooking process.
By thoroughly draining the ground beef after browning, we ensure that only the lean meat remains to absorb the complex spices and tomato base.
This allows the final product to achieve a deep, rich color and a velvety mouthfeel that is perfect for heavy dipping.
An Essential Game Day Dip That Saves You Time
Despite delivering the flavor profile of a chili that has simmered all day, this recipe requires only 10 minutes of active prep time.
For a deeper dive into slow cooking, explore this savory beef stew.
The total cook time is only 45 minutes, allowing you to achieve remarkable depth quickly enough for last-minute gatherings or weeknight cravings.
This efficiency, combined with the outstanding, thick dipping texture, makes it a superior choice for tailgates and Super Bowl spreads.
For slow-cooked beef that melts in your mouth, try this slow-braised beef stew.
Mastering the Building Blocks: Key Ingredients and Their Purpose
Selecting the Ideal Ground Beef for Dipping Chili
I recommend using 85/15 lean ground beef for this Diner-Style Beef Chili Dip.
The 15% fat content provides necessary flavor during the browning process, but it is critical that we completely drain away the resulting rendered liquid.
Using leaner beef (like 90/10) reduces initial flavor depth, while fattier beef (like 80/20) can make the draining step more difficult and less effective.
The Flavor Foundation: Blooming the Spices Correctly
High-quality chili powder is the bedrock, providing the deep red color and primary flavor notes.
Smoked paprika adds a crucial layer of smokiness, enhancing the savory profile without the need for actual smoke.
Cumin introduces earthiness and warmth; all these spices must be cooked briefly with the drained meat and aromatics to “bloom” them, maximizing their aroma and color saturation before liquids are added.
The Secret Thickener: Masa Harina vs. Cornstarch Slurry
To achieve the final, glossy dipping consistency, a thickener is often necessary near the end of simmering.
Masa harina (finely ground corn dough used for tortillas) is my preferred choice; it imparts a subtle, authentic corn flavor that deepens the chili’s profile.
Alternatively, a simple cornstarch mixed with cold water slurry works quickly to provide significant thickness and a glossy sheen.
Essential Tools for Your Diner-Style Beef Chili Dip Adventure
Choosing the Right Vessel: Dutch Oven vs. Heavy-Bottomed Pot
A Dutch oven or a heavy-bottomed pot is crucial for successful chili making.
Their superior heat retention ensures even cooking, which prevents scorching during the long, low-temperature simmer.
The sturdy vessel also helps contain heat during the initial browning phase and simplifies the process of tilting and scooping out rendered fat.
Accuracy in Measurement: Spoons, Scoops, and Heat Control
Precise measurement of spices is vital, especially when dealing with intense flavors like cayenne pepper or cumin.
Use dry measuring spoons for powders and pay close attention to heat settings-medium-high for browning and strictly low heat for simmering-to manage the texture.
Proper heat control prevents the chili from boiling rapidly, which can break down the beef and make the dip grainy instead of smooth.
Your Path to Diner-Style Beef Chili Dip Perfection: A Detailed Guide
-
Phase 1: Brown the Meat and Render Fat
Heat your neutral cooking oil in the pot over medium-high heat before adding the ground beef.
Break the meat up aggressively as it cooks; the goal is to brown the beef thoroughly and render out as much fat as possible, not to steam it.
-
The Critical Step: Thoroughly Draining the Fat
Immediately remove the pot from the heat once the meat is fully browned. This interruption prevents the beef from getting tough.
Carefully tilt the pot and use a large metal spoon to scoop out and discard every bit of visible, liquid rendered fat-this step is non-negotiable for a non-greasy dip.
-
Phase 2: Bloom the Aromatics and Spices
Return the pot to the stove over medium heat and add the diced onion, cooking until soft (about 5 minutes) before stirring in the garlic for one minute until fragrant.
Add the chili powder, smoked paprika, cumin, and cayenne; stir constantly for 1 to 2 minutes. This brief toast in the meat’s remaining heat fundamentally enhances the color and depth of the flavor profile.
-
Phase 3: Build the Sauce and Simmer for Depth
Stir in the tomato sauce, beef broth, brown sugar, salt, and pepper, bringing the entire mixture up to a gentle simmer.
Reduce the heat to low, cover the pot, and let the chili cook slowly for at least 30 minutes, stirring occasionally. This slow simmer integrates the spices, tenderizes the meat, and creates complex, layered flavors necessary for excellent Diner-Style Beef Chili Dip.
-
Phase 4: Achieving Glossy Consistency (The Optional Slurry)
If, after simmering, the chili is still too thin for dipping, prepare the slurry by mixing masa harina or cornstarch with cold water.
Pour the slurry into the simmering chili during the last 5 minutes of cooking and stir constantly until the sauce thickens and takes on a glossy, luxurious texture suitable for holding up against a tortilla chip.
Chef’s Secrets: 3 Ways to Elevate Your Chili Dip Game
-
Don’t Rush the Bloom:
When cooking the spices, the full 1 to 2 minutes is essential, even though it seems brief. This quick exposure to heat and the remaining fat fundamentally changes the chemical composition of the spices, ensuring a maximum depth of flavor and rich, red coloring that liquid alone cannot achieve.
-
The Vinegar or Lime Finish:
A heavy, rich dish like chili can benefit immensely from a touch of bright acidity to cut through the richness.
Add a tablespoon of apple cider vinegar or the juice of half a lime right before serving; this small tweak elevates the entire flavor profile and makes the complex spices pop.
-
Make it the Day Before (For Maximum Flavor Synergy):
Chili, like many tomato-based stews, improves dramatically overnight as the spices fully hydrate and the flavors merge.
Prepare the entire Diner-Style Beef Chili Dip recipe one day in advance, refrigerate it, and gently reheat it the next day for an exponentially deeper, more satisfying taste.
Troubleshooting Common Consistency Issues
My chili is still oily, even after draining the fat. What went wrong?
If you observe oil after the simmer, you likely did not drain thoroughly enough after browning, or you may have used beef with a fat content higher than 85/15.
To fix this, remove the pot from the heat and let it rest for 10 minutes; the fat will rise to the surface, allowing you to scoop it out with a large spoon or even blot the surface gently with a paper towel.
The chili tastes flat or bland after simmering. How do I fix the seasoning?
A flat taste usually indicates insufficient salt. Always taste the chili at the end, adding salt in small increments until the flavors intensify.
If it tastes bitter or overly acidic, balance it with a small pinch of brown sugar.
To boost warmth, stir in a teaspoon of cocoa powder (an authentic chili trick) or increase the heat with extra cayenne pepper or a dash of hot sauce.
The sauce is too thick-it’s more like a hearty stew than a dip.
If you over-thickened the dip, gradually thin it out by stirring in warm beef broth or plain water, about a quarter cup at a time.
Continue to stir and check the consistency until the mixture flows smoothly but still clings securely to a chip.
Round Out Your Meal
After enjoying this hearty chili dip, consider these dishes that offer different textures and tastes.
- For a satisfying handheld option, try these crispy beef paratha rolls, which use a similar beef base but with a different preparation.
- If you’re in the mood for something with a creamy texture and vibrant flavor, this tomato paneer curry offers a delightful contrast with its soft cheese.
Beyond the Chip: Creative Serving Suggestions and Pairings
The Ultimate Dippers and Topping Bar
Opt for sturdy, restaurant-style tortilla chips or the curved scoop chips that are designed to handle a dense dip.
Create a vibrant topping bar featuring shredded sharp cheddar or Pepper Jack cheese, dollops of sour cream, finely chopped green onions or chives, and a sprinkle of fresh cilantro.
Repurposing Leftovers: From Dip to Dinner in Minutes
Leftover Diner-Style Beef Chili Dip is incredibly versatile and can be used to quickly create satisfying meals.
Serve it generously over hot dogs for authentic chili dogs, spoon it over crispy french fries for chili cheese fries, or mix it into macaroni and cheese for a spicy, comforting chili mac.
Frequently Asked Questions About Diner-Style Beef Chili Dip
Can I make this recipe in a slow cooker or Instant Pot?
Yes, but you must complete the critical browning, fat-draining, and spice-blooming steps on the stovetop first.
Once those steps are done, transfer the mixture to the slow cooker and simmer on low for 4-6 hours, or cook under pressure in the Instant Pot according to manufacturer instructions for chili.
How do I store and reheat this chili dip?
Store cooled chili dip in an airtight container in the refrigerator for up to 3 to 4 days, or freeze it for up to 3 months.
Thaw frozen chili overnight and reheat gently on the stovetop over low heat, adding a splash of broth if the dip seems too thick upon reheating.
Is it possible to make this dip spicier without changing the texture?
Absolutely. Increase the heat by adding chipotle powder or extra cayenne pepper during the spice-blooming phase.
For a burst of fresh heat, finely dice a seeded jalapeño or serrano pepper and stir it into the chili during the final 10 minutes of simmering.
Ready to Impress? Share Your Diner-Style Beef Chili Dip Masterpiece!
This method delivers the ultimate chili dip experience: robust, deeply flavored, and perfectly textured every single time.
Say goodbye to disappointing, greasy chili and hello to your new game day champion.
Whip up a batch of this irresistible Diner-Style Beef Chili Dip and let me know how you served it!
Beef Chili
Course: AppetizerCuisine: AmericanDifficulty: medium6
servings10
minutes45
minutes450
kcal55
minutesThis rich, deep red chili uses a secret technique—thoroughly draining the rendered fat—to achieve a perfect, non-greasy dipping consistency every single time. By blooming the spices and simmering slowly, the flavors deepen for that classic diner taste.
Ingredients
1 tablespoon neutral cooking oil
2 pounds lean ground beef (85/15 recommended)
1 large onion, diced
3 cloves garlic, minced
2 tablespoons chili powder (high quality)
1 tablespoon smoked paprika
1 teaspoon cumin
1/2 teaspoon cayenne pepper (optional)
1 (15 ounce) can tomato sauce
1 cup beef broth
1 tablespoon brown sugar
1 teaspoon salt
1/2 teaspoon black pepper
1 tablespoon masa harina or cornstarch mixed with 2 tablespoons cold water (optional, for final thickness)
Tortilla chips, for serving
Directions
- Brown the Meat and Render Fat: Heat the neutral oil in a large pot or Dutch oven over medium-high heat. Add the ground beef. Cook, breaking it up with a spoon, until fully browned.
- The Silky Secret Step Drain the Fat Thoroughly: This is the critical step for non-greasy chili. Once the meat is browned, remove the pot from the heat and carefully use a spoon or tilt the pot to scoop out and discard all visible rendered fat. Return the pot to the stove over medium heat.
- Bloom the Aromatics and Spices: Add the diced onion to the drained meat and cook until softened, about 5 minutes. Add the minced garlic and cook for 1 minute until fragrant. Add the chili powder, smoked paprika, cumin, and cayenne (if using). Stir constantly and cook the spices for 1 to 2 minutes until very fragrant. This step “blooms” the spices, intensifying their flavor and color saturation.
- Build the Sauce: Stir in the tomato sauce, beef broth, brown sugar, salt, and pepper. Bring the mixture to a simmer.
- Simmer for Depth: Reduce the heat to low, cover the pot, and let the chili simmer for at least 30 minutes, stirring occasionally. This long, slow simmer allows the flavors to deepen and the meat to tenderize into a silky texture.
- Check Consistency: If the chili is too thin, stir in the masa harina or cornstarch slurry during the last 5 minutes of cooking. Stir continuously until the chili thickens to a glossy, dipping consistency.
- Serve Hot: Taste and adjust seasoning as needed. Serve immediately with tortilla chips for dipping.
Notes
- The key to non-greasy chili is step 2: thoroughly draining all rendered fat before adding the spices.


