
There’s a universally satisfying joy in perfectly cooked chicken, yet for too long, achieving truly exceptional Golden Chicken Cutlets felt like a culinary enigma. I, like many home cooks, once wrestled with dry interiors or a sad, soggy breading that just wouldn’t hold its crunch.
But through countless kitchen experiments and a dedication to detail, I’ve mastered a technique that guarantees incredibly juicy chicken and an irresistibly crispy, golden crust every single time. This recipe is your definitive guide to unlocking that restaurant-quality experience right in your own kitchen, delivering on taste and texture.
Why You’ll Adore These Golden Chicken Cutlets
The Secret to a Truly Crispy, Never-Soggy Coating
Our method focuses on optimal breading adhesion and precise frying temperatures. This ensures a shatteringly crisp exterior that stays crunchy, even after resting.
Unbelievably Juicy: Say Goodbye to Dry Chicken Breasts
The key here is proper pounding and quick, even cooking. Your chicken remains tender and moist, retaining all its natural juices thanks to our specific instructions.
The Irresistible Creamy Dipping Sauce: A Game Changer
This tangy, slightly sweet sauce elevates the entire dish. It’s the perfect counterpoint to the rich, crispy chicken, adding a layer of gourmet flavor.
Simple Steps for Stunning, Restaurant-Quality Results
Don’t let the professional results intimidate you. This recipe breaks down complex techniques into straightforward, easy-to-follow steps, making perfection achievable for any home cook.
For even more foolproof guidance on achieving tender and crispy results, check out this article on crispy glazed chicken cutlets.
Gathering Your Ingredients for Unforgettable Cutlets
The Star: Boneless, Skinless Chicken Breasts
Opt for fresh, high-quality chicken breasts. This forms the foundation of tender Golden Chicken Cutlets.
Their lean nature means they cook quickly, making them ideal for this pan-fried method.
Crafting the Ultimate Crispy Coating: Flour, Egg, and Panko
All-purpose flour creates the initial dry layer, allowing the egg wash to adhere effectively.
Large eggs mixed with water form the crucial binding layer, ensuring the breadcrumbs stick.
Panko breadcrumbs are essential; their unique flaky texture delivers an unparalleled crispness far superior to standard breadcrumbs.
Essential Flavor Boosters: Seasonings & Frying Oil
Salt and black pepper are divided between the flour and Panko, building flavor into every layer of the coating.
Vegetable, canola, or peanut oil provides a neutral flavor and has a high smoke point, vital for achieving that perfect golden fry without burning.
Whipping Up the Signature Creamy Dipping Sauce
Mayonnaise: The creamy base offers richness and body to the sauce.
Yellow Mustard: Adds a necessary tangy zing, cutting through the richness of the chicken.
Honey (or Maple Syrup): For a touch of natural sweetness that balances the mustard’s tang.
Garlic Powder & Salt: The perfect savory balance, enhancing all other flavors without overpowering.
Essential Tools for Golden Perfection
Pounding for Evenness: Your Meat Mallet or Heavy Skillet
A meat mallet ensures uniform thickness, which is crucial for even cooking.
If you don’t have a mallet, a heavy-bottomed skillet works perfectly to pound out the chicken breasts.
The Breading Station Setup: Shallow Dishes are Key
Three shallow dishes are indispensable for an organized and efficient breading process.
They allow for full immersion and easy coating of each chicken piece.
Frying & Draining: A Sturdy Skillet, Tongs, and Wire Rack
A large, heavy-bottomed skillet maintains consistent oil temperature, vital for crispy results.
Tongs are essential for safely handling hot chicken and placing it into the oil.
A wire rack set over a paper towel-lined baking sheet is critical for draining excess oil and maintaining crispness post-frying.
Step-by-Step Guide to Flawless Golden Chicken Cutlets
- Prepare the Chicken: Pounding for Tenderness & Evenness
Place each chicken breast between plastic wrap. Using a meat mallet or heavy skillet, pound until about 1/2 inch thick.
This crucial step ensures uniform cooking, preventing dry spots and maximizing tenderness for your Golden Chicken Cutlets.
Cut each breast in half lengthwise to create four cutlets, or into strips for chicken tenders.
If you’re slicing for tenders, ensure your breading is up to the task with unfailing breading for chicken tenders.
- Set Up Your Breading Station for Efficiency
Prepare three shallow dishes. In the first, combine flour with 1/2 tsp salt and 1/4 tsp pepper.
In the second, whisk eggs with water until combined. In the third, mix Panko breadcrumbs with remaining salt and pepper.
Organizing this station streamlines the coating process and ensures each layer is properly seasoned.
- Bread the Chicken: The Art of a Perfect Coating
Working with one piece at a time, dredge it thoroughly in flour, shaking off excess.
Next, dip into the egg mixture, allowing extra to drip off, then firmly press into the Panko breadcrumbs.
Ensure each cutlet is completely coated on all sides. Placing breaded chicken on a clean plate for a few minutes allows the coating to adhere better.
- Heat the Oil: Achieving the Ideal Frying Temperature
In a large, heavy-bottomed skillet, pour oil to a depth of about 1/2 inch.
Heat over medium-high heat until shimmering, reaching 350-375°F (175-190°C).
Test with a few Panko crumbs; they should sizzle immediately and turn golden. Do not let the oil smoke.
- Fry for that Signature Golden Crunch
Carefully place 2-3 breaded chicken pieces into the hot oil, ensuring not to overcrowd the pan.
Fry for 3-5 minutes per side, or until deeply golden brown and the internal temperature reaches 165°F (74°C).
Frying in batches maintains the oil temperature, crucial for crispy chicken and preventing sogginess.
- Drain and Rest: The Secret to Long-Lasting Crispness
Once cooked, use tongs to remove the chicken from the skillet and place it on a wire rack set over a paper towel-lined baking sheet.
This allows excess oil to drip off, ensuring the breading remains perfectly crispy and preventing the bottom from getting soggy.
- Whip Up the Creamy Dipping Sauce
While the crispy chicken cutlets rest, combine all dipping sauce ingredients in a small bowl.
Whisk until smooth and well-combined for a delicious, tangy accompaniment.
- Serve and Savor Your Golden Masterpiece!
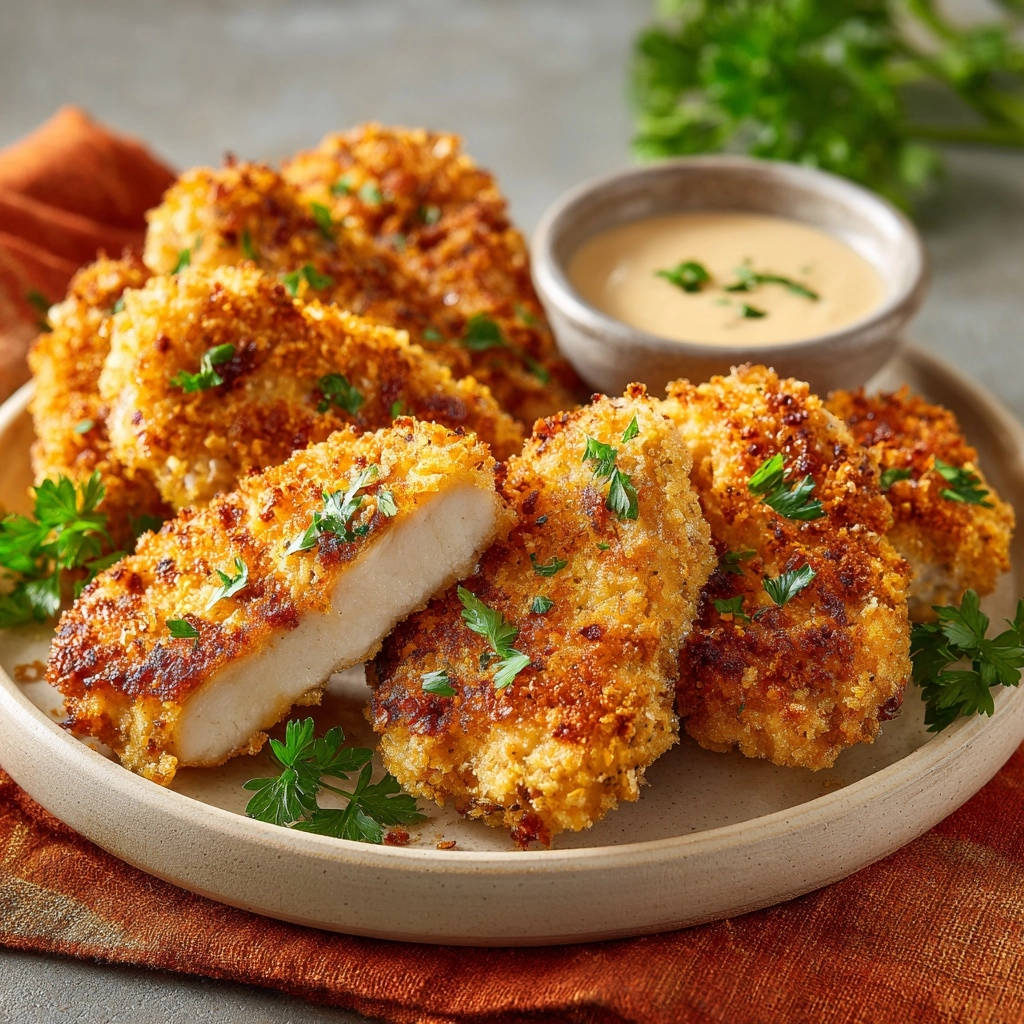
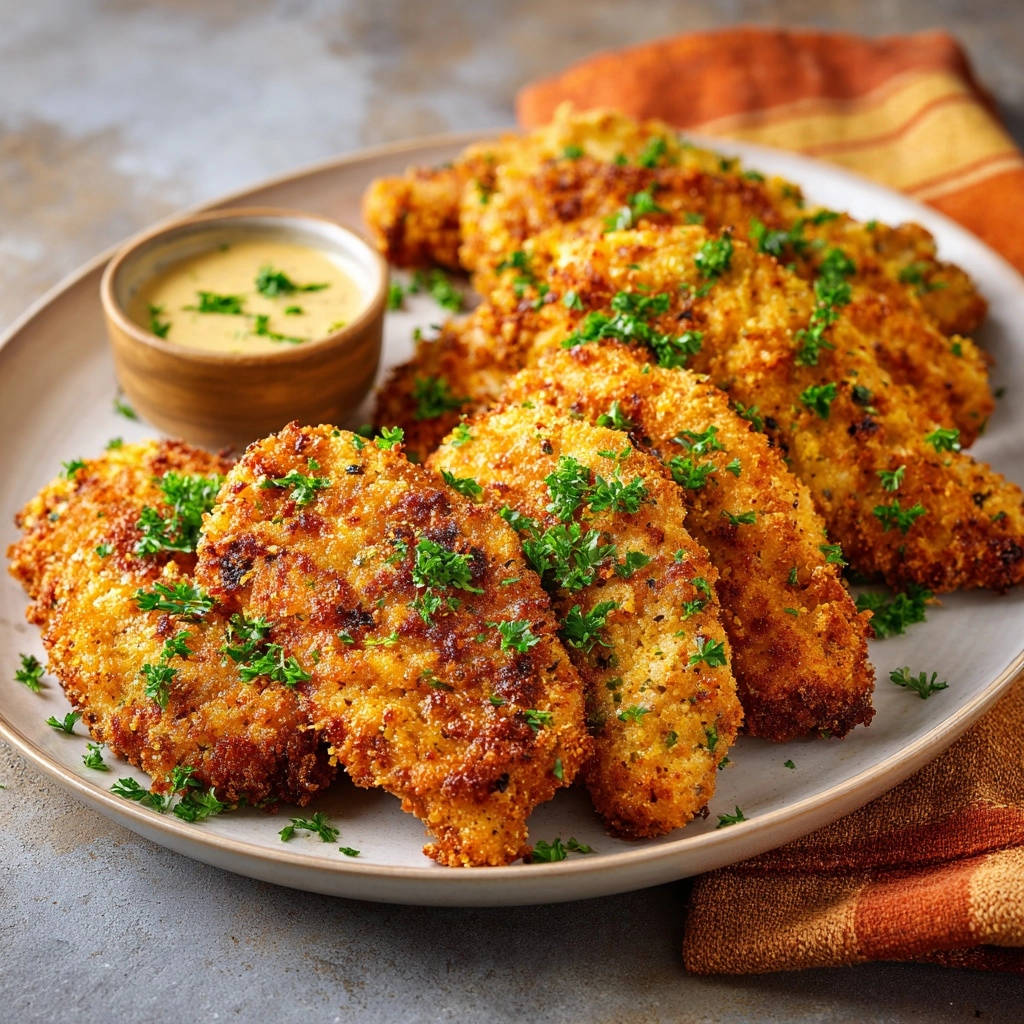
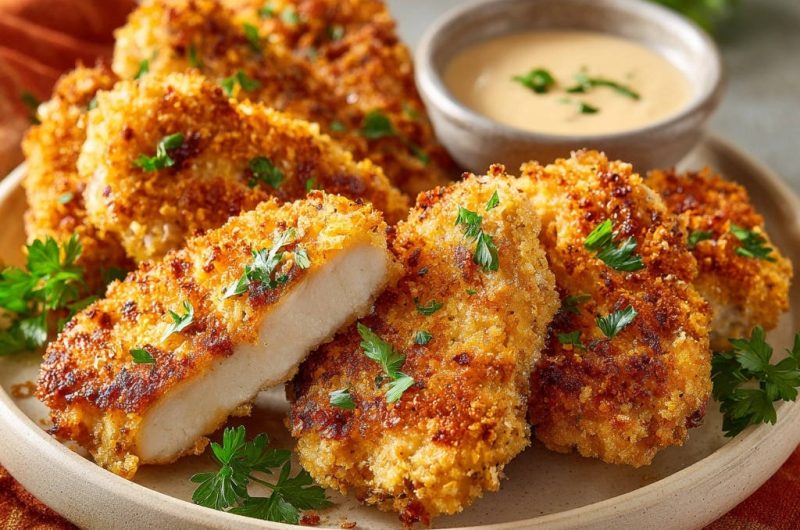
Garnish your freshly fried Golden Chicken Cutlets with fresh chopped parsley.
Serve immediately with the creamy dipping sauce and enjoy that perfect crunch and juicy interior!
Round Out Your Meal
To complement your golden chicken cutlets, consider these other dishes that share similar comforting qualities or offer a bright contrast.
- For a delightful bread to soak up any juices, try this Golden Skillet Cornbread, known for its tender texture.
- A vibrant Cranberry Potato Salad, featuring savory turkey bacon, would provide a refreshing counterpoint to the crispy chicken.
Chef’s Secrets for Next-Level Golden Chicken Cutlets
Why Pounding Matters: Beyond Just Even Cooking
Pounding chicken to an even thickness ensures every part cooks at the same rate. This prevents thinner edges from drying out while thicker parts finish cooking.
It also tenderizes the meat, breaking down fibers for a more succulent bite in your pan-fried chicken.
The Panko Advantage: Why It Delivers Superior Crunch
Panko breadcrumbs are coarser and flakier than regular breadcrumbs, which creates more air pockets. These pockets become incredibly crisp when fried.
Their texture absorbs less oil, resulting in a lighter, crunchier coating that truly sets these homemade cutlets apart.
Mastering Oil Temperature: The Key to Crispness, Not Greasiness
Too-cool oil leads to soggy, greasy chicken because the breading absorbs too much fat before it crisps.
Oil that’s too hot will burn the breading before the chicken cooks through. The ideal range of 350-375°F (175-190°C) is critical for a perfect, golden-brown crust and juicy interior.
The Non-Negotiable Rest Period for Crispy Breading (Before & After Frying)
A short rest after breading allows the coating to set and adhere firmly, preventing it from falling off during frying.
Post-frying, resting on a wire rack is crucial. It lets excess oil drain, maintaining that coveted crispness and preventing a soggy bottom.
Don’t Overcrowd the Pan! (A Common Mistake, Easily Avoided)
Overcrowding the skillet dramatically drops the oil’s temperature. This immediately leads to greasy, soggy breading instead of a crisp, golden finish.
Fry in batches, giving each cutlet enough space to cook evenly and maintain the optimal oil temperature. This is key for consistently crispy chicken.
Flavor Variations: Customizing Your Cutlets & Sauce
Experiment with adding smoked paprika, garlic powder, or onion powder to the Panko for a different flavor profile for your crispy chicken.
For the sauce, consider a touch of sriracha for heat, or fresh herbs like dill or chives for a fresh twist.
Troubleshooting Common Chicken Cutlet Challenges
“My Chicken Cutlets are Dry!”
Ensure your chicken breasts are pounded to an even 1/2-inch thickness. This promotes quick, uniform cooking, preventing overcooked dry spots.
Also, don’t overcook! Fry until just golden brown and a thermometer reads 165°F (74°C). Remove promptly.
“Soggy Breading Disaster!”
The culprit is usually oil that isn’t hot enough, or overcrowding the pan. Ensure oil is 350-375°F (175-190°C) before adding chicken.
Always fry in batches to maintain oil temperature. Drain cooked cutlets on a wire rack, never directly on paper towels, to allow air circulation.
“Why Isn’t My Coating Sticking Properly?”
Make sure to shake off excess flour before dipping in egg, and allow excess egg to drip off before pressing into Panko.
Firmly press the Panko onto the chicken. Crucially, let the breaded chicken rest for 5-10 minutes before frying to help the coating adhere.
“My Oil is Smoking or Not Hot Enough!”
If the oil is smoking, it’s too hot. Remove from heat briefly, let it cool slightly, then reduce heat to medium. Smoking oil will burn the breading.
If not hot enough (Panko test crumbs don’t sizzle), increase heat gradually and wait. Patience here prevents soggy results for your pan-fried chicken.
Beyond the Plate: Serving, Storing, and Enjoying
Perfect Pairings: What to Serve with Your Golden Cutlets
These versatile Golden Chicken Cutlets pair beautifully with a fresh garden salad, creamy mashed potatoes, or roasted asparagus.
For a heartier meal, serve alongside pasta tossed with a light lemon-butter sauce or fluffy rice pilaf. The creamy dipping sauce is a must-have.
Storage & Reheating: Keeping Them Crispy for Later
Store leftover cooked chicken cutlets in an airtight container in the refrigerator for up to 3-4 days.
To reheat and retain crispness, place them on a wire rack in a preheated oven at 375°F (190°C) for 10-15 minutes, or until heated through and re-crisped.
Make-Ahead Tips for Easy Meal Prep
You can pound and bread the chicken cutlets up to an hour in advance. Store them on a plate, loosely covered with plastic wrap, in the refrigerator.
The creamy dipping sauce can be made a day or two ahead and stored in an airtight container in the fridge, allowing flavors to meld beautifully.
Frequently Asked Questions About Golden Chicken Cutlets
Can I use chicken thighs instead of breasts?
Yes, you can use boneless, skinless chicken thighs. They tend to be more forgiving and less prone to drying out.
You may need to pound them slightly more and adjust frying time as thighs can be thicker than breasts.
What if I don’t have Panko breadcrumbs on hand?
While Panko is highly recommended for superior crispness, you can substitute with regular breadcrumbs. The texture will be less airy and crisp, but still delicious.
Alternatively, crush cornflakes or plain potato chips for a gluten-free and very crispy alternative.
Is it possible to bake these chicken cutlets instead of frying?
Yes, you can bake them. Preheat your oven to 400°F (200°C).
Place the breaded cutlets on a wire rack set over a baking sheet and lightly spray with cooking oil. Bake for 15-20 minutes, flipping halfway, until golden and cooked through.
How do I know when the chicken is fully cooked through?
The safest way is to use an instant-read meat thermometer. Insert it into the thickest part of the cutlet.
The chicken is fully cooked when it reaches an internal temperature of 165°F (74°C). The juices should also run clear.
Can I make the creamy dipping sauce in advance?
Absolutely! The creamy dipping sauce can be prepared up to 2-3 days in advance.
Store it in an airtight container in the refrigerator. The flavors often deepen and improve overnight, making it perfect for meal prep.
Your Turn to Create Golden Chicken Cutlet Magic!
Now that you have all the insider tips and a meticulously detailed guide, it’s time to create your own perfectly crispy, never-dry Golden Chicken Cutlets. This recipe is designed to transform your chicken dinner experience.
Gather your ingredients, unleash your inner chef, and prepare to impress yourself and your loved ones with a dish that truly shines. I can’t wait for you to experience that incredible crunch and juicy tenderness firsthand!
Chicken Cutlets
Course: Main CourseCuisine: AmericanDifficulty: easy4
servings20
minutes15
minutes650
kcal35
minutesSay goodbye to dry chicken and soggy breading! This recipe guarantees tender, flavorful Golden Chicken Cutlets with a perfectly crispy crust. Paired with a creamy homemade dipping sauce, it’s a dish that’s sure to impress every time.
Ingredients
2 boneless, skinless chicken breasts (about 1.5 lbs total)
1/2 cup all-purpose flour
1 teaspoon salt, divided
1/2 teaspoon black pepper, divided
2 large eggs
2 tablespoons water
2 cups Panko breadcrumbs
1/2 cup vegetable oil (or canola/peanut oil) for frying
Fresh parsley, chopped, for garnish
For the Creamy Dipping Sauce:
1/2 cup mayonnaise
2 tablespoons yellow mustard
1 tablespoon honey (or maple syrup)
1/4 teaspoon garlic powder
Pinch of salt
Directions
- Prepare the chicken: Place each chicken breast between two pieces of plastic wrap. Using a meat mallet or the bottom of a heavy skillet, pound the chicken until it is about 1/2 inch thick and an even thickness throughout. This ensures even cooking and helps keep the chicken tender. Cut each breast in half lengthwise to create four cutlets, or into strips for tenders.
- Set up your breading station: Grab three shallow dishes. In the first dish, combine the flour with 1/2 teaspoon of salt and 1/4 teaspoon of black pepper. In the second dish, whisk the eggs with the water until well combined. In the third dish, place the Panko breadcrumbs with the remaining 1/2 teaspoon of salt and 1/4 teaspoon of black pepper, mixing them gently.
- Bread the chicken: Working with one piece of chicken at a time, dredge it thoroughly in the seasoned flour, shaking off any excess. Next, dip it into the egg mixture, allowing any extra to drip off. Finally, press the chicken firmly into the Panko breadcrumbs, ensuring it’s completely coated on all sides. Repeat with all remaining chicken pieces. Placing the breaded chicken on a clean plate for a few minutes can help the coating adhere better.
- Heat the oil: In a large, heavy-bottomed skillet, pour the vegetable oil to a depth of about 1/2 inch. Heat the oil over medium-high heat until shimmering, reaching about 350 to 375 degrees F (175 to 190 degrees C). A good test is to drop a few Panko crumbs into the oil; if they sizzle immediately and turn golden, the oil is ready. Do not let the oil smoke.
- Fry the chicken: Carefully place 2-3 breaded chicken pieces into the hot oil, making sure not to overcrowd the pan. Overcrowding will drop the oil temperature and lead to soggy, greasy chicken. Fry for 3-5 minutes per side, or until golden brown and the internal temperature of the chicken reaches 165 degrees F (74 degrees C). The even thickness from pounding helps it cook through quickly without drying out.
- Drain and rest: Once cooked, use tongs to remove the chicken from the skillet and place it on a wire rack set over a paper towel-lined baking sheet. This allows excess oil to drip off, keeping the breading perfectly crispy.
- Prepare the dipping sauce: While the chicken rests, combine all dipping sauce ingredients in a small bowl and whisk until smooth.
- Serve: Garnish the crispy chicken cutlets with fresh chopped parsley and serve immediately with the creamy dipping sauce. Enjoy that perfect crunch and juicy interior!
Notes
- Pounding chicken to even thickness is key for tender results. Let breaded chicken rest briefly to help coating adhere. Drain cooked cutlets on a wire rack for maximum crispness.


