
Forget everything you know about limp, waterlogged greens that sit sadly on the side of your plate. Most people treat broccolini like a delicate flower, steaming it until it loses its soul and turns into a mushy mess. The real secret to restaurant-quality greens is high-heat roasting that creates a stunning contrast between a snappy stem and a crispy, deeply charred floret.
This method transforms a simple vegetable into a savory powerhouse by using intense heat to coax out natural sugars. You get earthy, pungent flavors from the garlic and a spicy kick from the chili oil, all balanced by a cool, creamy lemon yogurt base. It’s a texture-heavy experience that feels indulgent while staying incredibly light.
The absolute key to success here is the preheated pan technique. By sliding a cold baking sheet into the oven while it heats up, you create a searing-hot surface that hits the vegetables the moment they touch the metal. This immediate contact starts the browning process instantly, ensuring the florets crisp up before the stems have a chance to overcook and turn soft.
The Anatomy of Perfect Charred Garlic Broccolini
Broccolini isn’t just “baby broccoli,” though it looks like it. It’s actually a hybrid between standard broccoli and Chinese kale, which gives it those long, elegant stems and smaller, looser florets. These physical traits make it the ultimate candidate for roasting because there’s more surface area for the heat to grab onto.
When you roast at high temperatures, you trigger the Maillard reaction. This is the chemical process that creates those dark, savory bits on the edges of the florets. Because the florets are porous, they act like little sponges, soaking up the garlic-infused oil and crisping into something that tastes almost nutty.
Selecting the Best Bunches at the Market
Start with the best raw materials to ensure a great result. Look for bunches with tight, dark green florets that haven’t started to flower or turn yellow. If you see yellow spots, the vegetable is past its prime and will likely taste bitter and woody.
Check the stems for firmness. They should feel snappy and hydrated, not rubbery or bendable. Avoid bunches with thick, overly fibrous stalks at the bottom, as these can remain tough even after roasting. If the ends look dry or cracked, a quick trim before cooking will help them absorb the seasoning better.
Why Dryness is the Secret to Searing
Surface moisture is the enemy of a good char. If your broccolini is wet when it hits the oven, the heat has to work on evaporating that water before it can start browning the vegetable. Since water boils at 212°F and browning doesn’t really start until 300°F, you’ll end up steaming your food in its own moisture.
Take the time to pat every stalk dry with a clean kitchen towel or paper towels. You want the oil to cling directly to the skin of the vegetable. This ensures the oven’s energy goes straight into creating that crispy texture you’re after rather than creating a cloud of steam in your kitchen.
Essential Components for the Roasted Base
You only need a few ingredients, so quality matters. I prefer a high-quality extra virgin olive oil because it adds a fruity, peppery note that survives the roasting process. While some worry about smoke points, the moisture in the vegetables keeps the oil stable enough for a quick 12-minute roast.
Sea salt is another non-negotiable for me. The larger grains provide a better “crust” on the charred bits compared to fine table salt. It draws out just enough moisture to help the browning process without making the dish taste overly salty.
The Role of Smashed Garlic Cloves
We aren’t mincing the garlic here for a very specific reason. Tiny bits of minced garlic would burn to a bitter charcoal at 425°F long before the broccolini is ready. By smashing the cloves and leaving them whole, you protect them from the intense heat.
These smashed cloves infuse the olive oil with a mellow, roasted garlic flavor. As they cook, the insides become creamy and sweet, almost like candy. You can eat them right along with the greens for a concentrated burst of flavor that isn’t harsh or biting.
If you enjoy the aroma of roasted garlic, learn how to make fluffy garlic naan without a tandoor.
Choosing the Right Fat for High-Heat Roasting
Olive oil is the classic choice for its flavor profile, but avocado oil is a fantastic alternative if you want a more neutral taste. The fat acts as a heat conductor, carrying the oven’s warmth into every tiny crevice of the florets. This ensures that the entire bunch cooks evenly from the tip to the base.
Step-by-Step: Achieving the Perfect Char
The process is fast, so have your tools ready. You want to move quickly once that pan comes out of the oven to keep the heat trapped in the metal. This is where the transformation happens, turning raw stalks into a gourmet side dish.
The Preheated Baking Sheet Technique
Don’t skip the step of putting your empty baking sheet in the oven while it preheats. When you toss the oiled broccolini onto that hot metal, you should hear a loud, satisfying sizzle. That sound is the moisture on the surface evaporating instantly, which kickstarts the searing process.
This mimics the effect of a cast-iron skillet or a professional grill. It ensures the side of the vegetable touching the pan gets a deep, dark crust while the top roasts in the hot air. It’s the most effective way to prevent the “soggy bottom” syndrome that plagues most roasted vegetables.
Spacing and Airflow on the Sheet Pan
Crowding is the fastest way to ruin this dish. If the stalks are piled on top of each other, they release steam that gets trapped between the layers. This turns your roast into a steam-bath, resulting in soft, greyish greens instead of vibrant, charred ones.
Give each stalk some breathing room. If you’re doubling the recipe, use two separate baking sheets. Proper airflow allows the hot air to circulate around each floret, drying out the exterior and creating that coveted crunch.
Timing the Flip for Even Browning
Around the 6-minute mark, give the pan a good shake or use tongs to flip the stalks. You’re looking for the tips of the florets to be dark brown, almost black in some spots. Don’t be afraid of the color; that char is where all the smoky, complex flavor lives.
The garlic should be turning a beautiful golden brown. If the garlic is browning too fast, tuck it under a stalk of broccolini to shield it. You’ll know it’s done when the stems are easily pierced with a fork but still have a slight “snap” to them.
Building the Lemon Yogurt and Chili Garnish
While the oven does the heavy lifting, the garnish provides the “wow” factor. The contrast between the hot, charred greens and the cold, tangy yogurt is what makes this dish feel like it came from a high-end bistro. It’s a play on temperatures and textures that keeps your palate excited.
For a bright citrus counterpoint, consider this refreshing lemon soy wakame salad.
Whisking the Lemon Yogurt Base
Use a thick Greek yogurt or labneh for the best results. The heavy texture allows it to sit on top of the stalks without running off. The fresh lemon juice cuts right through the richness of the olive oil and the char of the vegetables.
This yogurt isn’t just a sauce; it’s a cooling agent. When you hit the dish with spicy chili oil, the yogurt provides a creamy buffer that rounds out the heat. It adds a bright, acidic lift that wakes up all the other flavors on the plate.
The Heat Factor: Chili Oil and Flakes
Chili oil adds a beautiful visual element with its vibrant red hue against the dark green and white. The capsaicin in the oil enhances the earthy, roasted notes of the garlic. It provides a slow, lingering heat that makes the dish feel substantial and satisfying.
Adding Texture with Toasted Sesame Seeds
Toasted sesame seeds provide the final layer of crunch and a subtle nuttiness. If you only have raw seeds, toss them in a dry skillet over medium heat for about 2 minutes until they smell fragrant and turn golden. This small step adds a professional finish that ties the Mediterranean and Asian-inspired flavors together.
Troubleshooting Common Broccolini Mistakes
If your broccolini is still tough, it usually means the produce was a bit older and more fibrous, or the oven wasn’t quite hot enough. You can fix this by roasting for an extra 2 minutes or choosing thinner stalks next time. If it tastes bitter, you might have let the garlic burn; remember to keep those cloves whole and smashed rather than chopped.
Soggy results are almost always due to overcrowding the pan or not drying the vegetables thoroughly. If you see a lot of liquid on the baking sheet halfway through, carefully pour it off and spread the stalks out further. High heat and plenty of space are your best friends for a crispy finish.
Flavor Variations and Ingredient Swaps
You can easily adapt this dish to what you have in the pantry. If you want a vegan version, swap the yogurt for a creamy tahini dressing mixed with lemon and a splash of water. It provides that same nutty, rich base without the dairy.
No chili oil? Use a pinch of red pepper flakes tossed with the oil before roasting. You can also add a teaspoon of lemon zest to the yogurt for an even more intense citrus punch. For a different crunch, try toasted slivered almonds or crushed hazelnuts instead of sesame seeds.
What to Serve with Charred Garlic Broccolini
This dish is incredibly versatile. It pairs beautifully with roasted chicken or a seared piece of salmon, where the lemon in the yogurt complements the protein. The acidity and spice also make it a fantastic side for a heavy pasta dish or a rich risotto.
Round Out Your Meal
Consider these dishes to complement your charred broccolini.
- For a pasta option featuring similar greens, explore this Sausage and Broccolini Orecchiette recipe with its smooth sauce.
- If you’re in the mood for something hearty, this Savory Beef Stew offers deep, warming flavors that pair well with simple vegetables.
For a vegetarian meal, serve it over a bowl of warm quinoa or farro. The yogurt acts as a built-in sauce for the grains, and the charred garlic adds enough savory depth to make the meal feel complete. It’s a great palate cleanser that brings a lot of brightness to the table.
Expert Tips for Professional Results
If you want to take this to the next level, try the “broil finish.” If your oven doesn’t seem to be charring the tops enough by the time the stems are tender, turn on the broiler for the last 60 seconds. Watch it like a hawk, though, as it can go from perfect to burnt in a heartbeat.
Another pro move is to use a mandolin to shave the garlic into thin chips if you prefer a crunchy garlic texture. However, you must add these halfway through the roasting time so they don’t burn. The goal is a golden, crispy chip that shatters when you bite into it.
Storing and Reheating Leftovers
While this dish is definitely best served fresh and crispy, you can store leftovers in an airtight container for up to three days. The yogurt should be stored separately if possible, but if it’s already plated, just know the texture will change slightly.
To reheat, avoid the microwave at all costs, as it will turn the broccolini into a rubbery mess. Instead, toss the stalks into a hot skillet for 2 minutes or use an air fryer at 350°F for 3 minutes. This will revive the charred edges and bring back some of that original snap.
Frequently Asked Questions
Can I use regular broccoli instead?
Yes, you can use standard broccoli, but you need to prep it differently. Cut the head into long, thin spears that include a good portion of the stem. Try to mimic the shape of broccolini so the ratio of floret to stem allows for even roasting and charring.
Is broccolini the same as broccoli rabe?
No, they are quite different. Broccoli rabe (rapini) is much more bitter and is actually related to the turnip family. Broccolini is sweet and mild. If you use broccoli rabe for this recipe, the flavor will be significantly more pungent and sharp.
Can I make this on a grill?
Absolutely. Use a grill basket to prevent the stalks from falling through the grates. Toss them in the oil and salt as directed, then grill over medium-high heat for about 8 to 10 minutes, shaking the basket frequently until you see those charred edges.
How do I keep the garlic from burning?
The “smash” technique is your best defense. By keeping the cloves large and intact, they roast more slowly. If your oven has hot spots, try to nestle the garlic cloves toward the center of the pan where they are slightly shielded by the broccolini stalks.
Is this dish keto-friendly?
Yes, this is an excellent keto-friendly side dish. Broccolini is low in net carbs, and the healthy fats from the olive oil and Greek yogurt fit perfectly into a ketogenic lifestyle. Just be sure to use a full-fat yogurt to keep the macros in check.
Charred Broccolini
Course: Side DishCuisine: Modern AmericanDifficulty: easy4
servings10
minutes12
minutes145
kcal22
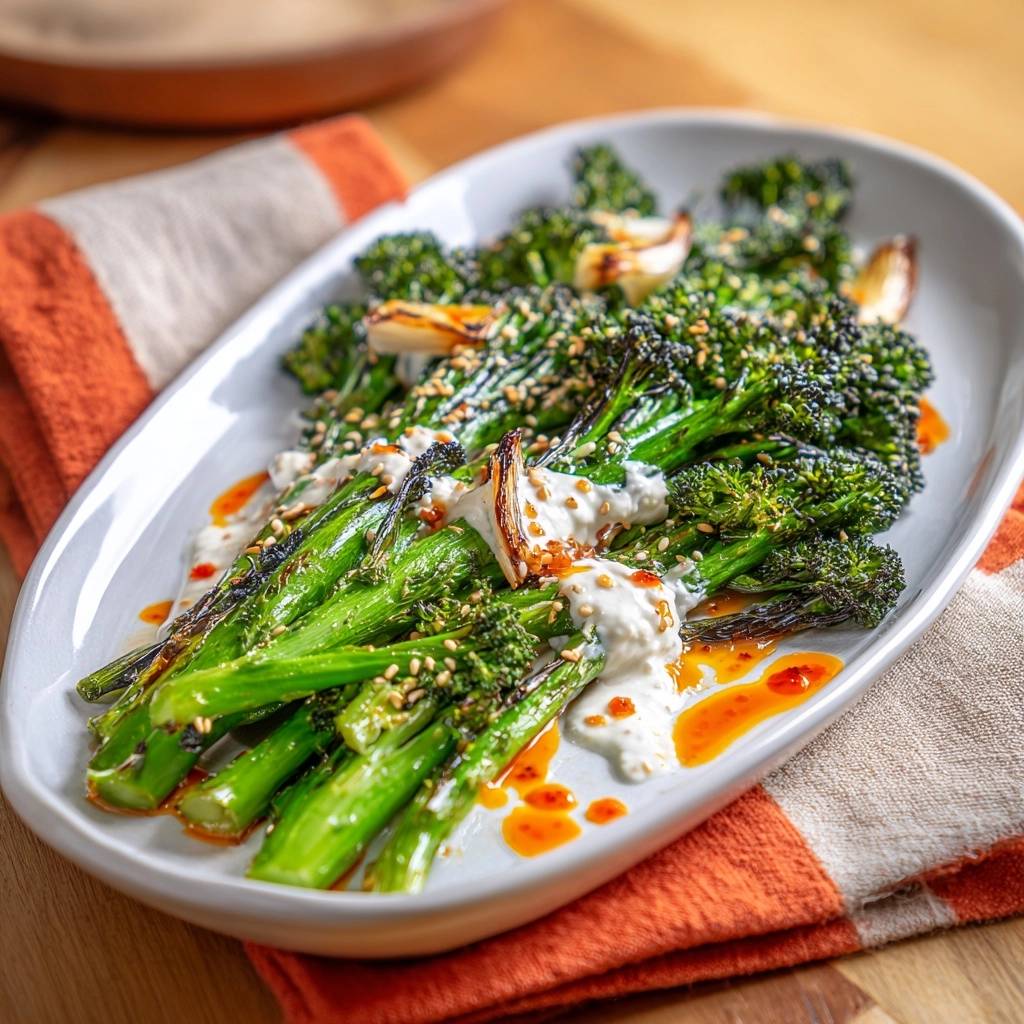
MinutesA high-heat roasting technique that eliminates mushy stems, resulting in perfectly charred broccolini served over a creamy lemon yogurt base with chili oil and toasted sesame seeds.
Ingredients
2 bunches broccolini, ends trimmed
3 tablespoons olive oil
6 cloves garlic, smashed and peeled
1/2 teaspoon sea salt
1/4 cup Greek yogurt or labneh
1 tablespoon chili oil (with flakes)
1 tablespoon toasted sesame seeds
1/2 lemon, juiced
Directions
- Preheat your oven to 425°F (220°C). Place a large rimmed baking sheet inside the oven while it preheats. This hot surface is the key to immediate searing and preventing mushiness.
- Thoroughly pat the broccolini dry with paper towels. Any surface moisture will create steam, which leads to a soft texture rather than a crisp roast.
- In a large bowl, toss the dry broccolini and the smashed garlic cloves with olive oil and salt until every floret is lightly coated.
- Carefully pull the hot baking sheet from the oven and spread the broccolini and garlic in a single layer. You should hear a sizzle. Do not overcrowd the pan; if the stalks are touching too closely, they will steam instead of roast.
- Roast for 10 to 12 minutes, tossing halfway through, until the floret tips are dark brown (almost blackened) and the garlic cloves are golden and softened.
- While roasting, whisk the yogurt with the lemon juice in a small bowl until smooth.
- To plate, arrange the hot broccolini on a platter. Spoon the lemon yogurt across the center of the stalks. Drizzle the chili oil over the yogurt and greens, then generously garnish with toasted sesame seeds. Serve immediately while the florets are at their maximum crispness.
Notes
- The secret to preventing mushiness is preheating the baking sheet and ensuring the broccolini is completely dry before roasting.


