
Nothing ruins a meal faster than a plate of mushy, steamed meatballs that lack any structural integrity. You want that satisfying, craggy crunch on the outside that gives way to a tender, juicy center bursting with ginger and garlic. Most home cooks struggle with this because they toss raw meat directly into a lukewarm oven, which results in a grey, rubbery texture rather than a golden masterpiece.
The secret to these Crispy Thai Chili Meatballs lies in a deliberate two-stage cooking process. By prioritizing a high-heat sear before the oven finish, you create a textured exterior that acts as a barrier. This ensures your meatballs stay firm and snappy even after they’re dunked into a pool of spicy, sweet chili sauce. It’s the difference between a sad, soggy bite and a restaurant-quality appetizer that people can’t stop talking about.
To get that professional-grade crust, you must ensure your meat mixture isn’t too wet. If the surface of the meatball is damp when it hits the oil, it will steam instead of sear. I always recommend patting the meat dry with a paper towel before mixing and using Panko breadcrumbs specifically because their large, airy flakes create more surface area for that coveted “crunch” to develop.
For a deeper dive into slow-cooked goodness, explore this slow-braised beef and apricot stew.
The Maillard Reaction: Why Searing Beats Baking
If you’ve ever wondered why oven-only meatballs look pale and unappealing, it’s because a standard 400°F oven environment doesn’t facilitate the Maillard reaction quickly enough. This chemical reaction between amino acids and reducing sugars is what creates that deep brown color and savory, complex flavor profile. In an oven, the ambient air isn’t a great conductor of heat, so the interior of the meatball often overcooks before the outside can brown.
By using a skillet with shimmering oil, you’re utilizing direct heat conduction. The oil fills the microscopic gaps between the meat and the pan, transferring heat instantly to the surface. This flash-sears the exterior, locking in the moisture and creating a rigid “shell.” This shell is vital because it prevents the juices from leaking out and steaming the bottom of the meatball while it finishes in the oven.
Essential Components for the Meatball Base
The foundation of a great meatball starts with the fat content. I strongly suggest using 80/20 ground beef or ground lamb. That 20% fat is non-negotiable; it renders out during the sear to keep the interior succulent while the proteins tighten up. If you go too lean, you’ll end up with something resembling a dry hockey puck rather than a tender Thai-inspired treat.
Panko breadcrumbs are your best friend here because they act as “spacers” within the meat mixture. Unlike traditional fine breadcrumbs that can turn into a dense paste, Panko keeps the internal structure light and airy. Additionally, always use fresh aromatics. Grating fresh ginger and mincing real garlic cloves provides a sharp, zingy punch that pre-packaged powders simply cannot replicate. The moisture in fresh aromatics also helps the Panko hydrate just enough to bind everything together.
Choosing Your Protein: Beef vs. Poultry
While ground beef provides a rich, savory base, you can certainly adapt this recipe for ground chicken or turkey. However, poultry is naturally leaner and stickier, which can make the “crispy” goal harder to achieve. If you choose poultry, add an extra egg yolk to the mix for fat and richness. You might also need to chill the rolled meatballs in the fridge for 20 minutes before searing to help them hold their shape in the hot pan.
The Umami Power of Fish Sauce
Fish sauce is the “secret weapon” of Southeast Asian cuisine. It’s made from fermented anchovies and salt, providing a deep, funky umami that salt alone can’t touch. It doesn’t make the meatballs taste “fishy”; instead, it enhances the meatiness of the beef. If you have an allergy, you can swap it for soy sauce or liquid aminos, but you’ll lose that specific fermented depth that defines Thai street food flavors.
Step-by-Step: Achieving the Perfect Golden Crust
Achieving the perfect texture is a three-phase journey. You have to respect the meat at every stage, from the moment you open the package to the moment the meatballs hit the serving platter. If you rush the process, you’ll lose the contrast that makes this dish so addictive.
Phase 1: Gentle Mixing and Portioning
When you combine your ingredients, treat the meat gently. Overworking the mixture develops too much myosin, a protein that turns meat rubbery and tough. Use your hands like claws to toss the ingredients together until just combined. For the best results, use a spring-loaded cookie scoop to portion the balls. This ensures they are all exactly 1.5 inches, so they cook at the same rate and finish at the same time.
Phase 2: The High-Heat Skillet Sear
Heat your oil until it’s shimmering and just starting to wisps of smoke. When you add the meatballs, listen for a loud sizzle. If it’s quiet, your pan isn’t hot enough. Do not crowd the pan! If the meatballs are touching, the temperature of the oil will drop, and they will release moisture and steam. Give them space, and don’t try to flip them too early. The meat will naturally release from the pan once a proper crust has formed.
Phase 3: The Oven Finish and Resting
Once you’ve achieved a deep golden-brown color on all sides, move the skillet into the oven. This allows the center to reach 160°F gently without burning the exterior. The most critical step is the 3-minute rest after they come out. If you plate them immediately, the internal steam will rush to the surface and soften that crust you worked so hard to build. Resting allows the juices to settle back into the fibers of the meat.
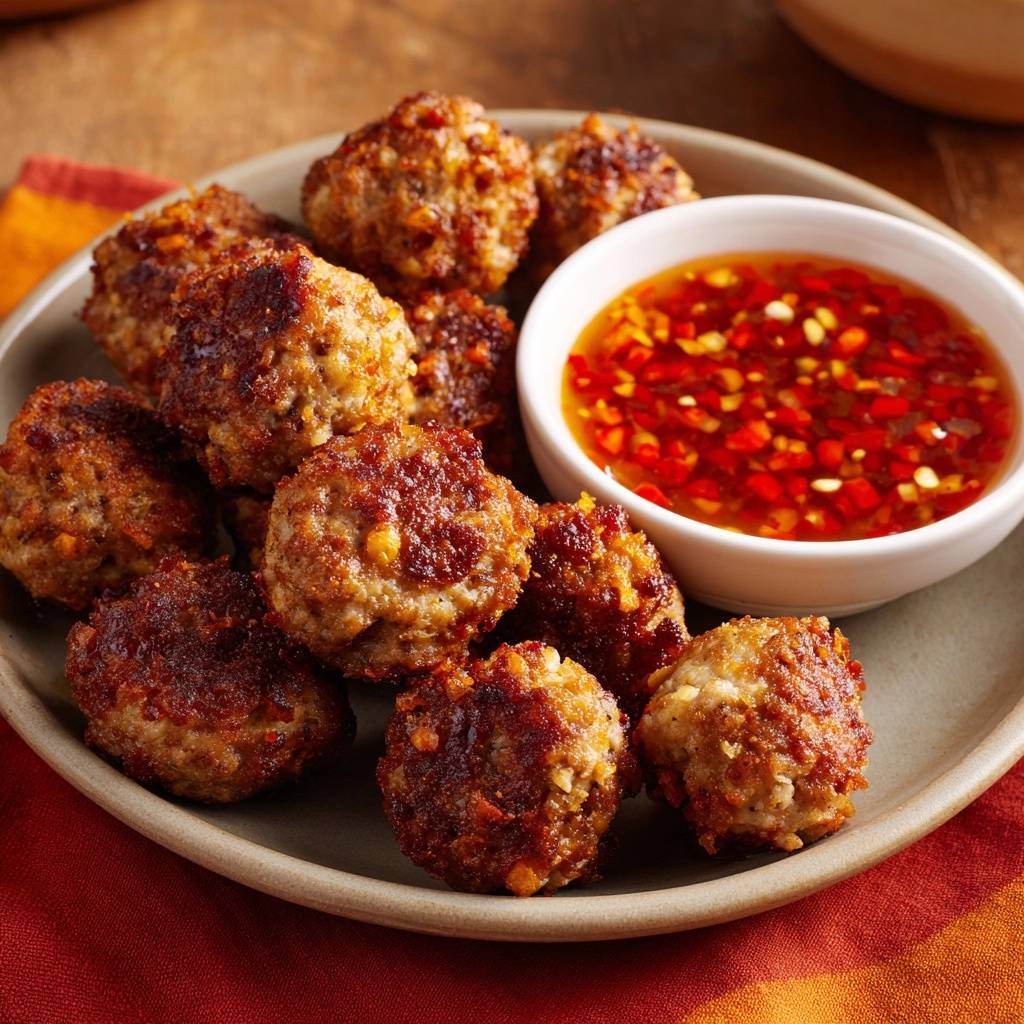
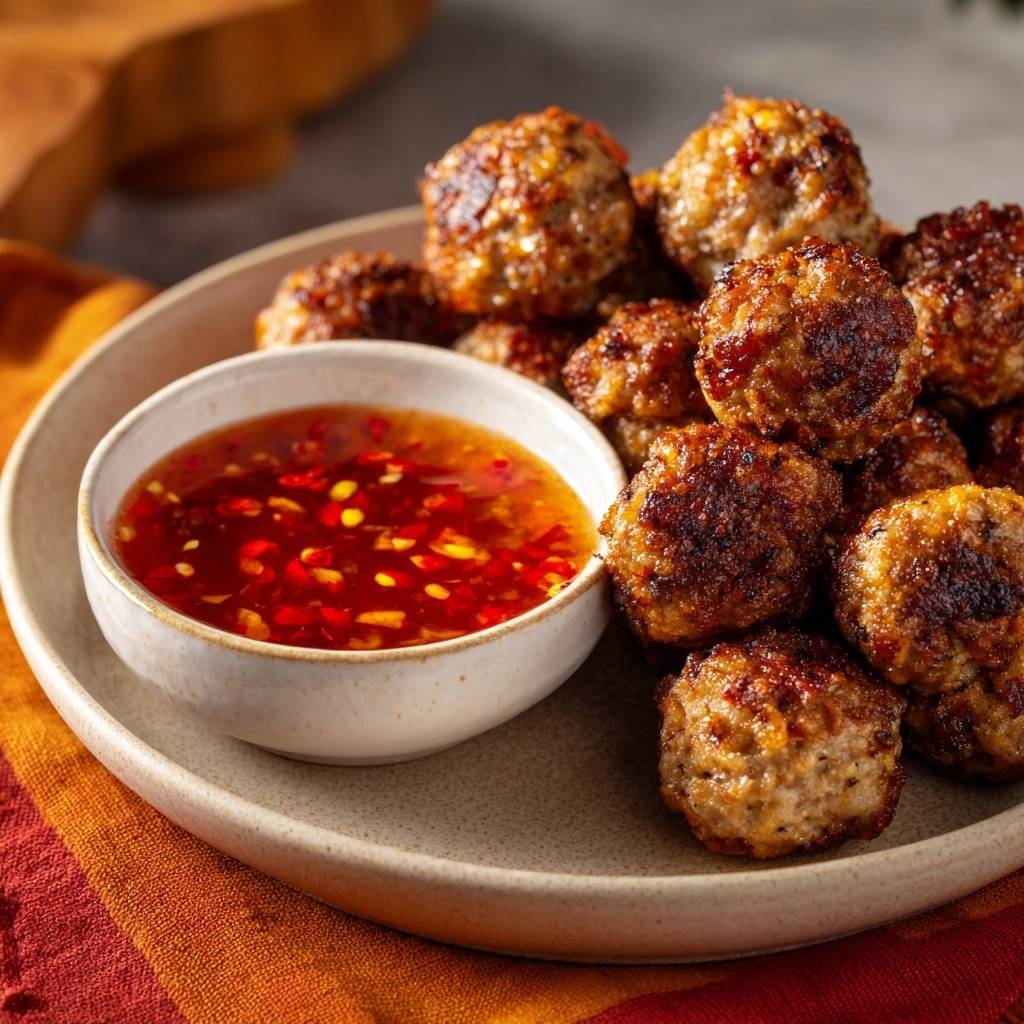
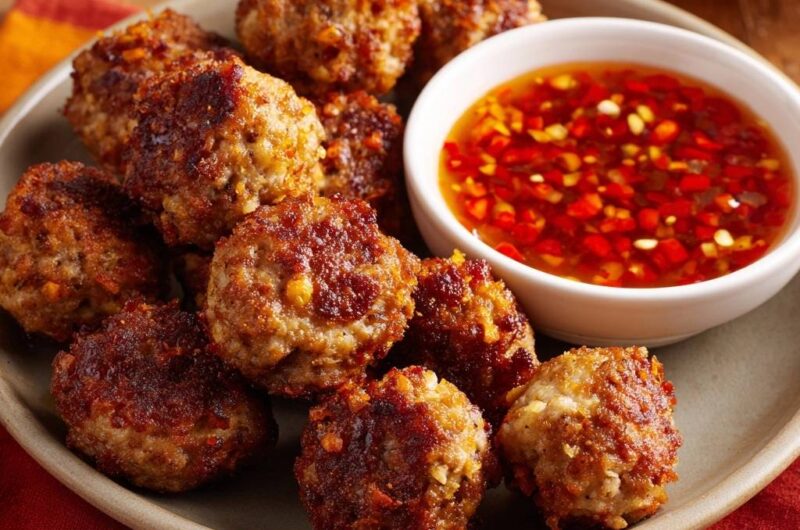
Crafting the Triple-Heat Chili Dipping Sauce
This sauce isn’t just spicy; it’s a balanced ecosystem of flavor. The sweet chili sauce provides a thick, sugary base that clings to the craggy surface of the meatballs. The chili oil with flakes adds a smoky, toasted depth and a lingering warmth. Finally, the fresh Thai bird’s eye chilies provide a sharp, acidic “front-of-the-mouth” heat. If you prefer a milder experience, remove the seeds from the fresh chilies or omit them entirely, relying on the milder heat of the bottled oil.
Complementary Dishes
Round out your meal with these dishes that pair well with crispy Thai chili meatballs.
- For a touch of sweetness and savory depth, consider these balsamic glazed pearl onions, featuring a similar savory element.
- If you enjoy the crispy texture achieved in the meatballs, you’ll appreciate these bacon-wrapped asparagus bundles for their similar crisp finish.
Troubleshooting Common Meatball Texture Issues
If your meatballs are falling apart in the pan, it’s usually a binder issue. Ensure you didn’t skip the egg or the Panko. If the mixture feels too wet to roll, add another tablespoon of Panko and let it sit for five minutes to absorb the excess moisture. On the flip side, if they are dry, you likely overcooked them. Use a meat thermometer to pull them out exactly at 160°F.
If you didn’t get a crispy skin, the culprit is almost always the pan temperature or overcrowding. Next time, sear in two batches if necessary. You want the oil to stay hot enough that the meat fries instantly upon contact. Also, ensure you aren’t using a non-stick pan if possible; cast iron or stainless steel provides a much better sear for proteins.
Optimal Pairings for Thai-Inspired Proteins
These meatballs are rich and bold, so they pair beautifully with clean, bright sides. A mound of fluffy jasmine rice is the classic choice to soak up the extra chili sauce. For a refreshing contrast, try a smashed cucumber salad with rice vinegar and sesame oil. The acidity cuts right through the fat of the meat. You could also serve these over cold rice noodles with plenty of fresh mint, cilantro, and lime wedges for a vibrant, light lunch.
For another hearty pairing, check out this slow-simmered beef stew.
Storage and Reheating for Maximum Crunch
Store leftovers in an airtight container in the fridge for up to three days. However, be warned: the microwave is the enemy of the crispy meatball. It will turn the crust soft and chewy. To revive that crunch, use an air fryer at 350°F for 4-5 minutes or a toaster oven. This dries out the exterior again and restores the original texture.
You can also freeze these meatballs easily. I recommend freezing them after the searing stage but before the oven finish. When you’re ready to eat, just pop the frozen, seared meatballs into a 400°F oven for 12-15 minutes. This ensures they taste fresh-made rather than like “leftovers.”
Expert Tips for Professional Results
Use a cast-iron skillet if you have one. Its superior heat retention means the temperature won’t drop when you add the cold meat, ensuring a better sear. Before you start rolling the meat, wet your hands with a little cold water. This prevents the meat from sticking to your palms and allows you to get a perfectly smooth surface for even browning.
Don’t be afraid of the fish sauce smell when it’s raw; it mellows significantly once cooked, leaving behind only a savory richness. Lastly, always use a meat thermometer. Hitting that 160°F mark exactly ensures the meatballs stay juicy. Even five extra minutes in the oven can turn a moist meatball into a dry one, so keep a close eye on the clock!
How do I store leftovers so they don’t get soggy?
Store the meatballs and the sauce in separate airtight containers in the refrigerator for up to 3 days. If you store them together, the meatballs will absorb the moisture from the sauce and lose their crispy texture. For the best results, only sauce the meatballs you plan to eat immediately.
Why did my meatballs turn out tough and rubbery?
Tough meatballs are usually the result of overworking the meat mixture. When you mix the beef with the aromatics and binders, use a light touch. If you squeeze or knead the meat too much, the proteins bond too tightly, creating a dense, rubbery texture. Mix until the ingredients are just barely distributed.
Can I make these without a cast-iron skillet?
Yes, you can use a stainless steel pan or even a heavy-duty non-stick skillet. However, stainless steel and cast iron are better for browning. If you use non-stick, you may need to cook the meatballs slightly longer during the searing phase to achieve the same level of golden-brown crust, as non-stick doesn’t conduct heat as aggressively.
What can I use instead of fish sauce?
If you don’t have fish sauce or have an allergy, soy sauce is the best 1:1 substitute. While it lacks the specific fermented funk of fish sauce, it provides the necessary salt and umami. You could also use Worcestershire sauce in a pinch, though it will lean more toward a Western flavor profile.
Can I freeze these meatballs for later?
Absolutely. You can freeze them raw or cooked. To freeze raw, place the rolled balls on a tray in the freezer for an hour until firm, then transfer to a bag. To freeze cooked, let them cool completely first. Reheat cooked meatballs in a 350°F oven or air fryer until warmed through to maintain the crispy exterior.
How do I make the sauce less spicy?
The heat in this recipe comes from three places: the red chili flakes in the meat, the chili oil, and the fresh Thai chilies. To dial it back, omit the fresh Thai chilies entirely and use a standard sweet chili sauce without adding extra chili oil. You can also add a teaspoon of honey or brown sugar to the sauce to balance the heat with more sweetness.
Crispy Thai Chili Meatballs
Course: Main CourseCuisine: Thai InspiredDifficulty: easy4
servings15
minutes15
minutes340
kcal30
MinutesThese meatballs feature a deep golden, craggy crust achieved through a high-heat pan sear followed by an oven finish. Served with a spicy chili oil dipping sauce, they stay crispy and flavorful.
Ingredients
1 pound ground pork or 80/20 ground beef
1/2 cup panko breadcrumbs
1 egg, lightly beaten
2 cloves garlic, minced
1 tablespoon ginger, grated
1 tablespoon fish sauce (or soy sauce)
1 teaspoon red chili flakes
1/2 cup sweet chili sauce
2 tablespoons chili oil with flakes (for the dipping sauce)
3 fresh Thai bird’s eye chilies, finely chopped (for sauce)
2 tablespoons vegetable oil (for frying)
Directions
- Preheat your oven to 400°F (200°C). Line a small baking sheet with parchment paper.
- In a large bowl, combine the meat, panko, egg, garlic, ginger, fish sauce, and 1 teaspoon of red chili flakes. Mix gently with your hands until just combined. Do not overwork the meat or the meatballs will become dense.
- Roll the mixture into 1.5-inch balls. You should get approximately 12-14 meatballs.
- Heat 2 tablespoons of vegetable oil in a large oven-safe skillet (cast iron is best) over medium-high heat.
- Once the oil is shimmering, add the meatballs in a single layer, leaving space between them. Sear for 2-3 minutes per side, turning carefully with tongs, until a deep golden-brown crust has formed on all sides.
- Transfer the skillet directly into the preheated oven (or move meatballs to the prepared baking sheet). Bake for 6-8 minutes until the centers are fully cooked through (160°F internal temperature).
- While the meatballs finish, prepare the dipping sauce: In a small bowl, combine the sweet chili sauce, chili oil with flakes, and the fresh chopped Thai chilies. Stir until well incorporated.
- Remove the meatballs from the oven and let them rest for 3 minutes. This allows the juices to redistribute so the crust stays crispy rather than getting soggy from steam.
- Serve immediately on a warm platter with the spicy chili dipping sauce on the side.
Notes
- The secret to the texture is searing in a skillet first to lock in juices and create a crust that holds up against the sauce. Do not overwork the meat to avoid density.


