
I remember my first attempts at making peppermint bark-a festive jumble of chocolate and candy that tasted great but often looked like a disjointed mess. Achieving that stunning, perfectly layered Peppermint Bark Perfection seemed elusive until I discovered a simple, yet critical, technique.
This recipe isn’t just about melting chocolate; it’s a foolproof guide to distinct, non-cracking layers that adhere beautifully, delivering that satisfying snap every single time. Get ready to impress with truly professional-looking bark.
For a delightful peppermint treat with similar layering, check out this festive peppermint white chocolate bark.
Beyond Basic: Why Our Peppermint Bark Perfection Truly Shines
Achieving That Coveted “Picture-Perfect” Look
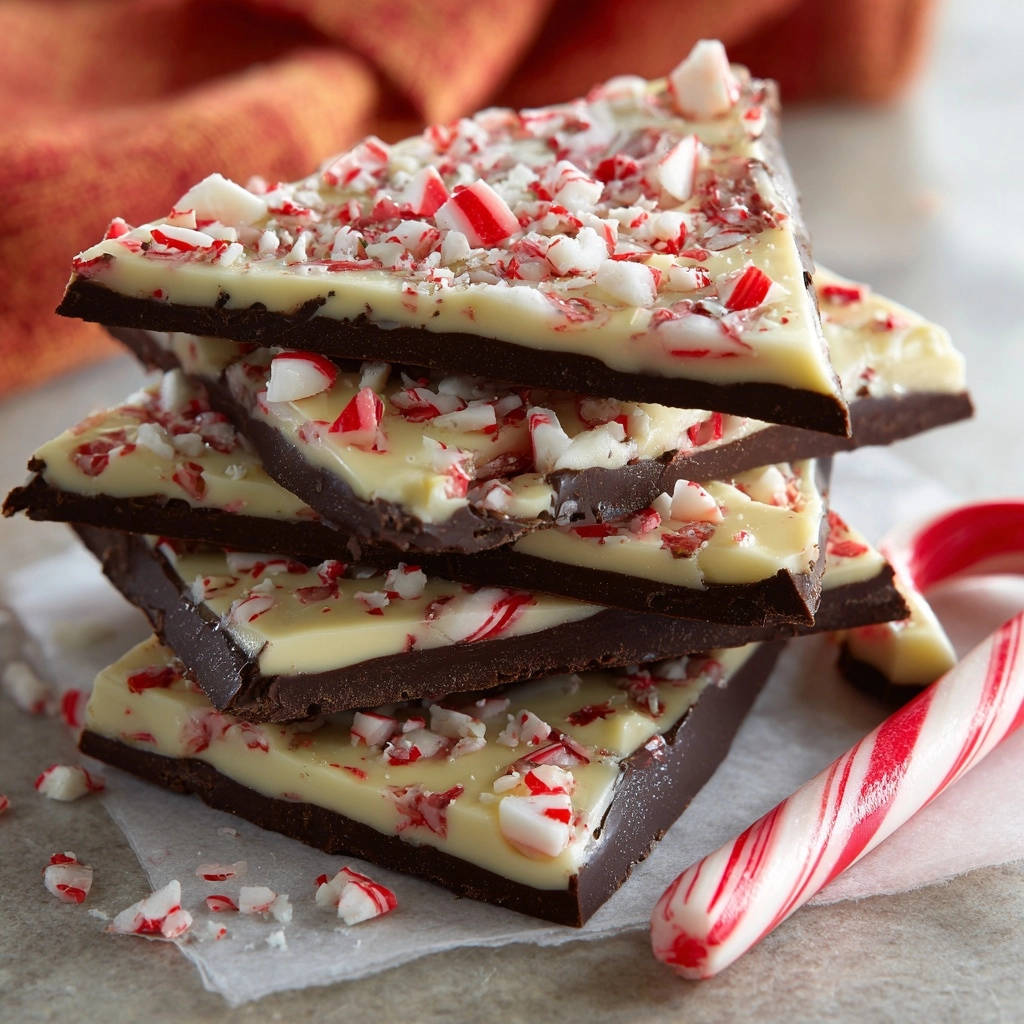
Our recipe prioritizes visual appeal, ensuring each layer of chocolate is distinct, smooth, and vibrant. We focus on techniques that prevent marbling or muddling, resulting in a clean, professional finish.
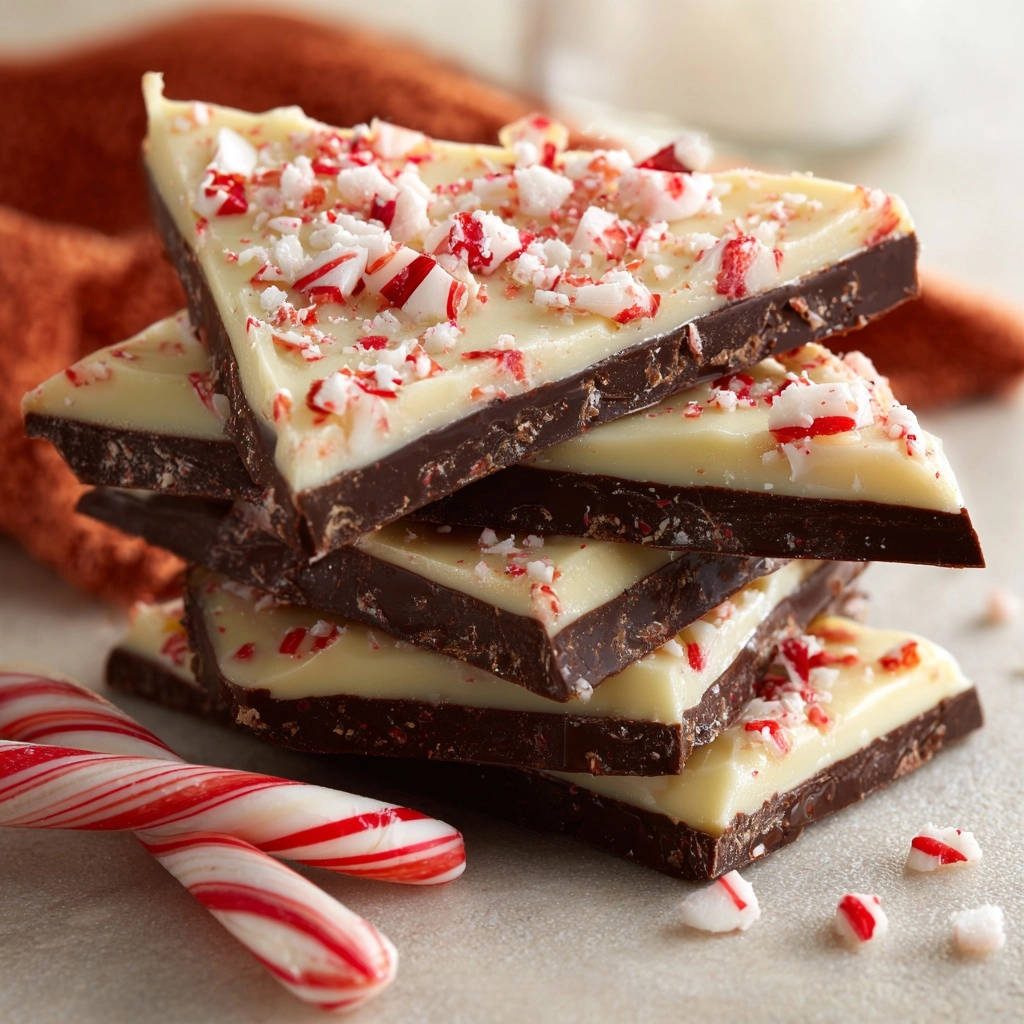
You’ll get those crisp lines between the dark and white chocolate, making your bark not just delicious, but also a showstopper on any holiday platter or gift box.
The Secret to Flawless Adhesion: No More Separation
The frustration of peeling layers is a common bark blunder. Our method introduces a critical “slightly tacky” phase for the dark chocolate layer.
This specific tackiness creates a perfect bond for the white chocolate, ensuring your layers never separate, even when snapped into pieces.
Irresistible Texture: The Perfect Snap Every Time
Forget crumbly, soft, or chewy bark. This recipe guarantees an ideal texture that delivers a satisfying crisp snap with every bite.
It’s the hallmark of well-made peppermint bark, combining smooth chocolate with the delightful crunch of candy canes for a truly irresistible treat.
Gather Your Essentials: Simple Ingredients for Sublime Bark
Dark Chocolate: Building a Strong Foundation
Opt for high-quality dark chocolate (60-70% cocoa) in chopped bar form for the best melting consistency and rich flavor. Good quality chocolate ensures a smooth, luscious base.
White Chocolate: The Bright, Beautiful Top Layer
Choose good quality white chocolate, also in chopped bar form, for optimal melting and a creamy texture. Avoid white melting wafers unless specifically designed for tempering, as they can sometimes contain less cocoa butter and behave differently.
Candy Canes: The Festive Crunch Factor
Around 6-8 regular-sized candy canes will provide the perfect amount of festive crunch and bold peppermint flavor. Ensure they are fresh for the best texture and aroma.
Parchment Paper: Your Non-Stick Ally
This simple liner is essential for stress-free removal of your finished bark and makes cleanup a breeze. Don’t skip it!
Equip for Excellence: Tools That Make Peppermint Bark a Breeze
The Double Boiler Setup: For Gentle Melting Mastery
A double boiler is crucial for melting chocolate gently and evenly, preventing scorching or seizing. Simply place a heatproof bowl over a saucepan of simmering water, ensuring the bowl’s bottom doesn’t touch the water.
Offset Spatula: For That Smooth, Even Spread
An offset spatula is your secret weapon for spreading chocolate into thin, uniform layers. Its angled blade makes it easy to maneuver and achieve a perfectly smooth surface.
Baking Sheet and Beyond: Essential Prep Tools
A sturdy 9×13 inch baking sheet provides the ideal surface area for your bark. You’ll also need a couple of heatproof mixing bowls for your chocolate, and a zip-top bag with a rolling pin for crushing candy canes efficiently.
The Art of Layers: Crafting Your Peppermint Bark Perfection Step-by-Step
- Preparation is Key: Setting the Stage
Line a baking sheet (approximately 9×13 inches) with parchment paper, ensuring there’s enough overhang on the sides. This thoughtful step makes lifting your finished bark a breeze, preventing any frustrating sticking.
- Mastering the Dark Chocolate Layer: Smooth & Tacky
Place your chopped dark chocolate in a heatproof bowl set over a saucepan of simmering water (a double boiler setup). Critically, ensure the bowl’s bottom does not touch the water.
Stir gently and continuously until the chocolate is completely melted and beautifully smooth. This gentle, consistent heat prevents lumps and ensures a velvety texture, which is foundational for your Peppermint Bark Perfection.
Pour the melted dark chocolate onto your prepared baking sheet and spread it into an even, thin layer using an offset spatula or the back of a spoon. A few gentle taps on the counter will release air bubbles for a perfectly smooth surface.
Refrigerate this layer for 15-20 minutes, until firm but crucially, slightly tacky. This tackiness is the secret for the white chocolate to adhere flawlessly.
- Perfecting the White Chocolate Layer: Bright & Bold
While the dark chocolate chills, prepare your festive crunch! Crush the candy canes by placing them in a zip-top bag and gently tapping with a rolling pin or meat mallet until you have delightful peppermint shards.
Repeat the precise melting process for the white chocolate in a clean heatproof bowl over simmering water. Stir gently and continuously until it’s completely melted and perfectly smooth – remember, patience here prevents any grittiness.
Retrieve the firm, slightly tacky dark chocolate layer from the refrigerator. Pour the melted white chocolate evenly over it, spreading smoothly with your offset spatula.
Immediately and evenly sprinkle your crushed candy canes over the warm white chocolate layer. Gently press them down lightly with your hand to ensure they embed securely and don’t fall off later.
- The Final Chill: Setting for Success
Return the baking sheet to the refrigerator for a substantial chill of at least 1 1/2 to 2 hours, or until both chocolate layers are completely firm and set. This patience guarantees that satisfying snap!
- Breaking & Storing: Enjoying Your Creation
Once thoroughly chilled, carefully lift the Peppermint Bark Perfection from the baking sheet using the parchment paper overhang. You can then artfully break or cleanly cut the bark into your desired pieces.
Store your beautiful Peppermint Bark Perfection in an airtight container at room temperature for up to two weeks, or in the refrigerator for extended freshness.
Unlock the Secrets: Expert Tips for Flawless Peppermint Bark
The Art of Gentle Melting: Avoiding Seizing Chocolate
Gentle, indirect heat is paramount when melting chocolate. Overheating or introducing even a drop of water can cause chocolate to seize, turning it grainy and unusable.
If your chocolate starts to seize, sometimes adding a teaspoon of vegetable oil or melted butter, stirring vigorously, can help rescue it, but prevention is always best.
Why “Slightly Tacky” is Your Best Friend
The “slightly tacky” dark chocolate layer is the key to perfect adhesion. After chilling, touch the dark chocolate lightly with a clean finger; it should feel firm but have a very slight stickiness, indicating ideal readiness for the white chocolate.
If it’s too hard, let it warm up at room temperature for a couple of minutes. If it’s too soft, chill for a few more minutes.
Even Spreading for Visual Appeal and Perfect Bite
Aim for uniform thickness across both chocolate layers. Use your offset spatula to spread quickly and confidently, ensuring edges are consistent with the center.
An even spread not only looks better but also ensures that each piece of bark has a balanced ratio of dark, white, and peppermint crunch.
Making Crushing Candy Canes a Breeze (and Less Messy!)
To crush candy canes with minimal mess, place them in a sturdy, freezer-safe zip-top bag. Squeeze out excess air before gently tapping with a rolling pin or meat mallet.
For fine dust, crush more aggressively; for chunkier pieces, use lighter taps. You can also experiment with different candy cane textures for visual appeal.
Storage Solutions for Lasting Freshness and Flavor
Store your bark in an airtight container away from direct sunlight and heat. For longer shelf life, the refrigerator is ideal, especially in warmer climates.
To avoid moisture absorption and maintain that satisfying snap, place wax paper between layers of bark if stacking. For another delightful treat that stores well, consider making chewy chocolate caramel nut bark.
Troubleshooting Your Treat: Common Bark Blunders Solved
Why Is My Chocolate Grainy or Seized?
This is typically caused by overheating the chocolate or allowing even a tiny drop of water to come into contact with it during melting. Use a clean, dry bowl and ensure the water in your double boiler is simmering, not boiling.
My Layers Are Separating! What Went Wrong?
Separation usually happens if the dark chocolate layer was too cold and firm when the white chocolate was poured over it. Remember the “slightly tacky” rule for optimal adhesion between layers.
The Bark Isn’t Snapping Cleanly
Insufficient chilling time is the most common culprit. Ensure both layers are completely firm and set, allowing for at least 1.5 to 2 hours in the refrigerator. Thickness can also play a role; very thin bark may be more delicate.
My Candy Canes Aren’t Sticking
This occurs if the white chocolate layer cools too much before the candy canes are added. Speed is key here: sprinkle and gently press the candy canes immediately after spreading the white chocolate for the best adherence.
Serve, Share, & Savor: Elevating Your Peppermint Bark Experience
Classic Serving Ideas
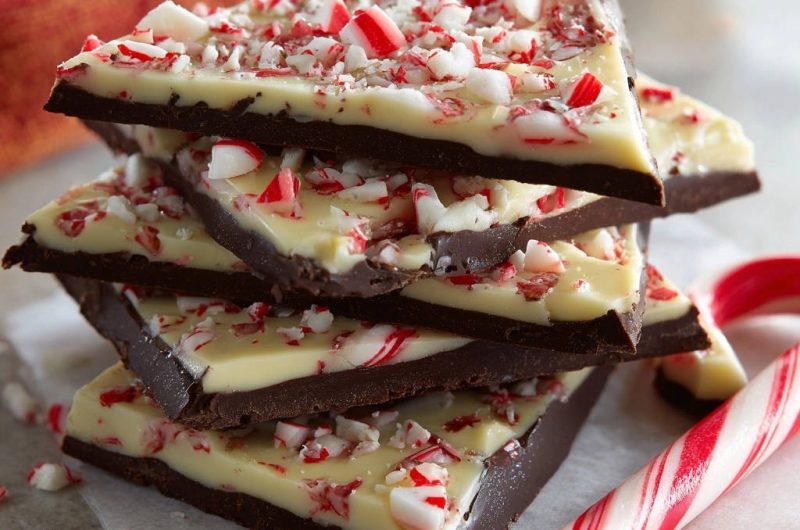
Break your Peppermint Bark Perfection into rustic, irregular pieces and arrange them artfully on a holiday platter. It’s a beautiful addition to any dessert spread and perfect for after-dinner indulgence.
Gift-Giving Presentation
Homemade peppermint bark makes an exquisite gift. Package pieces in clear cellophane bags tied with festive ribbons, or arrange them in decorative tins. Add a small handwritten label for a personal touch.
If you’re packaging sweets, consider trying out these chocolate pecan truffles for another delightful option.
Fun Flavor Twists and Topping Ideas
Beyond candy canes, consider adding a sprinkle of sea salt flakes for a sweet-and-salty kick, or a dusting of cocoa powder. For an extra layer of flavor, you could swirl a tiny bit of almond extract into the white chocolate, though peppermint is classic for a reason.
Beyond the Bark
If you’re craving more sweet treats or comforting bakes, consider these recipes.
- For a warm, spiced beverage that complements the peppermint notes, try this Homemade Pumpkin Spice Latte.
- To satisfy a savory craving alongside your sweet peppermint bark, explore this Cheesy Sausage Biscuit Bake.
Your Top Questions: All About Peppermint Bark Perfection
Can I Use Chocolate Chips Instead of Chopped Bars?
While chocolate chips can be used, chopped chocolate bars are generally recommended for superior melting consistency and a smoother finish. Chips often contain stabilizers that can affect how smoothly they melt, though good quality chips can work in a pinch.
How Long Does Peppermint Bark Last?
Properly stored in an airtight container, your Peppermint Bark Perfection will stay fresh at room temperature for up to two weeks. In the refrigerator, it can last for three to four weeks, maintaining its crisp texture and vibrant flavor.
Can I Make This Dairy-Free?
Yes, absolutely! There are many excellent dairy-free dark and white chocolate options available on the market. Ensure your chosen brands melt smoothly and follow the same melting instructions for a delicious dairy-free bark.
What’s the Best Way to Crush Candy Canes Without a Mess?
As mentioned, placing candy canes in a sturdy zip-top bag and gently tapping with a rolling pin is the cleanest method. For an even finer powder, a food processor can be used, but be careful not to over-process and create a sticky paste from the sugar.
There you have it-your definitive guide to crafting Peppermint Bark Perfection that’s not just delicious, but visually stunning too. With these expert tips and precise steps, you’ll achieve flawless, distinct layers and that irresistible snap every single time.
Don’t hesitate any longer; embrace the joy of making this festive treat. Dive in, create your own masterpiece, and share your delightful results with us! Happy bark making!
Peppermint Bark
Course: DessertCuisine: AmericanDifficulty: easy12
servings15
minutes10
minutes240
kcal120
minutesAchieve perfect, beautiful layers of dark and white chocolate with this Peppermint Bark recipe. Learn the secret to smooth, crack-free bark that snaps just right, topped with festive crushed candy canes. Ideal for holiday treats and gifts.
Ingredients
12 ounces dark chocolate, chopped
12 ounces white chocolate, chopped
6-8 regular size candy canes, crushed
Directions
- Line a baking sheet (approximately 9×13 inches) with parchment paper, allowing some overhang on the sides for easy removal.
- For the Dark Chocolate Layer (The Smooth Start): Place the chopped dark chocolate in a heatproof bowl set over a saucepan of simmering water (a double boiler). Ensure the bottom of the bowl does not touch the water. Stir gently and continuously until the chocolate is completely melted and smooth. The key to preventing lumps and ensuring a beautifully smooth layer is low, gentle heat and constant stirring. Avoid overheating the chocolate, which can make it seize or become gritty.
- Pour the melted dark chocolate onto the prepared baking sheet. Using an offset spatula or the back of a spoon, spread it into an even, thin layer. Tap the baking sheet gently on the counter a few times to release any air bubbles and achieve an even surface.
- Place the baking sheet in the refrigerator for about 15-20 minutes, or until the dark chocolate is firm to the touch but still slightly tacky. This slight tackiness is crucial for the white chocolate layer to adhere properly and prevent separation.
- For the White Chocolate Layer (The Flawless Finish): While the dark chocolate chills, crush the candy canes. You can place them in a zip-top bag and gently tap with a rolling pin or meat mallet.
- Repeat the melting process for the white chocolate: Place the chopped white chocolate in a clean heatproof bowl over simmering water. Stir gently and continuously until completely melted and smooth. Again, gentle heat and constant stirring are vital for a perfect, lump-free texture.
- Remove the dark chocolate layer from the refrigerator. Pour the melted white chocolate evenly over the dark chocolate layer. Spread it smoothly with an offset spatula.
- Immediately sprinkle the crushed candy canes evenly over the warm white chocolate layer. Gently press them down lightly with your hand to ensure they adhere well.
- Return the baking sheet to the refrigerator for at least 1 1/2 to 2 hours, or until both chocolate layers are completely firm and set.
- Once thoroughly chilled, remove the bark from the baking sheet by lifting the parchment paper. Carefully break or cut the bark into desired pieces. Store in an airtight container at room temperature or in the refrigerator.
Notes
- Store in an airtight container at room temperature or in the refrigerator.


