

I struggled for years to achieve a light, velvety crumb in my butter cakes, often ending up with dry or disappointingly dense results. This recipe solves that frustration entirely, relying on a meticulous but simple technique that guarantees a truly perfect texture.
Once you master the “tender crumb technique,” you will consistently bake the most moist and flavorful Rich Lemon Butter Cake you’ve ever tasted, making this method the only one you’ll ever need.
Beyond Dense: Why This Rich Lemon Butter Cake Recipe Works Every Time
Traditional butter cakes often suffer from two major faults: not enough air incorporated upfront, and too much gluten developed at the end. These issues lead directly to a tight, rubbery texture.
This specific formulation prioritizes maximizing aeration during the creaming stage, followed by minimal mixing once the flour is added, ensuring the cake remains incredibly tender.
The “Tender Crumb” Technique: Mastering the Creaming Stage
The secret to a light cake is the foundational air incorporated before any liquid or flour is introduced. This is achieved during the creaming stage of butter and sugar.
Beating the softened butter and granulated sugar for a full four to five minutes forces air bubbles into the fat, creating tiny pockets that expand in the oven. This intensive process is non-negotiable for achieving that signature velvety crumb.

The Power of Room Temperature: Consistency is Key
Room temperature ingredients are absolutely essential for a stable, lump-free batter. Cold ingredients will cause the softened butter to seize and split, leading to curdling.
When all components-butter, eggs, and milk-are at the same warm temperature, they emulsify perfectly, resulting in a smooth, homogenous batter that bakes up uniformly and retains maximum moisture.
Assembling Your Ingredients: The Building Blocks of Flavor
The Foundation: Flour, Leavening, and Salt
All-purpose flour provides the necessary structure without being overly heavy, creating an ideal base for this Rich Lemon Butter Cake.
Baking powder ensures an even lift, while a small amount of salt balances the sweetness and enhances the bright lemon notes.
Dairy and Fat: The Role of Softened Butter and Whole Milk
Unsalted butter is preferred as it allows for precise control over the overall salt content of the finished cake.
Whole milk adds significant moisture and richness, contributing to the soft, luxurious texture; it must be at room temperature to blend seamlessly.
Citrus Brilliance: Maximizing Fresh Lemon Zest and Juice
The deep, concentrated lemon flavor comes almost entirely from the zest, which holds the fragrant essential oils.
For a similar bright citrus kick, explore mastering the glazed lemon loaf cake.
Fresh lemon juice provides crucial acidity for balance and reacts with the baking powder, ensuring a bright flavor that permeates the whole cake.
The Glossy Finish: Building the Perfect Glaze
The glaze should be made simply from powdered sugar and fresh lemon juice, achieving a consistency that is thick, glossy, and opaque.
This finish seals in moisture and delivers a concentrated tartness that cuts through the richness of the butter cake.
If you enjoy rich, fudgy textures, you should also explore the walnut fudge brownies strategy.
Rich Lemon Butter Cake: Step-by-Step for Perfect Results
- Phase 1: Preparation and Mise en Place
Preheat your oven to 350°F (175°C). Properly prepare the 9×5 inch loaf pan by first greasing it, then lining it with parchment paper that overhangs the long sides.
This parchment sling method is the easiest way to remove the moist loaf from the pan without risking damage or sticking.
- Phase 2: Achieving Optimal Aeration (Creaming)
In a stand mixer, beat the softened butter and sugar on medium-high for 4 to 5 minutes until the mixture turns noticeably pale yellow and has doubled in volume.
Do not cut this time short; achieving this light, airy state is the single most important action for guaranteeing a tender, non-dense cake.
- Phase 3: Incorporating Eggs, Vanilla, and Zest
Add the room temperature eggs one at a time, mixing only until each egg is fully incorporated before adding the next.
Be sure to stop the mixer periodically to scrape down the sides of the bowl, ensuring the vanilla and lemon zest are evenly distributed into the base.
- Phase 4: The Crucial Alternate Additions Method
Reduce the mixer speed to the absolute lowest setting. Begin adding one-third of the dry ingredients, mixing briefly until just combined.
Next, add half of the wet ingredients (milk and lemon juice) and mix briefly again.
Repeat this sequence with the second third of the dry ingredients, the remaining wet ingredients, and finally the last third of the dry mix.
CRITICAL TIP (The Pain Point Fix): The instant the last streaks of flour disappear from the batter, turn the mixer off. Overmixing develops tough gluten strands, which will ruin the texture and density you worked so hard to achieve during the creaming process.
- Phase 5: Baking and Testing for Doneness
Pour the batter into the prepared pan and smooth the top. Bake for 50 to 60 minutes.
The cake is done when a thin wooden skewer inserted into the very center comes out completely clean, without any wet batter clinging to it.
- Phase 6: Cooling and Glazing the Rich Lemon Butter Cake
Allow the cake to cool in the pan for exactly 10 minutes; this helps the structure stabilize before moving.
Carefully lift the cake onto a wire rack to cool completely before applying the glaze, preventing the glaze from running off or dissolving into the warm cake.
To check the glaze, it should be thick and coat the back of a spoon; if too thin, incorporate a teaspoon of powdered sugar at a time until the desired opaque, glossy texture is achieved.
Chef’s Secrets: Elevate Your Rich Lemon Butter Cake Game
Sifting the Dry Ingredients for an Extra Light Texture
Though not strictly required, taking the extra step to sift your flour, baking powder, and salt ensures zero lumps and incorporates even more air.
This small action results in an even distribution of leavening and contributes to the finest, most velvety crumb possible.
Preventing a Tough Crust During Baking
If you notice the top of your cake browning too rapidly during the first 30 minutes of baking, the crust may become overly tough.
Loosely tenting the loaf pan with a sheet of aluminum foil helps deflect direct heat, allowing the cake interior to continue baking evenly without the crust hardening.
The Flavor Boost: Adding a Lemon Syrup Soak
For an intensely moist and flavorful lemon loaf, prepare a simple syrup (equal parts water and sugar, boiled with a splash of lemon juice).
Brush this warm syrup liberally over the entire surface of the cake immediately after removing it from the oven, before cooling and glazing; the cake will soak up the syrup for unmatched moisture.
Troubleshooting Common Lemon Butter Cake Failures
The Cake is Crumbly or Dry
If your cake crumbles easily or tastes dry, it is almost always due to overbaking or inaccurate measuring of flour.
Ensure you are measuring flour correctly by spooning it into the measuring cup and leveling it, as scooping directly compacts the flour, resulting in too much dry ingredient.
The Batter Curdled When Adding Eggs
Curdling usually indicates that the ingredients were not at room temperature, causing the fat and liquid to separate.
If this happens, try beating in one tablespoon of the dry flour mixture; the starches will often help re-emulsify the mixture, smoothing the batter again.
Uneven Rise: Why Did My Cake Peak or Crack?
A high peak or significant crack down the center is often caused by an oven hot spot or a batter that was too cold going into the oven.
Preheating for at least 30 minutes ensures a stable oven temperature, and placing the batter in the oven immediately after mixing prevents ingredients from settling.
Storing, Serving, and Adapting Your Lemon Masterpiece
Ideal Storage for Maximum Freshness (3-5 Days)
Store your glazed Rich Lemon Butter Cake at cool room temperature in an airtight container to preserve its moisture.
If refrigerated, the butter in the cake will firm up, potentially drying out the texture; always keep it sealed on the counter for the best flavor and crumb.
Freezing the Cake: Make-Ahead Strategies
This cake freezes beautifully if you plan ahead. Wrap the completely cooled, unglazed loaf tightly in plastic wrap, followed by a layer of aluminum foil.
The cake can be frozen for up to three months; thaw it overnight in the refrigerator, then let it come to room temperature before glazing and serving.
Creative Ways to Serve Rich Lemon Butter Cake
While delicious alone, the intense lemon flavor pairs perfectly with a contrast of texture or creaminess.
Serve slices alongside a dollop of fresh crème fraîche or a spoonful of lightly sweetened vanilla whipped cream, garnished with fresh raspberries or blueberries.
More Sweet Ideas
Round out your meal with these delightful dessert options.
- For a sweet start to your day or a delightful afternoon treat, consider these Cinnamon Sugar Jam-Filled Waffles, which share a comforting sweetness with your lemon butter cake.
- If you’re in the mood for something light and airy, these Fluffy Fried Dough Bites offer a pleasing texture that complements the velvety crumb of the cake.
Essential Questions About Baking Rich Lemon Butter Cake (FAQs)
What is the Ideal Temperature for Room Temperature Butter?
Butter should be soft enough to easily leave an indentation with your finger but still cool to the touch and hold its shape.
If the butter looks greasy or shiny, it is too warm and should be chilled slightly before beginning the creaming process.
Can I Use a Different Citrus Fruit?
Yes, you can easily adapt this recipe to create a rich lime or orange butter cake.
If using orange, you may need slightly less juice, as oranges are often sweeter and contain more liquid than lemons.
Is it Better to Grease and Flour or Use Parchment Paper?
For a reliable release, especially with a moist loaf like this one, using parchment paper with an overhang is highly recommended.
Greasing and flouring alone can sometimes fail, leading to sticking, whereas the parchment sling ensures you can gently lift the entire baked cake out flawlessly.
Ready to Impress? Share Your Rich Lemon Butter Cake Success Story!
The quest for homemade butter cake perfection ends here. By focusing on temperature and respecting the crucial creaming and anti-overmixing steps, you are guaranteed a moist, luxurious Rich Lemon Butter Cake.
Now that you possess the secrets to achieving that velvety crumb, go ahead and bake this masterpiece with absolute confidence-and don’t forget to share the results!
Lemon Butter Cake
Course: DessertCuisine: AmericanDifficulty: medium8
servings20
minutes55
minutes350
kcal60
minutesThis recipe guarantees a cake so tender and moist, you’ll never go back to your old method. The key is a specific creaming technique combined with careful mixing to achieve a light, velvety crumb, topped with a bright, tangy lemon glaze.
Ingredients
For the Cake:
1 1/2 cups all-purpose flour
1 1/2 teaspoons baking powder
1/2 teaspoon salt
3/4 cup unsalted butter, softened to room temperature
1 1/2 cups granulated sugar
3 large eggs, room temperature
1 teaspoon vanilla extract
1/2 cup whole milk, room temperature
Zest of 2 large lemons
2 tablespoons fresh lemon juice
For the Glaze:
1 cup powdered sugar
2 tablespoons fresh lemon juice
Directions
- Prep the Oven and Pan: Preheat your oven to 350°F. Grease and flour a 9×5 inch loaf pan, or line it with parchment paper leaving an overhang on the long sides for easy removal.
- Dry Ingredients: In a medium bowl, whisk together the flour, baking powder, and salt. Set aside.
- The Tender Crumb Technique (Creaming): In a large bowl or stand mixer, beat the softened butter and granulated sugar together until the mixture is very light and fluffy. This should take 4 to 5 minutes on medium-high speed. The mixture must look pale yellow and airy. This is the critical step for incorporating air and achieving a soft texture.
- Add Eggs: Beat in the eggs one at a time, mixing well after each addition and scraping down the sides of the bowl as needed. Mix in the vanilla and lemon zest.
- Alternate Additions: Reduce the mixer speed to low. Begin incorporating the dry ingredients and wet ingredients in alternating batches. Start with one-third of the flour mixture, mixing just until combined. Next, mix in half of the room temperature milk and the 2 tablespoons of lemon juice. Repeat with the second third of the flour, the remaining milk, and then the final third of the flour. Stop mixing the instant the last streaks of flour disappear. Crucial Pain Point Fix: Overmixing once flour is added develops gluten and leads to a tough, dense cake. Mix only until just combined.
- Bake: Pour the batter into the prepared loaf pan and smooth the top. Bake for 50 to 60 minutes, or until a wooden skewer inserted into the center comes out clean.
- Cool: Let the cake cool in the pan for 10 minutes before carefully lifting it out onto a wire rack to cool completely.
- Prepare Glaze: In a small bowl, whisk together the powdered sugar and lemon juice until completely smooth and thick enough to slowly drizzle (it should look glossy and opaque, not clear and runny). If the glaze is too thin, add powdered sugar one teaspoon at a time. If too thick, add water or milk 1/4 teaspoon at a time.
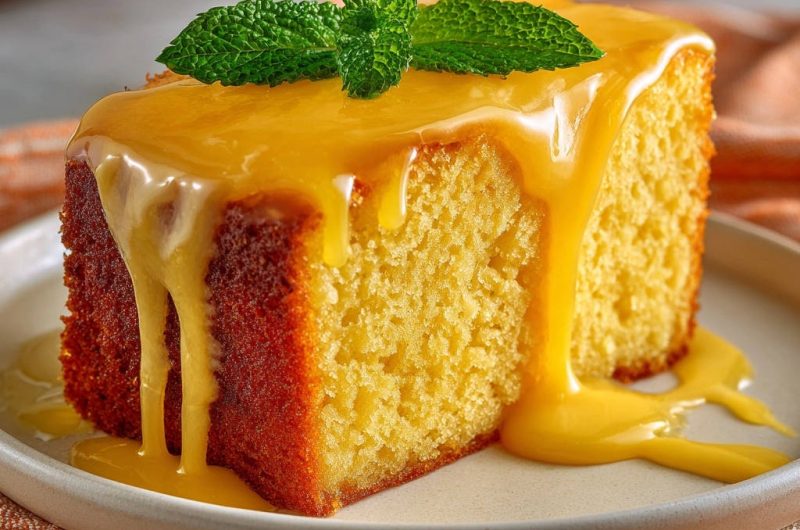
- Serve: Drizzle the glaze generously over the cooled cake. Slice and serve, optionally garnishing with fresh mint leaves as desired.
Notes
- The creaming step (beating butter and sugar for 4-5 minutes until pale and fluffy) is crucial for a tender crumb. Avoid overmixing once flour is added.


