
I remember those early attempts at making Snowball Cookies, often ending up with dry, crumbly lumps instead of the delicate, powdered treats I craved. It wasn’t until I pinpointed a few simple techniques that my batches transformed into truly unforgettable, melt-in-your-mouth perfection.
This recipe ensures that every single bite is tender, rich, and exactly what you envision from these classic powdered sugar cookies, perfect for any occasion that calls for a touch of sweet magic.
For added crispness, consider trying pistachio shortbread cookies in your next baking adventure.
Why Our Snowball Cookies Deliver Unforgettable Tenderness
The Melt-in-Your-Mouth Difference You’ll Love
Achieving that coveted melt-in-your-mouth texture means the cookies are impossibly tender, dissolving beautifully on your tongue without any chewiness or resistance.
For similarly tender results, consider exploring chewy snickerdoodles with crinkly tops.
This recipe consistently delivers that luxurious experience, making each cookie a delightful indulgence.
Beyond Dry and Crumbly: Achieving Perfect Texture Every Time
Many recipes can result in dry or crumbly snowball cookies due to overmixing or overbaking.
Our method focuses on precise steps and visual cues that actively prevent these common pitfalls, guaranteeing a consistently tender crumb.
A Simple Technique, Stellar Results
The “one simple technique” that transformed my baking involves a combination of careful ingredient handling and precise timing.
These nuances, detailed later, elevate these humble ingredients into truly spectacular holiday or everyday treats.
Gather Your Essentials: The Building Blocks of Delicious Snowball Cookies
Unsalted Butter: The Foundation of Flavor and Texture
Unsalted butter allows you to control the exact salt content in your cookies, ensuring optimal flavor balance.
Using softened butter is crucial for proper creaming, which is the cornerstone of their delicate texture.
Powdered Sugar: Sweetness and That Snowy Finish
Powdered sugar in the dough contributes to the fine, delicate crumb of these butterball cookies.
Its primary role, however, is to create that iconic snowy coating, applied in two distinct stages for maximum effect.
Vanilla Extract: A Hint of Warmth and Aroma
Good quality vanilla extract adds a foundational layer of warm, inviting flavor that enhances all the other ingredients.
It’s a simple addition that makes a significant difference in the cookie’s overall aroma and taste.
All-Purpose Flour & Salt: Structure and Balance
All-purpose flour provides the necessary structure without making the cookies dense or tough, especially when handled gently.
A touch of salt is vital; it balances the sweetness and deepens the overall flavor profile of these classic treats.
Essential Tools for Your Snowball Cookie Baking Journey
Baking Sheets & Parchment Paper: For even baking and easy cleanup, parchment paper is a non-negotiable for preventing sticking and ensuring consistent results.
Large Mixing Bowl: Essential for creaming the butter and sugar, allowing enough space to incorporate air for a fluffy mixture.
Electric Mixer (Handheld or Stand): While a sturdy spoon works, an electric mixer makes quick work of creaming, achieving that light and fluffy butter mixture with minimal effort.
Measuring Cups & Spoons: Accurate proportions are key in baking, so precise measurements ensure the perfect texture and flavor for your Russian tea cakes.
Wire Rack: Critical for cooling cookies completely, preventing sogginess and allowing the second powdered sugar coating to adhere perfectly.
Crafting Your Snowball Cookies: A Step-by-Step Guide to Perfection
- Prepare Your Workspace:
Preheat your oven to 350°F (175°C) and line a baking sheet with parchment paper.
This ensures your oven is at the correct temperature for consistent baking and prevents sticking, leading to perfectly golden bottoms.
- Cream Butter and Sugar to Perfection:
In a large bowl, cream together the softened unsalted butter and 1/2 cup powdered sugar until the mixture is light, fluffy, and pale.
This crucial step incorporates air, which is the secret to the delicate, melt-in-your-mouth texture mentioned in the recipe’s original instruction, creating truly tender snowball cookies.
- Infuse with Vanilla:
Stir in the vanilla extract until it’s fully combined with the creamy butter mixture.
This ensures the wonderful aroma and flavor of vanilla permeates every cookie.
- Gently Incorporate Dry Ingredients:
Gradually add the all-purpose flour and salt to the butter mixture.
Mix on low speed, or by hand, just until the flour is incorporated and a cohesive dough forms.
Remember not to overmix, as excessive mixing develops gluten, which can make your cookies tough instead of tender, as highlighted in the recipe instructions.
- Chill for Superior Structure:
Cover the dough and refrigerate it for at least 30 minutes.
This chilling period is vital as it helps the cookies maintain their shape during baking and further enhances their delicate, crumbly texture, as indicated in the original recipe.
- Shape Your Snowball Cookies:
Roll the chilled dough into uniform 1-inch balls and place them about 1 inch apart on your prepared baking sheet.
Uniform sizing ensures even baking across the batch, giving you consistent, perfectly sized powdered sugar cookies.
- Bake Until Just Set:
Bake for 10 to 12 minutes, or just until the edges are lightly golden and the bottoms are set.
The cookies should still look pale on top. It’s critical not to overbake, as this is the enemy of melt-in-your-mouth cookies; watch them closely!
- First Powdered Sugar Roll (While Warm):
While the cookies are still warm from the oven, gently roll them in about 1 cup of the remaining powdered sugar until thoroughly coated.
The warmth allows the sugar to adhere beautifully, creating the initial snowy layer that is characteristic of Mexican wedding cookies.
- Cool and Double Roll for the Perfect Finish:
Let the cookies cool completely on a wire rack.
Once cool, roll them a second time in the remaining 1/2 cup of powdered sugar for that perfect, snowy, signature Snowball Cookie finish.
Chef’s Secrets: Mastering Melt-in-Your-Mouth Snowball Cookies
The Power of Proper Creaming
Creaming butter and sugar until truly light and fluffy is “key for that delicate, melt-in-your-mouth texture” because it whips air into the mixture.
This trapped air expands during baking, creating a tender, less dense cookie that effortlessly melts on the tongue.
Don’t Overmix: Preserving Tenderness
Overmixing flour activates gluten, which develops elasticity and strength, making baked goods chewy.
For tender snowball cookies, mix just until the flour is incorporated, avoiding a tough texture.
The Importance of Chilling Dough
Chilling the dough for at least 30 minutes solidifies the butter, preventing the cookies from spreading too much in the oven.
This process also “further enhances their delicate crumb” by allowing the flour to fully hydrate, resulting in a more refined texture.
Watch the Oven: Preventing Dryness and Achieving Softness
Overbaking is the quickest way to turn melt-in-your-mouth cookies into dry, hard ones.
Look for lightly golden edges and set bottoms, keeping the tops pale; this ensures they remain wonderfully tender and soft.
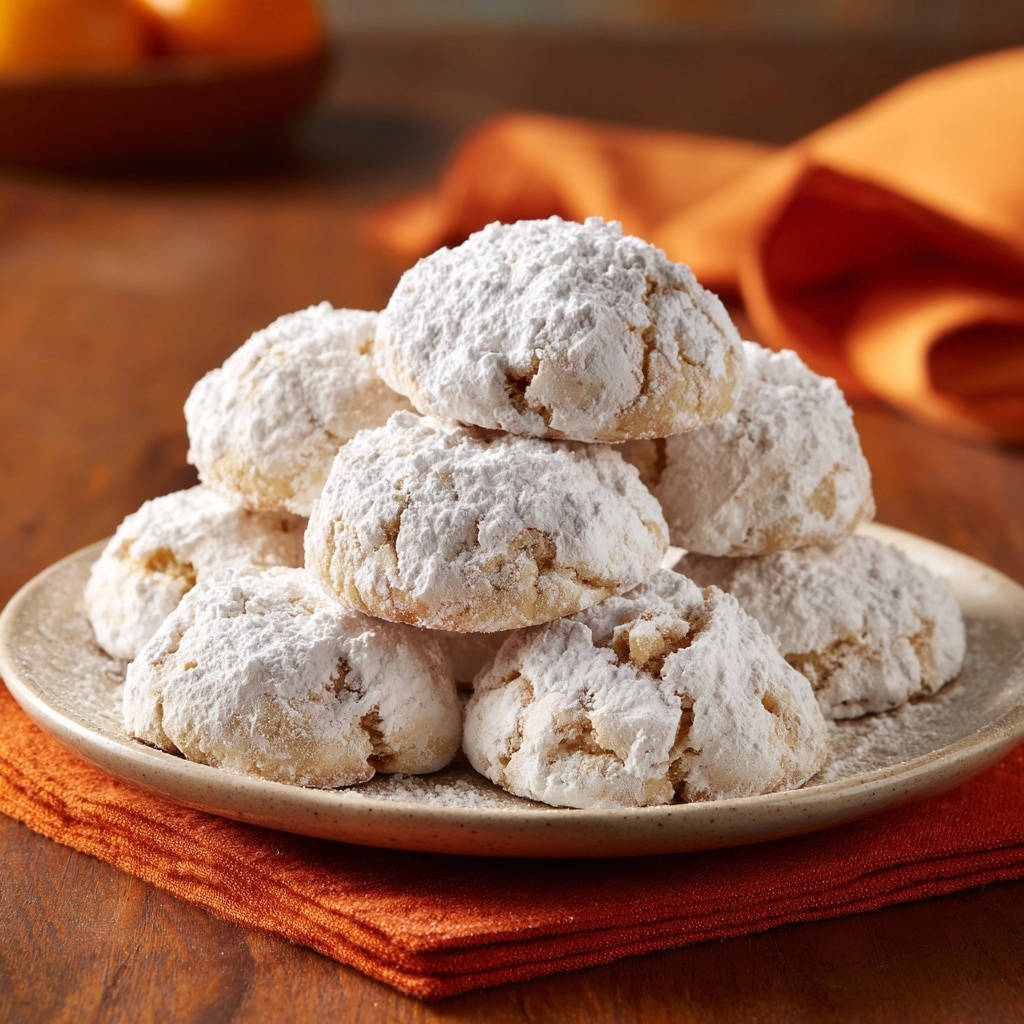
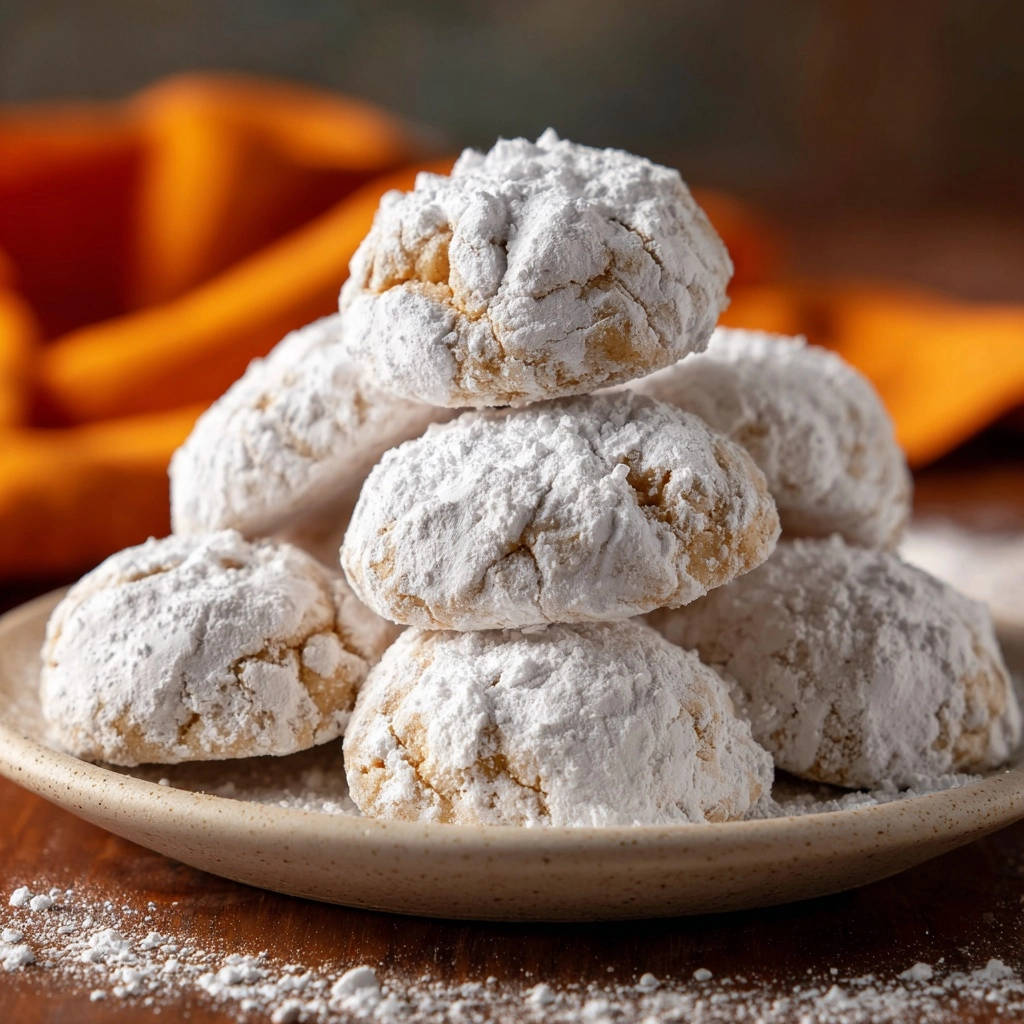
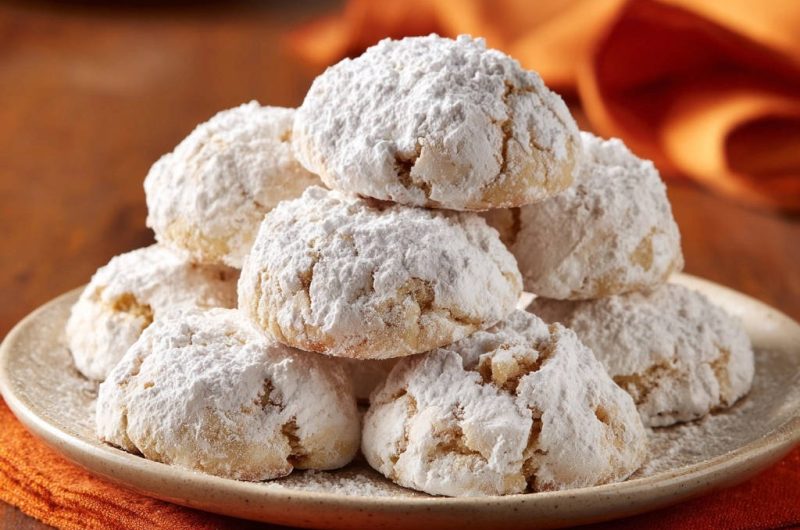
The Double-Roll for that Signature Snowy Finish
Rolling the cookies twice in powdered sugar is essential for their iconic appearance and texture.
The first roll when warm allows the sugar to slightly melt and adhere, forming a base layer, while the second roll when cool creates a beautiful, thick, snowy coating that stays put.
Troubleshooting Your Snowball Cookies: Common Issues & Quick Fixes
Why Are My Snowball Cookies Dry or Crumbly?
This usually points to overbaking or possibly too much flour. Ensure you measure flour correctly by spooning it into a measuring cup and leveling it.
Next time, reduce baking time by a minute or two and watch for those pale tops and lightly golden bottoms.
My Snowball Cookies Are Spreading Too Much!
Excessive spreading often means your butter was too soft, or the dough wasn’t chilled long enough.
Ensure your butter is cool to the touch but pliable, and always chill the dough for the recommended time, or even longer on a warm day.
Help, My Snowball Cookies are Dense or Hard!
Dense or hard cookies are a tell-tale sign of overmixing the flour or baking for too long.
Mix only until the flour disappears, and be vigilant with baking times; a minute can make all the difference for tender Russian tea cakes.
Beyond the Bake: Serving, Storing, and Enjoying Your Snowball Cookies
Perfect Pairings and Serving Suggestions
These delicate powdered sugar cookies are perfect alongside a warm mug of coffee, hot tea, or a glass of cold milk.
More Sweet Treats to Try
These snowball cookies are wonderful on their own, but if you’re looking for more baked goods to enjoy, consider these.
- For a breakfast or brunch option that complements the buttery sweetness, try these assorted fruit & chocolate scones, offering a different kind of crumbly delight.
- If you enjoy a tender texture similar to your cookies, you might like these diner-style fluffy pancakes, perfect for a sweet morning or afternoon treat.
They make an elegant addition to holiday dessert platters, cookie exchanges, or as a simple sweet treat any time of year.
How to Store Snowball Cookies for Optimal Freshness
Store your cooled snowball cookies in an airtight container at room temperature for up to 1 week.
Layering them with parchment paper can help prevent the powdered sugar coating from sticking together.
Make-Ahead Tips for Easy Entertaining
The dough for these pecan snowballs can be prepared ahead of time and refrigerated for up to 2-3 days, or frozen for up to 3 months.
If freezing baked cookies, ensure they are thoroughly cooled, then freeze in an airtight container; re-roll in powdered sugar after thawing, if desired.
Your Snowball Cookie Questions Answered: FAQ
Can I Use Margarine Instead of Butter in Snowball Cookies?
While you can use margarine, butter offers superior flavor and contributes significantly to the melt-in-your-mouth texture.
Margarine may result in a slightly different flavor and a less tender crumb.
Can I Add Nuts to This Snowball Cookie Recipe?
Absolutely! Finely chopped nuts like pecans or walnuts are a classic addition to snowball cookies.
Stir in about 1/2 cup of finely chopped nuts with the flour, adding a delightful crunch and nutty flavor. For other fantastic nut-filled treats, try our caramel nut squares.
How Do I Make Gluten-Free Snowball Cookies?
To make these gluten-free, substitute the all-purpose flour with a 1:1 gluten-free baking flour blend that contains xanthan gum.
No other adjustments should be necessary, but keep an eye on the dough consistency and baking time as it might vary slightly.
Can I Freeze Snowball Cookie Dough?
Yes, you can! Roll the dough into balls, then freeze them on a baking sheet until solid.
Transfer the frozen balls to an airtight freezer bag and store for up to 3 months, baking from frozen with an extra minute or two of bake time.
Ready to Bake? Share Your Snowball Cookie Success!
Now that you’re equipped with all the secrets to perfectly tender, melt-in-your-mouth snowball cookies, it’s time to preheat your oven and get baking!
We’d love to see your beautiful creations. Share your Snowball Cookies on social media and tag us, or leave a comment below with your favorite part of this recipe. Happy baking!
Snowball Cookies
Course: DessertCuisine: AmericanDifficulty: easy24
cookies15
minutes12
minutes170
kcal27
minutesThese delicate, powdered cookies just melt away the moment they hit your tongue. This recipe reveals a simple technique to achieve perfectly tender and absolutely unforgettable results every time, ensuring no more dry or crumbly batches.
Ingredients
1 cup unsalted butter, softened
1/2 cup powdered sugar, plus 1 1/2 cups for rolling
1 teaspoon vanilla extract
2 cups all-purpose flour
1/4 teaspoon salt
Directions
- Preheat your oven to 350°F (175°C). Line a baking sheet with parchment paper.
- In a large bowl, cream together the softened butter and 1/2 cup powdered sugar until the mixture is light, fluffy, and pale. This step is key for that delicate, melt-in-your-mouth texture.
- Stir in the vanilla extract until fully combined.
- Gradually add the all-purpose flour and salt to the butter mixture. Mix on low speed, or by hand, just until the flour is incorporated and a dough forms. Be careful not to overmix, as too much mixing can develop gluten and make your cookies tough instead of tender.
- Cover the dough and refrigerate for at least 30 minutes. This helps the cookies maintain their shape and further enhances their delicate crumb.
- Roll the chilled dough into 1-inch balls and place them about 1 inch apart on your prepared baking sheet.
- Bake for 10 to 12 minutes, or just until the edges are lightly golden and the bottoms are set. The cookies should still look pale on top. Overbaking is the enemy of melt-in-your-mouth cookies, so watch them closely!
- While the cookies are still warm from the oven, gently roll them in about 1 cup of the remaining powdered sugar until thoroughly coated.
- Let the cookies cool completely on a wire rack. Once cool, roll them a second time in the remaining 1/2 cup of powdered sugar for that perfect, snowy finish.
Notes
- Dough requires at least 30 minutes chilling time to ensure optimal texture and prevent spreading.


