
For years, I faced the common dilemma of dry, crumbly homemade cookies, always searching for that elusive soft, chewy center in a batch of Classic Peanut Butter Cookies.
Through countless experiments, I finally perfected this recipe, ensuring a wonderfully tender and moist texture with every bite. It’s a foolproof method that consistently delivers the ultimate comforting cookie, a true family favorite.
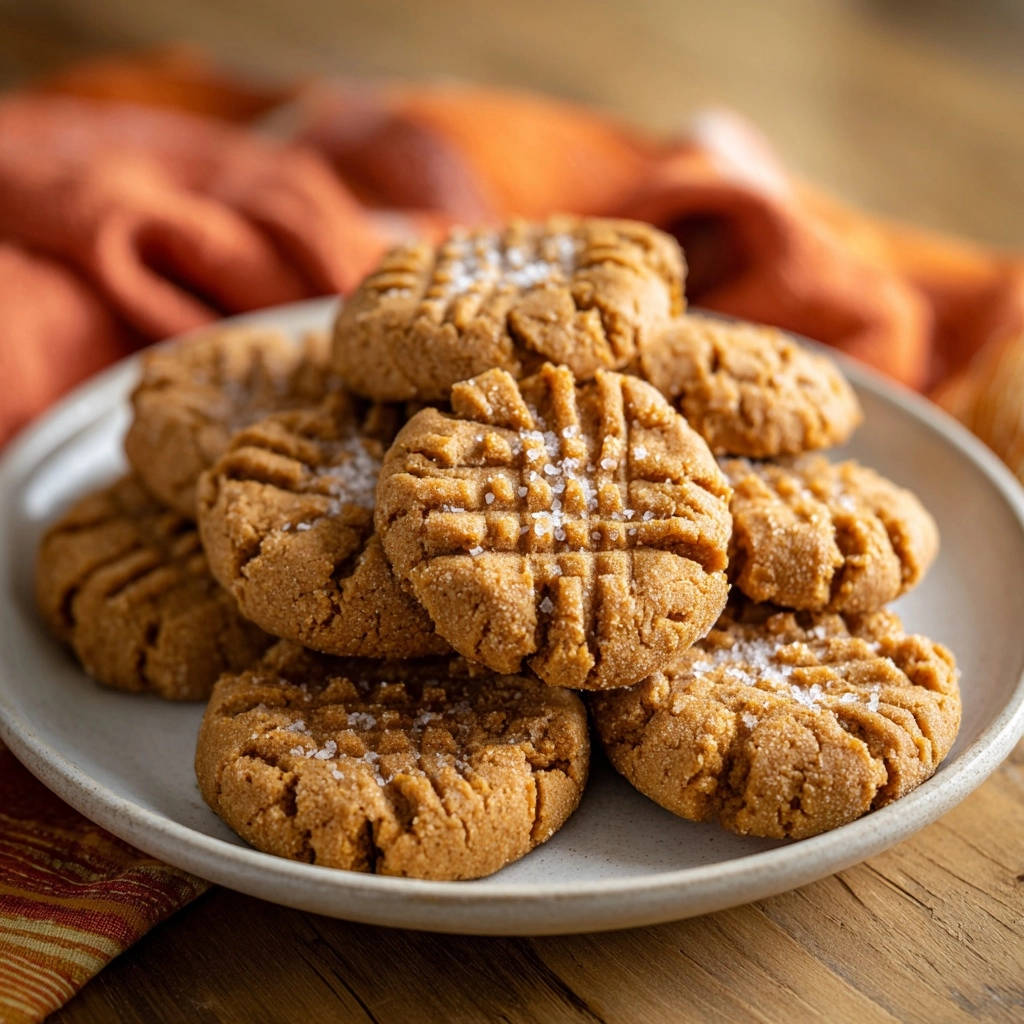
Classic Peanut Butter Cookies: Your Go-To for Soft, Chewy Perfection
There’s a reason Classic Peanut Butter Cookies hold a special place in our hearts – that rich, nutty flavor paired with an irresistible texture. This recipe isn’t just about recreating a childhood memory; it’s about perfecting it.
We’ve meticulously balanced ingredients and techniques to guarantee a cookie that’s always tender, delightfully chewy, and never disappointingly dry or crumbly.
Say Goodbye to Dry, Crumbly Disappointments
Many homemade peanut butter cookie recipes fall short, yielding a brittle or overly dense result. This guide specifically targets and eliminates those common pitfalls.
By focusing on proper ingredient temperatures and gentle mixing, we ensure your cookies achieve that sought-after melt-in-your-mouth quality, every single time.
Why This Recipe Will Become Your Family Favorite
Beyond its incredible texture, this recipe for perfect peanut butter cookies is remarkably easy to follow, even for novice bakers. It delivers consistently delicious flavor that appeals to all ages.
Its simple process and reliable outcome make it an instant staple for school lunches, afternoon snacks, or a comforting dessert after any meal.
Quick Look: Recipe Details for Your Next Baking Session
Here’s a snapshot of what to expect when you dive into making these incredible homemade peanut butter cookies.
Prep Time: 15 minutes
Cook Time: 10-12 minutes
Total Time: 25-27 minutes
Servings: 24 cookies
Gather Your Ingredients: The Foundation of Flavor
Understanding each ingredient’s role is key to crafting the best Classic Peanut Butter Cookies. Quality ingredients contribute significantly to the final taste and texture.
If you enjoy the rich flavor of peanut butter, you might also appreciate the warm spices in classic cinnamon snickerdoodles.
The Heart of the Cookie: Creamy Peanut Butter
For this recipe, creamy peanut butter is essential. Its smooth consistency contributes directly to the soft, even texture of the cookie.
Avoid natural, oil-separated peanut butter as it can result in a drier, less predictable cookie texture. Opt for brands like Jif or Skippy for consistent results.
Sweeteners & Fats: Achieving That Perfect Chewy Texture
Unsalted butter, softened: Butter adds richness and helps create the tender crumb. Softened butter creams easily with sugar, incorporating air for a light texture.
Granulated sugar: Provides sweetness and helps with browning and crispness at the edges.
Packed light brown sugar: Crucial for chewiness and moisture. The molasses in brown sugar keeps the cookies soft and adds a subtle caramel note.
Building Blocks: Flour, Leavening, and Salt
All-purpose flour: Forms the structural base of the cookie. Accurate measurement is key to avoiding dense or dry cookies.
Baking soda: Our primary leavening agent, it reacts with the acid in brown sugar to help the cookies rise and spread, contributing to their signature chew.
Salt: Balances the sweetness and enhances all the flavors, making the peanut butter taste even more prominent.
Essential Flavor Enhancers: Eggs, Vanilla, and Optional Sea Salt
Large eggs: Act as a binder, adding moisture and richness, and helping to achieve that desirable chewy texture.
Vanilla extract: A cornerstone of cookie flavor, it deepens the overall aroma and taste profile.
Flaky sea salt (optional): A sprinkle on top provides a delightful textural contrast and brightens the sweetness, elevating these chewy peanut butter cookies to a gourmet level.
Essential Tools for Classic Cookie Crafting
Having the right tools ready makes the baking process smooth and enjoyable, ensuring you can focus on perfecting your Classic Peanut Butter Cookies.
Standard Kitchen Essentials You’ll Need
Mixing Bowls: You’ll need at least two – one large for wet ingredients and one medium for dry.
Measuring Cups and Spoons: Accurate measurements are vital for consistent results in baking.
Rubber Spatula: Essential for scraping down the bowl and ensuring all ingredients are well-incorporated.
Baking Sheet & Parchment Paper: The Dynamic Duo
Using sturdy baking sheets helps distribute heat evenly, preventing burnt bottoms. Lining them with parchment paper is a non-negotiable step.
Parchment paper ensures your soft peanut butter cookies don’t stick, promotes even baking, and makes cleanup effortless.
The Power of a Mixer: Achieving Light and Fluffy Dough
While you can mix by hand, an electric mixer (handheld or stand mixer) is highly recommended for these cookies. It’s especially crucial for creaming the butter and sugars.
This process effectively incorporates air into the butter, resulting in a lighter, more tender dough structure, which translates to superior cookies.
Step-by-Step: Crafting Your Perfect Peanut Butter Cookies
Follow these detailed steps closely to achieve the ultimate chewy peanut butter cookies, ensuring every batch is a success.
- Prepare Your Workspace: Preheat & Line
Set your oven to 375°F (190°C) and line baking sheets with parchment paper. This preparation ensures you’re ready to go once the dough is mixed, preventing any delays that might affect dough temperature.
- Creaming for Perfection: Butter & Sugars
In a large bowl, use an electric mixer to cream together the softened butter, granulated sugar, and light brown sugar until the mixture is light and fluffy.
This critical step incorporates air, which is fundamental for creating a tender and soft cookie texture. Aim for a pale, airy consistency, about 2-3 minutes of beating.
- Wet Ingredients Unite: Peanut Butter, Eggs, & Vanilla
Add the creamy peanut butter, large eggs, and vanilla extract to the creamed mixture.
Beat until these ingredients are thoroughly combined, stopping to scrape down the sides of the bowl as needed to ensure everything is incorporated evenly and no pockets of unmixed ingredients remain.
- Dry Ingredients Harmony: Whisking Together
In a separate medium bowl, whisk together the all-purpose flour, baking soda, and salt.
This ensures these dry components are evenly distributed throughout the mixture, preventing pockets of leavening agent or salt in the final cookie and promoting a uniform rise.
- Gentle Integration: Combining Wet & Dry
Gradually add the whisked dry ingredients to the wet ingredients. Mix on low speed until the dough is just combined.
Be extremely careful not to overmix, as this can overdevelop the gluten in the flour, leading to tough rather than chewy cookies. Stop mixing as soon as no dry streaks of flour remain.
- Forming the Dough: Perfectly Sized Balls
Roll the prepared dough into uniform 1-inch balls. Place them about 2 inches apart on your parchment-lined baking sheets.
Uniform size helps ensure even baking across the batch, leading to consistent texture and doneness for all your homemade peanut butter cookies.
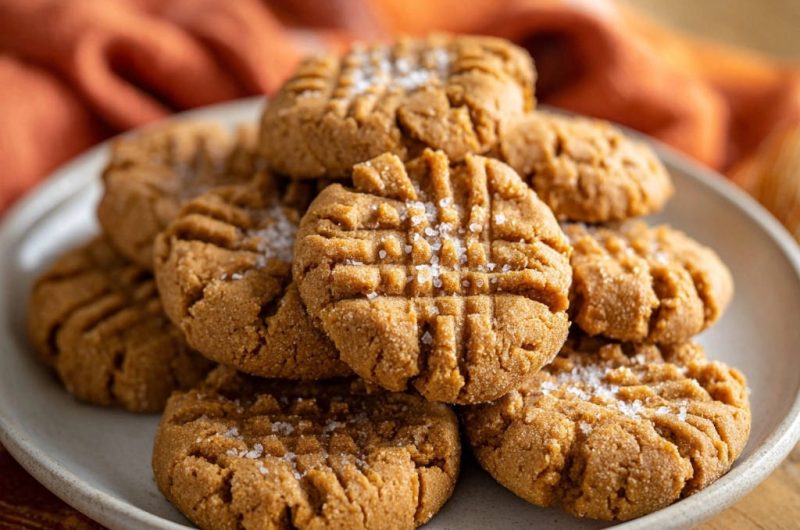
- The Signature Criss-Cross: Flattening with a Fork
For the classic peanut butter cookie look, gently flatten each cookie ball with the tines of a fork. Then, turn the fork 90 degrees and press again to create the iconic criss-cross pattern.
To prevent sticking, dip your fork in granulated sugar between each cookie. This also adds a little extra sparkle and sweetness.
- A Touch of Sparkle: Optional Sea Salt Sprinkles
If you desire an enhanced flavor contrast and a gourmet touch, sprinkle a little flaky sea salt on top of each cookie before they go into the oven.
The saltiness beautifully complements the sweet, nutty flavor of the peanut butter.
- Baking to Perfection: The Chewy Center Secret
Bake for 10 to 12 minutes, or until the edges appear set and lightly golden. Crucially, the centers should still look soft and slightly underbaked.
Do not overbake, as this is the primary key to achieving that wonderfully chewy center! The cookies will continue to firm up as they cool on the hot baking sheet.
- Cooling Gracefully: Setting Without Drying
Once baked, remove the sheets from the oven and let the cookies cool on the baking sheets for 5 minutes.
This resting period on the hot pan allows them to set properly without becoming dry, before transferring them to a wire rack to cool completely. This helps maintain their soft, chewy texture.
Unlock the Secrets: Expert Tips for Irresistible Cookies
Elevate your Classic Peanut Butter Cookies from good to unforgettable with these insider tips from a seasoned baker.
The Power of Softened Butter: Temperature Matters
Softened butter is paramount for the ideal cookie texture. It should be pliable enough to easily indent with your finger, but not melted.
Butter that’s too cold won’t cream properly, leading to a dense dough, while melted butter will make your cookies spread excessively and lose their structure.
Don’t Overmix: The Golden Rule for Tender Cookies
Overmixing flour with wet ingredients develops gluten, which can make cookies tough and chewy in a bad way. Mix only until the flour streaks disappear.
Embrace the “just combined” principle to ensure your soft peanut butter cookies remain tender and delightful.
The “Slightly Underbaked” Sweet Spot for Chewiness
Resist the urge to bake until the cookies look fully golden and firm. The magic of a chewy center lies in pulling them out when the edges are just set and lightly golden, but the centers still look quite soft.
They will continue to cook and set as they cool on the baking sheet, achieving perfect chewiness without becoming dry.
Chilling the Dough: A Small Step, Big Reward (Optional but Recommended)
While not strictly required for this recipe, chilling the dough for 30 minutes to an hour can improve its handleability and prevent excessive spreading.
Chilled dough also allows the flavors to meld, often resulting in a richer, more nuanced cookie. For a similar treat with deep, satisfying flavors, consider trying our decadent Chocolate Pecan Tart recipe.
The Fork Trick: Mastering the Classic Criss-Cross Pattern
Achieving a clean criss-cross pattern is easier with a simple trick: dip your fork tines into granulated sugar between pressing each cookie.
This prevents the dough from sticking to the fork and creates those distinct, charming lines that define Classic Peanut Butter Cookies.
Flaky Sea Salt: A Simple Upgrade for Gourmet Flavor
A light sprinkle of flaky sea salt on top of each cookie just before baking is a game-changer. It creates a beautiful contrast that enhances the nutty, sweet notes of the peanut butter.
This small addition elevates the cookie from a simple treat to a sophisticated indulgence.
Troubleshooting Common Cookie Quandaries
Even expert bakers encounter hiccups. Here’s how to tackle common issues when making your best peanut butter cookie recipe.
Why Are My Peanut Butter Cookies Dry or Crumbly?
This is most commonly due to overbaking or overmixing the dough. Overbaking removes too much moisture, while overmixing develops gluten excessively, making the cookies tough.
Ensure you bake only until the edges are lightly golden and the centers are still soft, and mix the dry ingredients into the wet ones until just combined.
My Cookies Spreading Too Much! What Went Wrong?
Excessive spreading can occur if your butter was too soft (partially melted), your dough was too warm, or your measurements for flour were off (too little).
Ensure butter is softened, not melted. Chilling the dough for 30 minutes before baking can also help firm it up and prevent spreading.
The Dough Is Too Sticky to Roll – Help!
If your dough is excessively sticky, it likely means it’s too warm. Place the dough in the refrigerator for at least 30 minutes to firm it up.
If still slightly sticky, lightly flour your hands (very sparingly) when rolling the balls, but avoid adding extra flour to the dough itself.
My Criss-Cross Pattern Isn’t Clear!
A blurry criss-cross pattern often means the fork is sticking to the dough, or you’re not pressing firmly enough. Remember to dip your fork in granulated sugar between each cookie.
Apply firm, but not forceful, pressure to create those defined lines, and turn the fork 90 degrees for the second press.
Enjoying & Storing Your Delicious Creations
Once you’ve mastered the best peanut butter cookie recipe, knowing how to serve and store them ensures maximum enjoyment.
Serving Suggestions: Perfect Pairings for Your Cookies
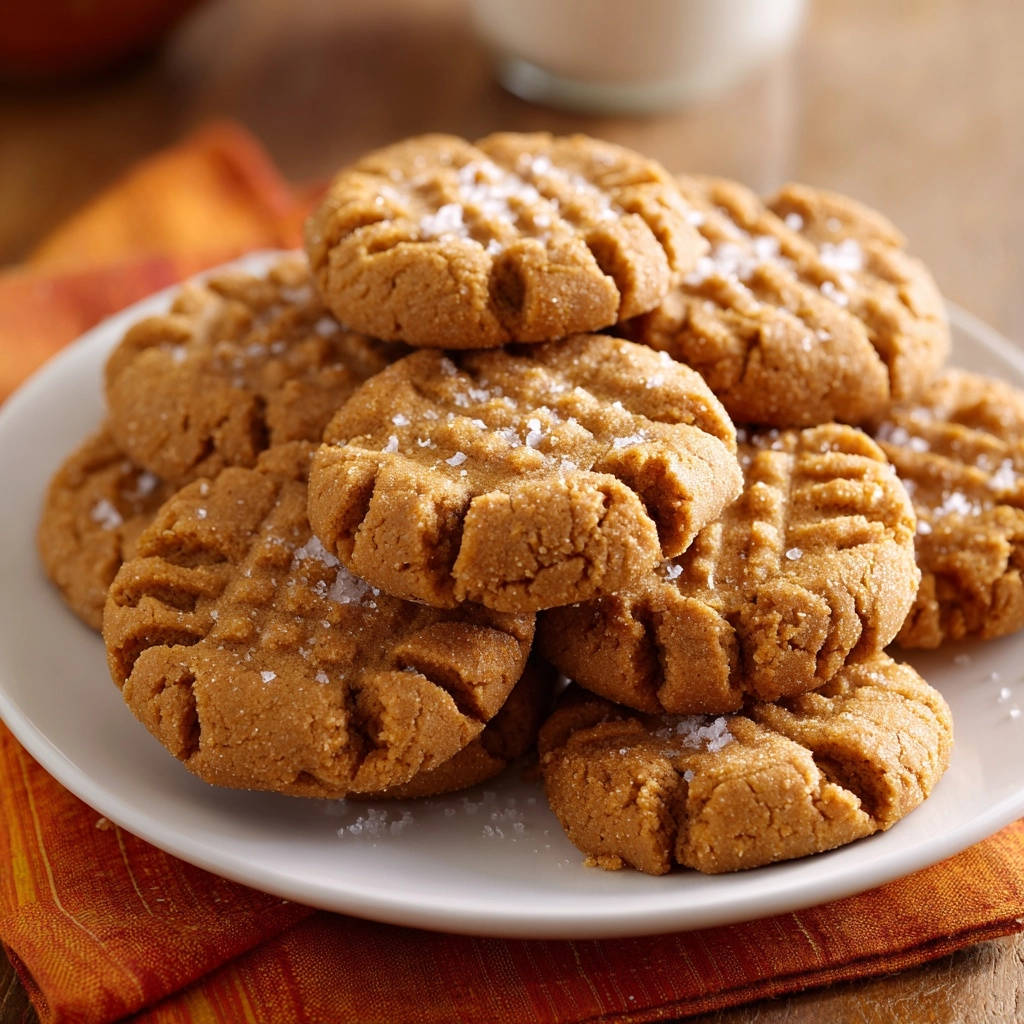
These Classic Peanut Butter Cookies are wonderful on their own, but truly shine with simple accompaniments. Serve them with a tall glass of cold milk or a warm cup of coffee or tea.
For an extra indulgent treat, use them to make ice cream sandwiches, or crumble them over a scoop of vanilla ice cream for a delightful sundae.
Storage Tips: Keeping Your Classic Peanut Butter Cookies Fresh
To maintain their signature soft and chewy texture, store your baked cookies in an airtight container at room temperature for up to 3-5 days.
Placing a slice of bread in the container can also help keep them moist by absorbing excess moisture and slowly releasing it back into the cookies.
Make-Ahead Options: Dough for Later
You can prepare the cookie dough in advance and store it, tightly wrapped, in the refrigerator for up to 2-3 days. This is perfect for fresh-baked cookies on demand.
Alternatively, roll the dough into balls, flatten with the fork, and freeze them solid on a baking sheet. Once frozen, transfer to a freezer-safe bag for up to 3 months. Bake from frozen, adding a minute or two to the bake time.
Frequently Asked Questions About These Classic Peanut Butter Cookies
Here are answers to some common questions about making these delightful chewy peanut butter cookies.
Can I use natural peanut butter instead of creamy?
While you can use natural peanut butter, be aware it will significantly change the cookie’s texture. Natural peanut butter often has less sugar and more oil separation, leading to a drier, more crumbly cookie.
For the soft, chewy texture this recipe promises, creamy, processed peanut butter is highly recommended.
What if I don’t have an electric mixer?
You can still make these cookies by hand! It will require more effort, especially for the creaming step. Use a sturdy whisk or a wooden spoon to vigorously beat the butter and sugars until light and fluffy.
For the subsequent steps, a wooden spoon and good old elbow grease will work perfectly well.
Are there any gluten-free or dairy-free alternatives for this recipe?
For gluten-free, you can experiment with a 1:1 gluten-free baking flour blend, noting that the texture might be slightly different. For dairy-free, substitute unsalted butter with a high-quality plant-based butter alternative.
These substitutions can alter the final texture and spread, so some experimentation may be required. For other dairy-free baking ideas, check out our guide on Easy Chocolate Lava Cake.
Can I add chocolate chips or other mix-ins?
Absolutely! These homemade peanut butter cookies are fantastic for customization. Chocolate chips (milk, semi-sweet, or dark) are a popular addition, as are chopped nuts like pecans or walnuts.
For more decadent chocolate goodness, explore these molten raspberry chocolate lava cookies.
You can also drizzle melted chocolate over the cooled cookies for an extra decadent touch.
Your Baking Journey Starts Here: Share the Joy!
Now that you have the ultimate guide to crafting the most wonderfully soft and chewy Classic Peanut Butter Cookies, it’s time to preheat your oven and get baking!
More Sweet Ideas
Round out your sweet treat selection with these complementary baked goods.
- For a warm breakfast delight, try these cinnamon sugar jam-filled waffles, a perfect match for a sweet craving.
- If you enjoy the warm spices in your peanut butter cookies, you’ll appreciate the comforting flavors in this warm cinnamon swirl coffee cake.
We’d love to see your delicious creations. Share your cookie triumphs with us on social media using #ChewyPeanutButterCookies, or leave a comment below with your favorite baking tip. Happy baking!
Peanut Butter Cookies
Course: DessertCuisine: AmericanDifficulty: easy24
cookies15
minutes10
minutes240
kcal25
minutesThere’s nothing worse than biting into a peanut butter cookie that’s dry and crumbly instead of wonderfully soft and chewy. This recipe delivers a wonderfully tender, chewy center every single time, making those dry disappointments a thing of the past.
Ingredients
1 cup unsalted butter, softened
1 cup granulated sugar
1 cup packed light brown sugar
1 cup creamy peanut butter
2 large eggs
1 teaspoon vanilla extract
2 1/2 cups all purpose flour
1 teaspoon baking soda
1/2 teaspoon salt
Flaky sea salt, for sprinkling (optional)
Directions
- Preheat your oven to 375°F (190°C). Line baking sheets with parchment paper.
- In a large bowl, cream together the softened butter, granulated sugar, and light brown sugar with an electric mixer until light and fluffy. This step is crucial for incorporating air and creating a tender cookie.
- Add the creamy peanut butter, eggs, and vanilla extract to the bowl. Beat until well combined, scraping down the sides of the bowl as needed.
- In a separate medium bowl, whisk together the all purpose flour, baking soda, and salt.
- Gradually add the dry ingredients to the wet ingredients, mixing on low speed until just combined. Be careful not to overmix; overmixing can lead to tough cookies and prevent that desired chewy texture.
- Roll the dough into 1-inch balls. Place them about 2 inches apart on the prepared baking sheets.
- For the classic criss-cross pattern, gently flatten each cookie ball with the tines of a fork, then turn the fork 90 degrees and press again. Dip the fork in granulated sugar between each cookie to prevent sticking.
- If desired, sprinkle a little flaky sea salt on top of each cookie before baking.
- Bake for 10 to 12 minutes, or until the edges are set and lightly golden, but the centers still look soft and slightly underbaked. This is the key to a chewy center! Do not overbake. The cookies will continue to cook slightly as they cool on the baking sheet.
- Remove the baking sheets from the oven and let the cookies cool on the sheets for 5 minutes before transferring them to a wire rack to cool completely. This resting period on the hot pan helps them set without becoming dry.
Notes
- Do not overbake; centers should still look soft for a chewy texture.


