
I know the frustration of chasing that elusive perfectly chewy cookie, only to end up with a batch that’s either too crisp or too cakey. After countless experiments, I finally mastered the exact method for baking these incredible Cookies and Cream Drop Cookies that are guaranteed to be irresistibly soft and chewy in the middle, every single time.
This isn’t just another cookie recipe; it’s your definitive guide to achieving cookie perfection. Get ready to bake a batch of homemade treats that will impress everyone, from the most discerning critic to the pickiest eater, delivering pure cookies and cream bliss with every bite.
For another take on classic baking, explore classic cinnamon snickerdoodles with a crisp finish.
The Secret to Irresistibly Chewy Cookies and Cream Drop Cookies Every Time
Mastering the Perfect Texture: Soft & Chewy Without Fail
This recipe meticulously balances ingredients and precise baking techniques to ensure a consistently soft and wonderfully chewy center. We focus on critical steps like proper creaming and controlled baking times to lock in moisture and tenderness.
The cooling process, often overlooked, is also key here. Allowing the cookies to cool on the hot baking sheets for a specific duration helps them set without drying out, preserving that coveted chewiness.
Simple Steps, Spectacular Results: Accessible Baking for Everyone
Despite their gourmet taste and appearance, these Cookies and Cream Drop Cookies are incredibly straightforward to prepare. The instructions are designed for clarity, making them achievable for bakers of all skill levels.
You don’t need fancy equipment or advanced techniques to create bakery-quality cookies right in your own kitchen. This recipe proves that exceptional results can come from simple, well-executed steps.
A Crowd-Pleasing Flavor Profile: Pure Cookies and Cream Bliss
The timeless combination of rich chocolate cookies and sweet cream filling is universally loved. This recipe elevates those beloved flavors, ensuring every bite of these Cookies and Cream Drop Cookies is a delightful explosion of taste and texture.
For a similarly rich experience, explore these molten raspberry chocolate lava cookies next.
These cookies are perfect for any occasion, from casual family desserts to impressive party platters. They consistently disappear quickly, testament to their irresistible appeal and comforting familiarity.
More Sweet Treats to Try
If you enjoyed these cookies, you might like these other baked goods.
- For a breakfast treat that complements the sweetness of cookies, consider these warm cinnamon swirl coffee cake recipes.
- Expand your baking repertoire with these delightful cinnamon sugar jam-filled waffles.
Essential Tools for Your Cookies and Cream Baking Success
The Power Duo: Electric Mixer (Stand or Handheld)
An electric mixer is key for creaming butter and sugar to the perfect fluffy consistency, crucial for light cookies.
Baking Sheet & Parchment Paper/Silicone Mat
For even baking and easy cleanup, parchment paper or silicone mats are highly recommended.
Cookie Scoop: For Uniformity
A cookie scoop ensures all your cookies are the same size, promoting even baking and a beautiful presentation.
Sturdy Mixing Bowls & Whisk
You’ll need separate bowls for wet and dry ingredients, along with a whisk for proper distribution.
Wire Cooling Rack
Essential for air circulation, allowing your cookies to cool properly and maintain their texture.
The Building Blocks of Flavor: Inside Your Chewy Cookies and Cream Cookies
The Creamy Foundation: Butter & Sugars
Unsalted butter, softened to perfection, creates a tender crumb. The combination of granulated and light brown sugar provides both sweetness and that desirable chewiness.
Light brown sugar specifically contributes to the moisture and softness of these delicious drop cookies.
Eggs & Vanilla: Binding and Boosting Flavor
Large eggs act as a binder, adding richness and structure. Pure vanilla extract amplifies the overall flavor profile, making the cookies truly irresistible.
High-quality vanilla makes a noticeable difference in the finished taste of these homemade cookies.
Flour Power & Leavening: Structure and Rise
All-purpose flour forms the structural base. Baking soda is the leavening agent, ensuring a soft rise, while a touch of salt balances the sweetness and enhances flavor.
Proper flour measurement is critical for the right cookie texture.
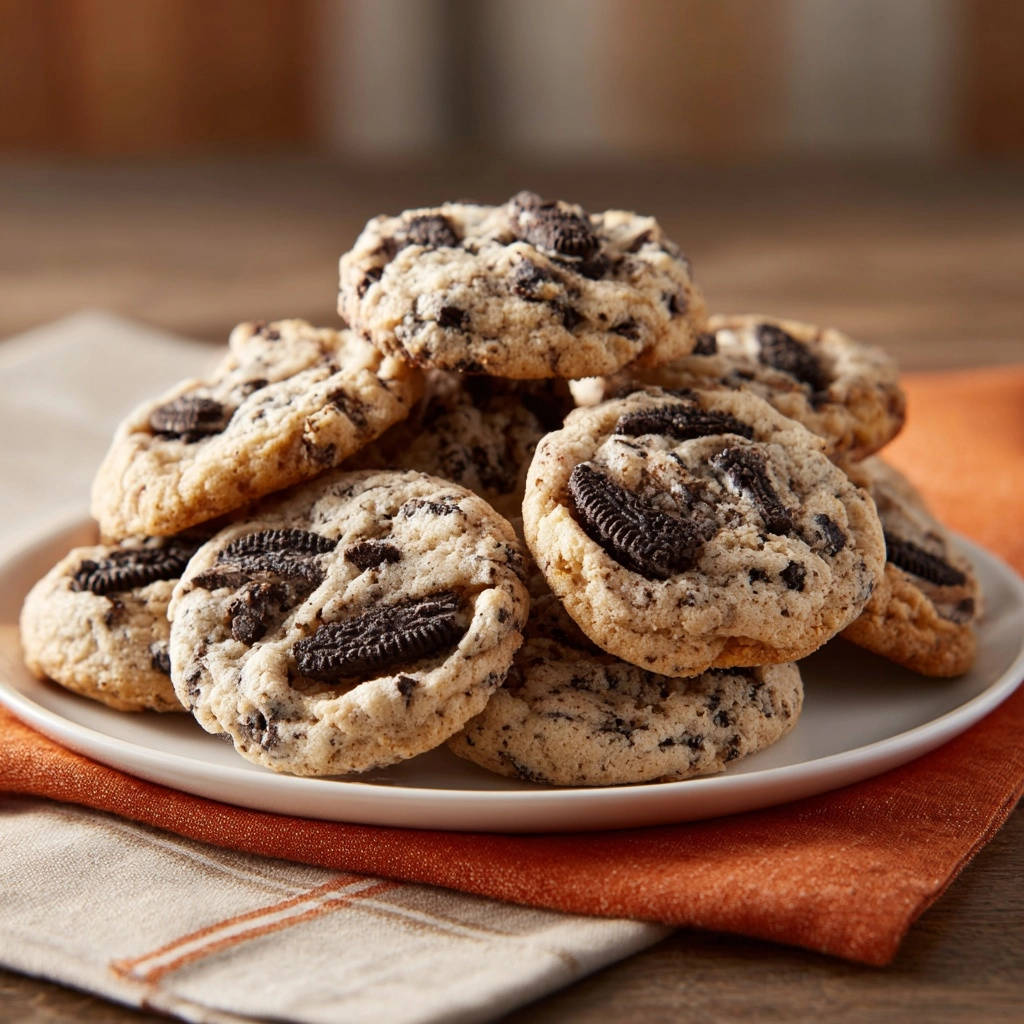
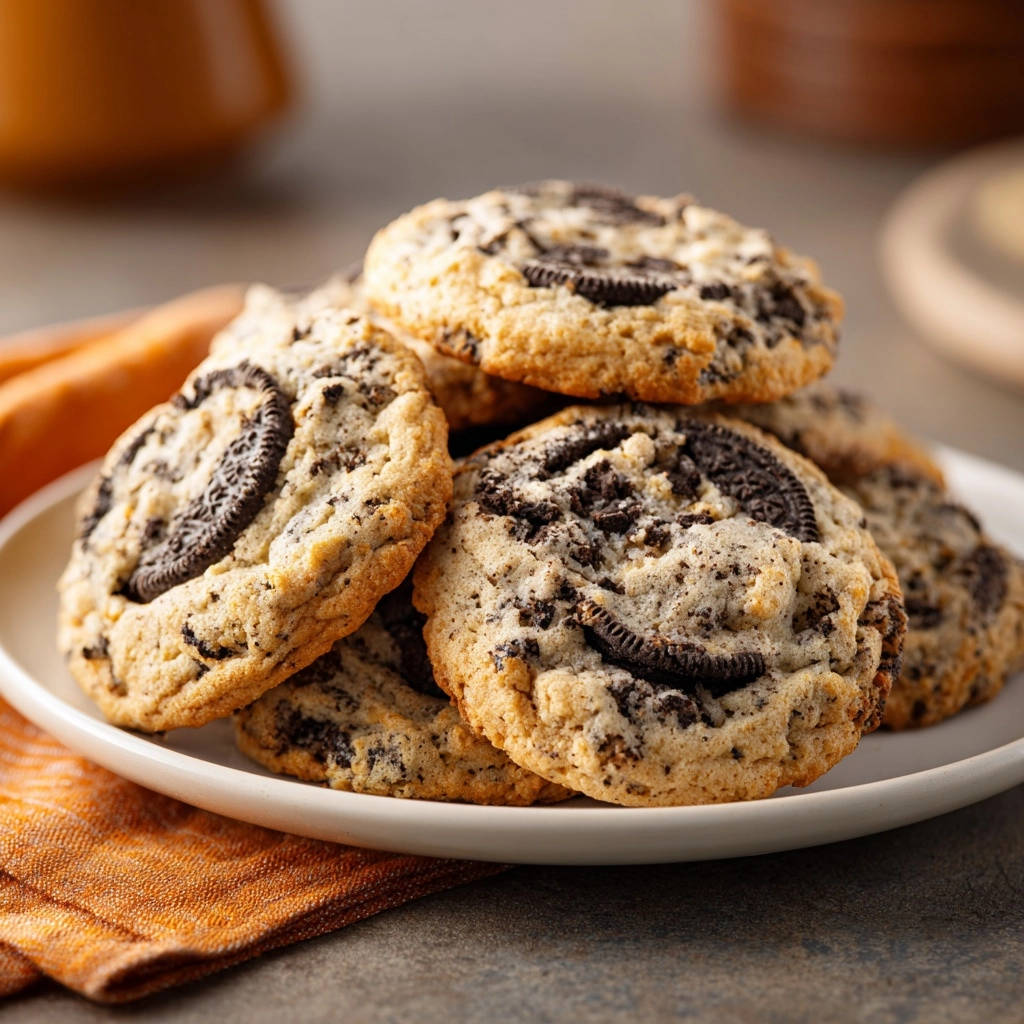
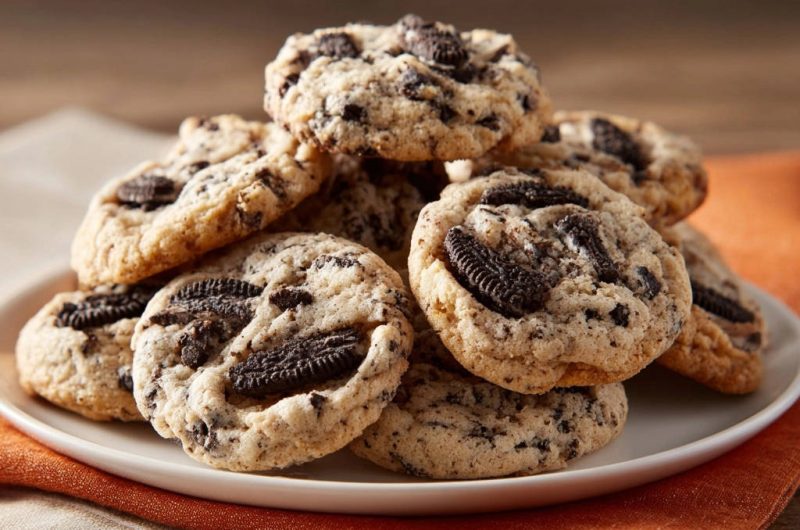
The Star of the Show: Crushed Cream-Filled Chocolate Sandwich Cookies
The namesake ingredient, crushed cream-filled chocolate sandwich cookies (like Oreos), provides chunks of chocolatey cookie and creamy filling, defining the cookie’s unique texture and taste.
These crushed chocolate sandwich cookies are the heart of what makes these treats truly special.
Your Path to Perfect Cookies and Cream Drop Cookies: A Detailed Guide
-
Prepare Your Baking Arena:
Preheat your oven to 375°F (190°C). Line baking sheets with parchment paper or silicone baking mats. This crucial step prevents sticking and ensures even heat distribution, essential for consistent baking across your batch of Cookies and Cream Drop Cookies.
-
Cream the Wet Ingredients to Fluffy Perfection:
In a large bowl, using an electric mixer, cream together the softened unsalted butter, granulated sugar, and light brown sugar for 2-3 minutes. Beat until the mixture is light, fluffy, and pale in color. This process incorporates air, contributing significantly to the cookie’s soft texture and ultimately a delightful chewy cookie.
-
Incorporate Eggs and Vanilla:
Beat in the large eggs one at a time, mixing well after each addition to ensure full incorporation. Stir in the vanilla extract, ensuring it’s evenly distributed throughout the mixture. This step adds richness and binds the dough together effectively.
-
Whisk the Dry Ingredients Separately:
In a separate medium bowl, whisk together the all-purpose flour, baking soda, and salt. Whisking ensures these ingredients are evenly combined, which is vital for a consistent rise and texture in your cookies. This prevents pockets of leavening agents or salt in the final product.
-
Combine Wet and Dry (Carefully!):
Gradually add the dry ingredients to the wet ingredients. Mix on low speed just until combined. Be extremely careful not to overmix, as this can develop gluten and lead to tough, dense cookies, ruining that desired chewy texture.
-
Gently Fold in the Star Ingredient:
By hand, gently fold in the crushed cream-filled chocolate sandwich cookies until they are evenly distributed throughout the dough. Avoid overworking the dough during this step to maintain its tender structure. This ensures every bite of your Cookies and Cream Drop Cookies contains delightful chocolatey chunks.
-
Scoop and Space for Success:
Drop rounded tablespoons of dough onto the prepared baking sheets, leaving about 2 inches between each cookie. This spacing allows them to spread without merging, ensuring perfectly shaped cookies and even baking. Using a cookie scoop helps achieve consistent sizing.
-
Bake to Chewy Perfection:
Bake for 10 to 12 minutes, or until the edges are lightly golden and set, but the centers still look slightly soft and puffed. This is the key moment for achieving that perfect chewy texture; they will continue to firm up as they cool. Do not overbake!
-
The Critical Cooling Phase:
Remove the baking sheets from the oven and let the cookies cool on the baking sheets for at least 5 minutes before transferring them to a wire rack to cool completely. This crucial step allows residual heat to finish cooking the centers without drying them out, locking in that incredible chewiness for your Cookies and Cream Drop Cookies.
Chef’s Secrets: Elevate Your Cookies and Cream Drop Cookie Game
Don’t Overmix the Dough!
Overmixing is the archenemy of tender cookies. Once the dry ingredients are just combined, stop. A few flour streaks are better than tough cookies. This single tip significantly impacts the final texture of your chewy cookies.
The Golden Rule of Baking: Don’t Overbake!
Pull your cookies out when the edges are set and lightly golden, but the centers still look soft. They will continue to bake on the hot sheet and firm up as they cool, leading to that perfect chewy texture. This is especially vital for achieving soft Cookies and Cream Drop Cookies.
The Power of Proper Cooling
Allowing cookies to cool on the baking sheet for those initial 5 minutes is non-negotiable for chewiness. This step is essential for residual heat to finish cooking without drying the cookies out. Skipping this can result in a drier cookie.
Achieving Uniform Cookie Size
Use a cookie scoop! It ensures consistent sizing, which leads to even baking and a beautiful, professional-looking batch of Cookies and Cream Drop Cookies. Uniformity makes for a more appealing presentation and predictable baking times.
Chilling the Dough (An Optional but Rewarding Step)
While not strictly required for this recipe, chilling your cookie dough for at least 30 minutes can further prevent spreading, intensify flavors, and make the dough easier to handle. It’s a game-changer for some, especially if you live in a warm climate or want a thicker cookie.
Troubleshooting Common Cookie Conundrums
Why Are My Cookies Spreading Too Much?
Excessive spreading can be caused by butter that’s too soft, an inaccurate flour measurement, or not enough chilling time. Ensure your butter is softened, not melted, and consider briefly chilling your dough if spreading persists. Adding an extra tablespoon or two of flour can also sometimes help.
My Cookies Are Too Hard or Dry – What Happened?
This is often a sign of overbaking or overmixing. Remember to pull them from the oven when the centers are still slightly soft, and mix the dough just until combined to keep them tender. Investing in an oven thermometer can ensure your oven temperature is accurate.
How Can I Prevent My Crushed Cookies from Sinking?
Ensure your dough isn’t too warm or loose. If the dough is very soft, a quick chill can help. Also, ensure the pieces aren’t excessively large; aim for varied but manageable crushed cookie sizes. Gently folding them in at the end minimizes mixing.
Serving Suggestions & Storing Your Delicious Cookies
Best Ways to Enjoy Your Freshly Baked Treats
These Cookies and Cream Drop Cookies are phenomenal on their own, perhaps with a tall glass of cold milk for a classic pairing. For an extra treat, serve them warm with a scoop of premium vanilla bean ice cream.
They also make a fantastic crumble topping for puddings or a simple dessert parfait. Their rich flavor and chewy texture elevate any sweet dish.
How to Store Cookies for Maximum Freshness
Store your cooled cookies in an airtight container at room temperature for up to 3-4 days to maintain their ideal texture. For an old-school trick, placing a slice of plain white bread in the container can help keep them wonderfully soft, as the cookies absorb moisture from the bread.
Freezing Baked Cookies and Dough for Later
Baked cookies can be frozen for up to 3 months in an airtight container or freezer bag, separated by parchment paper to prevent sticking. For future baking, you can also freeze scooped dough balls on a baking sheet until firm, then transfer them to a freezer bag; bake from frozen, adding a few extra minutes to the bake time, for fresh cookies anytime.
Frequently Asked Questions About These Drop Cookies
Can I use a different type of cream-filled cookie?
Absolutely! While classic cream-filled chocolate sandwich cookies are traditional and provide the iconic “Cookies and Cream” flavor, feel free to experiment with different flavors or brands. Mint chocolate or peanut butter cream-filled cookies could offer a delightful twist.
What if I don’t have an electric mixer?
You can still make these fantastic Cookies and Cream Drop Cookies! Creaming butter and sugar by hand will require more effort and time but is entirely possible with a sturdy whisk or a wooden spoon. Just ensure the mixture becomes light and fluffy through vigorous beating.
Can I make these Cookies and Cream Drop Cookies gluten-free?
Yes, you can! Substitute the all-purpose flour with a high-quality 1:1 gluten-free baking flour blend that contains xanthan gum. Additionally, ensure your crushed cream-filled chocolate sandwich cookies are certified gluten-free, as not all brands are.
How do I crush the cookies without making a huge mess?
Place the cookies in a large freezer bag, seal it tightly, and then use a rolling pin or the bottom of a heavy pan to crush them. This method keeps crumbs contained and allows for controlled crushing, preventing a messy countertop.
Why is the “softened butter” instruction so important?
Softened butter (not melted, and not cold!) creams properly with sugar, creating tiny air pockets in the mixture. These air pockets are crucial for the light, fluffy texture of the cookie dough and ultimately contribute to the final cookie’s tenderness and chewiness. Cold butter won’t cream properly, and melted butter will lead to greasy, flat cookies.
Ready to Bake Your Best Cookies and Cream Drop Cookies Yet?
You now hold the “secret code” to baking truly exceptional Cookies and Cream Drop Cookies-cookies that are perfectly soft, delightfully chewy, and bursting with classic flavor every single time. Forget disappointing batches; this recipe is your guaranteed path to cookie success, transforming simple ingredients into pure joy.
Don’t wait! Gather your ingredients, arm yourself with these expert tips, and experience the unparalleled joy of biting into your own homemade, utterly irresistible creation. Share your masterpiece with loved ones, or keep them all to yourself – we won’t tell!
Happy baking!
Cookies and Cream Drop Cookies
Course: DessertCuisine: AmericanDifficulty: easy24
cookies15
minutes10
minutes240
kcal30
minutesAfter years of trial and error, I finally cracked the code to making these cookies and cream beauties perfectly soft and chewy in the middle, every single time. Get ready to bake your new favorite cookie!
Ingredients
1 cup (2 sticks) unsalted butter, softened
3/4 cup granulated sugar
3/4 cup packed light brown sugar
2 large eggs
2 teaspoons vanilla extract
2 1/4 cups all-purpose flour
1 teaspoon baking soda
1/2 teaspoon salt
1 1/2 cups crushed cream-filled chocolate sandwich cookies (about 15 cookies)
Directions
- Preheat your oven to 375 degrees F (190 degrees C). Line baking sheets with parchment paper or silicone baking mats.
- In a large bowl, cream together the softened butter, granulated sugar, and light brown sugar with an electric mixer until light and fluffy, about 2-3 minutes.
- Beat in the eggs one at a time, mixing well after each addition. Stir in the vanilla extract.
- In a separate medium bowl, whisk together the all-purpose flour, baking soda, and salt.
- Gradually add the dry ingredients to the wet ingredients, mixing on low speed until just combined. Be careful not to overmix; overmixing can lead to tough cookies.
- Gently fold in the crushed cream-filled chocolate sandwich cookies by hand until evenly distributed throughout the dough.
- Drop rounded tablespoons of dough onto the prepared baking sheets, leaving about 2 inches between each cookie.
- Bake for 10 to 12 minutes, or until the edges are lightly golden and set, but the centers still look slightly soft and puffed. This is key for that perfect chewy texture! They will continue to set as they cool.
- Remove the baking sheets from the oven and let the cookies cool on the baking sheets for at least 5 minutes before transferring them to a wire rack to cool completely. This crucial step allows the residual heat to finish cooking the centers without drying them out, locking in that incredible chewiness.
Notes
- Ensure your butter is truly softened, not melted, for the creamiest texture. Don’t overmix the dough after adding the dry ingredients to keep your cookies tender.


