
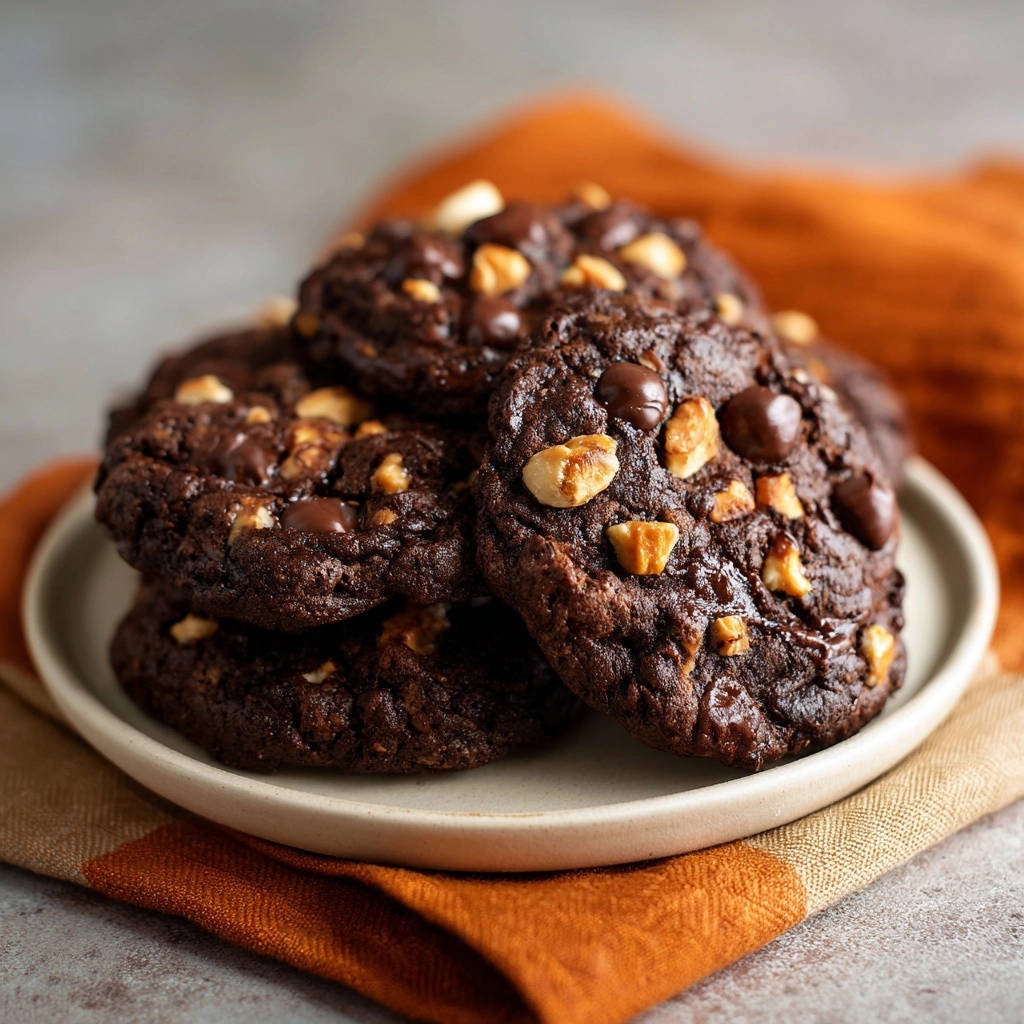
I remember the frustration of baking what I thought would be perfect Double Chocolate Nut Cookies, only to pull out flat, dry disappointments. It felt like a culinary mystery trying to get that ideal balance of fudgy and chewy. This recipe for Double Chocolate Nut Cookies solves that mystery, offering a simple yet brilliant trick for a truly fudgy and chewy texture every single time.
Get ready for a reliable method that delivers irresistible, rich chocolate cookies with delightful nutty crunch, perfect for any craving.
Beyond Basic: Why This Double Chocolate Nut Cookie Recipe Shines
Discover the secrets that elevate these cookies from good to absolutely unforgettable. This isn’t just another cookie recipe; it’s a guaranteed path to perfectly fudgy and chewy double chocolate delights.
The “Fudgy & Chewy Every Time” Promise
This recipe consistently delivers cookies with wonderfully chewy edges and a luxuriously soft, fudgy center. Say goodbye to dry, crumbly results or cookies that spread too thin.
For another decadent option, explore these molten raspberry chocolate lava cookies.
The texture achieved here is precisely what every chocolate cookie enthusiast dreams of.
The Simple Trick for Flawless Texture
The secret lies in a crucial chilling step. This simple technique solidifies the butter in the dough, preventing excessive spread and allowing flavors to deepen.
It’s the key to maintaining that perfect shape and achieving an unparalleled chewy texture.
Quick & Rewarding: Minimal Effort, Maximum Flavor
With a prep time of just 15 minutes and a bake time of 10-12 minutes, these indulgent cookies come together surprisingly fast. The minimal effort yields maximum flavor and satisfaction, making them ideal for any occasion.
Gather Your Essentials: Ingredients for Double Chocolate Nut Cookies
Achieving baking perfection starts with understanding your ingredients. Here’s a breakdown of what you’ll need to create these irresistible Double Chocolate Nut Cookies.
Pantry Staples: Flour, Cocoa, & Leavening
All-Purpose Flour: This forms the essential structure of our cookies. Proper measurement is crucial for preventing a dense or dry crumb.
Unsweetened Cocoa Powder: The backbone of the deep, rich chocolate flavor. Opt for a high-quality cocoa powder for the best taste.
Baking Soda & Salt: Baking soda provides the necessary lift and aids in spread, contributing to the chewy texture. Salt balances the sweetness and enhances all the chocolate notes.
Sweet Indulgences: Sugars, Butter, & Vanilla
Unsalted Butter (Melted): Using melted butter is the secret to a fudgier, chewier cookie texture, unlike softened butter which creates a cakier crumb. It also helps with the cookie’s spread.
Light Brown Sugar (Packed) & Granulated Sugar: This combination is key. Brown sugar adds moisture and chewiness, while granulated sugar contributes to crisp edges and overall sweetness.
Large Eggs & Vanilla Extract: Eggs act as binders and add richness, moisture, and structure. Vanilla extract is a fundamental flavor enhancer, complementing the chocolate beautifully.
The Star Add-Ins: Chocolate Chips & Chopped Nuts
Semi-Sweet Chocolate Chips: These melt into gooey pockets, creating that quintessential double chocolate experience. Feel free to experiment with dark or milk chocolate chips, or even chopped chocolate bars.
Chopped Nuts (Walnuts or Pecans): Nuts provide a wonderful textural contrast and a rich, earthy flavor that beautifully complements the chocolate. Walnuts and pecans are classic choices, but almonds or hazelnuts would also be delicious, or you can omit them for a nut-free cookie.
For more tips on achieving that perfect texture, explore our guide to cookies and cream cinnamon rolls.
Essential Tools for Your Double Chocolate Nut Cookies Adventure
Having the right equipment at hand makes the baking process smoother and more enjoyable. Here are the basic tools you’ll need to prepare these delightful cookies.
Mixing Bowls (Medium & Large): Essential for combining wet and dry ingredients separately, ensuring proper distribution.
Whisk & Spatula: A whisk helps to thoroughly combine dry ingredients and sugars, while a sturdy spatula is perfect for folding in chocolate chips and nuts without overmixing.
Electric Mixer (Optional, but Recommended): While you can mix by hand, an electric mixer makes creaming butter and sugar, and incorporating eggs, significantly easier and more efficient.
Measuring Cups & Spoons: Accuracy is paramount in baking, so precise measuring tools are non-negotiable for consistent results.
Baking Sheets & Parchment Paper: Parchment paper ensures even baking, prevents sticking, and makes cleanup a breeze. Dark baking sheets can cause over-browning, so lighter ones are preferred.
Cookie Scoop: A cookie scoop ensures perfectly uniform cookies, which not only look professional but also bake evenly, preventing some from being underdone and others overdone.
Wire Rack: Crucial for allowing air circulation around the cookies as they cool, preventing them from becoming soggy on the bottom.
Your Step-by-Step Journey to Double Chocolate Nut Cookie Mastery
Follow these detailed instructions carefully to achieve the perfect batch of fudgy, chewy Double Chocolate Nut Cookies every single time.
- Prep Your Dry Ingredients:
In a medium bowl, whisk together the all-purpose flour, unsweetened cocoa powder, baking soda, and salt until thoroughly combined. This step ensures that all the dry components are evenly distributed throughout the dough, which is crucial for a consistent rise and balanced flavor in your fudgy cookies.
- Combine Wet Ingredients (Part 1):
In a separate large bowl, combine the melted unsalted butter, light brown sugar, and granulated sugar. Whisk these vigorously until the mixture is smooth and the sugars are fully incorporated into the butter. This initial mix sets the stage for a rich, moist dough base for your Double Chocolate Nut Cookies.
- Incorporate Eggs & Vanilla:
Beat in the large eggs one at a time, ensuring each egg is fully mixed into the sugar-butter mixture before adding the next. This creates a stable emulsion, contributing to the cookie’s texture. Stir in the vanilla extract last, adding a warm, aromatic depth to the dough.
- Gently Combine Wet and Dry:
Gradually add the dry ingredients from step 1 to the wet ingredients. Mix on low speed with an electric mixer, or gently by hand with a spatula, until just combined. The most important tip here is to be careful not to overmix, as overmixing develops gluten and can lead to tough, cakey cookies instead of the desired chewy texture.
- Fold in the Goodies:
Using a sturdy spatula, gently fold in the semi-sweet chocolate chips and chopped nuts. Continue folding just until they are evenly distributed throughout the dough. Avoid overworking the dough during this step to maintain its tender consistency.
- The Game-Changing Chill:
Cover the bowl with plastic wrap and chill the dough in the refrigerator for at least 30 minutes. This step is critical! Chilling solidifies the butter, which helps the cookies maintain their shape and prevents excessive spreading during baking. More importantly, it allows the flavors to meld and develops that desired rich, chewy texture, much like how chilling enhances the depth in other treats such as decadent Caramel Nut Squares.
- Preheat & Prepare:
While the dough is chilling, preheat your oven to 350°F (175°C). Line your baking sheets with parchment paper; this simple step prevents sticking and ensures your Double Chocolate Nut Cookies bake evenly and release easily.
- Scoop & Space:
Using a rounded tablespoon or a cookie scoop, drop portions of the chilled dough onto the prepared baking sheets, leaving about 2 inches between each cookie. This spacing allows for proper air circulation and prevents cookies from merging together during baking.
- Bake to Perfection:
Bake for 10 to 12 minutes. The cookies are done when the edges are visibly set and the centers still look slightly soft and gooey. This is the crucial moment: do not overbake them if you want them to stay perfectly chewy and fudgy. They will continue to set and firm up slightly as they cool on the baking sheet.
- Cool & Enjoy:
Remove the baking sheets from the oven and let the cookies cool on the sheets for 5 minutes. This allows them to firm up slightly without losing their incredible softness. After 5 minutes, carefully transfer them to a wire rack to cool completely. Enjoy their warm, gooey deliciousness!
Unlocking Flavor Secrets: Expert Tips for Your Double Chocolate Nut Cookies
Elevate your baking game with these tried-and-true techniques and insights, ensuring every cookie is a masterpiece.
The Power of Chilling: Why It’s Non-Negotiable: Don’t skip the chilling step! Besides preventing spread, it deeply enhances the flavor of your chocolate cookies and contributes significantly to that coveted chewy texture. For an even chewier cookie, extend the chill time to an hour or even overnight.
Perfect Baking: Don’t Overbake! This is the golden rule for achieving fudgy cookies. Always pull them out when the edges are just set and the centers still look a bit soft. They will continue to bake and firm up slightly on the hot baking sheet as they cool, preventing dryness.
Measure Flour Correctly: Always spoon and level your flour, rather than scooping directly with the measuring cup. Scooping can pack in too much flour, leading to a denser, drier cookie that misses that ideal chewy texture.
Embrace Ingredient Quality: Using good quality unsweetened cocoa powder and premium chocolate chips makes a noticeable difference in the overall flavor of your Double Chocolate Nut Cookies. Invest in ingredients you genuinely love to eat!
Room Temperature Eggs: While the recipe calls for melted butter, using room temperature eggs helps them incorporate more smoothly into the sugar-butter mixture. This creates a more uniform dough and contributes to a better texture.
A Sprinkle of Sea Salt: A tiny sprinkle of flaky sea salt on top of the warm cookies right out of the oven can beautifully enhance the chocolate flavor. It adds a sophisticated, gourmet touch and balances the sweetness perfectly.
Common Cookie Conundrums Solved for Your Best Batch
Even experienced bakers encounter challenges. Here are solutions to common issues you might face when making Double Chocolate Nut Cookies.
My Cookies Are Spreading Too Much!
This is often due to the melted butter being too warm, not chilling the dough enough, or accidentally using too much leavening. Ensure your butter is melted but not hot, and always chill the dough for the recommended time (or even longer!). If the problem persists, try adding an extra tablespoon of flour to your dough.
Why Are My Cookies Dry or Cakey?
Overbaking is the most frequent culprit here. Remember to remove the cookies when the edges are set but the centers still look slightly underbaked. Overmixing the dough can also develop too much gluten, resulting in a tougher, cake-like texture rather than the desired fudgy and chewy consistency.
My Chocolate Chips Sunk to the Bottom!
This can happen if your dough is too warm or if the chips are particularly heavy. Try chilling your dough for a longer period to firm it up. Alternatively, you can toss your chocolate chips (and nuts) in a tablespoon of the dry flour mixture before folding them into the dough; the flour coating helps them adhere better.
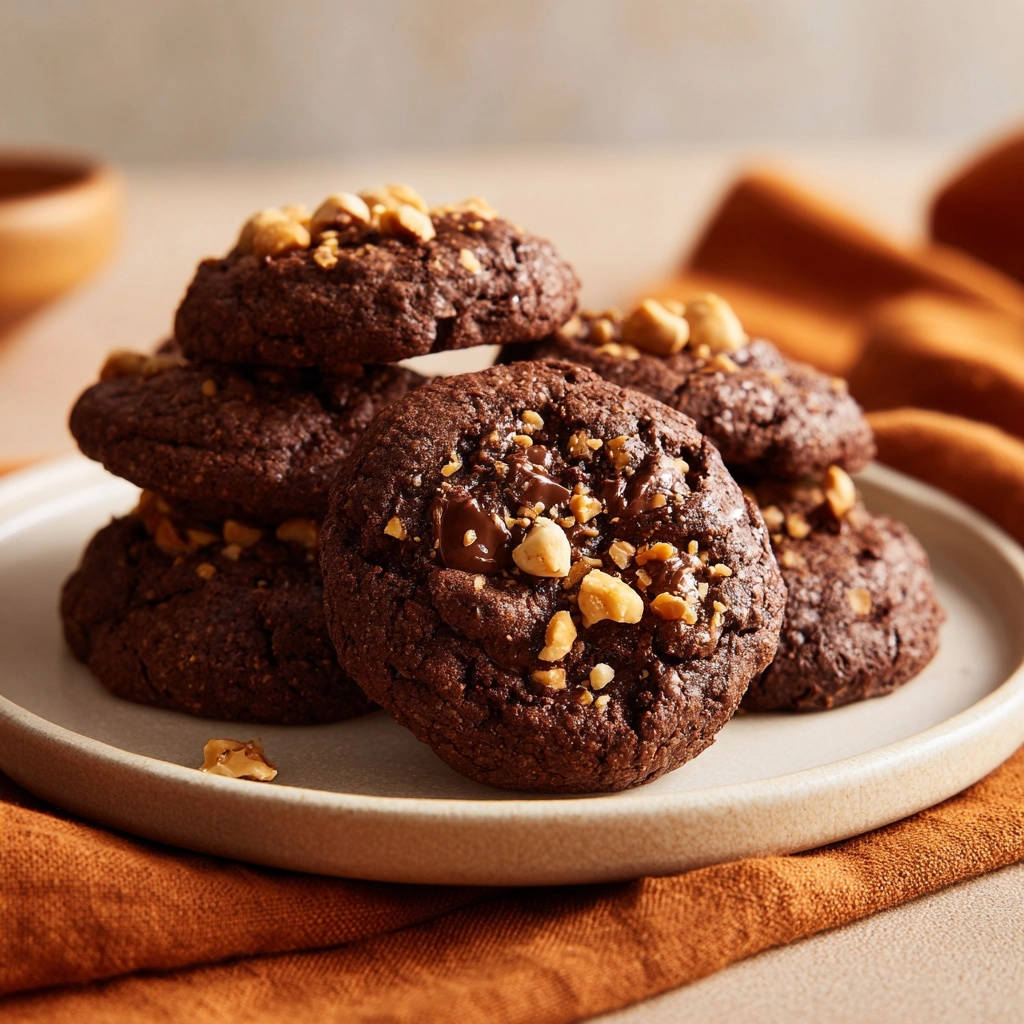
Savoring Every Bite: Serving & Storage Tips
You’ve baked the perfect batch of Double Chocolate Nut Cookies – now learn how to enjoy them best and keep them fresh.
More Sweet Treats to Explore
Since you enjoyed these double chocolate nut cookies, you might like these other chocolate and oat-based baked goods.
- For a different chewy chocolate experience, consider these chewy chocolate chip oatmeal bars, which also deliver on texture.
- If you’re in the mood for a warm, spiced breakfast treat to go with your cookies, try these cinnamon sugar jam-filled waffles.
Optimal Freshness: How to Store Your Cookies
Once completely cooled, store your Double Chocolate Nut Cookies in an airtight container at room temperature for up to 3-4 days. To maintain their softness and prevent them from drying out, you can even add half a slice of bread to the container; the cookies will absorb moisture from the bread.
Freezing Baked Double Chocolate Nut Cookies
For longer storage, baked cookies can be frozen for up to 3 months. Place cooled cookies in a single layer on a baking sheet to flash freeze for about an hour until solid. Then, transfer them to a freezer-safe bag or container, separating layers with parchment paper. Thaw at room temperature when ready to enjoy.
Creative Ways to Serve Your Fudgy Treats
While utterly delicious on their own, these Double Chocolate Nut Cookies are fantastic served warm with a scoop of creamy vanilla bean ice cream. They also make a delightful accompaniment to a cold glass of milk, a hot cup of coffee, or a comforting mug of tea.
Your Double Chocolate Nut Cookie Questions Answered
Got more questions about making the ultimate Double Chocolate Nut Cookies? We’ve got you covered.
Can I make these cookies ahead of time?
Absolutely! The cookie dough can be prepared up to 2-3 days in advance and stored covered in the refrigerator. In fact, longer chilling can often enhance the flavor and texture of these chewy cookies. Just be sure to let it sit at room temperature for 10-15 minutes before scooping if it’s very firm.
What’s the best type of chocolate to use?
While semi-sweet chocolate chips are recommended, feel free to experiment! Dark chocolate chips or even chopped chocolate bars can create a more intense chocolate experience in these fudgy cookies. If you love deep chocolate flavors, you might also enjoy our recipe for easy chocolate lava cake. You could also mix in some milk chocolate chips for added sweetness.
Can I substitute the nuts or make them nut-free?
Yes, you can easily omit the nuts entirely or substitute them with other mix-ins like white chocolate chips, dried cranberries, or even mini marshmallows for a different flavor profile. If omitting, you might consider adding an extra 1/4 cup of chocolate chips to maintain volume and texture.
Can I freeze the cookie dough?
Yes, scooped dough balls can be frozen for up to 2-3 months. Place them on a baking sheet to flash freeze until solid, then transfer to a freezer-safe bag or container. When ready to bake, place frozen dough balls on a prepared baking sheet and bake directly from frozen, adding an extra 2-4 minutes to the baking time.
How do I know if my butter is the right temperature after melting?
Your melted butter should be warm enough to be liquid, but not hot. It should not be bubbling or sizzling. If it’s too hot, allow it to cool for a few minutes before combining with the sugars to avoid “scrambling” the eggs later when you incorporate them.
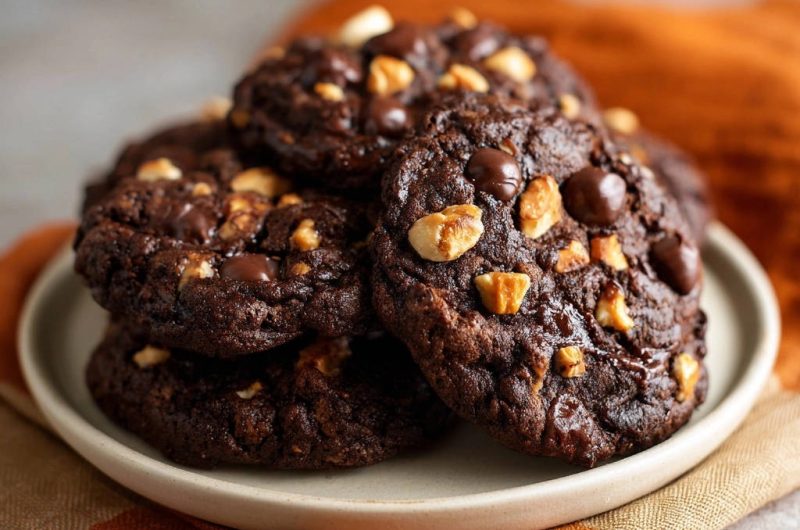
Ready to Impress? Share Your Double Chocolate Nut Cookies!
Now that you’re armed with all the knowledge and techniques, it’s time to create your own batch of truly unforgettable Double Chocolate Nut Cookies. This recipe is designed to be foolproof, guiding you to that perfect balance of fudgy chewiness every single time.
These rich, homemade cookies are sure to become a favorite in your kitchen. We’d love to see your baking triumphs! Share your creations with us on social media, or leave a comment below with your experience or any unique twists you added. Happy baking!
Double Chocolate Nut Cookies
Course: DessertCuisine: AmericanDifficulty: easy24
cookies15
minutes10
minutes240
kcal25
minutesNothing beats a warm, gooey double chocolate cookie! This recipe guarantees a beautifully fudgy and chewy texture every single time with a simple trick that’s easier than you think.
Ingredients
1 and 1/2 cups all purpose flour
3/4 cup unsweetened cocoa powder
1 teaspoon baking soda
1/2 teaspoon salt
1/2 cup unsalted butter, melted
1 cup light brown sugar, packed
1/2 cup granulated sugar
2 large eggs
1 teaspoon vanilla extract
1 and 1/2 cups semi sweet chocolate chips
1 cup chopped nuts (like walnuts or pecans)
Directions
- In a medium bowl, whisk together the flour, cocoa powder, baking soda, and salt. Set aside.
- In a large bowl, combine the melted butter, brown sugar, and granulated sugar. Whisk until smooth and fully combined.
- Beat in the eggs one at a time, mixing well after each addition. Stir in the vanilla extract.
- Gradually add the dry ingredients to the wet ingredients, mixing on low speed or by hand until just combined. Be careful not to overmix.
- Fold in the chocolate chips and chopped nuts until evenly distributed throughout the dough.
- Cover the bowl with plastic wrap and chill the dough in the refrigerator for at least 30 minutes. This helps the cookies maintain their shape and develop a rich, chewy texture.
- Preheat your oven to 350F (175C). Line baking sheets with parchment paper.
- Scoop rounded tablespoons of dough onto the prepared baking sheets, leaving about 2 inches between each cookie.
- Bake for 10 to 12 minutes. The cookies are done when the edges are set and the centers still look slightly soft and gooey. Do not overbake them if you want them to stay perfectly chewy and fudgy. They will continue to set as they cool.
- Remove from the oven and let the cookies cool on the baking sheets for 5 minutes before transferring them to a wire rack to cool completely.
Notes
- Chilling the dough for at least 30 minutes is crucial for shape and texture.


