
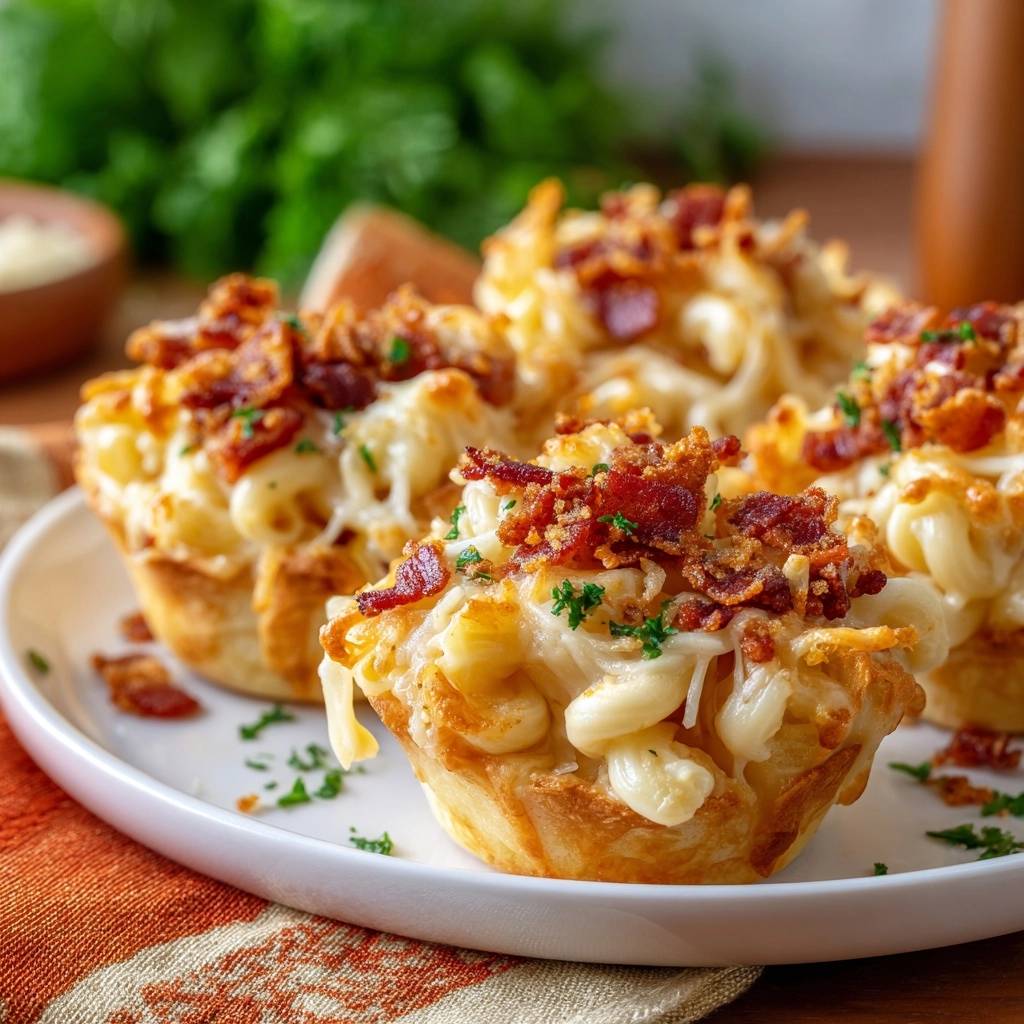
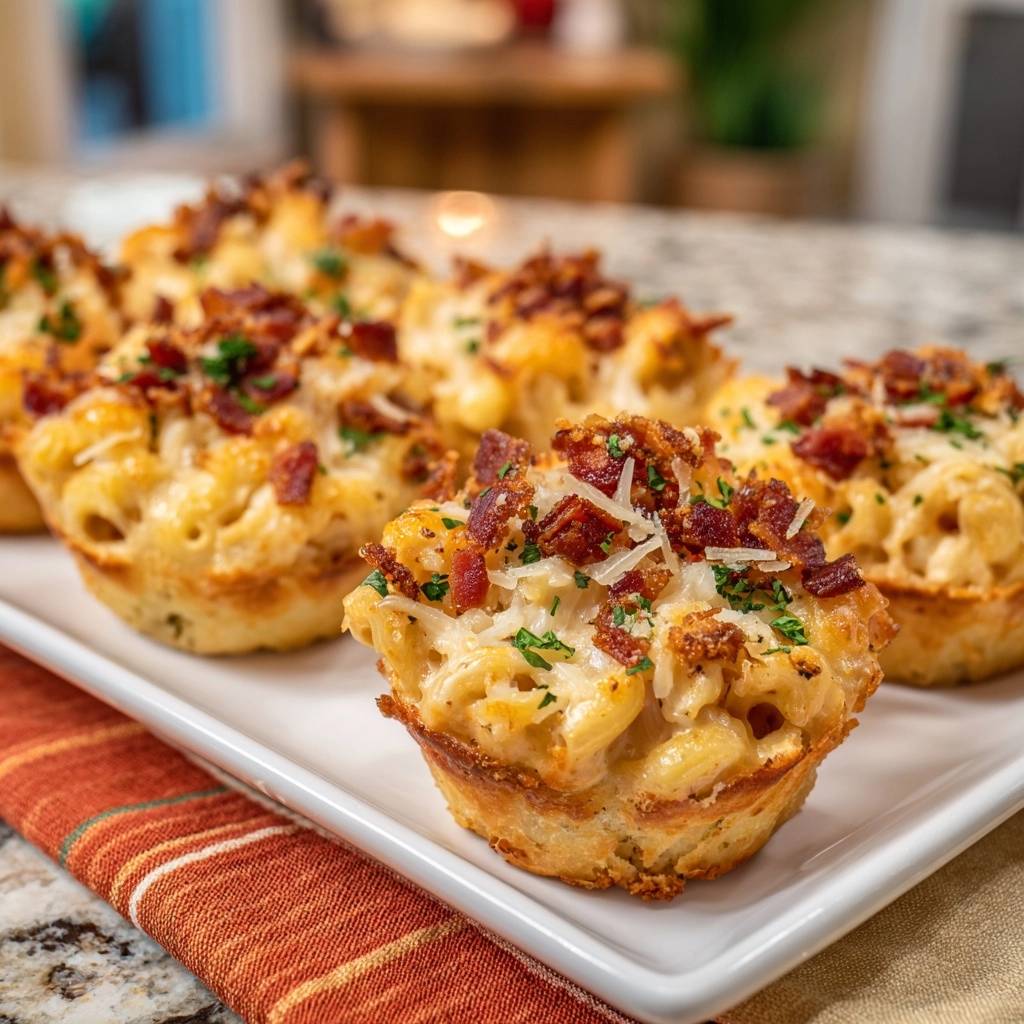
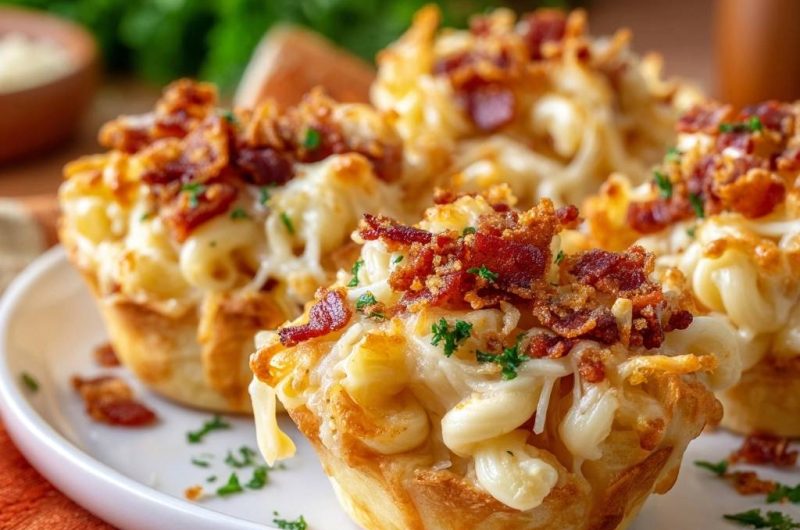
Imagine biting into a golden, buttery biscuit crust that actually crunches, only to find a center of warm, creamy macaroni and salty bacon. Most handheld snacks like this end in disappointment because the dough turns into a soggy, pale mess under the weight of the cheese sauce. You want a sturdy vessel that holds its shape from the muffin tin to your mouth without falling apart or feeling doughy.
The secret to achieving that perfect contrast lies in a specific pre-sealing technique that protects the dough from moisture. By creating a structural barrier before the pasta ever touches the biscuit, you ensure the bottom stays crisp and the sides remain flaky. It is the difference between a sad, mushy appetizer and a professional-grade snack that people will actually ask you for the recipe for.
I have found that the most common mistake is rushing the assembly by putting cold pasta directly onto raw dough. Instead, you must par-bake the crusts with a fat-based seal. This simple extra step creates a hydrophobic layer that blocks the cheese sauce from soaking into the flour. Once you master this barrier method, you can turn almost any creamy filling into a perfect handheld bite.
For a similar, comforting side, check out these loaded cheddar bacon mashed potatoes.
The Structural Integrity of Handheld Pasta
When you combine heavy, moisture-rich macaroni with raw biscuit dough, physics usually works against you. The weight of the pasta compresses the air pockets in the dough, while the sauce leaches liquid into the flour. This prevents the biscuit from rising and browning, resulting in that dreaded “soggy bottom” that ruins the entire eating experience.
To fix this, we treat the biscuit cup like a structural foundation rather than just a wrapper. By thinning the dough and pressing it firmly against the tin, you create a uniform thickness that cooks evenly. The moisture barrier we build acts as a shield, allowing the biscuit to flake and crisp up independently of the creamy filling inside.
This recipe bridges the gap between a light snack and a hearty meal by focusing on density and heat distribution. Because the macaroni is already cooked, the second bake is purely about melting the cheese and finishing the crust. This dual-phase approach ensures the pasta stays creamy while the exterior reaches a deep, satisfying golden brown.
Essential Components for Loaded Mac and Cheese Biscuit Cups
Quality ingredients dictate the final texture of these cups, so you should choose your biscuit dough wisely. I always recommend “flaky layers” refrigerated biscuits over the “Southern style” or “buttermilk” varieties. The laminated layers in the flaky version expand horizontally, creating a much crispier wall that stands up better to the heavy macaroni filling.
Panko breadcrumbs are another non-negotiable component for this dish. While standard breadcrumbs are fine, panko provides a jagged, airy crunch that contrasts beautifully with the soft pasta. When mixed with the melted butter and cheese on top, they create a crust that shatters slightly when you bite into it, adding a much-needed sensory layer.
Fresh parsley might seem like a simple garnish, but it provides a necessary hit of brightness. The oils in the fresh herb cut through the richness of the cheddar and the saltiness of the bacon. If you have it on hand, use flat-leaf Italian parsley for a cleaner flavor that doesn’t get lost in the cheese.
Selecting the Right Macaroni Base
You can certainly use leftover homemade macaroni and cheese, but it needs to be the right consistency. Chilled macaroni is mandatory because it is much easier to portion and stays put during the assembly phase. If the pasta is warm and runny, it will spill over the edges of the biscuit and cause the dough to stick to the pan.
Boxed varieties work surprisingly well here because the noodles are smaller and fit into the muffin cups more easily. However, if you use a “deluxe” version with a liquid cheese pouch, make sure the pasta has sat in the fridge for at least two hours. This allows the starches to set, giving the cups the structural stability they need to be handheld.
The Cheese Blend: Meltability vs. Sharpness
A great cheese blend balances flavor with function, which is why I use a mix of Sharp Cheddar and Mozzarella. The cheddar provides that classic, punchy flavor that everyone expects from mac and cheese. However, cheddar alone can be oily when melted, so the mozzarella steps in to provide that iconic “cheese pull” and a smoother texture.
For more cheesy goodness, check out these loaded cheddar potatoes.
I highly recommend grating your own cheese from a block if you have the time. Pre-shredded cheese in bags is coated in potato starch or cellulose to prevent clumping, which can interfere with how the cheese melts and seals. Freshly grated mozzarella melts into a much tighter “moisture shield” at the bottom of the biscuit cup, which is vital for preventing sogginess.
The Science of the Anti-Soggy Barrier
The par-baking technique is the most important part of this entire process. When you brush the raw dough with garlic butter and bake it for six minutes, you are essentially “waterproofing” the flour. The fat in the butter coats the surface of the dough, while the heat begins to set the outer proteins before the wet filling is added.
This creates a hydrophobic layer that prevents the sauce from the macaroni from migrating into the biscuit. Without this step, the dough would absorb the liquid and stay raw even after twenty minutes in the oven. You are looking for the dough to look matte and slightly puffed, but not yet browned, during this initial phase.
The “Secondary Shield” involves adding a small pinch of mozzarella to the bottom of the hot, par-baked cup. As that cheese melts, it fills in any tiny gaps or air pockets in the biscuit base. This creates a literal floor of cheese that sits between the dough and the pasta, ensuring the bottom of your cup stays as crisp as the sides.
Step-by-Step: Constructing the Perfect Biscuit Vessel
Start by thinning out your biscuit dough more than you think you need to. Use a rolling pin or the palm of your hand to flatten each biscuit into a wide, thin circle. If the dough is too thick, it will puff up too much in the oven and leave very little room for the actual macaroni filling.
When you place the dough into the greased muffin tin, use your thumbs to press it firmly into the bottom corners. You must pull the dough all the way up to the very rim of each cup. This “rim-to-rim” technique ensures that the macaroni stays contained and doesn’t bubble over and glue the biscuit to the metal pan.
Phase One: The Par-Bake and Seal
Preheat your oven to 375°F and make sure your rack is in the center position for even airflow. Once you have pressed the dough into the cups, brush the interiors generously with the garlic butter mixture. This adds flavor deep into the crust while providing that essential fat barrier we discussed earlier.
Bake the empty crusts for exactly six minutes. You will notice the dough looks set and has lost its raw, shiny appearance. Don’t worry if the bottoms puff up slightly; you can gently press them back down with the back of a spoon as soon as they come out of the oven to make room for the filling.
Phase Two: Loading and Topping
While the cups are still hot from the par-bake, drop in your base layer of mozzarella cheese. Follow this with a very generous scoop of the chilled macaroni and cheese, packing it down slightly. You want to fill these right to the brim because the pasta won’t expand much during the final bake.
Top each cup with the remaining cheese blend and a dusting of panko breadcrumbs. When you add the bacon bits, press them firmly into the cheese with your fingers. This ensures the bacon becomes part of the crust rather than just sitting on top where it could easily fall off when someone takes a bite.
Phase Three: The Final Golden Bake
Slide the tin back into the oven for another 12 to 14 minutes. You are looking for the edges of the biscuits to turn a deep, mahogany golden brown. The cheese on top should be bubbling vigorously, and the panko should look toasted and dark gold.
Since the macaroni was already cooked, you don’t need to worry about internal temperatures as much as visual cues. If the cheese is melted and the biscuit edges are firm to the touch, the center will be hot. The high heat of the oven penetrates the thin biscuit walls quickly, heating the pasta through perfectly.
The Critical Cooling and Extraction Window
Resist the urge to pull the cups out of the tin immediately. This is the most common point of failure where the cups might fall apart. As the cheese cools slightly, it acts like a glue that binds the pasta and the biscuit together into one solid unit.
Let the tin sit on a wire rack for at least five to seven minutes. During this time, carry-over cooking finishes the very center of the dough, and the crust firms up as the steam escapes. If you try to remove them too early, the structural integrity won’t be there, and you will likely leave the bottom of the biscuit behind.
To extract them safely, run a thin butter knife or an offset spatula around the edges of each cup. If you greased the pan well and used the rim-to-rim dough technique, they should pop right out. Lift them gently and place them on a serving platter, then hit them with that fresh parsley for a pop of color.
Troubleshooting Common Biscuit Cup Failures
If you find that your dough is shrinking down the sides of the tin during the par-bake, it usually means the dough was too cold or over-worked. To fix this, let the dough sit at room temperature for five minutes before pressing it into the tin. If it still shrinks, just use a spoon to gently push the warm dough back up the sides before adding the filling.
If the tops are browning too fast but the biscuit feels soft, move the tin to a lower rack in the oven. You can also tent the tin loosely with foil to protect the cheese while the bottom finishes. For those using a very “saucy” or wet mac and cheese, increase the amount of panko in the topping to help absorb any excess moisture that bubbles up.
In the event that a cup does get stuck, don’t force it. Let the pan cool for another few minutes. Often, as the metal contracts and the fats solidify, the cup will release more easily. A gentle twist with the knife is usually better than trying to pry it straight up.
Flavor Variations and Ingredient Swaps
Once you have the base technique down, you can get creative with the “loaded” aspect of this dish. Diced jalapeños added to the macaroni provide a great spicy kick that cuts through the heavy cheese. You could also swap the bacon for smoked brisket or even caramelized onions for a more sophisticated flavor profile.
More Comfort Food Ideas
Round out your meal with these satisfying dishes.
- For a rich and savory casserole, consider the Cheesy Sausage Biscuit Bake, offering similar baked goodness.
- If you’re in the mood for something fresh and crisp, the Crispy Breaded Chicken Caesar Salad provides a delightful contrast.
The biscuit dough itself is another place to experiment. Many brands offer honey-butter or herb-infused biscuits that can add another layer of flavor to the crust. If you want a more rustic look, you can use a “flaky” dough but leave the edges slightly jagged rather than pressing them perfectly smooth against the rim.
For a different textural experience, try swapping the panko for crushed butter crackers or even crushed pretzels. Pretzels add a wonderful malty saltiness that pairs perfectly with sharp cheddar. Just remember to press any dry toppings firmly into the cheese so they don’t burn or blow away in the oven’s convection currents.
Make-Ahead Strategies and Reheating Instructions
These cups are fantastic for parties because you can assemble them ahead of time. You can par-bake the crusts and fill them, then keep the whole tin in the fridge for up to four hours before the final bake. If you want to freeze them, do so after the final bake and once they have cooled completely.
To freeze, place the cooled cups on a baking sheet in the freezer for an hour until solid, then transfer them to an airtight bag. They will stay fresh for up to two months. When you are ready to eat, don’t use the microwave! The microwave will turn the biscuit into a rubbery, tough mess and make the bottom soggy again.
The best way to reheat these is in an air fryer at 350°F for about 5-6 minutes. This circulates hot air around the entire cup, recrisping the base and the panko topping perfectly. If you don’t have an air fryer, a standard oven at 375°F for 10 minutes will also do a great job of restoring that original crunch.
Optimal Pairings for Savory Handhelds
Because these biscuit cups are very rich and cheesy, they pair best with something that has a bit of acidity. A simple arugula salad with a lemon vinaigrette is a perfect side dish. The peppery greens and the tart dressing provide a sharp contrast to the buttery biscuit and creamy pasta.
If you are serving these as part of a larger spread, a vinegar-based coleslaw is another excellent choice. The crunch of the cabbage and the tang of the vinegar help cleanse the palate between bites. For dipping, a spicy ranch or a garlic aioli can add an extra punch of flavor, though these cups are certainly flavorful enough to stand on their own.
How do I store leftover mac and cheese biscuit cups?
Store any leftovers in an airtight container in the refrigerator for up to 3 days. To maintain the best texture, avoid stacking them directly on top of each other, as the moisture from the cheese can soften the crust of the cup below. For longer storage, you can freeze them for up to 2 months, but ensure they are completely cool before sealing them in a freezer-safe bag.
Why did my biscuit cups turn out soggy on the bottom?
Sogginess usually happens if you skip the par-baking step or if the macaroni was too hot and wet when added. The 6-minute initial bake creates a crust that prevents moisture absorption. Additionally, make sure you use the “mozzarella shield” at the bottom of the cup; that extra layer of melted cheese acts as a waterproof barrier between the pasta and the dough.
Can I use homemade biscuit dough instead of refrigerated?
Yes, you can use homemade dough, but you must roll it out very thin. Homemade dough tends to rise more than refrigerated versions, which can push the filling out of the cup. If using homemade, I recommend adding a bit more shortening or butter to the recipe to ensure the crust stays flaky and doesn’t become bread-like or tough when par-baked.
What is the best way to reheat these without them getting hard?
The oven or an air fryer is the only way to go. Reheat at 350°F for about 5-8 minutes until the cheese is bubbling again. Avoid the microwave at all costs, as it vibrates the water molecules in the bread and cheese, resulting in a crust that is simultaneously soggy and rubbery once it cools for even a minute.
Can I make these gluten-free?
You can substitute the refrigerated biscuits with a gluten-free biscuit mix or pre-made gluten-free dough. However, gluten-free dough often lacks the structural elasticity of standard wheat dough, so you may need to grease the muffin tin more heavily. Also, ensure your macaroni and cheese base and panko breadcrumbs are certified gluten-free to avoid cross-contamination.
My biscuits shrank down the sides of the pan, what happened?
This usually occurs when the dough is too cold or has been handled too much, causing the gluten to snap back. Let your dough sit at room temperature for about 5-10 minutes before pressing it into the tin. If it shrinks during the par-bake, simply use the back of a small spoon to gently push the warm, pliable dough back up the sides of the tin before you add the cheese and macaroni.
Mac and Cheese Biscuit Cups
Course: AppetizerCuisine: AmericanDifficulty: easy12
cups15
minutes20
minutes285
kcal35
MinutesA clever handheld snack featuring creamy macaroni and cheese, salty bacon, and melted cheddar inside a flaky biscuit crust that stays crispy thanks to a specialized pre-sealing method.
Ingredients
1 tube (16 oz) refrigerated flaky layers biscuits (8-12 count)
2 cups prepared macaroni and cheese (chilled works best for stability)
1 cup shredded sharp cheddar cheese
1/2 cup shredded mozzarella cheese
1/2 cup cooked bacon, roughly chopped into large bits
2 tablespoons melted butter
1/2 teaspoon garlic powder
1/4 cup panko breadcrumbs (for extra crunch)
Fresh parsley, finely chopped for garnish
Directions
- Preheat your oven to 375 degrees F and generously grease a standard 12-cup muffin tin with butter or non-stick spray.
- Flatten each biscuit into a thin, wide circle using your fingers or a rolling pin. Press them into the muffin cups, pushing the dough firmly against the bottom and all the way up the sides to the rim.
- The Anti-Soggy Secret: Mix the garlic powder into the melted butter. Brush the inside bottom and sides of each raw dough cup with the garlic butter. Par-bake the empty crusts for 6 minutes. This sets the dough and creates a fat-based barrier that prevents the pasta sauce from soaking in.
- Remove the tin from the oven. While the crusts are hot, sprinkle a teaspoon of shredded mozzarella at the very bottom of each cup. This melts into a secondary “moisture shield.”
- Fill each cup to the brim with a generous scoop of the chilled macaroni and cheese.
- Top each cup with a blend of the remaining cheddar, mozzarella, and a sprinkle of panko breadcrumbs. Press the bacon bits firmly into the cheese on top so they adhere during the bake.
- Bake for an additional 12 to 14 minutes until the biscuit edges are deep golden brown, the cheese is bubbling, and the bacon is extra crispy.
- Let the cups cool in the pan for at least 5-7 minutes. This is crucial; it allows the cheese and pasta to “set” and the crust to firm up so they can be lifted out cleanly.
- Use a butter knife to gently pop the cups out. Garnish with fresh parsley and serve immediately.
Notes
- Using chilled macaroni and cheese provides better stability when filling the cups. Letting the cups rest for 5-7 minutes after baking is essential for clean removal from the tin.


