
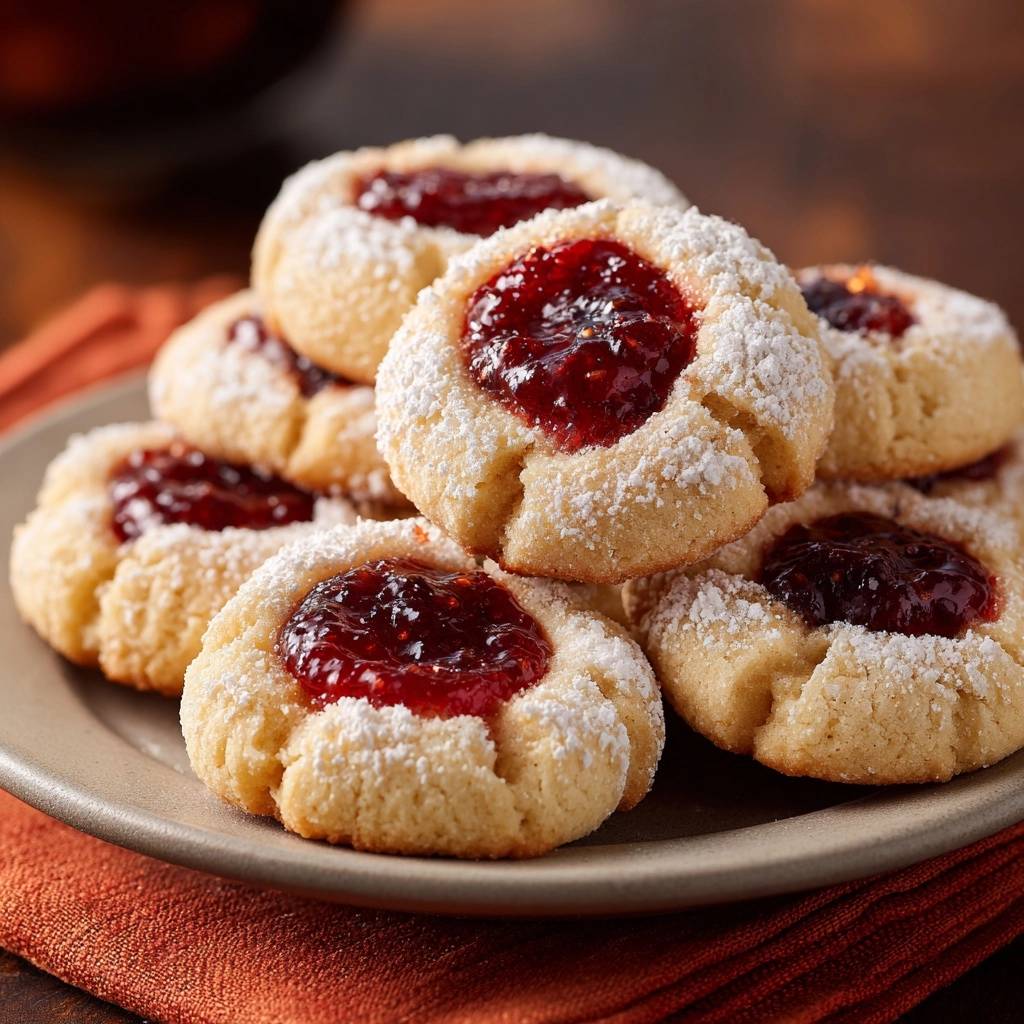
Picture this: you pull raspberry thumbprint cookies from the oven, and instead of perfect jam pools, you get a sticky, leaked mess everywhere. I’ve been there, scraping burnt raspberry off baking sheets after too many failed batches. But here’s the fix that changed everything for my raspberry thumbprint cookies: a quick chill and repress that locks in those shapes tight.
Why do most raspberry thumbprint cookies fail? Warm dough spreads like crazy in the heat, flattening indentations and letting jam bubble out. This recipe sidesteps that with a 30-minute fridge rest. You’ll get crisp edges, pale centers, and jam that stays put every single time.
For more ideas on baking techniques, explore classic cinnamon snickerdoodles that hold their shape.
The real secret? Chilling solidifies the butter crystals in the dough. That prevents the meltdown in the oven. Trust me, one try and you’ll never go back to leaky disasters.
For another twist on raspberry, explore molten raspberry chocolate lava cookies.
Why Raspberry Thumbprint Cookies Fail
Common Dough Spreading Issues
Warm dough in raspberry thumbprint cookies melts fast because butter turns liquid at oven temps. Therefore, indentations flatten out completely. Jam then leaks across the whole sheet, burning at the edges.
More Sweet Treats to Try
Since you enjoyed these raspberry thumbprint cookies, consider these other delightful fruit-forward desserts.
- For a breakfast or brunch option that uses similar fruit notes, explore these cinnamon sugar jam-filled waffles.
- If you’re looking for another way to enjoy raspberries in a baked format, give this sky-high raspberry Dutch baby pancake a try.
In addition, soft balls spread unevenly without structure. However, this recipe’s chill step firms everything up. You’ll see perfect rounds instead of puddles.
Overfilling Jam Pitfalls
Too much jam in raspberry jam cookies causes overflow every time. It bubbles up, sticks to pans, and tastes scorched. That’s why we stick to exactly 1/2 teaspoon per cookie.
Furthermore, excess heat makes it spread wide. But with our method, the cold dough walls hold it in place. No mess, just glossy centers.
Key Ingredients for Flawless Raspberry Thumbprint Cookies
Softened Unsalted Butter Role
Start with 1 cup softened unsalted butter for raspberry thumbprint cookies. It creams light and fluffy with sugar, trapping air for tender bites. Salted butter risks uneven flavor, so skip it.
Room temp butter mixes smoothly without lumps. That builds the structure that chills perfectly later. Exactly 1 cup gives the right fat ratio to prevent cracks.
Flour and Salt Balance
Whisk 2 cups all-purpose flour with 1/4 teaspoon salt first. This ensures even distribution and boosts raspberry flavors. Too much salt overwhelms the jam.
Gradually add to the wet mix to avoid overworking gluten. That keeps dough soft, not tough. Stop when it just comes together.
Raspberry Jam and Finishing Touches
Pick thick raspberry jam, seedless if you like smooth texture. It holds shape without running. Vanilla extract adds warmth that pairs perfectly.
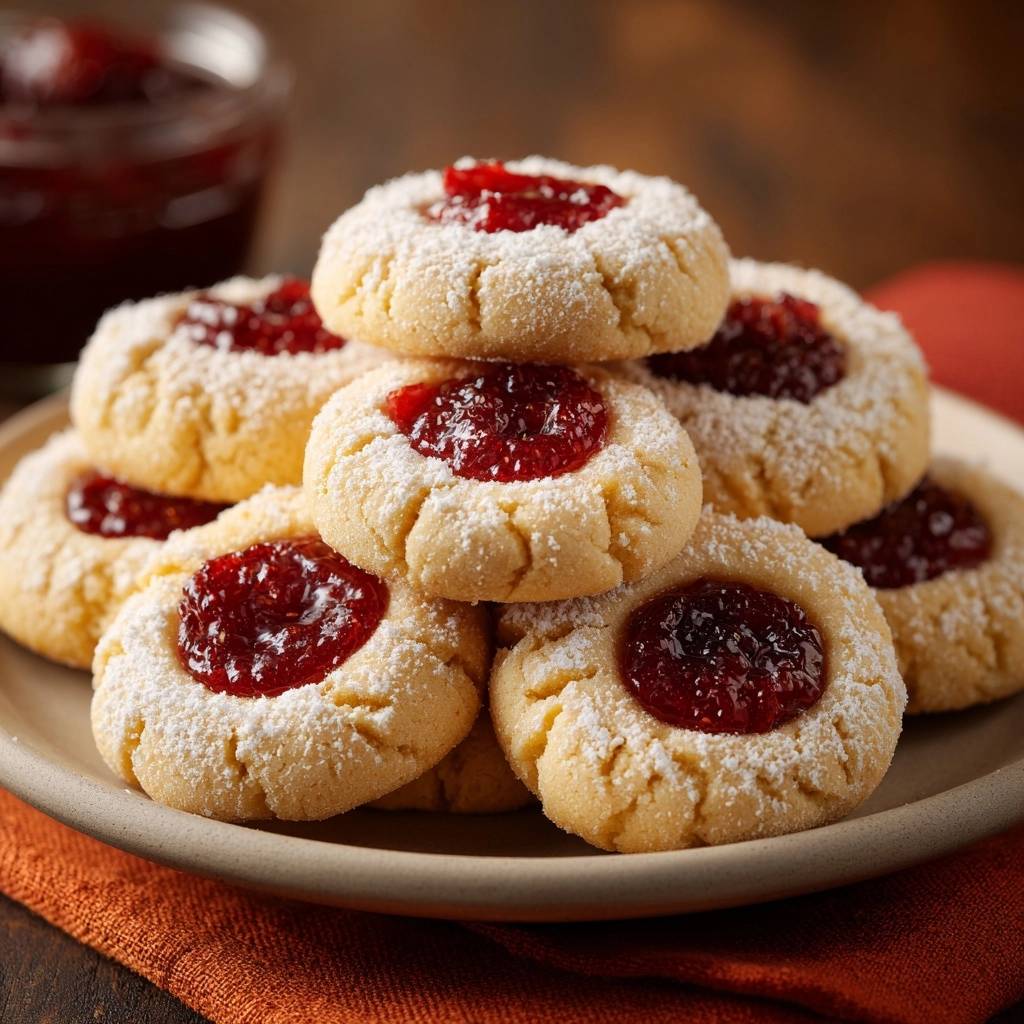
Powdered sugar dusts on last for that snowy look. It clings to cooled surfaces, hiding any tiny flaws. Simple, but stunning.
Science of Chilling Raspberry Thumbprint Cookies
Butter Solidification Process
During the 30-minute chill, butter fats crystallize in raspberry thumbprint cookies dough. This creates a stable network that resists oven heat. Without it, everything melts into flat disks.
Molecularly, cold temps slow spreading by firming the emulsion. Therefore, your shapes stay sharp. It’s basic bakery science you can taste.
Pro tip: chill on the sheet to keep spacing exact. No shifting later.
Indentation Shape Retention
Cold dough springs back slightly, locking thumbprints deep. Hot oven tests this strength. Unchilled versions lose half their depth, spilling jam everywhere.
However, with our repress step, walls stay high. You’ll get neat pools that look pro. Crisp edges form as it bakes pale.
Essential Tools for Raspberry Thumbprint Cookies
Electric Mixer Advantages
An electric mixer whips butter and sugar to pale fluff in 2 minutes flat. Hand mixing takes forever and misses air pockets. Use paddle for even creaminess.
Therefore, dough holds shape better. No dense spots from poor blending.
Thumb or Wooden Spoon Indenter
Your thumb makes natural 1/2-inch wells, but a wooden spoon end gives uniform depth. Parchment prevents sticking entirely. Wire racks speed cooling by air flow.
In addition, even heat circulation firms centers without sogginess. Essential for jam hold.
Step-by-Step Raspberry Thumbprint Cookies Assembly
Creaming Butter and Sugar Base
Beat 1 cup softened butter with 1/2 cup sugar until light, about 2 minutes. It turns pale and fluffy, doubling in volume. Beat in 1 teaspoon vanilla next.
Scrape sides often for even texture. This base smells sweet and holds everything together.
Forming and Indenting Dough Balls
Scoop 1-tablespoon balls, roll smooth, space 2 inches apart. Press thumb deep for 1/2-inch wide indents. Shallow ones fail later.
Therefore, make them wide enough for jam without overflow. Smooth tops bake even.
Chill, Repress, and Jam Filling
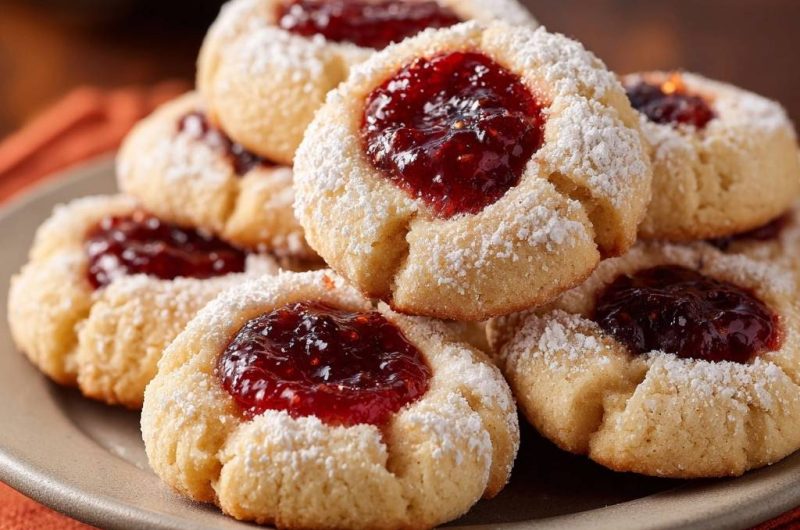
Chill sheets 30 minutes in fridge. Preheat to 350°F meanwhile. Repress softened spots gently, then add 1/2 teaspoon jam each. No more, or it leaks.
The jam gleams red against pale dough. Cold walls grip it tight now.
Baking and Cooling Precision
Bake 10-12 minutes until edges set but pale. Overbaking browns them tough. Cool 5 minutes on sheet, then rack.
Centers firm as they cool. That texture contrast shines with jam.
Powdered Sugar Snowy Finish
Dust cooled raspberry thumbprint cookies with 1/4 cup powdered sugar. It melts slightly on jam for pretty contrast. Yields about 24 cookies.
Store airtight up to 5 days. Crispness lasts.
Avoiding Mistakes in Raspberry Thumbprint Cookies
Overmixing Dough Dangers
Overmixing develops gluten, turning raspberry thumbprint cookies tough. Stop at soft dough stage, even with flour bits. It comes together with handling.
Visual cue: dough holds shape when squeezed. Mix just until combined.
Skipping the Chill Step
No chill means instant spreading and leaks in raspberry thumbprint cookies. I’ve ruined trays that way. Always fridge 30 minutes minimum.
Repress post-chill for extra insurance. Room temp sheets work best.
Overbaking Edge Signs
Golden edges mean overbaked, dry cookies. Pull at pale set stage. Cooling finishes the bake gently.
Therefore, jam stays vibrant, not boiled away.
Raspberry Thumbprint Cookies Flavor Variations
Jam Swap Options
Swap raspberry for apricot or strawberry jam. Lemon curd works too, but chill longer for runny fills. Keep the no-leak method intact.
Match vanilla amount to fruit brightness. All hold perfectly.
Add-Ins for Texture Twists
Roll sides in chopped nuts or coconut before indenting. Chocolate chips pair sweet with raspberry. Adds crunch without messing shapes.
However, don’t overload or dough cracks. Light touch rules.
Make-Ahead Guide for Raspberry Thumbprint Cookies
Freezing Dough Balls
Indent dough balls, freeze on sheet, then bag up to 3 months. Bake straight from freezer, add 1-2 minutes. Fill with jam after thawing slightly.
Perfect for holidays. Shapes hold through it all.
Storage and Revival Tips
Airtight container keeps them fresh 5 days. Re-dust sugar if it fades. For gifting, layer in tins with parchment.
They stay crisp longer than most.
Pairing Raspberry Thumbprint Cookies
Beverage Matches
Hot coffee cuts the sweet perfectly. Tea brings out raspberry notes, especially herbal. Milk softens the buttery bite.
Chai spices echo vanilla warmth too.
Holiday Platter Companions
Pair with shortbread for butter harmony. Ginger snaps add spice contrast. Even cheese board chunks surprise nicely.
Color pops on platters.
Troubleshooting Raspberry Thumbprint Cookies
Jam Still Leaking?
Check for overfill first, then short chill or hot oven. Fix by re-chilling pre-bake next time. Use thicker jam always.
1/2 teaspoon max prevents it.
Dough Too Crumbly or Sticky?
Crumbly means cold butter or extra flour. Sticky from warm or humid days, so chill briefly. Measure flour by spooning, not scooping.
Balances every time.
Cookies Spreading Unevenly?
Uneven balls or hot sheets cause it. Chill sheet first, roll uniform sizes. Space properly too.
Quick fixes work.
Powdered Sugar Not Sticking?
Cookies must cool fully first. Use a sifter for even coat. Damp ones absorb it gone.
Patience pays off.
FAQ
How do I store leftover Raspberry Thumbprint Cookies?
Keep them in an airtight container at room temperature for up to 5 days. They’ll stay crisp and the jam won’t dry out. For longer, freeze baked cookies up to 1 month in a freezer bag; thaw at room temp and re-dust sugar. Don’t fridge, as it softens texture.
Why did my Raspberry Thumbprint Cookies spread and leak jam?
Most likely, you skipped the 30-minute chill or used warm dough balls. Butter melts fast without solidification, flattening indents. Fix it next time by chilling fully and repressing; also ensure oven’s at exact 350°F, not hotter, to avoid rapid spreading.
Can I substitute ingredients in Raspberry Thumbprint Cookies?
Swap raspberry jam for strawberry, apricot, or even thick lemon curd, but stick to 1/2 tsp fills. For gluten-free, use 1:1 all-purpose blend, but chill extra 10 minutes as it spreads more. No butter? Coconut oil works but alters flavor slightly; soften same way.
Why are my Raspberry Thumbprint Cookies tough?
Overmixing after adding flour develops gluten. Mix only until soft dough forms, even if shaggy. Cold butter or too much flour also toughens; use room-temp butter and spoon flour lightly into cup before measuring.
How can I make Raspberry Thumbprint Cookies ahead for holidays?
Form and indent dough balls, freeze on sheet then bag for 3 months. Bake from frozen, adding 2 minutes, and fill post-bake. Or bake fully, cool, freeze, and thaw same day. Re-dust for fresh look; yields 24, perfect for platters.
What’s the best jam for no-leak Raspberry Thumbprint Cookies?
Choose thick, high-fruit jams like Bonne Maman raspberry; seedless holds best without seepage. Avoid runny homemade or low-sugar types, as they bubble over. 1/2 tsp exactly per chill-locked indent guarantees perfect pools every bake.
Raspberry Thumbprint Cookies
Course: DessertCuisine: AmericanDifficulty: easy24
cookies20
minutes12
minutes120
kcal60
MinutesTired of thumbprint cookies where the jam bubbles out and makes a mess? This recipe uses a simple chill-and-repress trick to lock in the shape and keep every bit of ruby-red raspberry jam perfectly centered, no overflow ever.
Ingredients
1 cup unsalted butter, softened
1/2 cup granulated sugar
1 teaspoon vanilla extract
2 cups all-purpose flour
1/4 teaspoon salt
1/2 cup raspberry jam
1/4 cup powdered sugar, for dusting
Directions
- In a large bowl, beat softened butter and granulated sugar with an electric mixer until light and fluffy, about 2 minutes. Beat in vanilla extract.
- In a separate bowl, whisk together flour and salt. Gradually mix into the butter mixture until a soft dough forms. Do not overmix.
- Scoop dough into 1-inch balls (about 1 tablespoon each) and place 2 inches apart on parchment-lined baking sheets. Use your thumb or the end of a wooden spoon to make a deep indentation in the center of each ball, about 1/2 inch wide.
- Chill the cookies on the baking sheets in the refrigerator for 30 minutes. This crucial step firms up the dough to prevent spreading and locks the thumbprint shape solid, ensuring the jam stays put during baking with zero leaking.
- Preheat oven to 350 degrees F. Remove cookies from fridge and gently repress the indentations if they have softened slightly. Fill each center with 1/2 teaspoon raspberry jam, being careful not to overfill.
- Bake for 10 to 12 minutes, until edges are set but cookies remain pale. Cookies will firm as they cool. Do not overbake.
- Cool on baking sheets for 5 minutes, then transfer to a wire rack to cool completely.
- Dust generously with powdered sugar just before serving for that snowy finish. Store in an airtight container up to 5 days.
Notes
- Chilling the dough for 30 minutes is crucial to prevent spreading and lock in the thumbprint shape, ensuring no jam leaks during baking. Do not overfill with jam and avoid overbaking for pale, tender cookies.


