

I spent years battling tough, disappointing stew meat, but I finally cracked the code to achieving truly fork-tender beef, making this my definitive recipe for Rich Classic Beef Stew.
The secret lies in one simple initial prep step that ensures every cube of beef retains its moisture and develops an unbelievable crust, resulting in a deeply savory and unforgettable winter meal perfect for cozy evenings.
The Fork-Tender Difference: Our Secret to Perfect Beef Stew
Why Stew Meat Gets Tough (And How to Prevent It)
Stewing beef, typically cut from the chuck, contains dense connective tissue (collagen) that requires long, slow cooking to break down into gelatin.
If not handled correctly, searing raw meat can cause the surface to dry out before the connective tissue has a chance to fully render, leaving you with dry, tough centers.
The Essential Tenderness Hack: Pre-Coating the Beef
Coating the beef generously in seasoned flour before searing creates a protective barrier, effectively locking in the moisture during the high heat phase.
This critical step not only guarantees tender meat but also forms the foundational starch component for a naturally thick, rich gravy right from the start.
Understanding the Power of Fond: Flavor You Can’t Skip
Fond refers to the highly caramelized, browned bits of protein and starch left on the bottom of the pot after searing the beef.
Scraping up this fond during the onion step (a process called deglazing) is absolutely critical for integrating complex, savory, roasted flavors unique to this Rich Classic Beef Stew.
Building Blocks of Deep Flavor: Essential Ingredients & Preparation
Choosing the Best Cut of Beef for Stew
We rely on stewing beef, often packaged chuck roast, because its high collagen content melts slowly over time, providing that signature unctuous richness to the sauce.
Cutting the meat into consistent 1 1/2-inch cubes is vital, as this size ensures even cooking and prevents smaller pieces from disintegrating or larger pieces from remaining tough.
The Aromatic Depth: Onion, Garlic, and Tomato Paste
Onions and garlic provide the aromatic backbone, sweetening slightly as they cook down and helping to lift the flavorful fond from the bottom of the pot.
The tomato paste adds critical acidity and umami. Cooking it briefly for one minute helps to caramelize its sugars, deepening its color and flavor profile before the liquid is added.
Selecting the Star Vegetables: Carrots and Yukon Golds
Yukon Gold potatoes are preferred because they possess a waxy interior that helps them hold their shape better than Russets, preventing a mushy final stew.
We add the carrots and potatoes later in the cooking process to ensure they are perfectly tender but still intact, avoiding that overcooked, watery texture.
The Liquid Foundation: Broth Quality Matters
Using a high-quality, low-sodium beef broth is essential for maximum flavor control.
Low-sodium liquids allow you to season the beef stew precisely in layers, tasting and adjusting the final salt content only at the very end.
Mastering the Dutch Oven: Step-by-Step Rich Classic Beef Stew Perfection
Step 1: Preparing the Beef for Optimal Tenderness (The Hack)
Thoroughly toss the cubed beef with the seasoned flour mixture.
Ensure every piece is completely coated; this starchy coating is essential for retaining moisture during the sear and sets the stage for a rich gravy.
Step 2: Achieving a Deeply Crusted Sear
Sear the floured beef in batches in hot olive oil, ensuring a dark, flavorful crust develops on all sides.
Crowding the pot prevents searing; the meat will steam instead of brown. Use 3-4 minutes per side, removing the meat to set aside when done.
Step 3: Building the Flavor Base (The Fond Scrape)
Reduce the heat and cook the onions, using their natural moisture and a flat spatula to scrape up all the browned bits (fond) from the pot’s bottom.
Add the minced garlic and tomato paste, cooking for just one minute until fragrant. This heat activates and deepens the tomato flavor instantly.
Step 4: The Initial Slow Simmer
Pour in the beef broth, stirring well to incorporate the thick base. Add the browned beef, dried thyme, and bay leaves.
Bring the entire mixture to a boil, then immediately reduce the heat to the lowest possible setting. Cover tightly and simmer for 2 hours.
Step 5: Adding the Vegetables and Finishing the Cook
After the initial two hours, stir in the potatoes and carrots.
Continue to simmer, covered, for the remaining 60 minutes, or until the vegetables are tender and the beef is completely fall-apart fork-tender.
For a truly melt-in-your-mouth experience, consider slow-simmered savory beef stew.
Chef’s Secrets and Common Pitfalls: Elevating Your Stew Game
Tips for Maximum Flavor Development
Use Wine for Depth: Before adding the broth in Step 4, deglaze the pot with 1/2 cup of dry red wine (like Cabernet Sauvignon). Reduce the wine volume by half before adding the broth for an extra layer of complexity.
For a deeper dive into slow-braised beef, consider this slow-braised beef stew recipe.
Seasoning in Layers: Do not rely solely on the initial salt. Taste after the first 2 hours of simmering, and again before serving. The volume reduces, concentrating the salt, so adjust only at the end.
The Final 15-Minute Uncover: If your stew needs a touch more thickening, remove the lid for the final 15 minutes of cooking. This allows some moisture to evaporate and concentrates the sauce naturally.
Troubleshooting Common Stew Issues
Problem: My Stew Sauce is Too Thin.
Create a slurry by whisking one tablespoon of cornstarch with two tablespoons of cold water. Stir this mixture into the simmering stew during the last 15 minutes of cooking until the desired thickness is reached.
Problem: The Beef Still Feels Tough.
If the stew has been simmering for 3.5 hours and the meat is still chewy, it simply needs more time. Connective tissue only breaks down with low, slow heat. Continue simmering, covered, checking every 30 minutes, until the beef yields easily to a fork.
What to Serve Alongside Rich Classic Beef Stew
Classic Pairings for Dipping and Sopping
A crusty baguette is essential for soaking up the rich gravy. Alternatively, serve the stew over a mound of creamy mashed potatoes or wide egg noodles.
Adding a Fresh Element
Balance the richness with a simple green salad dressed with a bright vinaigrette, or serve alongside quickly steamed green beans tossed with lemon zest.
Completing Your Meal
Round out your rich beef stew with these complementary dishes.
- For a bite that’s fun and satisfying, try these cheesy garlic pizza bombs, offering a similar comfort food feel.
- Add a green vegetable to your plate with these crispy garlic parmesan brussels sprouts, providing a contrasting texture and savory note.
Essential Stew FAQs: Storage, Freezing, and Make-Ahead Tips
Can I make this Rich Classic Beef Stew ahead of time?
Yes, beef stew is even better the next day! Prepare the stew fully, cool completely, and store it in an airtight container in the refrigerator for up to 3 days. Reheat gently on the stovetop.
Does this Rich Classic Beef Stew freeze well?
Absolutely. Once cooled, portion the stew into freezer-safe containers, leaving about an inch of headspace for expansion. It freezes well for up to 3 months. Thaw overnight in the refrigerator before reheating.
Can I use a slow cooker or Instant Pot instead of a Dutch Oven?
While the initial searing steps (Steps 1-3) should still be done on the stovetop for maximum flavor, the simmering phase can be adapted.
For the slow cooker, cook on low for 6-8 hours. For the Instant Pot, use the pressure cook function for 35-40 minutes with a natural release, adding the vegetables for a final 5 minutes of pressure cooking.
Ready to Impress? Share Your Rich Classic Beef Stew Masterpiece!
With the simple prep hack-flouring the beef first-you now possess the secret to a truly fall-apart, tender, and savory Rich Classic Beef Stew. This recipe transforms tough, mediocre meat into a comforting, unforgettable culinary experience.
Try this recipe tonight and let us know in the comments how the tenderness hack changed your stew game forever!
Beef Stew
Course: Soups-StewsCuisine: AmericanDifficulty: medium6
servings30
minutes3
hours450
kcal180
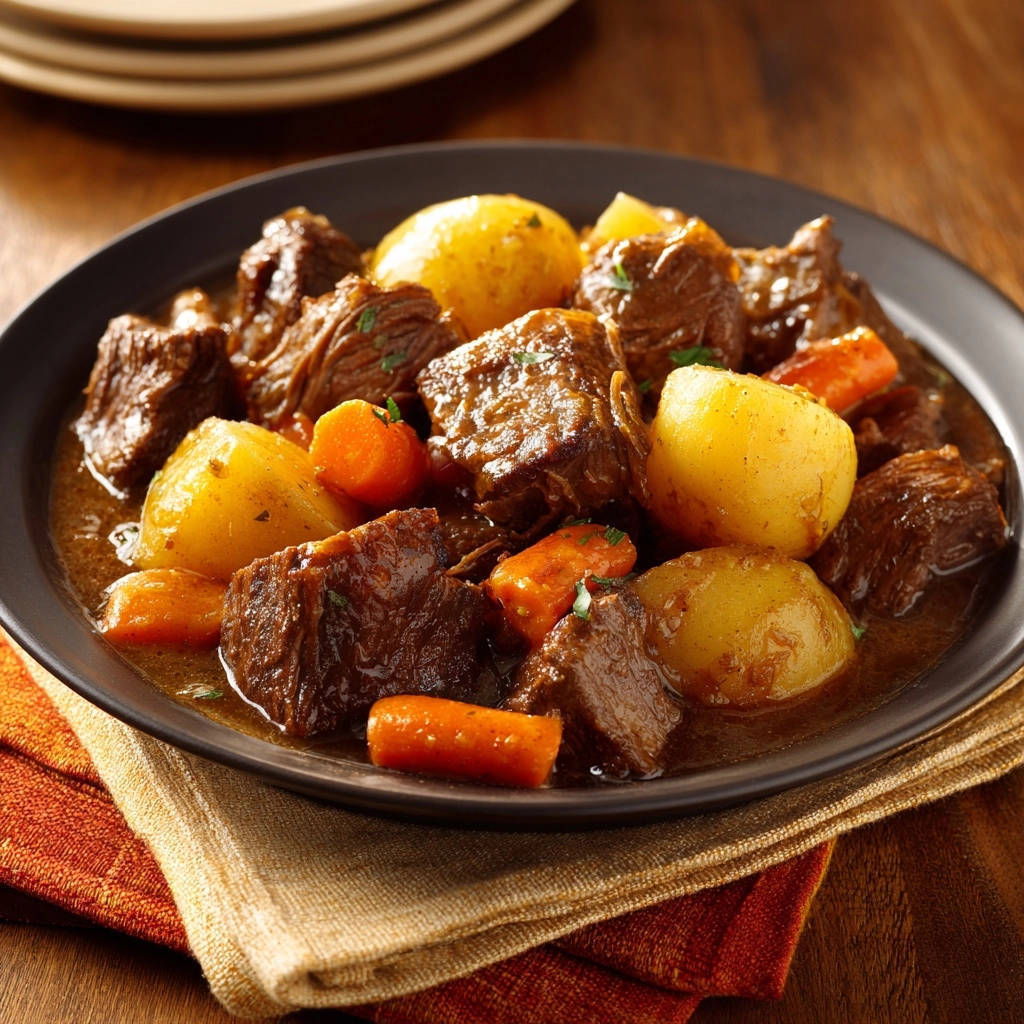
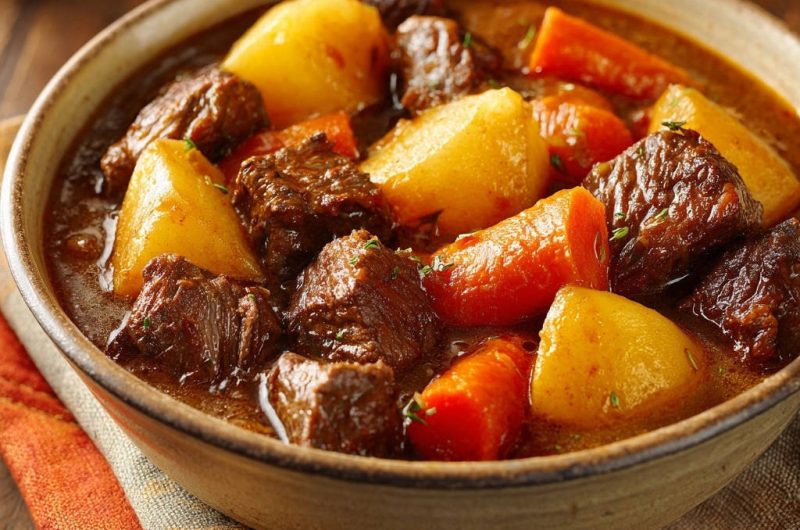
minutesThis hearty, deeply flavorful beef stew is the perfect winter meal. We reveal the simple prep step that ensures every piece of meat is absolutely fork-tender, every single time. Slow-simmered with carrots, potatoes, and thyme, this stew is a true classic.
Ingredients
2 pounds stewing beef, cut into 1 1/2 inch cubes
1/4 cup all-purpose flour
2 teaspoons salt, divided
1 teaspoon black pepper
2 tablespoons olive oil
1 large yellow onion, chopped
4 carrots, cut into 1 inch thick pieces
3 large Yukon gold potatoes, quartered
4 cups beef broth (low sodium)
2 tablespoons tomato paste
1 teaspoon dried thyme
2 bay leaves
2 cloves garlic, minced
Directions
- Prepare the Beef (The Tenderness Hack): Place the cubed beef in a large bowl. In a separate small bowl, combine the flour, 1 teaspoon salt, and pepper. Toss the beef thoroughly with the flour mixture until every piece is completely coated. This starchy coating is the essential step for retaining moisture during the sear and resulting in perfectly tender meat.
- Sear the Meat: Heat the olive oil in a large Dutch oven or heavy-bottomed pot over medium-high heat until shimmering. Sear the floured beef in batches, ensuring you do not crowd the pot. Sear each batch for 3 to 4 minutes per side until deeply browned and crusted. Remove the beef and set aside. Do not wipe out the pot; the browned bits (fond) are critical for flavor.
- Build the Base: Reduce the heat to medium. Add the chopped onion and the remaining 1 teaspoon of salt to the pot. Cook the onion for 5 to 7 minutes, scraping up the browned bits from the beef (the fond) as they soften. Add the minced garlic and tomato paste and cook for 1 minute until fragrant.
- Simmer: Pour in the beef broth, scraping the bottom of the pot one last time to fully incorporate all the flavors. Add the browned beef, dried thyme, and bay leaves. Bring the stew to a boil, then immediately reduce the heat to a very low simmer. Cover the pot tightly.
- Slow Cook: Simmer gently for 2 hours. After 2 hours, the beef should be softening but not quite fall-apart yet.
- Add Vegetables: Stir in the carrots and potatoes. Return the lid and continue to simmer for another 60 minutes, or until the potatoes and carrots are tender and the beef is completely fall-apart and fork-tender.
- Finish: Remove the bay leaves before serving. If the sauce needs to be slightly thicker, uncover the pot for the final 15 minutes of cooking. Serve hot.
Notes
- For incredibly tender beef, don’t skip the flour coating and searing steps; this creates a delicious crust and locks in moisture. Ensure your stew simmers gently, not at a rolling boil, to allow the flavors to meld and the beef to become melt-in-your-mouth tender.


