
I remember chasing that elusive, perfect fudgy texture in Salted Dark Chocolate Cookies for years, often ending up with dry or overly crumbly results. It felt like a culinary Everest until I finally cracked the code to achieving those rich, gooey centers we all crave. This recipe isn’t just a guide; it’s your definitive path to baking truly decadent cookies that consistently deliver chocolate bliss.
Why This Recipe is Your New Go-To for Dark Chocolate Bliss
Forget everything you thought you knew about baking chewy, rich chocolate cookies. This recipe is meticulously crafted to ensure every bite is an experience in pure indulgence, distinguishing itself through carefully considered techniques and ingredient ratios.
The Secret to Irresistibly Fudgy & Gooey Centers
Our method focuses on precise baking times and specific aeration during mixing, ensuring the cookies remain moist and intensely fudgy with that signature gooey core. It’s about knowing exactly when to pull them from the oven, capturing that perfect moment of doneness.
Effortless Decadence: Surprisingly Simple Steps
Despite yielding a gourmet-level treat, this recipe simplifies the process. Each step is clear, making it accessible for bakers of all experience levels to achieve sophisticated Salted Dark Chocolate Cookies without unnecessary fuss.
That Perfect Balance: Sweet, Rich, and a Touch of Salt
The careful blend of dark chocolate, both granulated and brown sugars, and the finishing touch of flaky sea salt creates a complex flavor profile. It expertly navigates the line between deep richness and balanced sweetness, preventing any single note from overpowering another.
For more ideas on achieving that perfect crisp, check out classic cinnamon snickerdoodles.
Gathering Your Ingredients: The Heart of Our Cookies
The foundation of exceptional cookies lies in the quality and purpose of each ingredient. Understanding their roles ensures a perfect outcome every time.
Foundation of Flavor: Flour & Cocoa Powder
All-purpose flour provides the essential structure for our cookies, ensuring they hold their shape while remaining tender.
Unsweetened cocoa powder is paramount, delivering that deep, intense dark chocolate flavor without added sweetness, allowing the sugars to do their specific work.
Sweetness & Structure: Sugars & Baking Soda
Granulated sugar contributes to the slight crispness around the edges, a delightful contrast to the soft interior.
Light brown sugar, packed, is key for adding moisture and contributing to the desirable chewy texture of these dark chocolate cookies.
Baking soda acts as our primary leavening agent, ensuring the cookies rise gently and achieve a soft, airy crumb.
The Essential Binders: Butter, Eggs, & Vanilla
Melted unsalted butter infuses incredible moisture and richness throughout the dough, promoting that signature fudgy texture.
Large eggs bind all the ingredients together, adding richness and playing a vital role in the aeration process for a tender crumb.
Vanilla extract elevates the overall flavor, adding a warm, aromatic depth that complements the dark chocolate beautifully.
The Star of the Show: Dark Chocolate & Flaky Sea Salt
Dark chocolate chips or chunks are the absolute heart of these treats. Opt for high-quality chocolate (70% cacao or higher) for superior melt and flavor.
Flaky sea salt is the non-negotiable finishing touch. Its delicate crunch and burst of salinity dramatically enhance and balance the profound sweetness of the chocolate, making these truly salted dark chocolate cookies.
Essential Tools for Your Salted Dark Chocolate Cookies Adventure
Having the right tools makes the baking process smoother and ensures consistent, professional results.
Mixing Bowls & Whisks
You’ll need separate bowls for your wet and dry ingredients. This allows for proper mixing and aeration of each component before combining them.
Whisks are essential for thoroughly incorporating ingredients, especially for aerating the butter and sugar mixture, which is crucial for texture.
Baking Sheets & Parchment Paper
Sturdy baking sheets provide a flat, even surface for baking. Their heavy gauge prevents warping in the oven.
Parchment paper is critical for non-stick baking, ensuring your cookies release easily without breaking, and promoting even heat distribution for consistent browning.
Cookie Scoop & Wire Rack
A cookie scoop helps portion dough evenly, leading to uniformly sized cookies that bake at the same rate. This consistency is key for perfect results.
A wire rack is vital for cooling cookies. It allows air to circulate around them, preventing the bottoms from becoming soggy and ensuring they firm up properly.
Your Step-by-Step Guide to Baking Salted Dark Chocolate Cookies
Preparing the Dry Mix
In a medium bowl, whisk together the flour, cocoa powder, baking soda, and 1/2 teaspoon of salt.
This crucial initial step ensures all leavening agents and flavor components are evenly distributed throughout the dough, preventing pockets of uneven texture in your final cookies.
Creaming the Wet Ingredients (The Aeration Secret)
In a large bowl, vigorously whisk the melted butter with the granulated sugar and brown sugar until well combined and slightly thickened.
Add the eggs one at a time, whisking vigorously for about one minute after each addition until the mixture is visibly lighter in color and slightly thickened. Stir in the vanilla extract.
This aeration step is key for a tender, fudgy crumb. It incorporates air, which contributes significantly to the light and airy texture of the final cookie, preventing a dense result.
Combining for Perfection (Mindful Mixing)
Gradually add the dry ingredients to the wet ingredients, mixing only until just combined.
Be careful not to overmix the dough, as developing the gluten too much can lead to tougher, chewier cookies rather than the desired fudgy texture.
Folding in the Dark Chocolate
Gently fold in your dark chocolate chips or chunks.
Ensure they are evenly distributed throughout the dough, so every bite is packed with rich chocolate flavor, making these truly decadent cookies.
The Crucial Chilling Period
Cover the dough and chill in the refrigerator for at least 30 minutes, or up to several hours.
This chilling period is crucial for preventing the cookies from spreading too much during baking. It allows the butter to solidify and the flavors to meld, contributing significantly to their chewy texture and intense, complex chocolate flavor, making them the best Salted Dark Chocolate Cookies.
Oven Prep & Scooping
Preheat your oven to 350°F (175°C) and line a baking sheet with parchment paper.
Scoop rounded tablespoons of dough onto the prepared baking sheet, leaving about 2 inches between each cookie to allow for proper spreading.
Baking for That Gooey Center (Timing is Key)
Bake for 9 to 11 minutes.
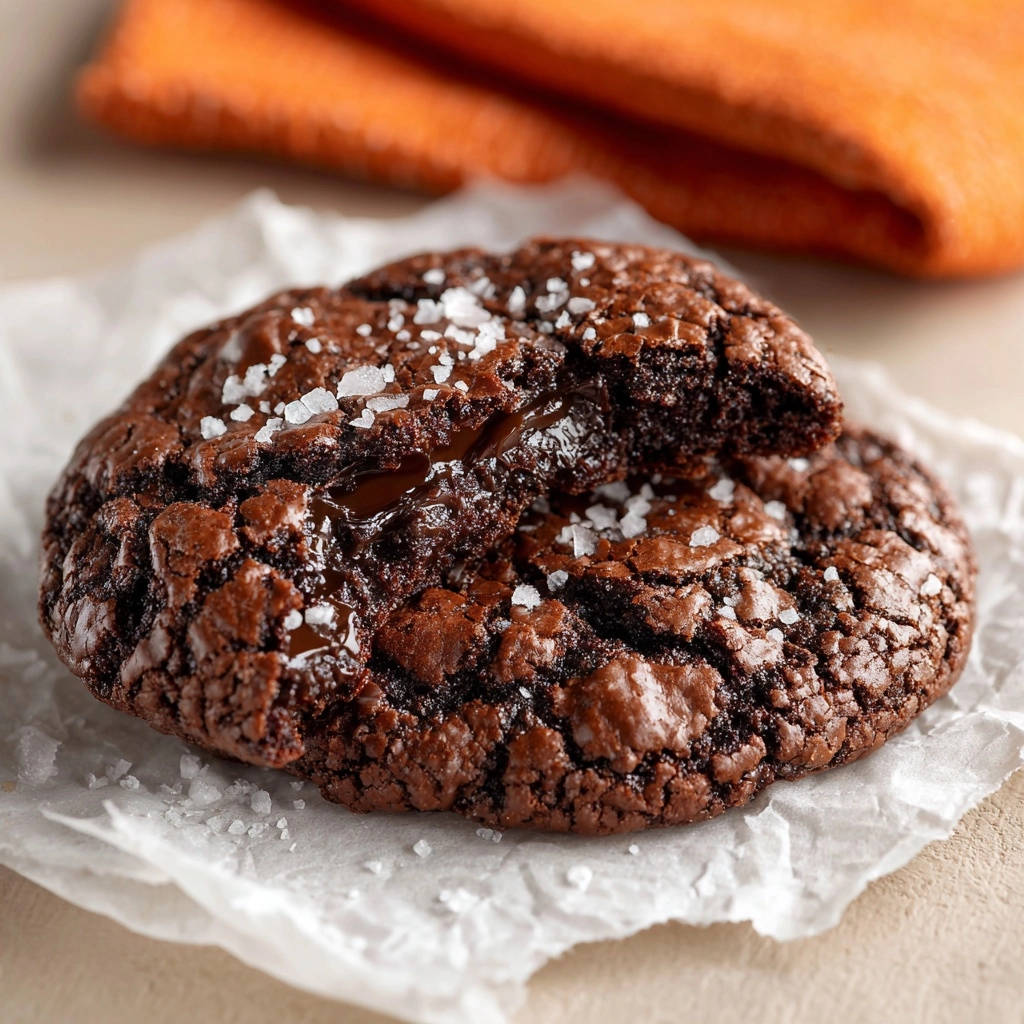
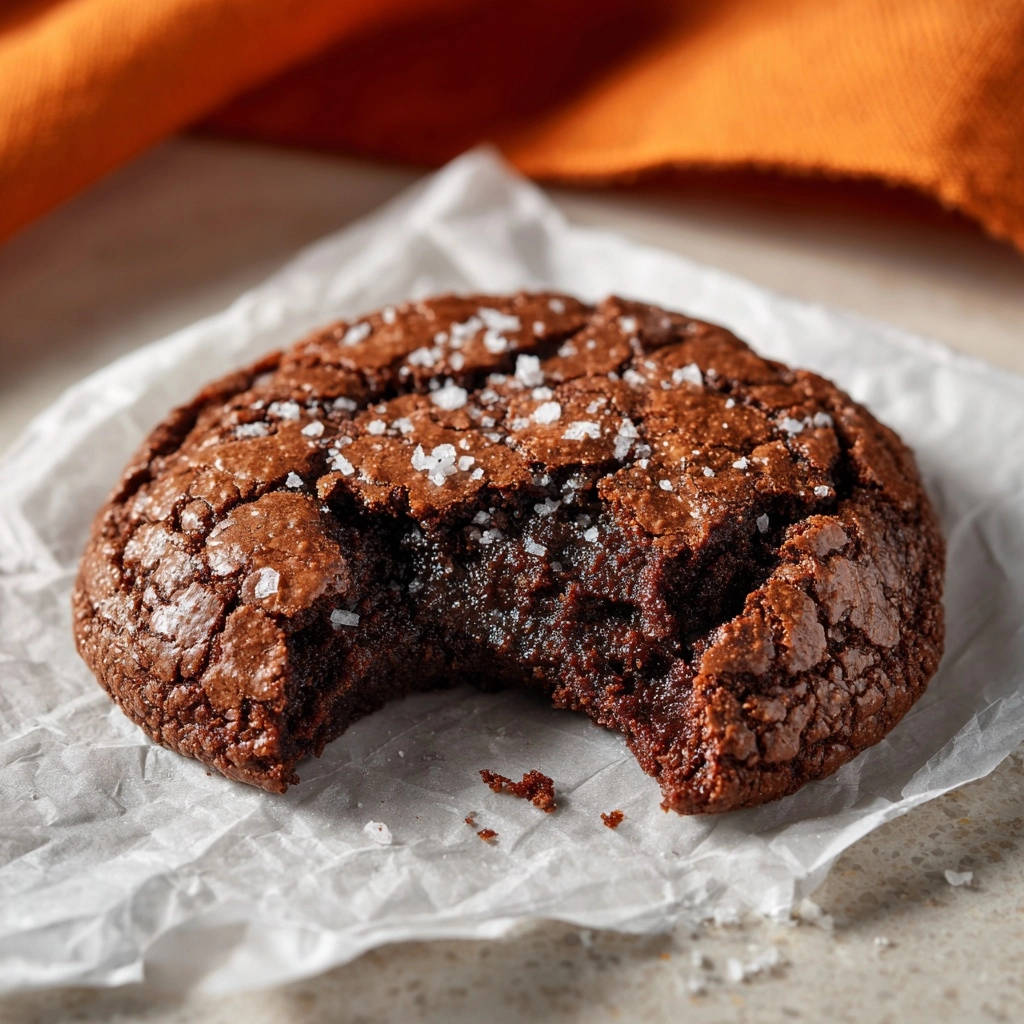
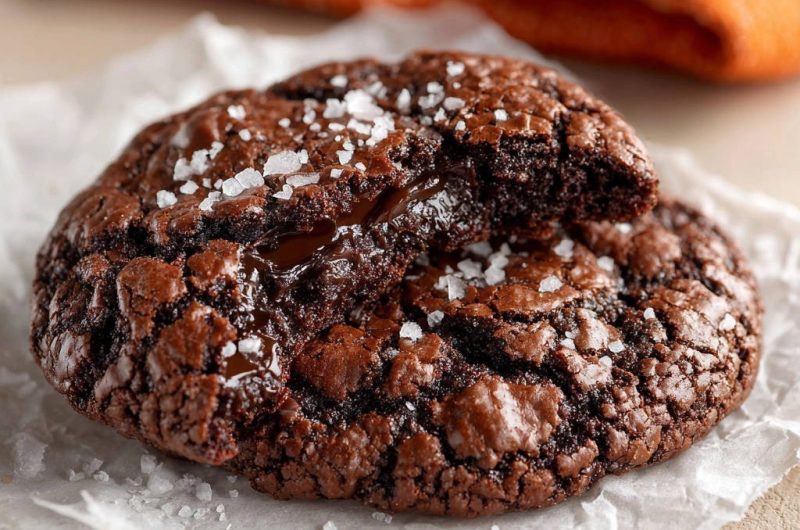
The secret to a perfectly gooey center is to remove the cookies from the oven when the edges are set but the centers still look slightly soft and underbaked. This prevents dry cookies and guarantees that desirable fudgy, gooey interior.
The Finishing Touch: Sea Salt Sprinkles
Immediately after removing from the oven, generously sprinkle the tops of the warm cookies with flaky sea salt.
The warmth of the cookie helps the salt adhere, ensuring every bite gets that delightful sweet and salty contrast that defines these salted dark chocolate cookies.
Cooling for Optimal Texture
Let the cookies cool on the baking sheet for 5 to 10 minutes before carefully transferring them to a wire rack to cool completely.
They will continue to cook and firm up as they cool on the hot baking sheet, solidifying that perfect fudgy texture.
Chef’s Secrets: Elevate Your Salted Dark Chocolate Cookies Game
Mastering these simple tricks will take your baking from good to truly exceptional.
Don’t Overmix Your Dough: Overmixing develops gluten, which can lead to tough, chewy cookies rather than the desired soft, fudgy texture. Mix only until the dry ingredients are just incorporated.
The Magic of Chilling Dough: While 30 minutes is the minimum, chilling for longer (1-2 hours or even overnight) deepens the flavor and significantly improves the cookie’s texture, making them chewier and less prone to spreading.
Understanding Oven Temperatures: An accurate oven temperature is crucial. If your oven runs hot or cold, invest in an oven thermometer. Too hot, and they’ll burn; too cool, and they won’t set properly, impacting the fudginess of your dark chocolate treats.
Knowing When They’re Done (The Gooey Center Trick): Trust your eyes – edges set, centers still soft. This ensures the cookies remain moist and fudgy after cooling, rather than becoming dry and crumbly, preserving those coveted gooey chocolate cookies.
The Power of Flaky Sea Salt: Don’t skip the flaky sea salt! It provides a beautiful textural contrast and a burst of salty flavor that perfectly balances the sweetness and richness of the dark chocolate, enhancing the unique appeal of these sea salt cookies.
Ingredient Quality Matters: Using good quality dark chocolate (70% cacao or higher) and unsweetened cocoa powder will significantly impact the depth of flavor in your cookies. For a truly decadent experience, consider exploring other recipes that highlight rich chocolate, like a decadent chocolate pecan tart, where quality ingredients shine.
Troubleshooting Common Cookie Conundrums
Even expert bakers encounter hiccups. Here’s how to solve common cookie problems.
Why Are My Cookies Flat?
Flat cookies often result from dough that isn’t chilled enough, butter that was too warm when mixed, or old leavening agents that have lost their potency. An oven temperature that’s too low can also cause excessive spreading before the cookies set.
My Cookies Are Too Dry/Crumbly!
This is a classic sign of overbaking. Removing the dark chocolate cookies when their centers are still slightly soft is crucial. Overmixing the dough, which develops too much gluten, or inaccurate flour measurement (too much flour) can also contribute to a dry texture.
The Chocolate Chips Sunk to the Bottom!
To prevent chocolate chips from sinking, gently toss them with a tablespoon of flour before folding them into the dough. This light coating helps them adhere to the dough and stay suspended. Additionally, chilling the dough longer can help solidify the mixture, keeping the chips in place.
How Do I Prevent Burnt Edges?
Always use parchment paper to prevent sticking and offer a buffer against direct heat. Ensure your oven temperature is accurate with an oven thermometer. If your oven heats unevenly, rotate your baking sheets halfway through the baking time. A slightly reduced baking time can also prevent crispy edges from turning burnt.
Beyond the Bake: Serving, Storing, and Making Ahead
Ensure your delicious Salted Dark Chocolate Cookies are enjoyed to their fullest, whether fresh or saved for later.
Perfect Serving Suggestions
These fudgy Salted Dark Chocolate Cookies are divine on their own, perhaps with a tall glass of cold milk or a hot cup of coffee. For an extra decadent dessert, serve them warm with a scoop of vanilla bean ice cream or alongside a rich easy chocolate lava cake.
For another fudgy chocolate treat, check out these molten raspberry chocolate lava cookies.
A light dusting of powdered sugar just before serving adds an elegant touch, though entirely optional for these already beautiful treats.
Storing Your Decadent Delights
Store your cooled dark chocolate treats in an airtight container at room temperature for up to 3-5 days. Placing a slice of plain bread in the container can help keep them soft and fresh.
Avoid refrigerating, as it can dry them out and alter their perfect fudgy texture.
Make-Ahead & Freezing Tips
You can prepare the cookie dough up to 3 days in advance. Simply keep it covered tightly in the refrigerator. When ready to bake, let it sit at room temperature for about 15-20 minutes to soften slightly before scooping.
Baked cookies freeze exceptionally well! Once completely cooled, place them in a single layer on a baking sheet to flash freeze for about an hour, then transfer to a freezer-safe bag or container for up to 3 months. Thaw at room temperature or warm briefly in the microwave for a fresh-baked feel.
Frequently Asked Questions About Salted Dark Chocolate Cookies
Can I Use a Different Type of Chocolate?
Absolutely! While dark chocolate chips or chunks provide the signature rich flavor, you can certainly experiment. Semi-sweet chocolate chips will yield a sweeter cookie, while milk chocolate will create a much milder, creamier flavor. White chocolate chips could add a lovely visual contrast and sweet, buttery notes. Be aware that changing the chocolate type will alter the overall flavor profile significantly.
Is Chilling the Dough Absolutely Necessary?
Yes, chilling the dough is highly recommended and, frankly, essential for the best results. It allows the butter to firm up, preventing the cookies from spreading too much in the oven. More importantly, chilling deepens the chocolate flavor and contributes to that desirable chewy, fudgy texture. Skipping this step often results in thinner, crispier, and less flavorful cookies.
Can I Make These Gluten-Free?
You can! Substitute the all-purpose flour with a 1:1 gluten-free baking flour blend that contains xanthan gum. Keep in mind that gluten-free cookies might have a slightly different texture, often a bit more delicate. Follow the recipe instructions closely, especially the chilling period, for the best outcome with your homemade chocolate cookies.
What’s the Best Way to Measure Flour?
For accurate flour measurement, use the spoon-and-level method. Lightly spoon the flour into your measuring cup until it overflows, then level off the top with a straight edge (like a knife). Avoid scooping directly with the measuring cup, as this can compact the flour and result in using too much, leading to dry, dense cookies.
Why is Flaky Sea Salt Important? Can I Omit It?
Flaky sea salt is incredibly important for these Salted Dark Chocolate Cookies! It provides a crucial contrast, cutting through the sweetness and enhancing the deep cocoa notes, creating a more complex and balanced flavor experience. It also adds a delightful visual and textural element. While you can omit it, you’ll miss out on a key component that makes these cookies truly special. If you don’t have flaky sea salt, a very light sprinkle of fine sea salt can be used, but use sparingly as it’s much saltier.
Ready to Indulge? Your New Favorite Cookie Awaits!
There’s nothing quite like the comforting aroma and incredible taste of freshly baked Salted Dark Chocolate Cookies. With their perfectly fudgy texture, intensely gooey centers, and the delightful sparkle of sea salt, these treats are truly a masterpiece of chocolate indulgence.
Looking for More Sweet Treats?
These recipes offer more rich chocolate and warm spice experiences to complement your dark chocolate cookies.
- For a delightful morning or afternoon treat, consider making warm cinnamon swirl coffee cake, which shares a comforting spiced sweetness.
- If you enjoy filled baked goods, try these cinnamon sugar jam-filled waffles for a touch of fruit and spice.
Now that you’re armed with all the secrets, it’s time to preheat your oven and experience the magic for yourself. Go ahead, bake a batch, and let these extraordinary cookies become your ultimate go-to for satisfying any chocolate craving!
Salted Dark Chocolate Cookies
Course: DessertCuisine: AmericanDifficulty: easy18
cookies20
minutes10
minutes240
kcal30
minutesAchieve the perfect fudgy texture and gooey center with these rich dark chocolate cookies. This recipe cracks the code for decadent chocolate bliss that’s surprisingly easy to make.
Ingredients
1 and 1/2 cups all purpose flour
3/4 cup unsweetened cocoa powder
1 teaspoon baking soda
1/2 teaspoon salt
1/2 cup unsalted butter, melted
1 cup granulated sugar
1/2 cup light brown sugar, packed
2 large eggs
1 teaspoon vanilla extract
1 cup dark chocolate chips or chunks
1 teaspoon flaky sea salt, for sprinkling
Directions
- In a medium bowl, whisk together the flour, cocoa powder, baking soda, and 1/2 teaspoon of salt. Set aside.
- In a large bowl, whisk the melted butter with the granulated sugar and brown sugar until well combined.
- Add the eggs one at a time, whisking vigorously for about one minute after each addition until the mixture is visibly lighter in color and slightly thickened. Stir in the vanilla extract. This aeration step is key for a tender, fudgy crumb.
- Gradually add the dry ingredients to the wet ingredients, mixing only until just combined. Be careful not to overmix, as this can lead to tougher cookies.
- Fold in the dark chocolate chips or chunks.
- Cover the dough and chill in the refrigerator for at least 30 minutes. This chilling period is crucial for preventing the cookies from spreading too much and contributes to their chewy texture and intense flavor.
- Preheat your oven to 350°F (175°C) and line a baking sheet with parchment paper.
- Scoop rounded tablespoons of dough onto the prepared baking sheet, leaving about 2 inches between each cookie.
- Bake for 9 to 11 minutes. The secret to a perfectly gooey center is to remove the cookies from the oven when the edges are set but the centers still look slightly soft and underbaked. They will continue to cook and firm up as they cool on the hot baking sheet, ensuring that desirable fudgy, gooey interior.
- Immediately after removing from the oven, sprinkle the tops of the warm cookies with flaky sea salt.
- Let the cookies cool on the baking sheet for 5 to 10 minutes before transferring them to a wire rack to cool completely.
Notes
- Chilling the dough is crucial for texture and preventing spread. Don’t overbake for a gooey center.


