
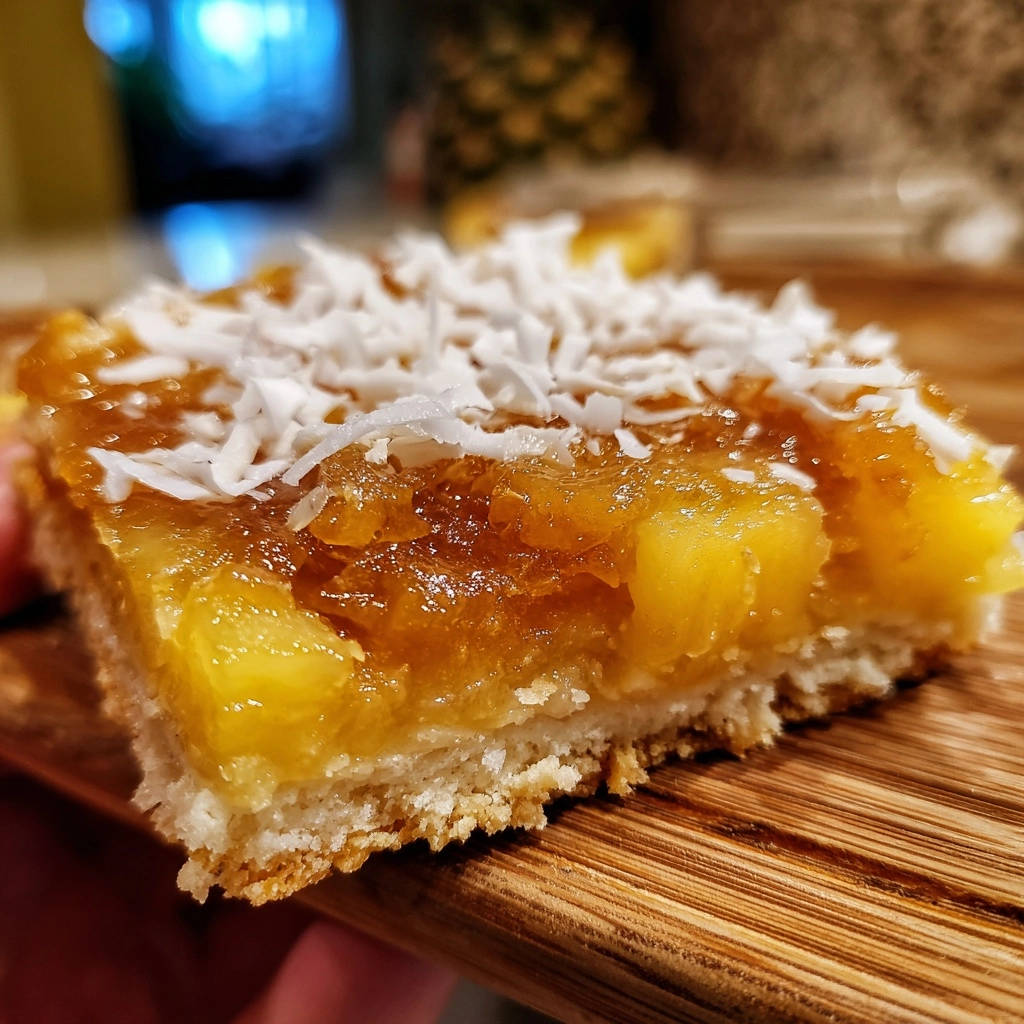
There’s nothing more disheartening than slicing into a beautiful dessert bar only to find a soggy crust beneath a luscious fruit filling. After years of perfecting, I’m thrilled to share my foolproof method for these Tropical Pineapple Coconut Bars, ensuring a golden, crisp base that perfectly complements the vibrant, sweet-tart pineapple, crowned with toasted coconut. This recipe delivers pure tropical bliss without the dreaded soft bottom.
Why These Tropical Pineapple Coconut Bars Will Be Your New Obsession
These aren’t just any dessert bars; they’re a culinary escape, meticulously designed to deliver on every promise. Here’s why they’ll quickly become a cherished recipe in your collection:
Guaranteed Crisp, Buttery Crust: Say goodbye to soggy bottoms! Our unique blind-baking technique creates an impenetrable barrier, keeping your crust perfectly tender yet crisp, no matter how juicy the filling. For another fantastic bar recipe with a similarly perfectly crisp crust, try our Classic Apple Crumble Bars.
For a different kind of rich, consider exploring the walnut fudge brownies strategy.
Bursting with Tropical Flavor: Each bite of these Tropical Pineapple Coconut Bars transports you to a sun-drenched beach, with the sweet-tart pineapple beautifully balanced by aromatic coconut. It’s a vacation for your taste buds.
Effortlessly Achievable: Don’t let the stunning results intimidate you. This recipe is straightforward and easy to follow, making it perfect for both seasoned bakers and eager beginners alike.
Perfect for Every Occasion: Whether it’s a backyard BBQ, a casual potluck, or a special family dessert, these bars are a crowd-pleaser that always impress. They’re a fantastic addition to any celebration.
The Golden Ingredients for Sunshine in Every Bite
Crafting these delectable Tropical Pineapple Coconut Bars begins with selecting the right ingredients. Each component plays a vital role in achieving that perfect balance of flavor and texture.
For the Irresistible Butter Crust
All-Purpose Flour: This forms the essential structure of our sturdy, tender base. Using good quality flour ensures the best texture for your crust.
Granulated Sugar & Salt: The sugar adds a subtle sweetness to the crust, while a touch of salt perfectly balances the flavors and enhances the butteriness.
Cold Unsalted Butter: This is arguably the most crucial ingredient for a truly flaky and irresistible crust. Cutting it into cubes and keeping it very cold prevents it from melting too quickly, creating those desirable pockets of steam during baking.
For the Luscious Pineapple Filling
Crushed Pineapple (Undrained): We use a 20-ounce can, undrained, to provide the perfect balance of vibrant tropical flavor and natural moisture. The juice is vital for the filling’s smooth consistency.
Granulated Sugar: This sweetens the tartness of the pineapple, creating a harmonious and balanced tropical taste.
Cornstarch: An absolute must, cornstarch is our thickening hero. It ensures the filling sets beautifully firm and sliceable without any gumminess, providing stability.
Lemon Juice: A small but mighty addition, fresh lemon juice brightens the overall pineapple flavor and adds a crucial touch of acidity to prevent it from being overly sweet.
Vanilla Extract: A classic aromatic, vanilla extract adds a warm, comforting note that beautifully complements and enhances the tropical fruit profile.
For the Toasted Coconut Topping
Shredded Unsweetened Coconut: This ingredient delivers a wonderful textural contrast and an authentic tropical finish to the bars. Using unsweetened coconut allows the natural sweetness of the pineapple to be the star.
Essential Tools for Your Baking Adventure
Having the right tools makes all the difference in ensuring a smooth and enjoyable baking process. Here are the essentials you’ll need for these Tropical Pineapple Coconut Bars:
8×8 Inch Baking Pan: This specific size is perfect for achieving the ideal thickness and structure for your bars. Don’t go too large, or your bars will be thin.
Parchment Paper: Absolutely crucial for easy removal! Lining the pan with an overhang ensures you can lift the entire slab out effortlessly for clean cutting.
Medium Saucepan & Whisk: These are indispensable for smoothly combining and thickening your pineapple filling without lumps or scorching.
Pastry Blender or Fingertips: For creating that perfect crumbly crust texture, these tools help incorporate the cold butter efficiently without overworking it.
Wire Rack: Essential for cooling the baked bars completely and evenly. Proper cooling prevents condensation and helps the filling set perfectly.
Baking Brilliance: Crafting Your Tropical Pineapple Coconut Bars Step-by-Step
Follow these detailed steps closely, and you’ll be rewarded with perfectly golden, intensely flavorful Tropical Pineapple Coconut Bars every single time.
- Prepare Your Pan & Oven:
Preheat your oven to 375°F (190°C).
Lightly grease an 8×8 inch baking pan, then line it with parchment paper, ensuring an overhang on two sides. This simple trick makes lifting the cooled bars out incredibly easy, preventing any sticking.
- Craft the Crust Foundation:
In a medium bowl, combine the all-purpose flour, granulated sugar, and salt, whisking them together thoroughly.
Add the cold, cubed unsalted butter to the dry ingredients. Use your fingertips or a pastry blender to quickly cut the butter into the flour mixture until it resembles coarse crumbs. Work efficiently to keep the butter cold.
- Press for Perfection:
Transfer the crumb mixture to the prepared baking pan. Press it down very firmly and evenly into the bottom of the pan. The back of a measuring cup or your hands are excellent tools for compacting it tightly.
A dense, well-pressed crust is your crucial first line of defense against any potential sogginess, creating a sturdy foundation.
- The Anti-Soggy Secret: Blind Bake!
Bake the pressed crust in the preheated oven for 15 to 20 minutes, or until it achieves a light golden brown color. This critical step pre-cooks the crust, driving out excess moisture.
It also forms a protective, waterproof barrier, preventing your juicy pineapple filling from making the crust soggy. Remove from the oven and set aside, but keep the oven on.
- Whip Up the Tropical Filling:
While the crust is blind baking, combine the undrained crushed pineapple, granulated sugar, and cornstarch in a medium saucepan.
Whisk this mixture thoroughly until the cornstarch is completely dissolved. This prevents lumps and ensures a smooth, consistent filling.
- Thicken to Perfection:
Cook the pineapple mixture over medium heat, stirring constantly with your whisk. Continue to stir and cook until the mixture thickens significantly and reaches a rolling boil.
Boil and stir for one full minute to ensure the cornstarch is fully activated. This guarantees a perfectly set and thick filling that will hold its shape beautifully.
- Flavor Infusion:
Remove the thickened pineapple filling from the heat. Stir in the lemon juice and vanilla extract until they are well combined.
The lemon brightens the flavors, while the vanilla adds a lovely warm, aromatic depth that complements the tropical fruit.
- Assemble Your Bars:
Carefully pour the hot pineapple filling evenly over the pre-baked, lightly cooled crust in the pan. Distribute it edge-to-edge for uniform layers.
- Final Bake:
Return the pan to the oven and bake for an additional 25 to 30 minutes. The filling should be bubbly around the edges and appear set and firm in the center. A slight jiggle in the very center is acceptable.
- Coconut Kiss:
Immediately upon removing the bars from the oven, evenly sprinkle the shredded unsweetened coconut over the hot filling. The residual heat will help the coconut adhere gently to the surface.
- Patience is Key: Cool & Chill:
Allow the bars to cool completely in the pan on a wire rack for at least 1 hour at room temperature. This initial cooling is absolutely vital for the filling to begin its full setting process.
Once cooled to room temperature, transfer the pan to the refrigerator and chill for a minimum of 2 hours, or preferably overnight. This extended chilling ensures clean, neat cuts and prevents the filling from weeping into the crust, guaranteeing perfect presentation.
- Slice and Serve:
After thorough chilling, use the parchment paper overhang to carefully lift the entire slab of bars out of the pan. Place it on a cutting board.
Slice into 12 squares using a sharp knife. For the neatest edges, wipe your knife clean with a damp cloth between each cut.
Chef’s Notes: Elevating Your Tropical Pineapple Coconut Bars
Unlock the full potential of these bars with these expert tips, ensuring every batch is a masterpiece of tropical flavor and perfect texture.
For other crisp baked goods, explore classic cinnamon snickerdoodles that keep their texture.
Don’t Skip the Cold Butter: Keeping your butter icy cold before cutting it into the flour is paramount for a tender, flaky crust. Warm butter melts too quickly, leading to a dense, tough texture.
Press that Crust Firmly: The firmer you press the crust mixture into the pan, the better and more robust barrier it creates against the juicy filling. This isn’t just a suggestion; it’s a critical step for a guaranteed crisp base!
The Blind Bake is Non-Negotiable: This step is truly the “secret sauce” for preventing a soggy crust. It thoroughly pre-cooks the crust and establishes a solid barrier, effectively trapping all the delicious moisture within the filling.
Stir, Stir, Stir the Filling: Constant stirring during the cooking of the pineapple filling prevents the cornstarch from clumping and ensures uniform thickening. Never walk away from the saucepan while it’s on the heat!
Embrace the Chill Time: While waiting for dessert is hard, allowing the bars to cool completely at room temperature and then chilling them for several hours (or overnight) is crucial. This patience rewards you with a perfectly set filling and beautifully clean, firm slices.
Toasted Coconut Boost: For an elevated depth of flavor and irresistible aroma, consider lightly toasting your shredded coconut in a dry skillet over medium-low heat until golden brown before sprinkling it over the hot bars. This optional step adds a gourmet touch to your Tropical Pineapple Coconut Bars.
Troubleshooting Common Bar Baking Hiccups
Even seasoned bakers encounter challenges, but with these solutions, you can effortlessly navigate common issues and ensure your Tropical Pineapple Coconut Bars are always perfect.
Why is My Crust Still Soggy?
A soggy crust typically stems from not blind baking long enough to fully dry it out, not pressing the crust mixture firmly enough into the pan, or insufficient cooling time before chilling. The blind bake step is especially crucial for creating that moisture-resistant barrier.
My Pineapple Filling Isn’t Setting. What Went Wrong?
The most frequent reason for a runny filling is not cooking it long enough to fully activate the cornstarch. You must bring the mixture to a full, rolling boil and continue stirring for at least one minute to ensure proper thickening. Consistent stirring is also key to prevent scorching and ensure even heat distribution.
My Bars Are Crumbly When I Cut Them.
This issue almost always points to insufficient chilling time. The bars require ample time to cool completely at room temperature, then firm up fully in the refrigerator. Patience here is truly paramount for achieving clean, firm, and easy-to-slice bars.
Serving, Storing, and Savoring Your Tropical Delight
Once your irresistible Tropical Pineapple Coconut Bars are perfectly set, knowing how to serve and store them ensures you enjoy every last crumb of their tropical goodness.
How to Serve Your Pineapple Coconut Bars
These bars are wonderfully delightful on their own, making them an ideal treat for picnics, potlucks, or a simple afternoon snack. Their vibrant flavor shines through beautifully.
For an extra special, decadent touch, serve them with a dollop of freshly whipped cream or a scoop of premium vanilla ice cream. This pairing elevates the tropical experience even further. If you’re looking for another delightful bar recipe, our Easy Creamy Berry Crumble Cheesecake Bars are a fantastic choice.
Proper Storage for Maximum Freshness
To keep your leftover Tropical Pineapple Coconut Bars at their best, store them in an airtight container in the refrigerator. They will maintain their deliciousness and texture for up to 5 days.
Always ensure the bars are completely cool before placing them in the container to prevent any condensation from forming, which could affect the crust’s crispness.
Can I Make These Bars Ahead of Time?
Absolutely! These bars are an excellent make-ahead dessert, making them perfect for entertaining or meal prep. In fact, many find they taste even better the next day.
Allowing the flavors more time to meld and the filling to fully set overnight results in an even more harmonious and perfectly textured bar. Prepare them a day in advance for stress-free enjoyment.
Your Tropical Pineapple Coconut Bars Questions, Answered
Here are answers to some frequently asked questions, helping you confidently bake and enjoy your Tropical Pineapple Coconut Bars.
Can I Use Fresh Pineapple Instead of Canned?
Yes, fresh pineapple can be used, but you’ll need to finely chop or crush it to achieve a similar consistency to canned. Be mindful that fresh pineapple can vary in moisture content, so you might need to cook the filling slightly longer to reach the desired thickness. Aim for about 2 cups of crushed fresh pineapple.
Is There a Gluten-Free Option for the Crust?
Absolutely! You can substitute a 1:1 gluten-free all-purpose flour blend for the regular flour in the crust with great success. Ensure your chosen blend contains xanthan gum for optimal structure and texture. The resulting crust will be equally delicious, with a slightly different mouthfeel.
What if I Don’t Like Coconut?
While the shredded coconut topping adds a beautiful textural element and classic tropical aroma to these bars, you can certainly omit it if coconut isn’t your preference. The Tropical Pineapple Coconut Bars will still be incredibly flavorful and delightful with just the vibrant pineapple filling and crisp crust.
Can I Freeze These Bars?
Yes, these Tropical Pineapple Coconut Bars freeze exceptionally well. Once they are completely cooled and thoroughly chilled, cut them into individual squares.
Arrange the squares in a single layer in an airtight, freezer-safe container, using small pieces of parchment paper to separate layers if stacking. They can be frozen for up to 2-3 months. Thaw them overnight in the refrigerator before serving for best results.
Ready to Taste Paradise? Share Your Tropical Pineapple Coconut Bars!
Now that you’ve unlocked the secret to perfectly crisp crusts and luscious fillings, you’re truly ready to create a dessert that will transport everyone to a sunny beach. These Tropical Pineapple Coconut Bars are more than just a sweet treat; they’re a guaranteed smile-maker, a testament to simple baking brilliance that truly pays off.
More Sweet Ideas
Round out your dessert table with these complementary baked goods.
- For a fruity and chocolatey treat, consider making assorted fruit & chocolate scones that offer a different texture.
- If you enjoy a light and airy baked item, these diner-style fluffy pancakes would be a welcome addition.
Don’t wait to bring a taste of the tropics into your kitchen. Gather your ingredients, follow these expert tips, and bake a batch today-we promise they’ll disappear in no time!
We’d absolutely love to see your creations! Share your beautiful Tropical Pineapple Coconut Bars on social media and tag us, or leave a comment below to tell us your favorite part of this delightful recipe.
Pineapple Coconut Bars
Course: DessertCuisine: AmericanDifficulty: medium12
bars20
minutes45
minutes350
kcal60
minutesSay goodbye to soggy dessert bars! This recipe reveals the simple trick to a delightfully crisp, buttery crust paired with a luscious pineapple filling. Topped with toasted coconut, these bars are a tropical treat perfect for any occasion.
Ingredients
For the Crust:
1 1/2 cups all purpose flour
1/2 cup granulated sugar
1/4 teaspoon salt
1/2 cup (1 stick) unsalted butter, cold and cut into cubes
For the Pineapple Filling:
1 (20 ounce) can crushed pineapple, undrained
1 cup granulated sugar
1/4 cup cornstarch
1 tablespoon lemon juice
1/2 teaspoon vanilla extract
For the Topping:
1/2 cup shredded unsweetened coconut
Directions
- Preheat your oven to 375°F (190°C). Lightly grease an 8×8 inch baking pan and line it with parchment paper, leaving an overhang on two sides for easy removal.
- Prepare the Crust (The Secret to No More Soggy Crust!): In a medium bowl, whisk together the flour, sugar, and salt. Add the cold, cubed butter. Using your fingertips or a pastry blender, cut the butter into the dry ingredients until the mixture resembles coarse crumbs.
- Press the crumb mixture evenly into the bottom of the prepared baking pan. This is crucial: Use the back of a measuring cup or your hands to press it down very firmly and compactly. A well-compacted crust is your first defense against sogginess.
- Blind Bake the Crust: Bake the crust in the preheated oven for 15 to 20 minutes, or until lightly golden brown. This step is the key as it cooks out moisture from the crust and creates a protective barrier for your juicy filling. Remove from oven and set aside. Do not turn off the oven.
- Prepare the Pineapple Filling: While the crust is baking, in a medium saucepan, combine the undrained crushed pineapple, granulated sugar, and cornstarch. Whisk until the cornstarch is fully dissolved.
- Cook the pineapple mixture over medium heat, stirring constantly, until it thickens and comes to a rolling boil. Continue to boil and stir for 1 minute to ensure the cornstarch is fully activated and the filling is thick enough to hold its own.
- Remove from heat and stir in the lemon juice and vanilla extract.
- Assemble the Bars: Pour the hot pineapple filling evenly over the pre-baked crust in the pan.
- Return the pan to the oven and bake for another 25 to 30 minutes, or until the filling is bubbly around the edges and looks set in the center.
- Remove from the oven and immediately sprinkle the shredded coconut evenly over the hot filling. The residual heat will help it adhere slightly.
- Let the bars cool completely in the pan on a wire rack for at least 1 hour. This is super important for clean cuts and preventing the filling from weeping into the crust! Once cooled to room temperature, refrigerate for at least 2 hours (or preferably overnight) before lifting out of the pan using the parchment overhang and cutting into squares.
Notes
- Blind baking the crust and ensuring complete cooling (preferably overnight) are crucial for perfect, non-soggy bars and clean cuts.


